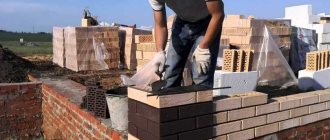
Brick is reliable and durable. This material looks attractive and presentable. But brick walls have one significant drawback: thermal conductivity. Even relatively warm ceramic material conducts heat well and does not sufficiently protect the building from the cold. In our climate, it will be necessary to build walls 64-90 cm thick to provide sufficient thermal resistance. A more rational option would be to make the external walls of the building from other materials with insulation and cladding. How to cover a house with facing bricks? It's not difficult if you know the technology and the nuances of the work.
The house, lined with brick, looks solid and presentable, it is protected from wind and other unpleasant weather phenomena. This finishing option is used for both lightweight concrete and wooden houses.
Nuances of choosing material
Below are the 4 main types of facing bricks that are presented by manufacturers on the market, in order of increasing cost. It happens:
- silicate;
- ceramic;
- hyper-pressed;
- clinker.
Facade bricks are often produced as decorative ones, i.e. hollow in the middle and perfectly smooth or with an imitation of chipped or natural stone on the front side. A full-bodied version is also made, but it is less common due to its higher cost.
As a rule, you can purchase or order the production of bricks in almost any size. But the standard dimensions are 25x12x6.5 cm.
In the absence of practical experience in facing work, it is recommended to take into account several tips:
- at the design stage, you should study the characteristics of the facing material and select the most suitable option in terms of beauty, practicality and frost resistance;
- you need to pay attention to the volume occupied by the voids and choose the fullest type with a not too thin front wall (spoon);
Types of facing bricks Source stroy-podskazka.ru
- cheap types of brick are often made with elements of curvature (the width of the spoon in the middle is greater than at the edges), so laying it for beginners is not recommended;
- When calculating the required amount of building materials for cladding, it is advisable to make a small reserve of 10-20%.
How to cover a wooden house with bricks
Brick and wood have very different characteristics, so certain difficulties may arise during the work process. When facing a wooden house with bricks, it is imperative to provide for sufficient ventilation of the main part of the wall. Otherwise, the wood will begin to rot or become moldy. Before covering the house with facing bricks, it is worth carefully examining the wall pie. Three-layer walls with brick cladding in this case will include:
- wooden supporting part;
- vapor barrier;
- insulation;
- waterproofing and wind protection;
- ventilation gap min. 50-60 mm;
- brick lining.
1 - ventilation layer;
2 - fastening the cladding to the wall; 3 - facing brick; 4 - additional insulation with windproof membrane; 5 - vapor barrier; 6 - finishing; 7 - thermal insulation; 9 - log wall It is important not to confuse vapor barrier and waterproofing. The latter must be permeable to steam so that it can easily escape from the insulation and brick into the ventilation gap. It is recommended to use modern vapor diffusion windproof membranes.
To ensure free movement of air, when clad with bricks on a wooden house, it is necessary to provide vents in the lower part and outlet openings in the upper part. It is recommended to use mineral wool as thermal insulation. It is characterized by low cost, ease of installation and good air permeability.
Before properly covering a wooden house with bricks, you must wait time for the walls to shrink. This process can take a couple of years, so it may be easiest to re-clad an older house.
Strengths of facing bricks
Strict compliance with dimensions is a distinctive feature of facing (or facade) bricks. This leads to visual neatness and beauty of the masonry if the worker has a certain skill, and it also makes the process much easier if this skill is lacking.
Facade brick differs from other types of building finishing (natural stone, clinker tiles, siding) in the following:
- used for cladding buildings whose walls are made of any materials (from wood to foam block and aerated concrete);
- Guaranteed durability due to high strength;
- a wide selection of design solutions is available due to the large selection of colors, textures and dimensions of bricks;
- the pressure on the foundation is reduced due to the characteristic feature of the product (less weight due to hollowness);
- high levels of moisture and frost resistance;
- aesthetic appeal of the material.
Types, purpose and advantages of facade bricks Source kirpichmaster.ru
Brick wall in a classic bedroom
A brick wall in the bedroom is a great idea for people looking for classic yet original solutions . A massive bed can stand against such a wall, giving you the effect of a palace interior.
A brick wall in a bedroom should be combined, for example, with accessories and walls in dark blue and gold, as well as light blue and grey. They will combine beautifully with the red color of the brick, bringing an impression of order and peace to the interior.
Remember that the wall should be integral with the entire bedroom, and above all with the headboard. It is very important to maintain the correct proportions. The bedroom should be a place of relaxation, an oasis of peace. We can also guarantee this peace of mind by properly arranging the room. Brick is a rather strong and bold decorative accent. It will certainly fit perfectly into the bedroom of anyone who has a strong character and relies on non-standard solutions.
Features and types of masonry
To understand how to correctly lay facing bricks with your own hands, it is important to first familiarize yourself with the types of masonry, which differ in the way the bricks are placed in a row. There is masonry:
- Bed (front): laying is carried out with the largest plane in area (“bed”) facing outward.
- Spoon: laying is carried out with a long narrow plane (“spoon”) outward.
- Tychkova: laying is carried out with the end plane (“butt”) facing outward.
Decorators delight clients with the variety of external appearances of facades by simply alternating brick sides when laying them in a single row or alternating the rows themselves with different installations. We also produce ready-made sets of different-sized bricks, the purpose of which is limited to a specific (pre-planned) type of masonry.
Types of facing brickwork Source msmeta.com.ua
See also: Catalog of companies that specialize in the construction of brick houses and related work
Based on decorative properties, bricklaying is divided into:
- The “half-brick” dressing is considered classic (bed or spoon). With it, the next row of bricks is laid with the vertical seams offset by half the horizontal length of the product, i.e. the brick of the upper row covers with its middle part the connecting seam of the two bricks of the lower row.
- Flemish binding is considered to be the alternation of spoon masonry with bonded masonry in a row.
- Stack dressing is usually called a method with vertically located seams in one line.
- American dressing is considered to be a type of masonry when the tying and spoon (less often bed) varieties alternate.
Each type can be briefly described as follows: the first method in the list is suitable for a beginner, because... minimal skill required; the second is more often applicable if you want to create a European design; the stacked version is the least durable and therefore practical; American dressing, on the contrary, is the most reliable.
Example of decorative brickwork Source timothysoararchive.co.uk
We prepare raw materials
So, the plan is ready, it’s time to get down to business. To make bricks we need a lot of clay, since that is what they are made from. First of all, you need to find its deposit. In this case, it is advisable to choose one that is located as close as possible to the place of future production.
In addition, the area being developed must be dry, otherwise the work will be extremely difficult, if not completely impossible. For the job, you will need tools for cutting bushes, crushing, digging and loading. At a minimum, stock up on a crowbar, a shovel and a pitchfork. And don’t forget about the wheelbarrows on which you will transport the material to the production site.
Raw materials are extracted as follows:
- if the field is overgrown with grass, bushes and trees, then all this must be removed. Brush cutters and shovels will help you with this,
- To make it convenient to transport the mined clay, dig a trench along which you can roll a wheelbarrow to the mining site and back. It is advisable to line the bottom of the trench with boards, then the wheels will spin much easier,
- Then you can proceed directly to development. If the clay is loose, great, just dig it out with shovels. If it is quite dense or completely frozen, then you will have to work with a crowbar. Instead, a pickaxe is quite suitable,
- As excavation progresses, the clay is transferred to waiting wheelbarrows. It can stick to shovels. If this factor interferes greatly, then you can replace the shovel with a fork, the teeth of which are often located,
- Roll the loaded wheelbarrow to the storage location and unload it there. You should not throw all the extracted clay into one pile. It is better to make several cone-shaped embankments a meter high, and the diameter of the base of each of them should be about one and a half meters.
I remind you once again that for every thousand bricks you will have to extract two and a half cubic meters of clay. Don't forget to check your preliminary calculations.
It is advisable to add about 7-10% to them in case errors are made during the production of some bricks. After all, no one is immune from receiving defective products. Especially if this is your first time encountering this type of work.
Selection of tools
Before laying bricks, you should be careful about choosing the right tool. Required:
- trowel (or trowel) - a metal spatula with a handle used for laying cement mortar, removing its excess and trimming bricks;
- building level or cord - to control the evenness of the masonry;
- grinder equipped with diamond wheels used for cutting bricks;
- a hammer with a pickaxe for splitting bricks;
- metal rods with a square cross-section of 10x10 mm for neat making of seams;
- metal rod with a round cross-section of 10 mm for jointing;
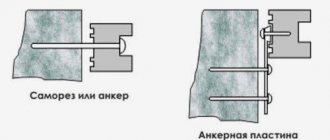
- anchor bolts and profiles or tying wire required when tying the cladding to a load-bearing wall.
An example of laying bricks along a cord Source we build with our own hands.rf
Joining
Joining is the process of outlining, arranging the seam relative to the outer plane of the wall. To perform the work, a special tool is used - a jointing knife or, simply, a jointing knife.
It is approximately 9mm wide and has a concave or convex blade to create the appropriate seam profile. When laying several rows, jointing is done - ironing the seams to give them a neat and even shape with the same depth relative to the surface of the masonry .
The process is simple, but requires timely completion - the set solution is difficult to joint, which complicates the work and worsens the result.
Read more about facing masonry
Despite the many types of masonry, without experience, it is better to start with the spoon method, ligating half a brick and jointing 8-10 mm.
Finishing differs significantly from rough masonry and has its own characteristics:
- each brick is laid with the best edge outward, and the defective sides are hidden inward;
- halves are excluded from masonry, only solid bricks are used;
- staining of the front face with solution is not allowed;
- the connection with the main structure is made every 4-5 rows;
- the gap between the cladding and the old building is left with an air gap or insulation is laid, in no case covering it with mortar residues.
Recommendation! If you have no masonry experience, you should not try to lay bay windows, arched vaults or protruding corners of a building. The likelihood of successful completion of these works is minimal; it is better to contact a professional mason.
Checking the masonry of facing bricks using a level Source uenicdn.com
Drying
Our future blocks should be in the forms for several hours. This time will be enough for them to become better formed. To avoid wasting time, prepare racks for drying.
The place where the bricks will dry should be:
- ventilated,
- protected from direct sunlight (for this purpose, you can attach a canopy to the rack itself),
- dry If drying will take place not indoors, but outdoors, then care should be taken in advance to protect it from possible precipitation. To do this, it is advisable to stock up on waterproof film. A sudden rainfall can ruin all efforts to make bricks if they are not protected from moisture.
Instead of a rack, you can simply use a piece of land, but the protection requirements will be the same. In addition, a two-centimeter layer of dry material, such as straw or sand, should be poured onto the surface of the soil.
This is necessary so that the moisture contained in the ground does not penetrate the drying bricks. In addition, straw and sand will prevent the material from sticking to the ground, and the blocks can be easily moved if necessary.
So, several hours have passed, the racks or ground surface are prepared. Now we take the blanks to the drying place, remove the lid, turn the molds upside down, thereby dumping the bricks onto the shelves. In this form they should lie for 7 to 10 days.
During drying, about 85% of the water will leave the blocks. Actually, the end of the process can be determined by the absence of moisture on the surface. The resulting material is called raw brick. In general, it can already be used in construction. But only for interior work.
Adobe cannot be used for cladding and construction of external walls, since it has a very low level of water resistance. Only a special procedure - firing - can solve this problem.
Preparing the solution
Before laying facing bricks with your own hands, you need to learn how to make the mortar correctly. The recipe is quite simple - a mixture of cement and sand in a ratio of 1 to 4 and the use of a concrete mixer. It is recommended to add a plasticizer or detergent (liquid soap).
Sequencing:
- It is necessary to wet the walls of the concrete mixer to prevent the mixture from sticking. Therefore, you should pour half a bucket of water into the device and turn it on.
- Then add about 50 grams (more precisely, it will be indicated in the instructions) of plasticizer.
- After this, you need to add two parts (measured in buckets or shovels) of sand to the water, and then (after mixing until smooth) one part of cement.
- Stirring continues until the solution falls off the walls of the bowl. Two more parts of sand are added, and then water in small doses, until a thick plastic mixture is obtained.
Advice! It is recommended to exclude the use of hard water, because... when dried, this will lead to the appearance of efflorescence (white salt deposits) on the front side, which will be almost impossible to remove.
Burning
For firing you will need a furnace, which you can also make yourself. You can build it in a large barrel. To do this, dig a hole half a meter deep, put material for lighting a fire at its bottom, and install legs 20 centimeters high above it. Place an iron barrel on them.
In this improvised oven, bricks are stacked in several rows. After filling, the structure is covered with a sheet of metal, and a fire is built under it. The firing process lasts approximately 18–20 hours, during which time the fire must be constantly maintained.
After this time is over, we gradually reduce the intensity of the fire, and then completely extinguish it. Under no circumstances should the metal sheet be removed until the barrel and its contents have completely cooled. Otherwise, the bricks will crack.
Cooling should occur slowly, naturally, without sudden temperature changes and without drafts. This is the only way you can get a quality product.
Next, take one of the finished bricks and split it in half. Carefully inspect the fault. It must have the same color and structure. Then immerse these pieces in water and wait for some time. If everything is in order, that is, there is no damage or color distortion, then such bricks can be safely used in construction.
Let's start laying the first row
The construction of the cladding is carried out directly next to the main wall, resting on the outer part of the foundation. To do this, the base is cleared of debris, and a waterproofing layer, for example, roofing felt, is laid. After this, the evenness and height of the surface are checked so that, if there is a difference, it is compensated for using masonry mortar.
First you just need to lay the bricks along the entire base without mortar, taking into account, however, the thickness of the seams between them. This is done to determine the required amount of material and install the mooring cord.
An example of bricklaying using reinforced mesh Source santeh-elektrik.ru
Necessary actions in case the outermost brick does not fit entirely:
- If the size of the residual opening is small (less than half a brick), it will be enough to increase the width of the seams. Usually an increase of 0.5 mm is sufficient.
- Reconsider the joining of corner bricks in a different way, for example: move the brick butts forward from the adjacent wall.
- If the residual gap is large, splitting by seams is not suitable, because the difference in the size of vertical and horizontal seams between each other will increase. Then the size of the gap is subtracted from the length of the brick, and the resulting result is divided by 5. The resulting value is the size that should be cut from the first five bricks in the row.
Video description
In this video you will see how to make imitation brickwork for a loft style:
Combination with other interior elements
The stylistic possibilities of brickwork in a room can be maximized through the correct selection of contrast. This may be another finishing material, and other interior elements - furniture, lighting.
Combination with furniture and floor Source roomester.ru
White grout for joints looks harmonious with the traditional red color of the finishing material. The rough, rough surface of the bricks is perfectly complemented by accessories made of glass and metal. In terms of furniture, natural wood always favorably emphasizes a brick wall. You can complement the wall with photographs, posters, drawings and other decorative elements.
Sequence of masonry
Upon completion of the preparatory operations and laying out the corners of the walls, you can proceed to the main work. Let's look at how to lay facing bricks under the internal jointing:
- You should lay a 1-1.5 meter square rod at the edge of the base and, focusing on the height of its cross-section, lay a layer of mortar on the bed, smoothing it with a trowel.
- The excess mortar, removed with a trowel, is applied to the poke of the already lying brick. The thickness of the seam is also checked against the rod, only this time it is short.
Appearance of the completed facing masonry Source royalhouse.od.ua
- Regular cleaning of the rods and mooring cord with a trowel will prevent the next brick being laid from getting dirty.
- Next, the next brick is attached and aligned by tapping it with a hammer, oriented towards the mooring.
- The described actions are repeated with periodic movement of the long rod until the end of the row between the corners. It is important to keep the front side clean.
- After laying the fifth row, perforated strips should be installed, followed by their fastening with anchors to the main wall every 2 bricks.
- Having laid 2-3 rows, you should repeat checks for verticality using a plumb line.
The most important thing in facing masonry is maintaining a clean surface and even laying. You should not fill the internal space between the walls with anything, because... it performs the function of thermal insulation. Every 6-7 rows it is necessary to take breaks to allow the solution to solidify reliably. Laying too many layers too quickly can lead to increased pressure and subsequent deformation of the masonry.
Slope finishing
The slopes are decorated with interlocking bricks, which creates an additional decorative effect and strengthens the perimeter of the opening. The material is installed in an even column, creating a dense edge of the masonry fabric and emphasizing the accuracy of the geometric lines.
For a more expressive design, you can use a brick of a different color, combining it with the main tone of the material. This option will decorate the slopes and make the facade more elegant.
Briefly about the main thing
Laying facing bricks requires certain skills so that the result is a smooth and neat wall. A beginner will be able to do this partially, having first familiarized himself in detail with the basics - types and methods of masonry, the correct mixing of the mortar, the sequence of laying work and jointing. Laying a simple wall yourself is possible, but more complex architectural facade structures will require the knowledge and skills of a craftsman. It is not difficult to cope with simple masonry - the tools and the work themselves are elementary, and the result is an attractive and durable design.
Ratings 0
Brick wall in a rustic kitchen
A large kitchen in a rustic style is the dream of many. However, it turned out that its structure is not so simple. Are you looking for interior design ideas? The base can be a brick wall. In addition, white furniture with glass fronts, light walls, purple or blue accessories and lots of warm light is a recipe for a successful interior that maintains an atmospheric style.
