No matter what room you start renovating, you will inevitably face the need to work with the walls. In this article we will look at such a finishing material for walls as decorative plaster. Decorating the walls with decorative plaster yourself will help not only make your apartment more beautiful, but also hide small defects, if any. Usually, ordinary plaster, putty and wallpaper are used for this. It’s worth noting right away that the most detailed information about all decorative plasters (composition, application technology and properties) is available in the “Manufacturers” section of our website.
Types of decorative plasters for interior decoration
Before choosing a specific material for wall decoration, you need to understand what it is like. First of all, decorative plaster for interior work is divided into facade and interior. In the first case, we get a “coarser pattern”, which is clearly not suitable for an apartment. Therefore, we will focus on the interior version.
There is also a division into structural (modeling), textured and Venetian plasters. In the first case, the solution will be evenly applied to the wall in an even layer, and then the desired texture and pattern will be created using various tools and techniques. In the second case, the solution will contain special granules, due to which the texture will be formed. Venetian is characterized by repeated application of thin layers with sanding and polishing to create an imitation of marble. All three options are described in more detail in the chapter on creating a textured coating.
Advice from the experts
Experts recommend adhering to the following tips:
- Before painting a wall with plaster, you need to prepare several rollers, a paint tray and a set of brushes. It is important to evaluate the quality of the pile. You will need a narrow brush with long bristles and a wide brush with short bristles. The first one applies the coating, the second one shades it.
- Using a long brush, scoop the decorative composition onto a long brush and cover an area of 1 square meter using a cross-shaped, chaotic movement. m. Strokes should be short. Do not skimp on the solution: apply the mixture in a medium thickness layer.
- The strength and service life of the entire coating depends on the correct application. To do this, the material is scooped onto a spatula, then stretched into a thin layer, after first transferring the mixture from the spatula to the brush.
AdviceIf the mixture is not thick, but quite liquid, then dip the brush into the container immediately, shake it off a little and begin surface work.
- Typically, plasters applied to the surface with a brush dry very quickly, so it is recommended to visually divide the wall into zones and process them one by one.
Plaster can be applied with brushes of different lengths and widths. It's better to have several types of tools. With a thin one it is easy to apply a preliminary layer, and with a thick one you can slowly shade it until the desired result is obtained.
Wall preparation is the key to quality coating
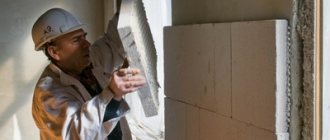
Decorative plaster of walls is possible only after proper preparation of the surface. The first step is to clear the wall of all excess. This could be old paint, which should definitely be removed using a spatula or special solvents. It could also be old wallpaper that should be removed completely.
If pieces of wallpaper remain on the wall and do not come off, they should be moistened with water. They will recede, after which they will be easy to remove with a spatula.
When the wall remains bare after removing previous coatings, you should take care of its cleanliness. At this stage, we remove grease stains (if any), dirt and fine dust particles. In other words, we remove from the wall everything that can interfere with the adhesion of the solution to it. If there is old plaster on the wall that does not hold tightly, then it also needs to be removed. Remove with a spatula or beat with a hammer. Next, we level the wall, making it even and smooth. For this, putty is used.
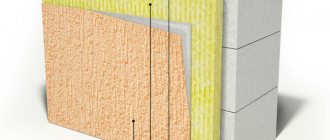
Now we have a wall ready to go. To improve the adhesion of the solution to the prepared surface, a primer is applied. The plaster manufacturer always writes on the packaging which primer is best used with this material. Only after this can the finished decorative plaster for the walls be applied. Of course, the primer must dry (usually 8-24 hours).
It is worth paying special attention to what material the wall is made of. To be more precise, you need to take into account the material on which the solution will be directly applied. The best options are concrete, drywall, brick and plaster. It is on these surfaces that decorative mortar is most often applied. By the way, depending on the selected surface, the primer is also selected. Sometimes decorative paint can be successfully applied even to glass without moving off it thanks to a good primer.
Features when working with drywall and wood
Very often decorative plaster is applied to drywall. The walls are sometimes so crooked that it is impractical to level them, and they are covered with plasterboard slabs. There is nothing wrong with this, because the decorative agent is easily applied to it. The surface is already smooth, which is a big plus. The most important thing in this situation is to choose the right primer, because a lot will depend on it (the adhesion of the solution to the cardboard leaves much to be desired).
Many people believe that wooden walls cannot be covered with mortar. This is not true, you just need to find the right approach. Indeed, the solution should not be applied to wood, because it sticks to it very poorly. However, you can lay shingles on a wooden wall, creating a lathing (a lattice made of strips of wood with diamond-shaped holes). Such a lattice is covered with a solution, onto which decorative plaster is then applied. However, this method is becoming obsolete.
Also, for strength, a metal mesh can be nailed to a wooden wall (this option is much simpler and more desirable). This mesh holds the solution well. Then decorative paint is applied to the plastered surface. As you can see, decorative plaster on wood is also possible. However, it is extremely important to insulate both the mesh itself and the dowels with brackets that secure it. If this is not done, then over time they will begin to rust, and the rust will appear on the wall, spoiling its appearance.
Some nuances
This material is very demanding on surface preparation. Although it can hide small cracks, other defects will be noticeable. Therefore, it is necessary to eliminate any shortcomings.
It is worth paying attention to some features:
- Avoid using products called fiberglass. It can damage the decorative layer. This is due to the fact that the material has good absorbency, which even a primer cannot level out.
- If metal beacons were used to apply the starting composition, they must be removed. Otherwise, there is a high probability that traces of corrosion will form.
- Walls in rooms characterized by high humidity are treated with moisture-resistant impregnations. Antiseptics are applied in advance, which should protect against fungus and mold.
Many manufacturers of silk-effect plaster recommend observing certain time intervals. Namely:
- block walls must withstand an interval of several months after the starting coating has been applied;
- for brick walls the period is up to six months;
- if the work was carried out in winter (in frozen rooms), then the decorative layer is laid only in summer.
Creating a textured coating, making the right efforts
It's time to learn how to apply decorative plaster to walls. In most cases, texture is the decisive factor when choosing a particular material. When decorative plaster is used for interior wall decoration, you need to think about the desired texture. A wide variety of tools can be involved in its creation.
It's very easy to use a notched trowel, brush or comb. By running these tools over the “raw” coating, we will create a different pattern. This also includes using your hand, a plastic bag or a regular sponge. With all this we apply or touch the decorative material that has not yet dried, forming a varied texture.
Stamps and special rollers can also be used. Such stamps and rollers already have a certain pattern that will be transferred to the wall. You can take a very ordinary roller, wrap it with a rope, and then create a texture with it. You can buy a ready-made tool with the design you like. The main thing is to then move the roller evenly along the wall so that the pattern is uniform. With a stamp it’s even easier, although it takes longer. Simply press it against the wall in the desired locations. Decorating walls with decorative plaster is impossible without creating a decorative effect. But it is achieved not only through special tools, but also thanks to the properties and composition of the solution.
The most understandable example would be the bark beetle. This decorative plaster contains granules, which create the texture. By the way, in this case the wall must be perfectly flat. Otherwise, the coating will not be uniform, and in some places the “bark beetle” will appear, but in others it will not. The fact is that the thickness of the applied layer of such a solution must correspond to the thickness of the grain used in its composition. Otherwise, the drawing will not work.
This decorative material is based on synthetic polymers and mineral fillers. The latter are of particular interest, because they help create the bark texture of the walls. Such fillers include crumbs of the following materials:
- Marble
- Granite
- Quartz
By the way, do-it-yourself decorative plaster of walls using this material is the most affordable option for the average person. You need a minimum amount of tools, because you will need to apply the solution and then simply rub it with a grater. And no special skills are required, just rub the solution evenly over the wall.
“Fur coat” on the wall - is it advisable?
I would also like to note the “fur coat” finish, which is also considered decorative. The technology of decorative plaster on walls to create a “fur coat” effect is very simple. Take the most common plaster (cement-lime) and simply spray it on the wall. For example, a broom is dipped into the solution and transferred to the wall by spraying. To do this, bring a broom with a solution on it to the wall and hit it against a stick or hand so that the solution flies directly onto the wall. Instead of a broom, a brush can be used to get a smaller drawing, if you can call it a drawing.
With this method, it is best to use a mortar gun, which is used to apply it to the wall.
In fact, this material does not have any decorative properties, and the decorativeness of the coating is imparted by a special application technique. It is also advisable to paint everything in beautiful colors to add more beauty. But in most cases, “fur coat” is used for facade decoration. It is also called decorative plaster on uneven walls, because it allows you to level the surface, since a large amount of mortar can be applied to one place.
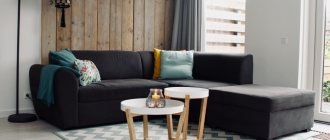
Width and color of stripes in the interior
Thin stripes are good because if they are not very contrasting, then from a distance they practically merge, becoming monotonous. But as you get closer, the stripe becomes obvious. Non-contrast thin stripes do not ripple or strain, but at the same time cope with their task of visually increasing the height or width of the walls.
If thin stripes have contrasting colors, severe effects arise for a person: simply put, it dazzles the eyes. You may even experience dizziness and nausea, not to mention permanent fatigue.
Does it ripple? Ripples. But some people like it!
Therefore, if you prefer wallpaper with small stripes or paint walls with narrow stripes, choose non-contrasting colors. And vice versa: when choosing contrasting shades, make the stripes wider.
Consider this when choosing striped wallpaper for your interior or when planning painting. A narrow strip is suitable for a child’s room for a lethargic, passive child prone to melancholy - such walls will activate and tone him up. Colors can be bright, but not too contrasting. The following striped combinations are suitable for children: yellow and green, yellow and blue, orange and blue, lilac and green, purple and khaki, purple and yellow. These colors in stripes can be diluted with stripes of beige, chocolate, white and other neutral shades.
Narrow bright stripes on the walls are suitable for the living room, where they like to throw parties, and for any other room where the energy of movement and dynamics is needed. But for the bedroom and living room, which serve more for relaxation than for entertainment, it is better to give preference to decoration with a wide strip of delicate colors.
Please also note that against the background of the energetic stripe, other interior objects will be lost. If, for example, you have a luxurious antique table, do not put it against a bright striped wall - the table will not be as impressive against its background.
As for the location of the strips, there is one important rule: if the height of the wall is greater than its length, a vertical strip should never be used. Otherwise, the room may turn into a “well”
And, of course, we remember the axiom: vertical stripes make the room taller, horizontal stripes make the room wider, but lower.
Horizontal striped wallpaper and a huge mirror made the bedroom visually very spacious, but a little low
Working with Venetian plaster
Since we discussed above the possibility of using textured (requires additional tools to create the texture) and structural (the relief is created through the use of various granules and additives in the solution itself) plasters, then to complete the picture it is worth considering Venetian.
Can smooth decorative plaster be applied to walls without leveling them? In the case of the Venetian, the answer will be negative. Therefore, in this case, the wall should not only be perfectly flat, but also as smooth as glass. Only then covering the walls with Venetian decorative plaster will give a magnificent effect. The beauty of this material is that it is made from marble flour and appears transparent. The result is the effect of marble walls. It is very difficult to work with it yourself, and the problem is not only that it requires careful preparation of the walls for decorative plaster.
Venetian decorative plaster for interior wall decoration is applied in very thin layers, which are usually tinted in different shades. There should be several such layers, usually 5-7. Grouting of the surface is carried out using fine sandpaper, this is a kind of grinding. It is also necessary to apply a protective layer of wax at the end, which adds shine to the entire coating. Finishing walls with Venetian decorative plaster is a painstaking process. You can ruin the coating with one wrong move at any stage of its creation.
Wallpaper on non-woven fabric
Paper wallpapers are gradually becoming a thing of the past, although they are still found in some stores. Today they are often made on a special non-woven base, which includes a non-woven paper-like material. It is a combination of natural and chemical fibers.
Such wallpaper has a dense texture, which makes it easy to disguise small cracks, unevenness, and imperfections in the walls. If the surface of the material has a pattern or structure created by hot stamping, then the camouflage properties are further enhanced.
Vinyl wallpaper can also have a non-woven base. They reinforce microcracks in the surface, and thanks to their varied texture, they successfully hide unevenness, roughness, convexity, and concavity. Such wallpaper for uneven walls can be either with or without embossing.
The latter are capable of creating unique decorative effects. For example, imitate heavy materials - stone, textured plaster, textiles. In addition, they are perfectly washable, withstanding exposure to water and detergents, and are resistant to UV rays.
Cost of work and price of materials
Finishing walls with decorative plaster has its own costs. Do you want to know how much 1 square meter of wall covered with decorative plaster will cost you? You will not get an answer to this question. And the point here is not only that the “bark beetle” costs a penny in comparison with the Venetian one. Such a pleasure as decorative plaster of walls has too many components, the cost of which varies significantly. Don’t think that you will buy a bucket of ready-made solution and that’s all.
Indeed, you need to buy plaster, and travertine, Venetian, sugar, rain and other options cost differently (the manufacturer also plays a role). You will also have to pay for a primer, which costs quite a bit (each plaster has its own primer). Do not forget that the solution should be tinted or painted, and this again means money. All this is included in the price of decorative wall plaster.
Maybe you want a special pattern that requires you to buy a stamp or a special roller? By the way, working tools also cost money, be it a cheap trowel for applying mortar or an expensive stencil for creating an additional unique pattern. Decorative plaster for walls can be a bit expensive. The price is formed from many components, which were described above. Additional requirements will increase the cost.
Think carefully about whether it would be better to hire someone for the job. It will be more expensive than doing it yourself, but it will also be of better quality. Moreover, the employee will buy everything himself, and will not have to pay for the tool at all. Of course, if you plan not just to use decorative plaster for the walls of the bathroom, but to go all over the apartment, then it makes sense to save money by doing everything yourself. In this case, purchasing a working tool would be advisable.
Required Tools
The methods for applying decorative plaster, purchased in a store or made by yourself, are no different.
First of all, let's figure out how to lay decorative plaster material. This will help you become more familiar with the process and organize control over employees. Such knowledge will not be superfluous for those who decide to install decorative plaster themselves.
What tools will you need for your work? Prepare the following kit:
- construction buckets;
- trowel;
- various spatulas, smoothers;
- rollers with special attachments;
- tape for painting;
- wax;
- electric drill with a mixing attachment;
- varnish;
- stencils for arranging decorative elements.
Perhaps not all names will be needed - it all depends on the type of plaster chosen.
Finish coatings for wall protection
After all the work is completed, the walls finished with decorative plaster will need to be further processed. We are talking about an additional finishing coating, which can be varnish, wax or paint. I usually use a protective wax coating for Venetian plaster, but it is suitable for other coatings. The situation is approximately the same with protective varnish.
Wax and varnish are applied with a sponge (bath or coral). A brush or thread roller may also be suitable for these purposes. The work of applying and rubbing is completed immediately after obtaining a uniform shade over the entire surface, so as not to spoil our coating on the wall due to changes in light due to thick layers of the finishing coating.
The finished coating is usually painted in cases where the solution was not tinted before application. Only water-based acrylic paint is used. Application is carried out in the standard way using a brush or paint roller.
Types of ready-made formulations
The following material options are available:
- embossed - the name of the plaster is due to the patterns that are obtained after its application. Has several varieties:
- structural - patterns are obtained due to the composition of the plaster mortar, which includes small pebbles, sand and other impurities that create patterns of certain structures;
- figured - the type is known for its fine-grained nature and has good plasticity. Patterns are formed through the use of special application methods and the use of available tools;
- smooth – creates smooth patterns. A typical example is “Venetian”, reminiscent of marble or onyx.
Decorative plaster used to repair interior walls in a house differs in its composition. Taking into account the main binding component, mixtures are divided into the following types:
- acrylic - the base contains resins that create reliable protection from the negative effects of a humid environment, but at the same time have poor air permeability. The solution is susceptible to abrasion and has a low level of fire safety;
- mineral - the main components are cement material, gypsum powder or lime. The solution is natural, used in rooms with normal humidity levels, otherwise you will have to additionally coat the wall with paint or varnish. Vapor permeability is excellent, making the indoor climate always comfortable;
- silicone - a universal composition for any room, with excellent values of vapor permeability, resistance to moisture and abrasion, used to decorate any walls;
- silicate is another universal plaster mixture that is not susceptible to ultraviolet radiation and water, and does not attract dust. Working with it requires special skills.
How to remove decorative plaster from walls
It is not enough to know everything about applying decorations to walls, because sooner or later you will get tired of it and want something new. It would be a good idea to find out how this material is removed from the wall. Using a chisel and hammer may well be considered the most traditional method of solving this problem.
Using tools, you need to knock out a small piece of decorative plaster from the wall in order to get to the base on which it was laid. Having gained access to the base, we place the chisel at an angle to the wall and begin to hit it with a hammer so as to remove layers of plaster. It will take a long time, but it is an effective method. It is clear that decorative plasters for interior wall decoration are different, but the principle of removal is approximately the same.
Instead of a chisel and hammer, you can use a hammer drill with a blade-shaped attachment. With such a tool the work will go faster. However, you will need a hat, headphones and a respirator. The fact is that as a result of such work, very loud noise and even more dust will be created. So it's better to protect yourself.
In some cases, it is not necessary to dismantle it, but this depends on the previously used decorative material and the quality of its application. If the coating is laid securely and is durable, then it is quite possible to work on top of it with new materials. If there are doubts that the old coating may not withstand it, then it is better to remove it.
Pattern application technique
If you want to get a surface with a pattern, you need to use a roller. Once the plastering work has been completed, you can begin to form the pattern. The layer should harden a little; you cannot use the tool on a completely liquid mixture, as it will not leave any mark. But you can’t wait for the material to completely harden. You need to start printing the design by placing the roller under the ceiling. Then it should be slowly driven down, the relief should be as uniform as possible. There is no need to remove the instrument from the base. The force of impact should be the same.
When the first strip is completed, you can move on to forming the second. It should go close to the previous one
It is important to align the drawing on top so that it starts from the same fragment. Once the relief has been formed, you can proceed to painting the walls.
Cork
This material attracts the attention of buyers due to its environmental friendliness, safety and special – natural and original decorative effect. It is made from cork oak bark, pressing the crushed raw materials, and then gluing the resulting crumbs using natural resin.
Decorative veneer is applied to the resulting blanks, and the top is covered with protective wax. The result is a material with unique qualities:
- has no smell;
- does not emit chemicals;
- not electrified;
- cannot become a source of dust in the house.
Due to the high porosity, moisture does not accumulate inside and mold does not develop. The cork surface is resistant to deformation, does not fade in the sun, and has soundproofing properties.
The most important thing is that the cork levels the surface, hiding all possible wall defects. For apartment renovations, modular coating in the form of plates and cork wallpaper are used. If the walls are very uneven, the first option is optimal.
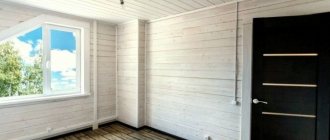
Tree
This beautiful, natural, environmentally friendly material has been used for interior decoration since ancient times. Once upon a time it was the prerogative of baths, saunas, and summer cottages, but today it is increasingly used for cladding the walls of apartments and country houses. This is a solution for Provencal or rustic style, classic decor.
A good option is covering the walls with clapboard. It looks impressive after being treated with stain, and white is suitable for Scandinavian and eco-style.
The board is notable for the fact that it can be laid diagonally, in diamonds, in a herringbone pattern, or in any other original way. Some use untreated chipboard sheets in the interior - cheap, but far from cheerful, but stylish and non-trivial.
In the house of real originals, you can find a wall that is a creative composition of ends, splits and other remnants of boards. This is an extraordinary way to decorate an uneven wall. There is a multi-stage relief and shelves for books.
3D panels
Three-dimensional materials used in construction are not new. They create an interesting optical effect and reliably hide strong irregularities. 3D panels are made from:
- plastic;
- bamboo;
- aluminum;
- glass;
- polymer;
- become;
- gypsum
They have one drawback - they “eat up” a lot of space, so they are not suitable for small apartments. But they can be used for decoration. In addition, they can provide additional sound insulation. The price varies - it all depends on the area and material.