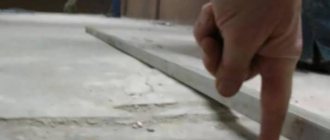
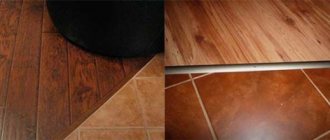
Washed down the tiles at 45 degrees
Today, a fashionable trend is to design corners without using plastic corners; to do this, cut the tiles at 45 degrees - yourself .
This type of cutting can have different names: · Burring.
· Kremlin corner .
· Pruning.
· Sharpening.
All these names have one concept - cutting tiles at 45 degrees. Looking ahead, I would like to draw attention to the advantages and disadvantages of this method of framing a corner .
How to cut (sharpen) tiles at an angle of 45 degrees?
Everyone calls this action differently: sawing, sharpening, trimming, burring, Kremlin corner - the meaning is the same.
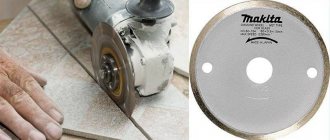
To properly trim the end of a tile at 45 degrees, you will need an electric tile cutter (a machine for cutting tiles) or, as a last resort, a grinder (Ushm) with a tile disc.
The easiest way is a grinder
It is more difficult to achieve a high-quality result with a grinder, but, in principle, it is also possible. This is the easiest way to sharpen a 45 degree corner of a tile with your own hands at home.
The process of bevelling and polishing porcelain tiles in the video below.
First of all, you must have a good diamond tile blade.
Place the tile on the edge (perpendicular to the one that is being cut) and grind its back part (clay) at an angle of 45 degrees.
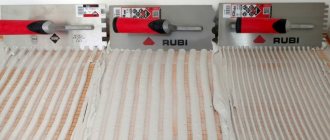
If it turns out a little uneven, then large rough irregularities can be gone over again with a disk, and in order to get a cleaner and smoother edge, you can use a grinding attachment like this (pictured below) with sandpaper or diamond “ turtles” .
The sanding wheels are on Velcro, if they wear off, take them off and attach a new one. The base itself with Velcro is screwed onto the thread of the grinder. Diamond bits have a much longer service life, but they also cost many times more. If you are constantly laying tiles, then it makes sense to take diamond turtles . If you are doing the first and last repairs in your life, then you can get by with sanding wheels.
When working with such a thing, you need an angle grinder with adjustable speed (minimum speed!), otherwise the edge of the tile will melt and burn, rather than being sanded.
You can buy great “turtles” here!
Electric tile cutter
An electric tile cutter, or as tilers also call it, a wet cutter. It has a water-cooled disk, and the same water extinguishes all possible dust. The tile cutter cuts along one clear, fixed path and minimizes the human factor such as hand trembling, etc.
The tile cutter has two working positions - a straight cut and a cut at an angle of 45° (in fact, you can set any angle from 0 to 45°, but this most often makes no sense).
Generalization on the topic
Recently, when tiling walls with tiles, many people refuse to use plastic corners. Refusal sounds different every time. Some people are unable to match the color of the plastic ceiling to the color of the ceramic tiles, others prefer to use as few additional elements as possible in the decoration, while others simply like to experiment and try something new.
The very idea of cutting the tiles at an angle of 45 degrees and joining the tiles at a right angle is not new. It was often used by builders when cladding façade ceremonial elements with marble. Now a similar technique has begun to be used when designing niches and boxes behind which utility lines are hidden. It allows us to obtain a rather interesting solution. But when using it, it is important to know that the corner on the tile, sharpened at an angle of 45 degrees, has its technical disadvantages.
Firstly, the corner becomes fragile, it is vulnerable, any strong blow can destroy the tiled lining. Therefore, this technique cannot be used when finishing surfaces located in the passage plane. It is enough to hook a corner with a metal bucket, and it will crack and crumble, or become covered with chips.
Secondly, such a finishing option significantly increases the labor intensity of the work, which means the final cost of repairs will increase significantly. Forming a right angle using cutting requires the use of professional construction equipment. Therefore, if you want to experiment on your own in the direction described, you need to think carefully and weigh the pros and cons.
How to properly cut tiles at 45 degrees?
In order for the corner of two tiles to look beautiful , when cutting the tiles you need to be a little short of the glaze (0.5-1mm). That is, only the clay is cut off. If you walk on the glaze (the front part of the tile), it will be “torn” and chipped. It will immediately catch your eye, it’s not beautiful.
We encountered this problem when cutting wavy tiles. But more on that later.
Surely many of you have seen such “art”, but most often everyone thinks that this is how it should be. And a tilemaker with twenty years of experience assures that it cannot be any other way.
But no, maybe.
Even if there is a need to cut the corner of the tile away from the “factory” edge and you have to cut the glaze, there is still a way to do it beautifully.
Firstly, to do this, you first need to cut the tile evenly (to the required size), and then, again, before reaching the glaze, cut it at 45°. This cut will be much cleaner and more beautiful.
You can also sand the edge of the glaze with fine sandpaper, this will make it even smoother.
Secondly, you can still cut off the corner from the beautiful edge (factory end), and sand the trimmed opposite edge and hide it in the other direction. It will be less noticeable.
For example, we once did this when tiling a toilet installation. Because a nice corner is more important than the bottom seam. Moreover, it also turned out to be very neat, and if you don’t know that it is trimmed, you will never pay attention to it.
Washed down the mosaics
Mosaic is the same ceramic tile, it is also actively used today in the design of modern interiors, so sometimes it becomes necessary to cut at an angle of 45 degrees on small-sized modules. How to do it?
For work, it is better to use an electric tile cutter; if you have experience working with an angle grinder, it can also come in handy. If you use a tile cutter, as practice shows, cutting mosaics with the glaze facing up is not very convenient. And all because the structure of the formed models is very mobile, it constantly moves, so it is better to turn the tile inside out, fix it on the back of the cutting disc and, supporting it with your hand, make the cut. You will have to suffer a little, but you will still be able to complete the operation.
And here an important condition remains - when processing the edge, you do not need to reach the glaze layer. Mosaics processed in this way are most often used to decorate niches and boxes under which utility lines are hidden in the bathroom and toilet.
It will also be quite difficult to cut down with a grinder. This process is quite dusty, and you need to be prepared for it. The mosaic in this case is also laid face down. During operation, the tile must be pressed against the surface of the base with something. You can use plywood of a suitable size for these purposes.
The sawing is done slowly, the clay is removed layer by layer. The diamond blade should operate at the lowest speed all the time. It will not be possible to cut down carefully with a grinder. Therefore, the cut will need to be modified with a file or sandpaper.
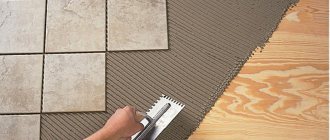
How to veneer and form a right angle?
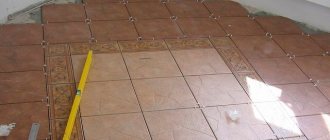
First you need to glue the first tile and level it. The trimmed edge will “fly” beyond the plane of the wall.
Then you immediately need to glue the second (counter) tile on the other side of the corner. While the glue is fresh and adjustable, you need to form a beautiful right angle.
And so we gradually move up, row by row.
Important point!
Before tiling the corner, make sure that your walls are vertical.
Because if the walls are even slightly heaped outwards, then without steps the corner will no longer meet. And this is not very beautiful, believe me! And you won’t cover it up or make up anything.
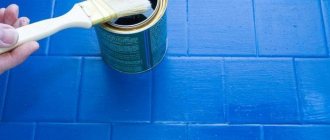
Silicone seam
Making this connection is the most technically correct, and many grout manufacturers recommend making the connection this way.
Many customers like it because regular cement grout has a matte effect, while silicone grout has a glossy effect. This corner formation is carried out after all the grouting has been completed.
Using the basic grout mixture
The simplest, but no less labor-intensive way to form an internal junction is to use the main grout mixture.
Let’s say from experience: if you do not have permanent walls, but, say, made of APA plasterboard panels, then this method of formation will not suit you, since you may subsequently get a crack in this seam. In this case, the previous method is better for you. Let's also add that we prefer the rounded shape of the junction. To do this, we perform this grouting in several stages. First, we fill the space between the tiles, and only then we directly form a rounded shape. And, unlike the two previous methods, here we first grout the corners, and only then do the rest of the grouting on the walls.
Where should you not use a turned 45° angle?
This type of corner becomes quite fragile due to the thinned (narrowed) edge of the tile, so it is undesirable to use it when facing steps. In the place of the greatest traffic, the tile will definitely come off, the corner will be chipped - it’s only a matter of time.
The steps are laid with the top tile overlapping the end tile (on the riser) or using aluminum corners/profiles.
And in general, before making such angles, think carefully about everything. If there is a big threat of hitting and knocking down a given corner, then most likely this is not your option. In this case, you can try using an aluminum corner (but not a plastic one).
Tags
materials mosaic diagonal laying of tiles kitchen foam plastic podium for shower stall cutting tiles at 45 degrees trimming tiles reinforcement floor screed concrete waterproofing waterproofing shower cabin bathtub bathroom primer leveling tile replacement grouting tiles soundproofing the floor our services holes in tiles marking tile laying mortar for screed we recommend! laying mosaics laying tiles laying floor tiles bathroom floor screed heated floor thin-layer screed tamping the base cracks in the screed forming a corner from tiles cement prices for services finishing floor screed extruded foam plastic
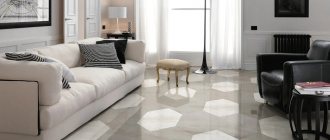
Examples of right angles from tiles cut at 45° (our work)
Frame for partitions and plasterboard ceilings
If you purchased an apartment in a new building, before moving you will undoubtedly want to make quality repairs.
This usually involves leveling the walls, installing a suspended ceiling for sound insulation and leveling, creating partitions, niches, as well as implementing design ideas and original lighting solutions. As a rule, work begins with the manufacture of the frame. But if in the recent past almost all frames in the interior were built from wooden blocks, today preference is given to metal profiles .
Need to plaster a wall? We choose a beacon profile, or in common parlance, plaster beacons. They will help to form smooth surfaces and level the plaster, generally in one plane, to a given level.
The beacon profile usually has a wall height of 6-10 mm. The beacon profile requires elasticity and strength so that it does not sag during plastering. It is recommended to take a 22 mm wide profile with stiffeners. You can check the profile for bending right in the store: bending a high-quality profile is not so easy.
Among ordinary consumers and even builders, all components for frame systems are usually called in one word “guides”. You can often hear the phrase: “Now let’s fasten the guides, and you can install the drywall.” But the profiles have different types and sizes. Let's look at the four main, most popular types using KNAUF profiles as an example: Guide profile (PN 50x40) Rack profile (PS 50x50) Guide (or ceiling) profile (PN 28x27) Ceiling profile (PP 60x27).
These profiles are made of 0.6 mm thick galvanized steel, with grooves and stiffeners, as well as second-by-second markings on the side wall.
Partitions The guide profile, or in the slang of professionals “PN-ka”, has a size of 50x40 mm. This profile is installed in conjunction with the PS 50 x 50 rack profile, and the guide is usually screwed horizontally. The lateral width of its wall is 40 mm, on the back there are two grooves - stiffening ribs. For ease of fastening, factory holes with a diameter of 8 mm are punched in the back of the profile for the screw head.
Another type of profile is rack-mount 50x50 mm. It is installed vertically, and this is clear from the name itself. It’s easy to remember: the rack profile stands vertically, the guide profile lies or is installed horizontally, showing the direction of installation of the racks.
The rack profile has bends at the edges for greater strength, and the stiffening ribs are 3 longitudinal grooves, grooves or “corrugations” located on the shelf (side). The function of the grooves is not only to strengthen the profile, but also to precisely guide the tip of the screw so that it does not jump off or slide along the smooth surface of the profile. This is especially important when constructing multi-layer cladding. If the screw is of poor quality or has a dull point, it will be difficult for them to penetrate the metal and press down the drywall.
The central groove helps to install KNAUF sheets exactly in the center. in the back of the rack profile for the passage of electrical wiring or other small communications.
Typically, rack profiles are installed in increments of 600 mm. A gap of 1 cm is left in the height under the ceiling of the PS so that the profile fits easily into the guide. The gap is also important in the event of shrinkage of the building, which, by the way, is a problem with new buildings. The gap prevents frame deformation.
Structures made of plasterboard or gypsum fiber are not load-bearing, so you should not design loads or use profiles as racks. Two additional profiles are installed above the doorway so that the joints of the drywall sheets do not intersect on two different sides of the partition.
From below, the profiles are fastened together with a cutter or screws with a flat head. It is not recommended to rigidly connect the profiles to each other at the top, otherwise even in the case of slight shrinkage of a fraction of a millimeter, cracks may appear in the final finish. Actually, a standard 12.5mm thick plasterboard sheet securely fastens the profiles and provides the necessary structural rigidity.
The sheets are screwed to the rack profiles with a screw pitch of 250 mm. Drywall is not screwed to the upper horizontal (guide) profile in order to leave free movement of the concrete floor slabs. The pitch of the profiles and, accordingly, the screws every 600 mm in the rack profiles is quite sufficient to ensure that the partition is strong.
It is impossible to screw drywall close to the floor; the sheet must be lifted, leaving a gap of 1 cm. Any moisture, even when the floors are washed, can accidentally seep in, rise up the plaster, and the finish will be compromised. The gap between the sheet and the ceiling should be left at 5mm.
Ceilings For suspended ceilings, as well as thin, economical wall cladding, there is a set of ceiling profiles 28x27 mm and 60x27 mm.
The narrow profile 28x27 is popular among builders, which is often used for all occasions, since it is the simplest and cheapest. Armed with metal scissors, they cut out any combinations and connections, but this is wrong. The main purpose of the ceiling guide profile is to fix a wide ceiling profile 60x27.
You can see how the suspended ceiling frame is assembled here .
Cladding If you need to level and at the same time insulate or soundproof a wall, as well as hide communications - pipes or wires, we choose a certain type of cladding on a metal frame.
There are two main types: from the 50th profile (Covering C-625) and the ceiling 28th profile (C-623). Thin cladding saves space and is attached to the wall using direct hangers. The cladding on the rack profiles is not fixed to the wall. The rules for installing cladding are approximately the same as when constructing partitions, only the frame is sheathed on one side.
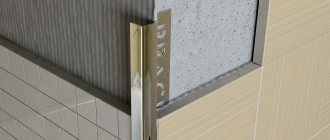
Corner profile Corner profile 31x31 mm is designed to protect the outer corners of plasterboard or gypsum fiber sheathing from mechanical damage.
The cross-section of the PU profile is made in the form of an acute angle (85°), due to which the profile fits tightly to the surface of the corner of the partition or cladding. “The top of the corner profile also acts as a beacon for puttying surfaces.
So, we looked at the main types of metal profiles. I would like to emphasize that when choosing profiles, you should pay attention to the thickness of the metal, rigidity, and quality of the galvanized coating. Properly assemble your construction site and accurately combine the types of profiles with each other.
How to create a partition from plasterboard without attaching it to the ceiling
The design will require a guide profile. It is distinguished by a sheller-shaped cross-section. It is used as a base for fixing the rack profile.
The standard width of the shelves is 40 mm, and the width of the back can vary from 50 to 100 mm. Then similar actions are performed on the other side of the structure. At this point, the frame covering is considered complete. Now they start finishing, which will add grace and aesthetics to the interior. After that, they start finishing.
Choose any material at your discretion. Drywall is universal, so it can be easily combined with any options. Among the traditional ones are wallpaper or paint.
If desired, you can leave the drywall itself. If the work is done well, it looks attractive. This option is suitable for high-tech or minimalist design. It is not difficult to determine the boundaries of the resulting structure.
To do this, the thickness of the selected sheets of drywall, putty and the planned finish is added to the marked parameters. If you are planning an arch or doorway, take this into account during the marking process. Drywall is attached to the frame using self-tapping screws in increments of 200-250 mm.
It is recommended to recess the screws by approximately 1 mm. This will cover one side of the frame. embedded parts are mounted inside. These include lamps or supports for shelves, laying pipes and electrical wiring, if required, laying sound and heat insulating material.
However, this is not always required for the partition.
Installation of an interior partition made of plasterboard
In new apartments with a large area and in old apartments with an outdated layout, there is a desire to remodel the premises for yourself. From one large room you can always make two smaller ones. For these purposes, interior partitions made of plasterboard are used. They are an effective solution in this situation due to their lightness and ease of installation. Also, their construction does not need to be coordinated with anyone.
Once the partition to divide the room is assembled, it will need to be prepared for finishing. For these purposes you will need: You need to insert racks to strengthen the structure. They are inserted in increments of 40 to 60, depending on how the drywall sheets will be attached later. The fact is that the joints of the sheets must fall on the profile.
Typically, racks are installed in increments of 60 cm with the expectation that the entire structure will be additionally reinforced with jumpers. Before you make an interior partition from plasterboard, you need to decide where the door will be located. After calculating the doorway, the points where it will be located are marked on the floor. It is necessary to take into account not only the width of the door leaf, but also the door frame itself, so calculations are carried out carefully . You can assemble two frames for partitions at a distance of 10-20 cm from each other.
They are then covered with plasterboard, and a thick partition is obtained. This step is taken when they are going to place a lot of things inside such a structure.
Zoning of living space, or how to make a partition if there is a suspended ceiling
Residents are not always satisfied with the visual separation of a separate area in a large room. Often, to create a comfortable environment, you need to build a wall that will divide one room into two. This option will be the most time-consuming and difficult, but it is possible. In this case, the coating should be film, and the installation method should be harpoon. The method is not acceptable for fabric ceilings. After heating the tension fabric with a heat gun, the tension material is carefully inserted into the profile using a special spatula. Folds and irregularities are heated until they are completely eliminated. It is recommended to leave about 25cm between the partition and the suspended ceiling.
A larger distance will not look aesthetically pleasing, while a smaller distance will create additional difficulties during installation. The next stage is plasterboard covering . If lighting is planned, then it is necessary to install the electrical wiring.
If necessary, sound and heat insulating materials are laid between the drywall inside the frame.