Self-leveling mixtures for flooring were originally developed for large industrial premises. Today, such materials are used everywhere. They are also used by private developers, and their high popularity is explained by the easy application technology and reduced curing time.
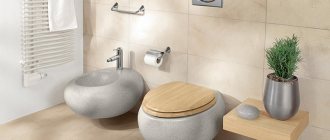
Today, these compounds are widely used to form floors in children's and medical, as well as entertainment institutions, shopping and sports centers. You can find a wide range of self-leveling floors on sale, some of them contain cement, others are methyl acrylate, while others are polyurethane.
You can also purchase epoxy mixtures, the latter of which are based on organic materials. These floors are poured when it is necessary for the coating to meet strict physical, mechanical and chemical properties. Among others, there is a self-leveling floor “Horizon Eunice” on sale, which will be discussed below.
Advantages of self-leveling floor
If you still don’t know whether it’s worth purchasing a self-leveling floor from the above-mentioned brand, then you should understand its main advantages, including:
- seamless surface;
- versatility;
- antistatic properties;
- resistance to chemicals;
- formation of an optimal indoor microclimate.
This list can be supplemented with long-term operational life, high decorative capabilities and compatibility with underfloor heating systems. Self-leveling floor "Horizon Unis" eliminates the possibility of dirt accumulation and is not a surface favorable for the settlement of microorganisms. Caring for such a base is quite simple, because it does not allow moisture to pass through, thereby extending the service life of the floors.
The floor can be used in any room, which indicates its versatility. It is also worth highlighting the antistatic properties, due to which dust does not settle on the base. Self-leveling floors can be used when exposed to chemicals; they are resistant to ultraviolet, radiation and fire.
Indoors, with their help, you can create an ideal microclimate for a person, because the floors do not emit dust, do not spread toxins and are not able to affect changes in humidity levels. You don’t have to worry about the smell, because it disappears within 2 hours after pouring.
How to calculate the required amount of mixture to fill the floor?
If a certain clarity has been achieved with the choice of the optimal composition, then the next question will certainly be how much mixture needs to be purchased. Making calculations is not so difficult if you have the initial data.
- You need to know the area of the room. For rectangular rooms it’s quite simple. For more complex configurations, you will have to carry out a separate calculation, but this is also not particularly difficult.
For those who have problems determining the area of the room
If you have to deal with a room (area of a room) of a non-standard shape, you have to use slightly different approaches to determining the area. But this will not be difficult if the reader goes to a special article on our portal, where various examples are discussed and convenient calculators are available for calculating the area of a room .
Prices for self-leveling floor Unis Horizont Universal
self-leveling floor Unis Horizon Universal
- It is necessary to use a laser or water level to draw a basic strictly horizontal line on the walls, and measure from it at different points in the room the distance to the base to which the pouring will be carried out. This is how the highest and lowest points are determined, and the difference between them will show the difference in height, which must be leveled with a self-leveling compound.
An example of taking measurements, determining the highest and lowest points of the base, the “zero level” line corresponding to the minimum thickness of the leveling at the highest point.
- It is necessary to decide what minimum thickness will be used to fill the self-leveling floor at the highest point of the base. It should not be less than the lower threshold of the permissible thickness range for the selected composition.
- Finally, it is necessary to clarify the average “certified” consumption of the dry mixture per unit area specified by the manufacturer.
Below is a calculator that will help you make calculations for Unis self-leveling floors quickly and accurately. The calculation result includes the traditional 5 percent margin. The final value is shown in kilograms and is also converted into the number of standard factory packages.
By the way, the number of bags is shown as a fraction, rounded to one tenth. But you should correctly understand that a whole quantity is still purchased. Any dry building mixtures, after opening standard containers, quickly lose their quality, becoming saturated with moisture from the air. Therefore, most likely, no store will pack it in kilograms.
Calculator for calculating the amount of dry mixture for self-leveling floors “Unis”
Go to calculations
Main disadvantages
Self-leveling floor "Horizon Eunice" can be chosen by you if you familiarize yourself not only with the advantages, but also with the main disadvantages. Among the latter, it is worth highlighting the meager choice of colors and patterns. In addition, before starting work, it will be necessary to prepare a rough coating, level the surface and control the humidity level.
After pouring and drying the composition, it will be quite difficult to cope with dismantling the layer. Sometimes consumers also refuse self-leveling floors because of their high cost and complexity of repairs. Installing such coverings is also quite expensive, this is true when compared with conventional flooring solutions.
What determines the drying time?
Types of self-leveling floors differ in the composition of the mixture. The main thing in them is the base; the drying time depends on its properties. The average is 7 days for regular mixtures and 1-2 days for quick-hardening ones .
The main conditions affecting the drying of the self-leveling floor:
- The basis of the mixture.
- Application thickness.
- Number of layers.
- Presence and type of additives to the mixture.
- Finish type
- External conditions.
Generalized drying times for various mixtures:
- Plaster – 12 days.
- Cement – 7-14 days.
- Polymer – 4-6 days.
- Polyurethane – 3 days.
- Epoxy – 2-5 days.
Each manufacturer of such building materials indicates the exact characteristics and parameters for their products. Practice shows that an additional 10-12 hours must be added .
There is another indicator - readiness for pedestrian traffic. Then you can walk on self-leveling floors, but you still cannot place furniture or carry out work with vibration.
On average, setting occurs after 12 hours. For quick-hardening mixtures, the surface hardens 2-3 hours after pouring the last portion.
Cement mixtures are one of the most common, but they take the longest to dry. This is due to many additives and modifiers. For polymer surfaces, the hardening speed also depends on the pigments.
To reduce the time, special coatings are used that are suitable for a specific type of mixture and for further work. In any case, it is necessary to follow the pouring technology and create optimal conditions for the material to harden.
You can see the general procedure in the following video:
Surface preparation
"Unis Horizon" universal should be applied to a previously prepared surface. When carrying out work at the stage of drying the composition, it is necessary to maintain the air temperature in the range from +5 to +30 ° C, while the humidity level should not exceed 75%.
It is important to make sure that the base is dry and durable. Before application, crumbling elements, oil and bitumen stains, paint coatings and other contaminants that could interfere with the adhesion of materials are removed from the surface.
"Unis Horizon" universal should be applied to a primed surface that should not be dusty. Cracks and potholes, the depth of which is more than 10 cm, must be sealed with Horizon screed; this must be done three days before the start of the main work. Vertical surfaces around the perimeter of the room must be covered with edge tape before installation. Its width should be selected depending on the expected thickness of the future layer.
Advantages and disadvantages
The group of companies, which settled in the Russian Federation in 1994, is one of the leaders in the domestic industry producing construction and finishing materials. But among the wide range of manufactured products, there are still no finishing compositions that are in demand by consumers and intended for use without additional finishing. There is no doubt that, in terms of price and technical characteristics, the mixture, which is in good demand, presented in the catalog as the self-leveling floor “Unis Horizon Universal”, looks very attractive. Using it, you can:
- Make a smooth and strong screed with a thickness of 3 to 100 mm, filling potholes or cracks in the base.
- Install warm floors, which are becoming increasingly popular among owners of apartments and individual residential buildings.
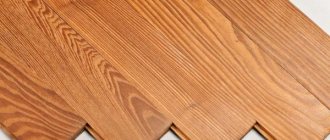
- Prepare the base for laying linoleum, ceramic tiles, laminate panels or parquet.
Bestseller - self-leveling floor "Unis Horizon" There is no doubt, in addition to the affordable price, it has other advantages:
- It is made according to a recipe that ensures a uniform filling structure. The necessary changes are achieved through the use of specific plasticizers and modifiers.
- It hardens in 2 hours and dries completely within a day, after which you can glue tiles, lay linoleum or laminate onto it. This self-leveling floor “Yunis” is quick-hardening. Using it, it is possible to significantly reduce the time required to complete the work.
- It has high strength, withstanding compressive loads of up to 20 MPa (200 kg per square centimeter), which is quite sufficient for operating conditions in parking lots and transport enterprises.
- It can be applied in a layer thickness from 3 to 100 mm, which allows you to level bases with large differences in height and, in one pass, seal both small and large defects.
- Designed for a long service life of 15 years or more.
Flaws:
Self-leveling floor "Unis Universal" is in good demand. However, craftsmen with experience in construction and finishing work warn that specialized compounds have the best performance. After all, versatility is always a compromise, for the sake of which you have to sacrifice some characteristics. This leads to disadvantages:
- Low turnover. Simply pouring the mixture and waiting until it is distributed evenly will not work. It will take some effort to level it out.
- Significant increase in the amount of waste. Those who claim that the consumption of Yunis self-leveling flooring is not high are lying. To achieve satisfactory results, you will have to try.
- Sensitivity to temperature changes. Do you want the mixture to dry on time and harden evenly? This means that during operation you will have to turn off heating devices and air conditioners.
Despite this, reviews of the Yunis self-leveling field are generally positive. But when you read about the beautiful appearance with a polished effect, the question arises: did the user really deal with this material?
Preparation of the solution
The Unis Horizon solution must be prepared in advance. To do this, the dry mixture is placed in a container with clean water. For 1 kg of composition you will need approximately 0.14 liters of water. Then the mixture is stirred until smooth.
This can be done mechanically, using a professional mixer set at low speed. Manual mixing is permissible if the mass of the mixture does not exceed 1 kg. The solution is then left for 5 minutes and then mixed again. The prepared portion must be consumed within 120 minutes.
A few words about
The now famous brand “Unis” was released in 1994. The founders of the company assessed the prospects for new standards of construction and finishing, in which they purchased ready-made dry building mixtures. The beginning was made with the production of adhesive compositions, but the range of products is constantly growing, and now it has already exceeded the bar of 90 items.
A recognizable group logo is a product that deserves unconditional trust
A characteristic feature is that the company’s management did not take the simpler route of ordinary “copying” or releasing licensed products. All compositions under the Unis brand are our own technological developments that have passed laboratory tests, comparative testing, and verification by practical application and operation of finished facilities.
Unis products quickly won the appreciation of professionals and became widely in demand. And to meet the ever-growing demand, five production facilities were launched - in the Central region, in the Volga region, in the Urals and in Siberia. We can safely say that Unis building mixtures are always included in the “top list”, and in some positions they even confidently occupy the leading position in it.
The company's products have repeatedly received prestigious international and Russian diplomas and awards, and is a regular participant in the most representative exhibitions of building materials. Without exception, all items comply with current international standards and have been certified in terms of quality, environmental and sanitary safety. There are no restrictions on the use of mixtures on any construction projects.
Drying time and some technical characteristics
Hardening time is a parameter that interests most consumers. If the thickness of the layer being laid is 10 mm, then this period can last from 2 to 5 days. It will be possible to walk on the surface with the same layer thickness after 6 hours.
The thickness of the laid layer can vary from 10 to 50 mm. For 1 m2 with the above parameters it will take approximately 20 kg of dry mixture. The frost resistance of the composition is 35 cycles, while the compressive strength is 200 kg/cm².
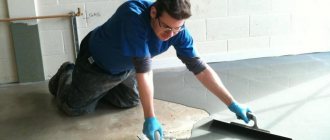
Carrying out alignment
As soon as the solution is ready, you can begin to lay it on the surface, distributing it evenly over the base as a rule. Ceramic tiles can be laid after the work is completed only after the surface has dried. If the floor has differences of more than 50 mm, then the floor leveler should be applied in several layers. Before you begin laying the next layer, you must wait until the previous one has completely dried, which will take 28 days. Before this, the surface is treated with primer and dust-free.
Installation instructions for the floor “Horizon 2”
“Horizon 2” is a composition that is intended for thin-layer leveling of surfaces followed by laying parquet, linoleum, laminate and ceramic tiles. If differences on the floor do not exceed 5 mm, then installation of beacons is not required. The prepared portion must be poured and then rolled with a needle roller. The next portion of the solution must be poured no later than 20 minutes from the moment the mixture is mixed. Each new portion must be poured, moving away from the previous one, so that the mixture can spread spontaneously.
Horizon 2 may be flooded with some interruptions. This is true if the area is more than 100 m2. In this case, 2 cm seams are left between the areas to be filled, which are filled with a spatula 6 hours after applying the last portion of the solution.
Briefly about the process of pouring self-leveling floors “Unis”
So that the home craftsman, even before purchasing material for pouring the floor, has an idea of the amount of work he will be faced with, it makes sense to briefly show the stages of this process.
| Illustration | Brief description of the operations performed |
| The usual set of tools for pouring a floor. A mixer or drill with an attachment is necessary for mixing the bulk composition (there is no point in trying to do this manually). In addition, for mixing, you need a clean, capacious container, so that you can immediately prepare a whole package of dry mixture for use. A rule and a needle roller are necessary for distributing and leveling the composition spilled on the base. A wide brush or roller with a foam attachment is for priming the surface. It is possible that in some cases other tools and devices will be required - this will be mentioned throughout the presentation. | |
| The initial surface on which the pouring will be carried out must be carefully prepared. | |
| If there are very protruding bumps on the floor, then they can be knocked down with a pick, chisel and hammer, or even an ordinary ax. | |
| The surface is thoroughly cleaned of construction debris and dust. You can use a broom, brush... | |
| ...but the best effect is achieved by cleaning with a powerful construction vacuum cleaner. | |
| If there is serious damage to the floor surface in the form of dips, cracks, crevices and other similar defects, then they should first be widened, cleaned of dust, primed and sealed with repair mortar. For example, use the coarse floor leveler “Unis” (mortar for screeds) for these purposes. | |
| The next important step is thorough priming of the surface. The primer will bind remaining dust, penetrate into the base surface, strengthening it and eliminating high absorption, and ensure the required adhesion with the bulk solution. This treatment is carried out at least twice, with the second layer applied after the first has completely dried. | |
| For ordinary concrete screeds and other absorbent substrates, the universal deep penetration primer “Unis” is well suited. | |
| If the floor will be poured onto a smooth reinforced concrete base (floor slab), into which water is practically not absorbed, then it is better to use the Unis Concrete-Active composition. | |
| The floor surface after priming takes on something like this. | |
| If you plan to fill the floor in a room with high humidity, then it is not possible to treat the surface with three to four layers of coating waterproofing. After thinning, it is applied with a brush, changing direction for each subsequent layer (after the previous one has dried). | |
| High performance qualities and excellent adaptation to all “Unis” self-leveling floors are demonstrated by the coating composition of the same. | |
| If the fill is supposed to be quite thick, over 5 mm, then it is recommended not to neglect the installation of a damper tape around the perimeter, at the junction of the floor and wall. It will prevent the coating from deforming and crumbling due to temperature changes. | |
| What about lighthouses? With thin-layer leveling fill, they are often dispensed with without them at all. But if the floor has significant differences in level, then it is better to have guidelines to maintain the required minimum thickness. Firstly, these could be the usual beacon profiles, fixed with a solution... | |
| ...and then precisely installed to the building level. However, after pouring and distributing the mixture, these profiles will have to be removed. By the way, such beacon-profiles can also serve as separators, when in a large room it is not possible to fill the entire area at once, and it is necessary to divide it into so-called maps. | |
| Here's a demonstration of a different approach. Even before priming, holes are drilled in the floor surface and dowel plugs are driven into them... | |
| ...and then the screws are screwed in. | |
| By rotating the screws in one direction or another, this position is achieved... | |
| ...so that the caps of all these “beacons” are located in the same horizontal plane, at a height slightly higher than the level of the future fill. Such guidelines will be very helpful in your work. And after pouring, it’s easy to unscrew them - the mark will be covered with solution. | |
| Finally, reference-type beacons are convenient. Their design may vary somewhat, but usually it is a tripod with thin legs, in the center of which there is a rod. This rod can be very accurately adjusted in height using a screw or other lock. | |
| The benchmarks are placed on the floor, and using a level, the lower edge of their pins is positioned exactly along the horizon of the future filling layer. Great landmarks! | |
| You can proceed to preparing a self-leveling solution. To do this, pour a strictly measured amount of water (in accordance with the attached instructions) into a clean container. No amateur activity is allowed here, otherwise the finished floor will lose its declared qualities. | |
| The dry construction mixture is poured into the water (that’s how it works, not the other way around!). Experienced craftsmen advise first pouring out about half the package and mixing thoroughly so that there are no deposits left at the bottom. Well, then add the rest. | |
| The composition is mixed with a construction mixer or a drill with an attachment until an absolutely homogeneous semi-liquid consistency, no less than the time indicated in the instructions. Then a pause is made to allow the solution to mature, and after that, final mixing for another minute. | |
| To ensure that the work goes smoothly, and there is no risk of not having time to distribute the composition or to apply the next portion for normal merging with the previous one, it is better to carry out the work with an assistant. One is busy with mixing, and the second is busy with pouring and distributing. And it’s even better to have several containers at your disposal so that you can practically prepare the bulk composition in a stream. | |
| The finished composition is poured onto the surface of the base. They try to provide the necessary fill layer, that is, it is advisable to fill it slightly above the level of the landmarks. | |
| Primary distribution over the surface can be carried out using a wide spatula or a rule. | |
| A very convenient tool for distributing the self-leveling composition over the surface is a squeegee mounted on a long handle. Not only does it cover a wide band, but it is possible to preset the height of the fill layer. | |
| And in order to move freely on a surface filled with mortar, it is recommended to attach special paint-shoe soles to your shoes. The marks from the thorns are immediately covered with the solution. | |
| The illustration clearly shows how a craftsman, wearing sandals, distributes the spilled composition with a squeegee. | |
| A needle roller is also used to distribute the spilled mixture. But it is recommended to use such a tool in any case - it involves both high-quality “rolling” and the removal of thorns and air bubbles. That is, the coating acquires the necessary density and solidity. | |
| The illustration shows how a craftsman, using a simple homemade device, controls the height of the fill relative to the heads of screwed-in beacon screws. When the desired level is reached, the screws are unscrewed. | |
| It is even easier to carry out control using reference beacons. The gap between the distributed layer and the lower edge of the central rod is always clearly visible. When the desired layer thickness is reached, the beacons are removed, and not a trace remains of their thin legs. | |
| It is very important to ensure that the mixture does not lose mobility, and also not to exceed the joining intervals for the poured areas allowed by the manufacturer. Then the self-leveling composition will be well distributed, merge into a single layer, and the surface, under the influence of gravity, will become smooth and take on a perfectly horizontal position. | |
| This is what a freshly poured floor might look like after carefully spreading the self-leveling compound. | |
| And this is him a few hours later. And you can already walk on it with your feet in regular shoes. | |
| And if everything was done in strict accordance with the manufacturer’s technological recommendations, then the check will show that a smooth and horizontally aligned surface has been obtained, ready for subsequent finishing. |
* * * * * * *
At the end of the publication, there is a short video that shows one of the recommended options for pouring the self-leveling floor “Unis Horizon”.
Composition of the floor "Horizon"
The composition of the self-leveling floor is of interest to some experts. If you are one of them, you should know that the ingredients include:
- quick-hardening cement;
- polymer additives;
- crushed limestone.
If we compare cement from the “Horizon” mixture, its chemical composition will not differ from Portland cement, but during its production the clinker is crushed more strongly, so the particle size is 2 times smaller. This allows the cement to gain strength up to 60% in just 5 hours. However, after this the process slows down and proceeds as usual. That is why we can assume that the composition of the self-leveling floor determines some of the characteristics of the described mixture.