A bed with a lifting mechanism is the best option for small apartments, which allows you to solve several problems related to the improvement of the room. Practicality, reliability and versatility are its main advantages. It can act not only as a sleeping place, but also serve as a chest of drawers for storing various things and accessories. Making a bed with a lifting mechanism with your own hands is not as difficult as it might seem at first glance. If all the requirements and recommendations of specialists are met, the bed will turn out no worse than the factory one. In order to figure out how to do this, it is necessary to divide the entire process into several stages, each of which requires special attention.
Features of such models
Beds with a lifting device have a number of features that must be taken into account when making them yourself:
- the dimensions of the bed, which mainly affect the strength of the lifting device. The larger the bed, the more weight will be placed on the mechanism. According to the standards, the bed size is 2 meters in length, the width of a single bed is 0.9 m, a double bed is 2 m;
- beds with a lifting device can be single or double;
- the mechanism can be mounted horizontally or vertically;
- The height of the bed affects the capacity of the box. If the product is planned to be made with legs, then the box will be much smaller than a bed without them. A product without legs has another important advantage: the absence of dust underneath;
- Assembling a product with your own hands requires consistent, responsible implementation of all its stages, these are drawings, preparation of materials, manufacturing of individual parts of the bed, and their assembly. On average, it will take 1-2 months to make a bed, subject to the simultaneous completion of other daily duties;
- the choice of material should be made not only from personal preferences, but also depending on the design of the room in which the product is planned to be installed.
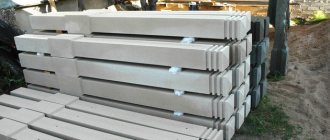
Steel frame bed
Diagram of a bed frame with a lifting mechanism
Scheme of the design of a bed with a lifting mechanism
Bed assembly diagram
Drawing
After choosing a bed model, its dimensions, materials of manufacture and type of lifting mechanism, it is worth making a drawing based on a preliminary sketch of the product. Thanks to its presence, it will be easier for you not only to detail individual elements, but also to assemble a complex structure . There are several options for making a drawing:
- you can make it yourself if you know how to draw;
- you can use special computer programs downloaded from the Internet;
- You can contact a furniture company, where, in addition to a competent drawing, you will be offered to do the detailing of all individual elements.
Materials and tools
Any construction process or making furniture with your own hands begins with drawing up a drawing, as well as preparing the necessary tools and materials. The choice of material begins with the base of the box. The most common and inexpensive material for making any furniture is chipboard sheets. But other materials, such as OSB, particle boards and others can also be used, it all depends on the preferences of the owner and financial capabilities. Next, the upholstery material is prepared, the choice of which depends solely on personal preferences and the design of the room.
The filling of the bed consists of foam rubber and upholstery fabric. Their dimensions and thickness are prepared according to the drawn up drawing.
The most accessible and inexpensive material for making a bed is chipboard
To process the material and prepare it for installation work with your own hands, you will need the following tool:
- level;
- roulette;
- pencil or marker;
- jigsaw;
- screwdriver with different attachments;
- grinder with a metal disc;
- welding machine;
- construction hair dryer;
- steel strips;
- furniture stapler.
Orthopedic base
Base materials
Elevator transformation system
The benefits of making it yourself
Making a raised bed with your own hands is advantageous for the following reasons.
- Homemade furniture products are reliable and durable.
- The material for furniture is chosen at the discretion of the master, in accordance with the interior of the bedroom.
- The ability to manufacture an item of the desired size to fit into the interior of the room.
- A piece of furniture is made according to the wishes and preferences of the owner.
Before you start creating a lift-up bed, you need to decide on the appearance, configuration and frame of the desired product.
Double bed made of furniture panels with a lifting mechanism
Which lifting mechanism to choose
The design of modern beds allows them to be used in rooms of different sizes, while having a suitable lifting mechanism, thanks to which the bed can be reclined both horizontally and vertically. In addition, lift beds are classified according to the type of built-in lift. The simplicity and ease of use of furniture depends on it. The lifting mechanism is divided into 3 types:
- with manual lift;
- spring;
- on gas shock absorbers.
Gas lift
Spring
Manual
The manual lift mechanism is the most affordable device because it does not contain additional devices in the form of shock absorbers or springs. Beds with such a mechanism are mainly used for adults, since when opening the box you need to make a lot of effort, children cannot cope with such a load. But, besides the disadvantages, the manual mechanism also has advantages - strength, durability.
The spring mechanism is convenient to use, but its service life ranges from 3 to 5 years, after which it will need to be completely replaced. The main cause of failure is wear and stretching of the spring. The big advantage of the spring mechanism is its price; it is relatively small, thanks to which it is very popular and in demand.
The gas shock absorber is the most convenient, reliable, durable mechanism. The device operates smoothly, silently, with virtually no human intervention. The service life of such a mechanism ranges from 5 to 10 years, with constant use. The choice of shock absorber is made depending on the dimensions of the product and the weight of the sleeping frame. The mechanism on gas shock absorbers is expensive, but at the same time in demand.
When making a bed with your own hands, a lifting device can be bought in furniture stores or ordered online. You can make it yourself from suitable materials. But when choosing materials, you need to take into account the fact that the load from the mattress falls not only on the shock absorbers and mechanism bars, but also on the fastening points with fastening fittings.
The mechanism is fastened in the following order:
- first, the upper strip of the device is installed, to the base of the box, the lathing of the sleeping plane;
- to completely secure it, a bar is made from rolled iron;
- assembly of the next two slats will allow you to control the height of the rise of the grid with the mattress;
- the lower support bar is attached to the main box; it is necessary to facilitate the sliding of the hinge supports;
- Having finished installing the mechanism, you need to check all its fastenings.
The gas lift is mounted on a rack base
Mechanism on gas shock absorbers
Installation of gas shock absorbers
Mattress base options
Having decided on the dimensions, you can move on to choosing such an important part of the bed as the base for the mattress. Yes, of course, you can do without a mattress, replacing it with a non-removable filler from the same chair-beds and similar furniture, but at home this is extremely difficult to do, so most often beds are made for a mattress
They are like this:
Today it is already considered a relic of the past, but in some places you can still see a flat base. It consists of boards knocked together to form a wooden shield on which the mattress is placed. There are practically no advantages to this design (compared to more modern options), but there are a lot of disadvantages.
Firstly, the mattress deforms very quickly and loses its useful properties. Secondly, a dream with such a reason is not the most pleasant. Thirdly, the mattress is not ventilated, which is why it can become damp, which will lead to the appearance of various parasites in it or the onset of rotting, which is also not very pleasant.
Making a lifting frame
Assembling a lifting frame with your own hands consists of two main stages, these are carpentry and carpentry work and the processing process.
Carpentry work:
- assembly begins with the preparation of parts for the frame, according to the drawing, which indicates all dimensions;
- Next, the base of the frame is assembled, this is a box of calibrated boards. The process must be carried out on the floor to avoid distortions. To align the corners, you must use a construction square;
- The structure is tied using metal corners, and for strength, the joints are glued with wood glue. When fastening, you need to pay attention to the heads of the screws; they should sink into the wood, but not too much. It is recommended to immediately treat any cut areas that appear;
- in case of large sleeping space, it is recommended to make a central partition along the frame;
- the next stage is attaching the slats, which are screwed using self-tapping screws on the inside of the sidewalls, aligning them along the bottom edge of the box. They are needed to attach lamellas to them. The size of the slats should be within 20 by 80 mm;
- The same slats act as slats, only their length will correspond to the width of the bed. They are fastened to support rails along the frame, in increments of no more than 15 cm. Plywood is also suitable for slats, but in this case the installation of a central partition is required;
- At this point the carpentry process is completed and the lifting frame is ready.
Frame processing:
- this process involves refining wooden parts with sandpaper or a special sanding machine and coating them with varnish;
- One of the nuances of preparing the frame is a plywood sheet, which lies on the lamellas to evenly distribute the load. Or you can lay the lamellas with a step frequency of 8–10 cm.
Frame assembly
The sides of the bed are attached using corners and screws
Finished bed frame
Decorative elements
We have already talked about soft headboards, but this is far from the only way to decorate a homemade bed. Now on the market you can make to order or buy ready-made decorative elements for covering beds. This can be a small fragment or a whole carved wooden plate.
This decor looks luxurious, the only problem is that handmade work costs serious money. Alternatively, such plates can be ordered from a furniture workshop and made not from natural wood, but from MDF. There are machines that mill patterns in 3D projection.
Carved decor on a homemade bed looks luxurious.
Making the main frame
The assembly of the frame, like all other components of the bed, is carried out in stages. First of all, to manufacture the main frame, its components are prepared. Design, height, size of backrests, presence of legs - all these nuances are reflected in a pre-drawn drawing. The main requirement in the manufacture of a product is reliability, strength and quality of the material.
As mentioned above, any material can be used, depending on financial capabilities and personal preferences. For the frame of a double standard bed (2000x1800) you will need: for the side parts - two boards 207 cm long, for the end elements you need two boards 182 cm long. They are assembled according to the same principle as the lifting frame, using self-tapping screws, corners and glue . In the assembly process, this moment is the most critical, so before attaching the corners, you need to check that all corners correspond to 90 degrees. Excess glue that has come out must be removed immediately so that in the future it does not cause difficulties when processing the frame.
When making large beds with your own hands, you need to install a stiffener in the main frame through the longitudinal axis of the product. If the bed design includes legs, the last step in the installation process is their installation. The simplest option for making them is to assemble two bars (40x50) and install them at the depth of two crowns of the bar. To strengthen the structure, you can also install a leg in the center. Having placed the structure in its original position, you can proceed to its processing, clean it and varnish it.
Fastening slats for plywood bottom
Bed legs
The legs are attached inside the frame
View from the outside
To prevent the floor from scratching, you can glue pieces of linoleum to the ends of the legs.
Point No. 5: fastening the supports for the slatted bottom
| Illustrations | Recommendations |
| Bed side rails. A support beam with a cross-section of at least 50x50 mm is attached to the side ironing of the box. The bars are fixed in the same way as the box, that is, through inclined holes on self-tapping screws. | |
| Glue mounting . In addition to self-tapping screws, the bars are placed on glue. In order for the glue to set over the entire plane, the structure is tightened with clamps. | |
| Legs . Everyone determines the height of the legs independently. For manufacturing, a beam with a cross section of 100x100 mm is taken. | |
| Installation of legs . The legs are screwed with self-tapping screws along the corners of the box to the supporting horizontal bars. | |
| Reiki . The mattress will be placed on the slatted tray. A 100x20 mm planed board is used as slats; the board is fixed with self-tapping screws. A ventilation gap of 50 mm is left between the slats. |
Sheathing of the product
The final stage in the manufacture of a bed with a lifting device is its design and upholstery. Depending on the design of the room, the personal preferences of the owner, as well as banal financial capabilities, cladding can be done using:
- fabrics;
- skin;
- dermantine.
If the product is made from high-quality wood, it can be treated with paints and varnishes.
For the cladding process you will need:
- fabric (or other selected materials);
- construction stapler;
- sheet foam rubber.
The covering is done on the main frame and headboard. To create a small volume and airiness of the upholstery material, a pad of sheet foam rubber is made between the wood and the fabric. A construction stapler is quite sufficient for fastening fabric; its metal staples, thanks to the spring mechanism, are driven quite firmly into the wood and hold the fabric tightly.
Legs are wrapped in upholstery material
Final installation of legs
The sides of the bed are covered with foam rubber
Foam rubber is nailed on top with an overlap of approximately 3-4 mm
Leatherette upholstery
This is how the side around the leg was finished
The leatherette was lined at the bottom with a slouch, without a turn-up
The corners of the upholstery are fixed
Finishing
When it comes to finishing, there are several options:
You can cover the product with textiles (leather, fabric, leatherette). By choosing this option, the headboard and sides of the product are sheathed. The selected textile is attached to the tree using a stapler.- If you assembled a bed from elite and expensive wood, you should not cover it with fabric or paint. To do this, all parts are carefully cleaned with a grinder, covered with stain and varnish in several layers.
Advice : if you are serious about saving space in your apartment, try making a bed-wardrobe and a bed-chair. You may also be interested in a wardrobe or beds made of timber, solid wood, chipboard, pallets and boards.
Varieties
Wooden frame
Wood is, first of all, a natural material; a product made from it will not only be durable and beautiful, but also environmentally friendly. The wooden frame does not become loose over time, does not creak, and looks beautiful and neat when combined with other furniture. Wood is more pliable, easier to process, has a beautiful texture, and there are many ways to decorate it. The production of such a frame does not require special equipment, as with a metal base, so it is technologically simpler to manufacture it. In addition, the paint on the metal base peels off over time and, despite all the treatments, the iron is susceptible to rust. Almost every owner has experience working with wood; the difference will only be in scale.
When choosing, it is better to focus on natural wood. Fiberboard and chipboard use glue, which can have a strong, unpleasant odor and furniture made from them is not so environmentally friendly.
In addition, if you choose high-quality wood, it will be more durable than fiberboard and chipboard, not even to mention its higher aesthetic value.
Metal carcass
Despite all the beneficial properties of wood, metal frames have also become widespread, primarily due to greater mobility and lower weight. Metal beds are very durable, elegant and beautiful, but if it is an intricate design, then it is not suitable for every interior. In order for a metal bed to fit beautifully into the interior design, you must have the minimum skills of an interior designer or try to get advice from a designer. But if you solve this problem, the result is worth it! A successful design solution for a metal bed will improve and ennoble the sleeping area! Painting such a frame requires special attention, because if the technology is not followed or you are inattentive, it will begin to rust. The durability of the product also depends on the correct choice of metal and its high-quality finishing. The metal frame is lighter, but does not look as impressive as wood and does not have its beneficial properties.
Metal does not retain heat. Such a bed will almost always be cold, especially in winter.
Assembling a double bed
The assembly of a double bed is as follows:
We set the footboard and headboard vertically and support them with some objects.- We apply the drawers and check the evenness of the corners.
- We mark the points for the dowels and connect the drawers to the backs.
- We remove the drawers and drill holes in them .
- We assemble the structure by choosing holes on the backs.
- We proceed to the complete assembly of the base - we drive the dowels into the grooves and lubricate the parts with glue . For better fastening of parts, we wrap the product with rope.
- Leave the product for several days until the glue dries completely.
- Next, we make the flooring . For the slatted bottom, we distribute special holders along the frame.
- We select the spaces between the slats so that the mattress can easily be supported on them.
- We connect the slats with longitudinal bars.
- Now you can start installing the legs . To do this, we fix the beams on the inside of the corners of the frame.
That's the whole simple process of assembling a wooden bed frame.
Important : in order not to spoil the appearance of the bed, choose screws whose thickness will not exceed the thickness of the boards.
Wood species
You can make a wooden bed from different types of wood:
- pine trees
This material is in demand due to its presentable appearance and high technical characteristics. This product will delight you not only with its beautiful texture, but also with its pleasant pine aroma. Products that have been well sanded and varnished are highly resistant to the formation of fungi and do not rot; - oak _ This wood is considered elite. It is distinguished by its luxurious appearance, environmental friendliness, and the ability to create patterns and ornaments on the product;
- beech _ Such beds are distinguished by their original cut patterns, durability and strength. Beech models look noble and fit classic motifs;
- birch trees This type of wood is easy to process, has a high level of strength and elasticity, and is attractive.
Attention : when choosing wood, you should base it on what kind of bed model you need.
To make a wooden product look aesthetically pleasing, but not cost too much, you should know some secrets :
- for decoration and frame it is worth taking expensive material (oak);
- for making legs, cheaper wood (pine) is suitable;
- and for the slats that will be located inside the product, you can choose the simplest option (birch).