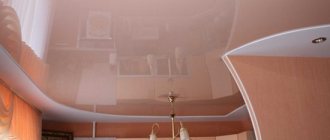
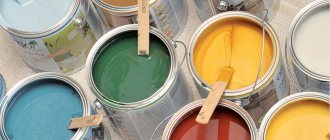
The overall perception of the entire room depends on the type of ceiling. Using paint, you can fill a room with light and hide imperfections and defects. You can easily paint the ceiling yourself. This simple finishing method has been used for a very long time and is still popular. With the advent of modern materials and technologies, improving the interior has become much easier. Any composition is simply applied using a roller or brush. Ceiling paint stands out for its low price, versatility of use, and wide palette of colors.
General provisions
Any paint is classified according to the type of material, gloss and washability. Depending on the reflective properties of the surface, painting materials can be glossy or matte. Glossy painted ceilings are characterized by the presence of shine and high decorative characteristics. However, to apply such a coating it is necessary to carry out careful preparatory work to eliminate the slightest irregularities and defects.
As for matte paint, due to its lower reflectivity, it is able to mask minor flaws in the base base. This reduces the time and effort required for plastering or putty by an order of magnitude. An intermediate option is also available for sale - the so-called. “semi-gloss” paints: they are able to impart a certain shine to the ceiling surface, simultaneously masking minor defects and irregularities.
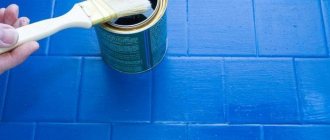
Depending on their ability to withstand wet cleaning, paints are either washable or non-washable. The selection of a specific option depends on the operating conditions. For rooms with a low level of pollution (bedrooms, children's rooms, living rooms), inexpensive non-washable options are quite suitable. It is better to paint a kitchen, hallway or bathroom with a washable material that can withstand regular wet cleaning with a sponge, rag and detergents without loss of decorative characteristics.
Main groups of paints
There are two classifications of ceiling paints - according to the type of effect created on the surface and according to the cleaning method. Below we will look at the types that fall under each classification in more detail.
Types of paints according to the type of effect created on the surface
Matte
Based on the name, you can guess that this is a type of paint that has no shine at all. Experts advise giving preference to this type of paint, since it will perfectly hide all the unevenness of the ceiling.
Glossy
You can safely choose glossy paint only if you have perfectly smooth ceilings. With this type of paint you can get a shiny ceiling surface, but it is better to use it on large areas.
Semi-matte or semi-gloss
Such paints have a less noticeable shine than glossy ones. Also, semi-matte or semi-gloss paints have several degrees of gloss, which will allow you to choose the one that best suits your ceiling.
Types of paints by cleaning method
Resistant to dry abrasion
When choosing such paint, keep in mind that the surface of the ceiling can only be wiped with a dry cloth. As for wet cleaning, using steam or soapy water, this type of cleaning is not suitable for this type of paint.
For dry rooms with low traffic load
If you see such a marking on the can, it means that this paint should not be used in the kitchen or bathroom, as well as in rooms where people often smoke.
Indelible, abrasion resistant
A ceiling painted with this paint can easily be washed with a damp sponge, but you should remember that the dirt will not come off well and most likely it will leave streaks.
Washable or stain-resistant coating, resistant to intensive washing
Washable paints are perfect for ceilings in the kitchen or bathroom, since the surface covered with such paint can be washed repeatedly with soap or even an alkaline solution.
Features of water-based paints
The main option for painting the ceiling in an apartment is water-based compositions. In another way they are also called water-dispersed. Plain water is used as a solvent here. Among the ingredients there are also film-forming materials - pigments that impart covering properties to the substance. To give the paint the necessary performance properties, special additives are introduced into its composition.
The result is a liquid suspension consisting of solid components (base, pigments and additives) suspended in the liquid. A very important point is that these particles do not dissolve and do not mix with water. As a result of application to the base to be decorated, water evaporates, after which only the polymer layer of the desired color remains.
Water-dispersed paints have a number of strengths, which makes it possible to decorate not only ceilings, but also walls indoors for various purposes:
- High adhesion
. This allows the material to fit well on almost any base, forming a reliable “adhesion” with it. If the surface preparation technology is carried out correctly, there is no need to worry about peeling or swelling in the future. - High drying speed
. Usually after 2-3 hours the painted surface can be used. - No unpleasant smell
. This makes the work much easier, because... there is no need to use personal respiratory protection. This is especially appreciated when finishing large areas. The absence of harmful toxins makes the material environmentally friendly. It can be used without restrictions in any room. - Easy to apply
. Working with water-based paint usually does not cause difficulties even for a person without painting experience.
Compositions of this type also have some disadvantages:
- Temperature requirements
. Water-dispersed paints must not be used in unheated rooms where the air temperature can drop below +5 degrees. Otherwise, small cracks will appear on the finishing surface. - Humidity restrictions
. If the humidity level in the room is high, then water-based paint simply will not be able to dry: the water in its composition will have nowhere to evaporate. - Requirements for the quality of foundation preparation
. It needs to be well leveled and sanded, because... Painting this type of slope will further highlight any imperfections in the surface.
Water-based paints are acrylic, silicate, silicone, mineral and polyvinyl acetate.
Kinds
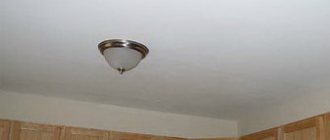
Matte surfaces mask surface defects, but are more difficult to clean
Depending on which binding component is the basis, ceiling paints are:
1Silicone
2Silicate (mineral)
3Acrylic
4Water-emulsion
5Latex
Oil compositions are not used to cover the ceiling, as they form a vapor-proof layer. Lack of air leads to slow destruction of the base.
All varieties, except water-emulsion, are water-soluble products.
Painting the ceiling
Based on resistance to moisture and abrasion, they are classified into:
- Whitewash. Not intended for cleaning or washing with water
- Painting. Can be washed with a cloth or soft cloths
- Surface. Wash with aggressive detergents and brushes
The presence of gloss is another criterion for classifying a paint material, which can be:
- Glossy (coating that reflects light)
- Matte (has light-absorbing properties)
- Semi-matte
- Semi-gloss (has a slight reflective effect)
To treat rooms with high levels of humidity, special moisture-resistant mixtures of softened grain size are used. They are made on the basis of polymers: acrylic or vinyl. These solutions contain antifungal components.
Silicone
The silicone coating is self-cleaning, weather-resistant and moisture-proof
Reliable, abrasion-resistant paints made from silicone resins are not afraid of moisture and temperature changes. Such products combine the advantages of organic and mineral solutions. Therefore, they are used to cover surfaces in rooms with difficult conditions.
The paint coating repels dirt and dust, but allows air to pass through, due to which the ceiling screed “breathes” and does not accumulate condensation. The applied layer is resistant to fire and withstands mechanical stress.
Prestige, durability, reliability in operation - these are the advantages that smooth out the only drawback of the product - the high price.
Acrylic
Acrylic-based coatings are resistant to moisture and ultraviolet radiation
Acrylic-based mixtures have become widespread due to their ease of application and low price.
In terms of performance characteristics, this type is inferior to analogues on other bases, but shows good results in resistance to moisture and sudden temperature fluctuations. It is easy to apply, and the composition itself is able to mask unevenness on the ceiling.
Acrylic products do not need to be tinted additionally, because there are a lot of color options in the line.
The acrylic coating does not fade, does not absorb foreign odors and does not change color when exposed to ultraviolet rays. Application is economical: 1 liter of paint is enough to cover 6 m2 of ceiling.
Silicate
The silicate product is characterized by high vapor permeability, adhesion and resistance to UV radiation
The product, resistant to any impact, combines quality, safety and reasonable price. Silicate mixtures are used to cover facades, which indicates their durability and reliability.
Such solutions are created on the basis of liquid glass and allow covering even plastered or pure concrete surfaces.
Silicate coatings are not elastic and can crack, but due to the alkali content in the composition, they do not require the additional use of antifungal additives.
Latex
Latex products are considered some of the best ceiling coverings, but also the most expensive.
In terms of performance characteristics, it is slightly inferior to silicone, but still shows high resistance to abrasion, ultraviolet radiation and moisture.
The composition can hide cracks and surface defects up to 1–1.5 mm deep. Therefore, it is preferable for painting ceilings in new buildings, which may shrink in the first years.
A characteristic feature of the coating is excellent adhesion to the surface, at the same time it allows air to pass through, preventing the occurrence of condensation. The painted ceiling dries in just 2-3 hours, leaves no odor - you can even paint unventilated rooms.
The application is scratch-resistant and can be washed even with detergents and abrasive sponges. The main disadvantage of the product is its high price, and when used in damp areas, it is also susceptible to fungus.
Water-based
The water-based solution dries quickly and does not smell at all when painting
A quick-drying composition that is applied evenly and does not leave stains or streaks, is absolutely non-toxic and has no pungent odor. However, such a coating can be washed only a few times, and in the event of flooding by neighbors, untidy stains will appear.
Water-based emulsion lends itself well to tinting, but when purchasing a ready-made color composition, you need to make sure that the product is from the same batch. Otherwise, the shades in different banks will differ.
Before application, you need to carefully prepare the ceiling surface:
- Remove the old color layer, paint or other type of finish
- Prime with any penetrating primer using a brush. If the surface is infected with fungus or mold, select an antiseptic composition
- Remove unevenness using gypsum putty
- Sand the surface after the putty has completely dried, first with coarse and then fine sandpaper or a grouting mesh.
This ceiling covering is best used in dry rooms without high humidity and sudden temperature changes. Solvents and cleaners are not needed to remove it: you can remove the old layer with a spatula, after wetting it with water for 10–20 minutes.
The water-based product does not tolerate freezing, so it is not recommended to buy paint in winter in uninsulated warehouses and markets.
Acrylic paints for ceilings
Compositions of this type are made on the basis of acrylic resins: it is they, together with various additives, that form a decorative film on the surface of the ceiling. Among other options for painting the ceiling in a room, acrylic paint is the most popular. With its help you can decorate concrete, wood, polymer, steel, glass and plaster bases. The material dries very quickly, without emitting unpleasant odors or toxic substances.
Acrylic compounds are known for their durability. Once applied to the ceiling, they can last a long time without losing their decorative qualities. Such a surface is not afraid of sunlight, abrasion, peeling and crumbling. The created layer of paint allows steam to pass through, which is very convenient when decorating rooms with high humidity levels. The high adhesion of the material should be taken into account: once applied, it will not be easy to remove. Therefore, you need to decide in advance for what time this finishing is designed. In the process of preparing the base, it is recommended to use special antiseptic impregnations.
A special type of acrylic paint stands out - acrylate. Along with the standard set of components, latex was introduced into its composition. This makes it possible to impart additional unpretentiousness and durability to the material. Acrylate compounds adhere very well and adhere to the surface, masking various minor flaws in the form of cracks, crevices and base defects.
To enhance this effect, it is recommended to apply the material in two layers. In the future, the finished finish can be washed using delicate detergents. According to the manufacturers of acrylate paints, the base decorated with their help is able to withstand many washing cycles, with full preservation of the original decorative characteristics. The high performance characteristics of acrylate paints are expressed in the fairly high cost of this type of material.
People's rating of products
Caparol is a manufacturer of paint and varnish coatings that has earned the trust of not only experts, but also consumers
Considering their own painting experience, many people share recommendations for choosing a quality composition.
Thus, reviews from people confirm the reliability of such paint coatings:
Caparol AmphiSilan-Plus (Silicone)
PROS:
- It has vapor permeability and dirt-repellent properties.
- Waterproof and remains glossy even after washing with aggressive detergents
MINUSES:
- High price
Profilux (Acrylic)
PROS:
- Characterized by high vapor permeability, does not fade, provides a smooth finish, inexpensive
MINUSES:
- Susceptible to chemical solvents, takes a long time to dry, does not provide a glossy finish
Ceresit CT 54 (Silicate)
PROS:
- Resistant to moisture, easily tinted, inexpensive
MINUSES:
- Poor adhesion to non-mineral surfaces and susceptibility to fading
Tikkurila Joker (Latex)
PROS:
- It has a long service life, is non-toxic and safe, adhesion to most surfaces is noteworthy
MINUSES:
- May be difficult to apply, high price
Choosing high-quality paint that will delight you with its decorative properties for a long time is a responsible task. The final decision when purchasing should be made taking into account the type of room, the impact factors that the coloring composition will encounter and its consumption rates.
Experts give advice on what type of paint to choose in the video:
VIDEO: How to paint the ceiling - which paint to choose
Ceiling paint | TOP 8 Best: priority on reliability and durability | Review of the most popular manufacturers
Recommendations for proper painting of ceilings are given in the story:
Silicate
The basis of silicate paint is a mixture of liquid glass, talc and chalk. After application, a very hard and durable coating is formed on the surface, the service life of which reaches 15-20 years, even in the presence of unfavorable external conditions. Indoors, where there is virtually no aggressive impact on the finish, silicate paints can last an order of magnitude longer.
An important advantage of this finishing material is its high vapor permeability. As a result, water molecules can circulate freely in any direction, providing a microclimate that is favorable for humans indoors. In addition, the decorative layer will not peel off or become damp. It is still not recommended to use silicate paints in very damp rooms. But when choosing which paint is best to paint the ceiling in a room for water procedures or cooking, you need to pay special attention to silicate paints.
However, the specificity of liquid glass is such that due to its low elasticity, silicate paint is prone to cracking. This must be taken into account when looking for an option on what paint to paint the ceiling in an apartment in houses where walls and ceilings tend to shrink. Before applying this type of material, it is necessary to very carefully remove all traces of previous paint from the base (primarily this applies to organic finishes). In terms of moisture resistance, silicate paint is very similar to acrylate paint: it can be washed with a damp sponge and household chemicals.
Why do you need to paint the ceiling?
Painting ceilings is the least expensive way to decorate the space in a room in terms of finances and effort.
However, this finish also has a number of other advantages:
- durable coating that will not fade or wear off
- finishing that can be replaced in whole or in part in a short period of time
- visual smoothing of uneven surfaces
- quick results with minimal labor costs
- selection of colors and textures for any design solution
Painting the ceiling is an inexpensive but effective way to update the appearance of a room and decorate it.
Advantages of painting over other finishing methods:
- Does not reduce the usable area of the room, unlike suspended ceilings
- Does not require skills or special equipment
- Water resistance and ability to carry out wet cleaning
Silicone ceiling paints
This type of paint became freely available relatively recently. Silicone resins are used as the main binder here. As a result, the resulting composition managed to combine two very unusual characteristics - hydrophobicity and vapor permeability. After drying, the decorative layer created on the ceiling will allow moisture vapor to pass through well, without causing the formation of a damp, stuffy atmosphere. In this case, excess moisture will not affect the ceiling material or thermal insulation.
Silicone compounds are superior to their silicate counterparts in terms of elasticity. At the same time, the finish continues to be durable and resistant to ultraviolet radiation. The good elasticity of the film formed on the ceiling allows you to protect the finish from the appearance of cracks in the event of shrinkage processes. In addition, the material smoothes out small cracks or defects in the base well, filling them flush with the surface. Silicone paint fits perfectly over the old finishing layer. The ceiling finished in this way can be periodically repainted, refreshing or changing the color of the finish.
Like other types of water-based paints, this material demonstrates excellent characteristics in terms of durability, environmental safety, fire resistance, antiseptic characteristics, drying speed and the complete absence of unpleasant odor. Among the disadvantages of silicone paints, one can highlight their high cost, which imposes additional responsibility on calculating the required amount of material.
Mineral and polyvinyl acetate
These compositions are made on the basis of cement (slaked lime) and polyvinyl acetate (this is the well-known PVA glue). Mineral paints are usually used to decorate ceilings made of concrete panels: the service life of such a coating is not very long. The scope of use of PVA-based materials is dry rooms, because... The decorative layer created with their help is not hydrophobic.
The first (preparatory) stage of the process
Having decided to repair the ceiling, it is necessary to create convenient conditions for its implementation:
- Clear the room of all objects and furniture. For ease of finishing, it is necessary to organize access to the entire ceiling area. It is advisable to remove everything that is possible from the room - ideally, the room should be left with bare walls and floor. Those objects that, due to their dimensions, do not fit through the door, are placed in such a position that they do not interfere with the movement of scaffolding. For example, it is recommended to pull out a cabinet under the wall and place it in the center of the room.
- Protect all remaining items from dirt. Such repairs are accompanied by a large amount of debris and dust, so furniture and other items remaining in the room are carefully wrapped in film or old fabric. It is recommended to protect the floor with paper or thick film;
- Remove the chandelier and wall lights. It’s better to spend time on this than to clean them of dirt and paint later. Instead of a chandelier, one incandescent light bulb with a power of 150 W or more is hung.
Oil and enamels
Along with water-based compositions, ceilings are sometimes decorated with oil paints and alkyd enamels. In the first of them, the role of a binding component is played by organic oil or drying oil. The latter contain alkyd varnishes and organic solvents. It should be said that materials of this type are gradually being forced out of the market for compositions for painting ceilings in a room.
The reasons for this process are as follows:
- The ceiling coating created using alkyd enamel is characterized by strength and durability, but during application it is necessary to overcome a number of difficulties. We are talking about long-term drying and the presence of an unpleasant noxious odor. The enamel layer formed after drying does not allow steam to pass through easily, which leads to the effect of blocking the room. As a result, in the bathroom or kitchen this is fraught with condensation on the ceiling.
- Oil paints have even lower performance properties. In addition to slow drying, unpleasant odor and lack of vapor permeability, the resulting finish is fragile and weakly elastic. This often leads to the appearance of cracks on the surface. The only advantage of oil paint is its low cost.
Popular manufacturers
The variety of brands producing ceiling enamels in construction stores is great. The choice of paint depends on the personal preferences of the manufacturer, financial capabilities and the effect to be achieved. Among the popular ones, we highlight 8 manufacturers who have won the trust of users.
Tikkurila
The famous Finnish brand creates high quality finishes. The materials are used when working with problematic surfaces; they work well on putty, drywall and wood. The mixture contains substances with antibacterial properties that prevent the development of dangerous microflora and can be used in the bathroom and kitchen.
Finnish paints Source cmp24.com.ua
Adhesive compositions
These materials also fall into the budget category. They are an aqueous mixture of chalk, pigment and glue.
There is the following recipe for making it yourself:
- Dry mix chalk and pigment in a ratio of 1000:35. It is important to achieve complete homogeneity of the dry mixture.
- Pour water into the dry powder (3 liters of water per 1 kilogram of mixture). It is better to do this gradually, mixing the ingredients well. The result should be a viscous liquid, reminiscent of sour cream in consistency.
- Add glue in a ratio of 80 g of wood glue per 1 kg of chalk. Starch paste can be used as an additive.
- Strain the finished mass through a metal sieve, adding the required amount of water.
It should be understood that the quality of homemade material will be quite low: in this case you cannot count on long-term operation. Still, the best option is to purchase a factory-made version of paint for the ceiling in the room.
Materials and tools
The quality of finishing the ceiling with paint largely depends on properly prepared tools and materials.
To work you will need the following:
- Roller
. It is the main tool for applying paint to the ceiling. If the area of the ceiling to be finished is small, a lightweight model will do just fine. In other situations, it is recommended to arm yourself with a wide roller, which will require some skill when handling. These tools often come with telescopic extensions that allow finishing work to be done directly from the floor. For applying acrylic and oil paints, foam or plush rollers are more convenient; for synthetic paints, mohair rollers are more convenient. - Set of paint brushes
. They help paint hard-to-reach areas, giving the surface to be decorated a decorated look. The stiffness of the bristles is selected depending on the required thickness of paint application: the higher the stiffness, the thicker the layer.
- Plastic tray
. Paint is poured into it from a can or bucket before application. Such trays have dimensions convenient for soaking the roller and a special rolling surface. - Masking tape
. It allows you to separate sections of the ceiling of different colors or patterns from each other. - Step ladder or sawhorse
. The second option is more convenient. Instead of a sawhorse, you can use an old kitchen table or the already mentioned telescopic extension that fits onto the handle of the roller. - Set of spatulas and scrapers
. They are necessary to prepare the base. - Painting sandpaper
. It is used to treat putty surfaces before painting. - Protective clothing
. Plastering and painting work is accompanied by a lot of dirt, so you should prepare special clothing for the work. These can be old things that can protect your head and body from paint and dust. It is also advisable to purchase safety glasses and a respirator.
Preparing the ceiling for painting
Before painting, it is necessary to prepare the surface. This process can take much more time and effort than the coloring itself. First you need to evaluate the ceiling material and its condition. If the base is concrete, all cracks should be sealed and a primer applied. You will also need to align all the seams between the plates. Wooden surfaces are sanded before applying an intermediate layer of primer, and the joints between sheets of drywall are puttied. To remove the old coating and apply a new one, you will need to stock up on the necessary tools.
Required tools and materials
The process of cleaning the ceiling from old paint and applying new paint will be faster and more efficient using special tools. To do this you will need the following equipment:
- Roller. The main tool for applying mixtures should be selected based on the size of the surface to be painted. In small areas it is better to use a small, lightweight specimen. Wide tools can make work difficult. It is necessary to provide a long handle. The choice of roller material depends on the type of paint. Foam rubber and plush are suitable for oil and acrylic compositions. It is more convenient to apply synthetic mixtures with a mohair roller.
- Brushes. Useful for painting hard-to-reach places. The coarser the bristles, the thicker the layer of paint applied.
- Tray. A special paint attachment will make it easier to apply the mixture to the tool, especially if it is a wide roller.
- Masking tape. It is used to determine the boundaries of painting and create patterns on the ceiling.
- Spatulas. With their help, preparatory work is carried out, the old layer of paint or whitewash is removed.
- Step ladder. For safe and convenient coloring.
- Sandpaper. It will be needed to level some sections of the ceiling and remove a heavily dried old layer.
- Protective clothing. Necessary to protect exposed areas of the body from paint. When working with oil mixtures, be sure to wear a respirator mask.
Removing old whitewash
In some cases, it is allowed to apply paint to the whitewash, but only if it is a small layer and it adheres firmly. If the chalk regularly crumbles, rusty spots appear and streaks are visible, it is better not to use paint for decoration, otherwise after six months everything will have to be repainted.
Removing whitewash is a dirty and labor-intensive job. The process is facilitated by the good water solubility of chalk. First, you need to wet the whitewashed ceiling with warm water so that the liquid saturates the thick layer well. This can be done using any spraying tool or use a roller, brush, or rag.
After 15-20 minutes, the whitewash layer will swell and can be peeled off in layers using a spatula. Remains of chalk should be washed off with a hard rag. After each pass with a rag it must be rinsed.
Removing old water-based paint
There are several ways to remove old paint without any special tricks. More often they use soaking with water and gluing newspapers. Using a simple roller, wet the entire ceiling surface. Water-repellent mixtures will require intensive application of the liquid and longer time to swell.
When all the moisture has been absorbed, the paint is ready to peel off. Now it can be removed with a spatula. To avoid scratching the ceiling surface, the tool should be held at the most acute angle.
To remove paint from the ceiling using newspapers, you will need a stepladder and several hours of time. Cover the ceiling surface with glue, apply newspapers and leave until completely dry. The water-based emulsion will be well saturated with the adhesive mixture and will come off along with the newspaper. Remains of the former decor can be removed with a spatula or chisel.
Puttying
The starting putty is applied to the leveled and dried ceiling. The mass is collected on a narrow spatula and applied to the ceiling surface from the corner. The tool is pressed firmly so that the mass fills and hides all the indentations. The first layer is made thin, literally translucent. This will help hide minor surface defects.
The next layer must be well leveled. Stripes and burrs are not allowed. They begin to distribute the material vertically and horizontally, trying to straighten the joints between the wall and the ceiling. At the final stage of puttying it is necessary to carry out rubbing. To do this, use a construction float with an abrasive mesh. If it is necessary to eliminate defects, apply another layer of textured putty. Then the ceiling is rubbed down again and priming begins.
In order to carry out the rubbing of putty in the most efficient manner, each area covered must be illuminated with a light bulb.
Padding
Multi-layer application of primer begins after complete cleansing and preparation of the ceiling surface. Painting should be carried out in stages, waiting for the compositions to dry completely. To give strength and durability to the new decor, it is necessary to apply a layer of putty between the primer. It’s easy to do this kind of work yourself by watching a video or photo.
The soil solution should be prepared strictly according to the instructions. For each type of putty there are certain proportions. In order for the mixture to fully perform its functions and improve adhesion, it must be applied correctly.
Before priming, you need to get rid of all dusty debris. If this is not done, due to dust settling on the wet soil, the paint may lie unevenly. After complete drying, the surface should be wiped with a damp cloth to make it look beautiful.
Preparing the base
Before painting the ceiling in an apartment with your own hands, it is important to prepare the rough base as thoroughly as possible.
Operating procedure:
- Investigation of the condition of the ceiling
. Determine the scope of future work by visual inspection. On a concrete floor, it is important to notice all the gaps, cracks and joints between the slabs. Wooden ceilings must be sanded and primed, plasterboard ceilings must be sealed. - Cleaning the base from old finish
. The floor slab must be completely cleaned of the previous finish. If it is whitewash, it is washed off with water; if it is old putty or paint, it is removed with a strong spatula. It is advisable to pre-wet the wallpaper and then remove it with a spatula. Any traces of glue found must also be removed. - Priming
. For this, deep penetration impregnation is used to increase adhesion and create a waterproof film. A good option is acrylic primers. - Sealing cracks, joints and cracks
. You will need a starting putty or mortar for laying tiles: the adhesive it contains will make the seam stronger. - Continuous alignment
. If the base is more or less even, you can putty immediately. If there are defects and differences, a leveling layer of the starting mixture is laid. Putty is usually applied in 2-3 layers, which makes it possible to obtain a smooth surface. - Grinding
. The purpose of this procedure is to remove all sagging and small scratches on the putty layer. The tool used is a grater and painting sandpaper No. 120. It is better to protect the respiratory organs with a mask or fabric bandage. - Final priming
. For this, an antiseptic composition is usually used to create protection against mold and mildew.
Grinding
The final stage of work is grinding the putty, which allows you to create a perfectly smooth surface for painting. Performed manually or with a grinder.
Experts manually grind “to look like a light bulb” (you can also use a simple flashlight with the same effect). By highlighting, it allows you to see the smallest defects, which are eliminated during grinding. Small defects are removed with zero-grade sandpaper, large ones - with a grater with a mesh.
Grinding scheme.
The work is carried out in a circular motion from wall to wall, which is clearly visible in the diagram. It is important to constantly monitor the quality of work. The machine method greatly simplifies the process. Otherwise, everything is done in the same way as with manual grinding.
Before painting, the ceiling is primed again.
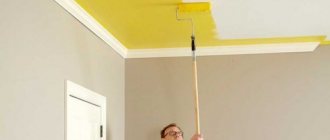
Painting the ceiling in the apartment
You can proceed to applying the paint composition only after the ceiling has completely dried:
- Prepare the paint
. This must be done in strict accordance with the instructions on the bucket. As a rule, for the first layer the material is diluted with water in an amount of 10-20%. For convenience, part of the diluted paint is poured into a painting tray that has recesses along the width of the roller. - Application
. It is recommended to start from the corner in the room farthest from the door. First, areas along the ceiling friezes and corners are painted, for which it is better to use a brush. Next comes the roller: after soaking, it must be rolled out to remove excess paint. If this is not done, it will spill onto the floor. It is most convenient to work from a construction sawhorse or an old table. So, step by step, the entire room is gradually painted. - It is recommended to apply the first layer perpendicular to the light
. In places where one area transitions to another, you need to carefully roll out the paint border so that no sagging remains. Each time you move the goat to a new place, you need to inspect the painted area from several angles. If a leak or gap is detected, it must be promptly eliminated before the paint sets. - The second layer is applied only after the first has completely dried
. Usually this takes 3-4 hours, but it’s better to take a longer break. During the second application, the roller should move perpendicular to the direction of the first layer.
Applying primer
Priming is necessary for better adhesion of paint to the surface and increase the life of the paint. The required primer is usually indicated on the paint label. To prime a dark ceiling, you can use the base paint, diluting it with water. Hard-to-reach places are treated with a brush, the rest of the surface with a roller.
A separate set of tools is used to apply the primer. Treatment begins from the outer window to the wall opposite it in strips of 1 meter with overlap. The dark areas remaining after drying are primed again, but it is better to apply a second layer over the entire surface.