When faced with the problem of cleaning epoxy grout residue for the first time, everyone without exception has a feeling of hopelessness. Cleaning companies rarely cope with this difficult task. Having worked with epoxy grouts from different manufacturers and selling them for the last five years, we have collected all the experience and all the questions from consumers and builders on the topic: “Why is it difficult to work with epoxy grout and often the surface remains dirty”?
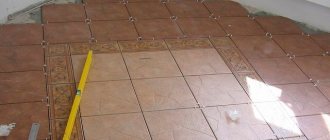
Examples of contamination of various types of surfaces with epoxy grout:
Once fully cured, epoxy grout becomes a monolithic, abrasion-resistant material. According to their characteristics, epoxy grouts belong to reactive epoxy adhesives, so to clean epoxy grout from tiles or porcelain tiles. Residues of two-component grout that were not washed off in time can be in the form of a film on the surface, in the form of shagreen, similar to sandpaper, or the grout may not be removed from the surface at all and has hardened in a thick layer on the tile.
In the first two to three days, the remaining epoxy grout can be removed with the Fuga Soap eco cleaner. a film from epoxy grout remains on the surface of tiles, mosaics or porcelain tiles after work is completed , then this is the easiest stain to clean:
- Take Fuga soap eco epoxy grout cleaner, manufacturer Kerakoll
- Apply the product to the contaminated area with a brush.
- Wait 15 minutes
- Clean with a brush or special abrasive sponge
- Rinse thoroughly with water.
Recommended cleaning times
Removal of the grout layer is carried out in several stages - from the initial removal of excess to dry and wet cleaning.
It is better to carry out the first stage when the material has not yet hardened, but has already hardened sufficiently. In this case, the risks of damaging the surface of the tile and disrupting the hardening process of the putty are minimized. It’s easy to check the condition of the seams - just moisten them with a damp cloth and evaluate the reaction.
If, after interacting with the liquid, the grout mass begins to increase in size and extend beyond the seam, it is too early to begin cosmetic work. If the layer remains unchanged and does not react to water in any way, then the moment for cleaning is most suitable.
Reference! The average initial setting time for tile grout is about 30 minutes.
We assess the condition of the composition and coating
It must be understood that removing hardened mortar from joints can damage the ceramics. Therefore, this should only be done if the material is completely damaged. To make sure of this, you must first thoroughly wash the space between the tiles and inspect it carefully.
It is necessary to remove grout if:
- There are multiple cracks, crumbling and voids.
- Mold or mildew has appeared and is spreading under the cladding.
- The space between the tiles is deformed.
In other cases, sanding with sandpaper and updating the grout mixture will be sufficient.
Epoxy grout Starlike Evo, absolutely white, 2 kg
2 184
Buy
- Decoration Materials
How to fix a burn on linoleum: 3 effective ways
Epoxy grout left on tiles
Grouting mixtures are made based on epoxy resins. In most cases, cement-based mixtures are used. They are cheaper, which pays for the higher costs. Cement grouts delight with their color variety, high strength and durability.
Epoxy fugues are different:
- optimal viscosity and fluidity, which allows you to fill the joints between tiles well;
- moisture resistance;
- durability and beautiful appearance.
So, such fugues are used for covering grout joints on tiles in rooms with high humidity, for outdoor work, for finishing lining of swimming pools. But what to do if the grout remains on the tiles?
Epoxy grout can be removed in different ways:
- heating the resin stain;
- freezing the soiled base;
- household chemicals.
Heating
A stream of hot air is directed onto the resin stain. You can use a hairdryer; it is important to regulate the degree of heating of the surface so as not to damage it.
After delamination and softening of the resin, pry up the stain with a paint knife or spatula. If you cannot remove all the stain at once, heat individual areas of the stain, remove them with a spatula or blade, then move on to the next fragment.
Removing a tar stain ends by washing away small particles of contamination with acetone or another suitable solvent.
Freezing
Refrigerants are sold in aerosol form in stores. They are suitable for freezing soiled areas. Please note the following when working with refrigerant:
- You need to work in a respirator. The aerosol sprays harmful substances, so you need to protect your respiratory system.
- When performing such work, children or pets should not be present in the room. It is important to organize a flow of fresh air.
- Please read and follow the instructions before use. Shake the aerosol canister.
- Spray coolant onto the epoxy stain. When applied correctly, the resin will become brittle and susceptible to mechanical stress.
- After this, pry up the dirt with a spatula or painting knife and remove it.
It is better to repeat the spraying again than to use force when removing the stain with a spatula. This can damage the lining. Heating and freezing are suitable if the grout or resin remains on the surface for a long time.
If you rubbed the seams only yesterday, then a soap solution and a fiber sponge will do. With reasonable effort, you can remove the grout from the tiles. Then wipe the lining dry.
Household chemicals
Both household chemicals and chemical reagents will cope well with stains on tiles. Use boric or hydrochloric acid to remove tar and grout stains. Afterwards, you need to go through the lining with a cleaning solution, which will remove the remaining reagents and the grout itself.
Don’t forget: you need to wear gloves and a respirator when working.
In this case, manual influence will also help. Do not use abrasive materials; do not sand the stain with sandpaper. Using a blade or putty knife, carefully try to pry up the epoxy grout. Work carefully to avoid scratching the glaze on the tile.
Other surfaces
What if the resin needs to be removed from the tree? What then needs to be taken into account? To remove it from a wooden surface, the same methods are used: heat, coolants and solvents.
Heating must be controlled so that the wood does not swell or dry out.
Before heating, the area to be treated can be treated with acetone. This will avoid swelling and delamination of the base.
After heating, the remaining glue must be carefully pryed off with a spatula and removed.
Epoxy resins are often included in glue that is used for gluing rubber products, shoes, and other things. You need to wear gloves when working with such adhesives to protect your hands.
We suggest you read: How to remove ballpoint pen ink from clothes at home
What to do if glue gets on your hands:
- Take off your gloves and throw them away.
- Wash your hands with tar soap or regular laundry soap.
- Soak some cotton wool in solvent or nail polish remover and wipe off any remaining glue from your hand.
- Wash your hands again with soap.
- Apply moisturizer to your hands to prevent irritation and cracked skin.
If the glue has already dried and you only notice now, use the same solvent to wash off any remaining glue. To soften the epoxy glue, use the means at hand: rich mayonnaise or oil.
Cleaning different types of grout
Grout mixtures include different components that give the solution certain beneficial properties.
Therefore, it is necessary to take into account the basic composition of the product and its drying speed.
Fresh grout
Grout is considered fresh if it has not yet had time to set and dry. As a rule, it is easily removed within the first 24 hours after facing work. If the tile is matte and embossed, the mixture should be removed immediately - with a soft spatula and a dry cloth.
With glossy tiles everything is different - it can only be washed the next day, otherwise scratches will remain on the surface.
Fresh putty can be removed with a damp sponge. It is moistened in water and wrung out thoroughly - a poorly wrung out sponge will blur the seams and delay their drying.
Wash the tiles with a sponge until all stains are eliminated.
Cement grout
Since sand is included in the cement grout, the remaining mixture is easily washed off with plain water.
After half an hour, when the initial setting of the cement occurs, excess and stains can be removed with a damp sponge in several approaches. You need to rinse the washcloth as thoroughly as possible - under running water or in a large basin.
The sponge should not be too wet so as not to wash out the space between the tiles.
If the grout layer has already dried, and there are traces of putty and glue on the tile, acids – sulfuric, hydrochloric or acetic – will come to the rescue.
Advice! Regular food vinegar, a concentrated solution of citric acid, or a water-glycerin mixture will work well with cement mortars.
“Epoxy”
Grouting materials based on epoxy resin are considered to be of the highest quality. They lie smoothly, harden quickly and have a wide palette of colors. But due to the high setting speed, it is possible to clean the surface of epoxy resins only in the first day. Already on the second day, only the mechanical method will help.
On the first day, special solvents and acid reagents will come to the rescue - such as MAPEI, Litokol, Sopro, Keranet, Clean Kiilto, etc.
Their active components interact with resins, allowing the substance to be washed away from the surface without damaging the base.
General cleaning of the lining in the bathroom or kitchen can be carried out when the main contamination of the coating has been eliminated and the seams have lightened. Some owners prefer to simply carry out wet cleaning, wiping the entire area of the tile with a wet rag.
Regular dish soap will help make glossy tiles shine. You can prepare a soap solution or drop a little onto a sponge.
After treatment, the product is allowed to dry for 10 minutes, and then the tiles are wiped dry with a soft cloth.
You can try cleaning embossed tiles with dry citric acid powder:
- Moisten a work sponge with water and wring it out.
- Pour a small amount of lemon onto a washcloth.
- Wipe the surface without touching the tile seams.
It is advisable to wait until the crystals melt on the surface of the sponge, or clean with crystals, but without pressing on the lining.
The embossed surface can be treated with a homemade paste made from vinegar and soda. The acid will make the grout more flexible, and the soda will act as a soft abrasive. It’s easy to prepare the paste - mix soda and vinegar in a ratio of 3 to 2. Apply the product to the dirt and after 10 minutes, brush over it.
A solution of white spirit will help restore the cleanliness of porcelain tiles. For half a liter of water you need to take 2 tablespoons of white spirit and mix thoroughly.
Use a cloth to carefully remove any remaining grout, and then completely clean the surface of the alcohol solution.
We suggest you familiarize yourself with How to clean a frying pan from carbon deposits.
Porous tiles are the most difficult to clean, because they literally absorb all dirt. The most effective method of cleaning will be a mechanical cleaning method using a brush or hard cloth. You can also use a scraper designed for washing pots and pans.
If the grout is still fresh, you can remove it from the pores with a felt glove dipped in vegetable oil.
You can take note of this popular recipe:
- Mix baking soda, natural lemon juice and vinegar - a few tablespoons of each component.
- Dilute the resulting mixture with water to one and a half to two liters.
- Soak a soft cloth in the solution and wipe the tiles, carefully treating all pores.
Sometimes you have to resort to more aggressive methods using chemicals - acid removers and solvents. They penetrate deep into the pores and lift all contaminants, including grout, to the surface.
Reference! Special washes not only effectively deal with all kinds of dirt, but also give the seams a uniform color.
Rules for removing dried contaminants
When removing dried putty, it is necessary to take into account the type of tile coating - glossy or matte. Glossy tiles do not tolerate hard abrasives; they are easily scratched by powders and brushes. Therefore, you need to choose methods that are as gentle as possible - first try wiping off the dirt with a damp sponge and detergent.
If this doesn't work, use a soft brush or the back of a scouring sponge.
Matte and textured tiles do not impose strict requirements on methods for cleaning dried grout. It is allowed to use brushes and acid washes, but within reason. Chemical preparations should not contain substances that can harm the tile coating - information should be found in the instructions.
Before using abrasives, the space between the tiles should be covered with masking tape.
It is almost impossible to avoid traces of grout when laying tiles. But it is quite possible to minimize the area of pollution by taking the following measures:
- stick masking tape or adhesive tape around the perimeter of all joints, which will protect the surface of the tile from dirt;
- cover adjacent areas with cellophane film, not forgetting the floor and plumbing.
You need to glue the tape so that its edges fit tightly to the surface of the tile and to each other. This will prevent the putty from leaking and will allow you to process the seams with high precision and a clear contour.
You can use several fixing agents at once - seal the perimeters with masking tape, and seal the joints with tape and secure them with furniture staples.
Preventive actions
To avoid the need to get rid of the grout remaining on the surface of the ceramic tiles after repairs, it is better to take preventive measures to prevent the grout from getting on the cladding. There are not many of them, some of them are labor-intensive, but sometimes, especially in the case of epoxy grout, it is easier to prevent its appearance than to deal with dried residues.
One of the most effective methods is the use of protective foam, which is used to cover the tiles, and upon completion of work, wash it off along with the remains of the dried fugue.
Masking tape will also help. It needs to be used to cover the entire perimeter of the tile, leaving only the spaces for the fugue free. This process is labor-intensive, but also effective.
The most important preventive measure is considered to be compliance with the technology of stage-by-stage jointing of one area after another and thorough cleaning of the composition remaining on the ceramic tiles. It’s better if the process takes a long time, but after it you won’t have to clean the tiles of grout residue using chemicals that are harmful to health.
How to remove from skin and fabric
What should you do if resin gets on leather furniture or your favorite clothes?
- Assess the extent of the damage: if the damage is aggressive and has penetrated deeply, then it will be difficult to clean, and in some cases cleaning does not make sense.
- Use gentle solvents: ethyl alcohol, ammonia solution in a 10% ratio.
- Any type of alcohol will do: cotton wool soaked in alcohol can wash off all dirt. It takes patience and careful effort.
- The same freezing method is used.
Place an item of clothing in the freezer and the cold will cause the stain to become brittle and brittle. The method of freezing in the freezer is also suitable when chewing gum is stuck to clothing. - Exposure to heat: iron the damaged area of clothing several times through a layer of gauze.
They practice an unconventional cleaning method: Pepsi-Cola or Coca-Cola will do an excellent job with both rust and resin.
Bottom Line Removing epoxy resins and resin-containing products is a labor-intensive process. Removing the consequences of careless grouting of tiles and removing epoxy glue stains from clothing are completely different cases.
The tips in this article will help you deal with every case of contamination.
Cleaning products
To care for a tiled surface, the easiest way is to use ready-made special products that are sold in household chemical stores. They are ready for use and do not need to be diluted or mixed with other substances. However, there are no universal ones among them, so before purchasing you should carefully study their purpose.
A good product must meet the following requirements:
- Be gel-like or liquid. It is better to avoid the use of powders and abrasive pastes, because they spoil the glaze layer, and over time the tile will lose its shine, the gloss layer will be erased irrevocably.
- It is desirable that it contains chlorine. This component makes the product almost universal, because... not only helps to cope with various contaminants, but also destroys bacteria and unpleasant odors.
- Does not contain chalk. Many housewives have long abandoned the use of chalk to clean tiles, because to wipe off the white coating on the tiles will require additional time and effort.
- Does not contain acids. Their impact destroys the layer of putty and grout in the seams.
How to clean seams?
The seams between the tiles, even with high-quality cladding, lose their presentability over time. Dust, grease and dirt accumulate here, and mold also multiplies in damp rooms. There are two effective methods for cleaning seams - chemical and mechanical.
Chemical method
Any household chemicals designed for cleaning ceramic coatings will do. They remove dirt, mineral deposits, fungus and bacteria, and also effectively combat unpleasant odors.
The above-mentioned folk remedies will also come to the rescue - solutions with vinegar, soda, citric acid and glycerin.
Sandpaper is a proven way to combat inter-tile dirt. The abrasive should be as thin as possible, and the work should be done carefully so as not to touch the tile coating. To be on the safe side, roll the paper into a thin tube equal to the width of the seam. Pasted strips of masking tape will also help protect the edges of the tiles.
We suggest you familiarize yourself with How to clean grease from kitchen tiles: folk remedies and household chemicals against stubborn greasy dirt on the floor and walls
After sanding the seams, the surface is washed with water and wiped dry.
A melamine foam sponge works great on seams.
It is a soft yet durable material that easily penetrates into any pores, leaving them clean without chemicals.
Hard-to-reach areas can be treated with a toothbrush with washing or cleaning powder.
Should I delete or not?
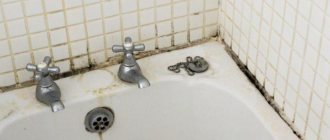
The seam between the plates is the weakest link of the ceramic cladding. They lose color, wear out and crack. This happens especially quickly if the technology was violated during installation. It doesn’t matter whether the tiles are on the wall or on the floor, the grout material gradually loses color, turns black, and sometimes becomes moldy. There may be several reasons for this:
- The composition was initially selected without taking into account operating conditions.
- Preparation of a solution in non-compliance with the proportions recommended by the manufacturer.
- Incompetent care of tiles using drugs that destroy the mass filling the space between the plates.
- Lack of effective ventilation in a damp room.
- Uneven seam sealing.
Grout Ceresit CE40 2kg anthracite
388
Buy
Regardless of the cause of the damage, it is impossible to correct the situation and return the surface to its original properties. You need to remove the old layer and lay a new one. This can only be done if the finish can withstand such manipulations.
- Cleaning
Cheat sheet for housewives: how to properly clean different types of tiles
Grout restoration
Grout joints sooner or later need updating. Restoration allows you to improve not only the appearance of the coating, but also its performance properties.
Ready-made chemicals for the restoration of tile joints are sold in ready-made liquid form in bottles. They contain components that renew color, eliminate dirt, lime, mold, darkening, grease and oil stains.
Advice! For light grout, choose products containing bleaching components; for colored grout, choose products that do not affect the shade of the grout.
You can use special products in concentrated form or diluted with water, depending on the level of contamination. 5-7 minutes after applying the drug, the tiles can be cleaned with a stiff brush.
The available tools in any housewife's arsenal also do a good job of updating seams.
- Washing powder. Prepare a liquid paste from the powder and a small portion of water. Dip a toothbrush into the mixture and scrub the dirty areas, then rinse off the foam with water.
- Washing gel. Once finished, apply the gel mixture to the seams and wait a couple of minutes. You can clean dirt with a sponge, brush or any other abrasive.
- Spray. The spray cleaner may contain additives that dissolve grease, destroy lime and mildew. It is sprayed directly onto the joints between the tiles and left for a while for a chemical reaction.
Then wipe the seams with a brush or hard sponge and polish with a dry cloth until shiny.
If the dirt has become too deep and even mechanical methods do not help, there is nothing left but to partially remove the grout.
There is no need to completely remove all the grouting material - just clean off a layer 2-3 mm thick. The work is carried out with a scraper or extender with preliminary wetting of the grout.
Cement and latex mixtures are well softened with ordinary water, but for epoxy products only a special solvent is used.
After removing the grout material, the edges of the tiles are sanded with sandpaper. The cleaned surface is primed for better adhesion to the new layer. Next, prepare a portion of grout and compact it tightly between the tiles with a rubber spatula.
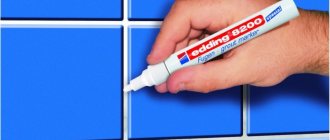
A waterproof seam marker can be purchased from a specialty store. It masks unsightly areas on the seams well, but does not fundamentally solve the problem of cleaning. The achieved cosmetic effect will become invisible in a few weeks.
Restoring with a marker is easy - just go along the seams with a working rod. The work area must first be prepared - wash everything with soap and water, remove mold and putty on cracked areas.
Some important recommendations
To clean tile grout efficiently, you should pay attention to several important points:
- it is necessary to remove excess tile adhesive and grout immediately, preventing them from drying on the surface of the cladding;
- for scrubbing, it is better to use a sponge or a piece of foam rubber - if they do not help, you can use felt, burlap or any hard fabric;
- You cannot immediately start using acidic removers and aggressive solutions - you need to read the instructions and take into account the characteristics of the tile;
- It is better to clean vertical surfaces from top to bottom, horizontal surfaces - from the far corner to the door;
- You need to be careful when handling glossy tiles - they are easily damaged and leave streaks;
- white deposits from detergents and cleaning products can be easily removed with a dry felt glove;
- The cleaning should be completed by treating the seams with fungicides that protect the room from mold;
When working with chemicals, you must wear protective clothing, gloves and a respirator.
The effectiveness of all the above methods has been time-tested and tested by builders and craftsmen. It is enough to be patient, put in a little effort and money - and even the most persistent stains and the strongest grout will not leave a trace behind.
