/Repair/
The choice of grout is as important as the choice of the tile itself. Its main task is to protect the base and ends of the tiles from the destructive effects of moisture, as well as from dirt, dust and chips. But there is another key function - the color and texture of the seams largely determine the perception of the interior and how easy it will be to clean the room. We tell you how to choose the best grout for tiles and which manufacturer should be preferred.
How long does it take for tile grout to dry?
The grout mixture for joints dries completely in about a week, but the surface can be loaded after just a few days. It may seem to harden very quickly, but this is only superficial. After about 24 hours, the mixture can already be wetted with water so that the loss of moisture does not affect its appearance. It finally dries on the 3rd day, and already on the 5-7th day you can give the surface a full load, that is, drill, mount, wash with plenty of water, use chemicals.
Having completed all the work efficiently, the grout will last a long time and will fully protect the seams from destruction and moisture. Features of the work will also affect the appearance.
Flow calculator
Use this calculator to find out the average consumption of epoxy grout from Litokol. It is recommended to add a margin of 10% when calculating.
| Grout type | |
| Tile size (mm) | |
| Seam width (mm) | |
| Laying area (sq.m.) | |
| Calculation data | |
| Grout consumption (kg/sq.m.) | |
| Required amount of grout (kg) | |
When using 15x15 glass mosaic 4 mm thick with 2 mm seams, the Starlike consumption was approximately 1.6 kg per square meter.
Litokol grout mixture consumption table
Consumption of EPOXYSTUK X90
When can you start cleaning?
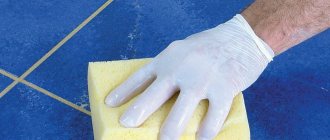
To complete the work, you need to clean the surface of the tiles from excess material. It is permissible to carry out this after as long as necessary for final drying.
Wet cleaning is carried out after 2 days, full cleaning – on the 7th day. You can understand when you can wet the joints and use detergents using the visual method. You should see how much lighter the mass has become, but not in the seams, but the one that remains after work. When it has already begun to change color and harden, you can begin cleaning.
Tips for use
When opening containers of substances, the epoxy resin may appear to be too thick and this will affect its application. However, during the process of combining this material with the hardener, the consistency gradually changes. The resin becomes less viscous. It is recommended to follow the instructions for connecting the grout components. This will allow you to obtain a material with excellent properties. It is necessary to work with gloves. As a result, contact of the grout with the skin can be avoided.
How to divorce?
Take a plastic container. The components must be combined in accordance with the proportions and manufacturer's recommendations. Thus, mixtures are produced in different quantities, which allows you to prepare the required volume of grout. As a result, the material will not dry out. The likelihood of this increases when a large amount of grout is prepared at once. It will not be possible to use it all, which will lead to increased costs for finishing work.
The grout hardens completely after 60 minutes. The mixture begins to set immediately after mixing the main components. For this reason, it is better to first prepare no more than 300 g of the substance. This amount can be used for a short period of time. The mixture is prepared using an electric drill with a special attachment.
It is important to operate it at no more than 300 rpm.
Moreover, the construction mixer should have as few blades as possible. The quality of the mixture will depend on this. If a nozzle with a large number of blades is used, and the drill speed is high, then the material will be oversaturated with oxygen. This will lead to a change in the color of the grout and will also cause heterogeneity in its structure.
How to apply?
Before use, transfer the solution to a clean container. This measure allows you to avoid damaging the structure of the material. During the mixing process near the walls of the container, the mass may be less actively saturated with the hardener. This leads to a decrease in strength and loss of the basic qualities of the mixture.
At the next stage, the process of grouting the seam joints begins, since the material immediately hardens. In this case, a harder rubber spatula is used. With its help, a sufficient amount of mixture is placed in the space between the tiles.
Movements should be directed perpendicular to the seam. Using a corner section of a spatula or a special shaper, create the desired surface shape. Remove excess grout immediately.
How to clean?
Litonet Litokol solvent is widely used. This is a special product for removing epoxy mixtures from the surface. Its main characteristic is alkaline pH. The substance can be applied to different types of tile coverings. This is a concentrated solvent and can be diluted to reduce consumption. This measure also allows you to reduce the degree of aggressive impact on the tiles. The product is universal.
There is also a gel-like version of this solvent, which allows you to reduce its consumption. The container is equipped with a spray bottle. This product is convenient to use for treating vertical surfaces, since it is characterized by increased viscosity.
The substance can be applied at temperatures within +5…+35°C. The duration of exposure to the surface is up to 15 minutes. A 1 liter container is enough to clean 10-15 m². Regardless of where you plan to do the work: in a garage, workshop or living space, it is important to ensure effective ventilation.
The substance is diluted in accordance with the manufacturer's instructions. The concentration of the solution depends on the degree of complexity of the tile contamination. The more time has passed since the grout was filled, the more difficult it will be to remove stains from the surface. After applying the solution, you need to wait 10-15 minutes, then remove the remaining substance and wipe the tiles.
When it is not possible to use a solvent, you need to prepare water. If you use a special sponge (with increased rigidity), you can remove fresh dirt immediately after grouting the seam joints. It is possible to simplify the cleaning process. To do this, cover the edges of the tiles with masking tape.
What affects how long it takes for a seam to dry?
To prevent various damage to the finished seam, you need to follow the recommendations for surface preparation, application and finishing. Before laying the grout, the seams must be dry and clean so that the mixture does not become diluted with moisture, changing its characteristics.
Features of applying grout and how long it takes to dry:
- Cooking fugue. When mixing components, you must strictly follow the instructions. Excessive amount of water, poor mixing - this can affect how long the seam will take to dry.
- Excerpt. After mixing the cement composition, it needs to be kept for a while before starting work. It is highly not recommended to neglect the rule.
- Filling. Already when applying the composition, you need to make sure that the tile joints are dry and free of dirt, dust and old substances. You need to dry them well.
- Removing excess material. Initial cleaning may be done after application, keeping in mind that excess material will be difficult to remove once dry. When using a silicone composition, you need to do it in 10 minutes; cement ones need to be removed within half an hour. To remove excess you need a damp and clean sponge.
- Final processing. Final drying takes place in 7 days, while compositions with latex and acrylic require 10 days, silicone - 20 days.
After drying, new seams can be treated with compounds to improve performance. Detergents are then used for 3 days.
Basics of color selection
A win-win solution is to use white fugue or chameleon mixtures. They match any cladding color. The white finish visually highlights the tile layout and its clear geometry, and the chameleon mixture merges with the surface, creating a monolithic effect, although they are only available in epoxy. If you want to experiment, you need to select a shade taking into account the rules given below.
- Tinting to match looks better when the joints are slightly darker than the tiles. It is possible to select a shade to match the color of the decor, but such solutions are not always successful.
The grout is slightly darker than the tiles. - The same color of tiles and fugue creates some monotony, but also brings a sense of integrity. On a white wall, grout for tiles in a small bathroom that matches in color will be the right choice: the room will visually expand.
White tiles with light grout. - Contrasting combinations are good for mosaics, but are not recommended for porous and rough cladding. You should not use them when refinishing masonry, especially if there is damage: a contrasting fugue will draw attention to the defects. It should also be taken into account that such solutions can visually
Contrasting grout.
make a room smaller, for example – white tiles with black joints. - It is necessary to use grout and tiles of different colors taking into account the interior, otherwise you will end up with an irritating mix. According to classical canons, a maximum of three colors are allowed in a bathroom.
Advice! Do not decorate the entire area at once, test the color combination in a small area. Wait until the mastic dries, because... at the same time she brightens.
Features of different types of grout
How long it takes for the grout to dry depends on its type. Every year new products with improved characteristics appear from different manufacturers.
Now we are considering the main types of grout:
- Cement - based on Portland cement and sand. It also has additional modifying components. This is the most popular type of grout, which is represented by universal compounds from well-known manufacturers.
- Latex is an improved option; it has properties that repel moisture, making it great for baths, saunas, and kitchens.
- Epoxy is in second place after cement, but is more often used in production work, since it costs more and is more difficult to work with. It is characterized by high strength and resistance to moisture.
- Furan is a super-dense black composition that is resistant to aggressive chemicals. It is not used at home.
The best option for home work is a dry cement mixture. It is mixed with water in the proportions indicated on the package. You can mix the components with a drill with an attachment, a mixer or a regular spatula.
Depending on how long the composition dries, there is some time for the formation of the correct seam. It should not go onto the tiles, unless the goal is to hide defects. You need to look at the type of tile cut. It is best to fill the seam completely, leveling the surface so that the material absorbs less dirt.
The best manufacturers
Popular grout manufacturers produce mixtures of all types and colors; there is no point in listing the assortment. And considering that fugues from industry leaders are of equally high quality, it is difficult to compile a rating. It’s better to talk about the nuances of the product.
Ceresit
Under the Ceresit brand, a line of building mixtures is supplied by Henkel. A special component of the product is the antifungal additive MicroProtect, on the basis of which the biocide concentrate CT 99 is also produced. The company also advertises the Aquastatic effect, which any Ceresit water-repellent mastic has. But this is simply the presence of latex.
MAPEI
The products of this Italian company also include anti-mold and waterproof materials of their own design. A certain organic additive BioBlock fights fungi by preventing the development of spores. Water flows off MAPEI grout in drops thanks to Drop Effect technology.
LITOKOL
LITOKOL is also from Italy. It has not been caught enriching the product with exclusive additives, but, among other things, it produces the popular latex additive IDROSTUK for mixing cement mixtures.
ATLAS
The Polish concern ATLAS announces three innovations in its fugues. COLOR PROTECT technology makes the color stable, protects against fading in the sun, and prevents contamination. Hydrophobicity is provided by EFEKT PERLENIA with certain special molecules. Well, where would we be without protection against fungus? MYKO BARIERA is responsible for this.
How to avoid mistakes and not affect drying times
Let's take a closer look at how to properly apply grout in different ways:
- With a grater. Suitable for large volumes of work. The finished composition is applied to the surface and distributed with a grater diagonally relative to the seam. Gradually, the liquid mixture will come out, and the cracks will be filled with a dense composition. You need to work in small sections as the treated area dries.
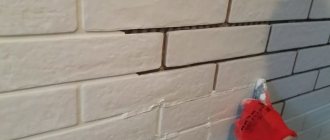
- With a spatula. The grouting compound is applied to the tool, then with force it is pressed into the gap between the tiles. It is necessary to apply force so that the rubber tool can distribute the material across the width and depth of the seam. Only epoxy and cement compounds should be applied with a spatula.
- Cone. You need to squeeze out the grout from it in slightly larger quantities than is required to fill the seam. Afterwards, the excess is removed with a brush. This option is suitable for porous surfaces that are difficult to clean after another application option. For example, a cone can be used to fill the seams between stone tiles.
- A syringe pistol. Used for grouting outdoor joints. Suitable for large workloads and porous surfaces. The gun allows you to accurately fill all seams without forming voids. The result of the work is visually attractive.
Wet treatment of the seams is carried out after half an hour. At the same time, the inner part still remains viscous, therefore it is contraindicated to apply a strong load. If the solution trails behind the sponge, this indicates that it is not ready for wet cleaning. We need to wait a little longer. After the main cleaning, you need to rub and smooth the seams with a rounded stick and then with a damp sponge.
On video: Master class on grouting tiles.
Video
Below you can watch a video on Litochrom Starlike. It is aimed specifically at those who are just learning to carry out this work. The emphasis is not on how to do, but on what to do. The video is long and boring for ordinary people. The total duration is about an hour, but everything is very well and detailed. Watch it and you won't regret it.
A small conclusion: working with epoxy grout took a little longer than usual, because there were three complications: liquid grout, crooked tile laying, and little practice. This ultimately slowed down the entire process. In general, the principle is clear and accessible. Working methods must be selected individually for a specific case, taking into account how epoxy grout behaves.
Removing excess grout
Fresh composition can be wiped off within a day, but it will not be as easy as immediately after application. For this purpose, a metal brush and sponge are usually used.
Recommendations for proper removal of excess material after drying:
- Half an hour after application, carefully remove the remaining mixture with a damp cloth. To prevent the composition from losing its properties, you need to take a small amount of clean water so that it does not drain. You can use foam rollers.
- On the second day, the white coating is removed. This is done with felt gloves using detergent or citric acid.
- Areas of heavy contamination can be wiped off with baking soda. The powder should be applied to damp tiles, then cleaned with a cloth.
- If you find any remaining mixture, defects, or unevenness, you can use sandpaper.
- If the grout remains on the decorative elements of the tile, use a felt mitt soaked in sunflower oil. Afterwards, the surface is degreased with alcohol solutions.
Modern epoxy grouts dry quickly. To clean the surface, some craftsmen use special removers, as they are resistant to chemicals. But the cement mixture is easy to clean; it lends itself to various acidic agents and solvents.
Conclusion
Mapei. If we consider the epoxy grouts Kerapoxy and Kerapoxy Design, the first has more shades and is not as grainy. Although the second one is much simpler and easier to work with.
Litochrome Starlike. If you look at this grout, you can note its excessive softness. In the finished state, it may seem much lower than usual elasticity. It is difficult to smooth out with your finger, even after spraying. In this case, you need to wait a long time for it to partially harden. It is difficult to wash it off even with a cellulose sponge.
Known grouts and their characteristics
The most popular construction products manufacturer is Ceresit. There are several varieties of grout from this company.
Grouting compounds from Ceresit:
- Ceresit CE 79 UltraPox is an epoxy composition, not affected by chemicals, withstands mechanical loads, wear-resistant.
- Ceresit CE 40 Aquastatic - tolerates different temperatures well, suitable for indoors and outdoors, maximum joint thickness is 10 mm.
- Ceresit CS 25 is a silicone fugue, best suited for kitchens and bathrooms with seams up to 30 mm.
- Ceresit CE 43 Super Strong is a high-strength composition that is suitable for joints of 4-20 mm. It can be used in all weather conditions and can withstand high temperatures, but is not used on glazed surfaces or marble.
- Ceresit CE 33 Super - for joints 0.4-15 mm, an excellent option for bathrooms and kitchens, can also be applied to external walls.
Speaking about the disadvantages of Ceresit, it should be noted the difference in color before and after application. It is better to buy compounds where you can conduct a test before installation. This will not interfere if the appearance of the seams is not in the first place. The quality of such compositions does not become worse.
Well-known grouts will also include Mapei Kerapoxy Design and Litokol.
The advantage of the first one is that it is presented in the form of a paste, so it is easy to work with. The downside is that it is more difficult to mix and is thick. Mapei grout can be washed off with a foam sponge or brush. When dried, it becomes more elastic than Litokol.
The grout dries in several stages, at each stage certain work is carried out. You can’t always guess by external signs how well the composition has hardened; it is better to focus on the standard terms for a particular type of grout.
Application rules and drying times for grout (2 videos)
Types of grout and drying times (23 photos)
What to choose and is there any point in overpaying?
Since epoxy resin-based material has a high price, it is advisable to use it only in certain cases. For example, when lining swimming pools, areas near them, as well as other areas that will be exposed to water, it is better to use an epoxy compound. Other situations in which this grout cannot be avoided:
- design of kitchen apron and countertop;
- finishing places where mold constantly settles and seams are subject to high mechanical stress;
- creation of a “warm floor” coating;
- complex design work (composition, panels, tiles with a graphic pattern).
In simpler situations, when you need to lay tiles in the bathroom, kitchen, or finish a wall, you can use regular cement grout.
Reviews
Consumers prefer epoxy grout due to its high stability, long service life and wide range of applications. In addition, many argue that this mixture is ideal for porous tiles, since it does not leave behind colored stains, which often form after a cement mixture. Epoxy is a godsend for designers who value a clear color selection and decorative effect.
Consumers note that the grout does not depend on temperature and easily tolerates changes from -20 to 100°C. The composition does not shrink, and after drying, cracks do not form on it, like with cement grout. They also emphasize the hypoallergenic nature of the material and its complete safety for the health of others.
How to remove cloudy plaque?
Novice craftsmen are faced with the problem of how to clean off epoxy grout after completing installation work? For this purpose, special compounds have been developed that remove any type of darkening after the grout has dried.
For example, Litokol Gel is a concentrated substance that is pre-diluted in a container with water. For matte surfaces it does not need to be diluted in liquid. It is enough to apply a small amount of the composition on a foam sponge.
Foam is formed in the process. It must be quickly removed with a damp cloth. If you skip this moment, bubble marks will form on the surface of the tile. In the future, they are difficult to remove from the decorative plane.
Final cleaning involves using a soft cloth. Experts recommend choosing a cloth with a microfiber base. To give a glossy shine, use a special polish. However, it should be noted that after some time an oily film forms on the surface, which must be removed with detergents.
Note!
Mosaic for the bathroom: TOP-150 photos of new designs, as well as modern ideas for combining mosaic tiles
Do-it-yourself water heated floor under tiles step by step: installation instructions with photos and descriptions, installation and connection
Quartz vinyl floor tiles - what is it? Application features, advantages, disadvantages, choice, manufacturers, photos
Briefly about the main thing
Tile grout is used as a decorative and protective coating for tile joints. It prevents moisture accumulation and the appearance of mold and mildew. When choosing grout, pay attention to its elasticity, color and type: compositions can be cement, epoxy, polymer, latex. The stages of applying grout involve preparing the seams, preparing the mortar and filling the space between the tiles. Over time, the grout requires updating.
Ratings 0