Expert answers: 0
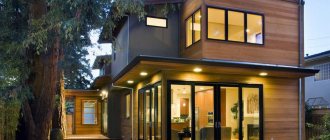
If you want to surprise your neighbors with an unusual roofing structure, a great option is a house with a semicircular roof. The non-standard shape is not its only advantage; there are others:
- In winter, snow does not accumulate on such a roof;
- During rainy times, water does not stagnate;
- Wind resistance is higher than that of roofs with flat slopes;
- There is more space in the attic than with straight slopes;
- Any material is suitable for coating, except hard profile ones;
- A huge variety of design solutions.
How to make a semicircular roof? Let's figure it out.
I’ll say right away: building a semicircular roof is not easy. It’s not so much the installation itself that will cause difficulties, but the drawing up of a diagram and calculation of the structure.
Types of semicircular roof
Arched, domed or semicircular roofs are mostly common on public buildings with large capacity; exhibition halls, swimming pools, sports complexes, galleries, winter gardens. However, in the last few years, private developers have also begun to pay attention to this ancient architectural delight. Many people, including far from wealthy citizens, want to have a house with an arched roof.
The construction of a semicircular roof is more labor-intensive than a conventional pitched one, but the result is always impressive.
It is worth noting that the semicircular roof attracted people not only due to its unusual shape. There are also practical advantages to this method of roofing, which has its own varieties.
Multi-pincer
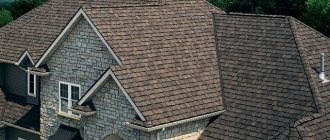
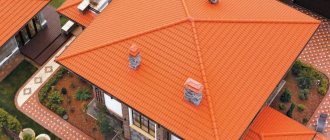
This type of house roof is distinguished by a large number of valleys (internal corners) and ribs. It seems as if there are several roofs on one house. This design is used in the construction of houses with complex architecture and a multifaceted base. A very complex rafter system requires the involvement of professional specialists. With the help of modern roofing materials, the roof can turn out amazingly beautiful.
Advantages and design features of a domed roof
An example of a drawing of a slope of a semi-pitched roof: both external and internal dimensions must be indicated.
Today you can see many buildings with complex construction and architectural layouts. A domed roof is just an option for arranging such structures. Such a roof, which even an ordinary residential building can have, can help solve a number of problems. For example, moving from one room to another, providing a roof over a terrace or veranda. In addition, the domed roof:
- has high resistance to wind load;
- does not “allow” accumulation of snow on its surface;
- creates a significant air volume inside the room, which has a beneficial effect on the physical condition of people;
- provides natural light (if the roof is transparent), which saves money spent on electricity bills.
In such roofs, the load-bearing elements are arches and trusses, curved accordingly. The manufacturing material can be metal, reinforced concrete or wood. In residential construction, the latter option is most often used. Wood is a relatively durable and at the same time lightweight material. This allows you to reduce the load on the house and foundation, and thus spend less money on construction. The only drawback of wood is its relative fragility, which is not typical for metal. And if the iron profile for arranging the frame is too heavy, then an aluminum one will be just right. This material does not corrode, does not require maintenance, and its installation is simple; The aluminum profile is aesthetically attractive and, most importantly for a domed roof, is lightweight. The only negative is the high cost.
The rafter system, like the entire structure, has a rounded appearance.
One of the most expensive and time-consuming options for arranging a domed roof is natural tiles. Since this is still an expensive pleasure, they often prefer to cover a country house with a semicircular roof with a soft roof (flexible tiles, for example). And if the structure is non-residential, then modern homeowners use polycarbonate as a roof for domed roofs. This inexpensive modern material has a low mass and a high degree of transparency. Polycarbonate is resistant to mechanical stress, has high resistance to ultraviolet radiation, and is easy to install - all this has led to the high popularity of polycarbonate among fans of domed buildings. Typically, gazebos, rotundas on the site, and sometimes greenhouses and greenhouses are covered with this material.
Construction of houses
Do you want your home to look like a medieval castle or palace? Design a conical roof. This option makes the building fabulous and solemn. Learn about the secrets of installing a conical roof truss system and get valuable advice from specialists in its repair.
Table of contents:
- Advantages of constructing a conical roof
- Types and design of conical roof
- Conical roof construction technology
- General recommendations for installing roofs with conical lathing
Advantages of constructing a conical roof
A conical roof is installed in round buildings. Among the advantages we note:
- unusual and attractive appearance;
- ease of maintenance of the structure;
- long service life.
Disadvantages of roofing with circular sheathing:
- complex calculations for its construction;
- problems with repairs;
- high price;
- difficulty of installation;
- a large number of materials for roofing.
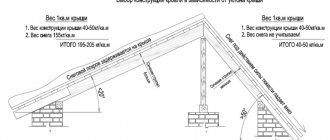
A conical roof is installed over a structure of a round or multifaceted shape. The rafter system is installed in such a way as to ensure a uniform slope of the rafters. Additional elements in the form of purlins serve as supporting elements. The upper, annular part of the purlin is fixed on the central pillars and takes on the load from the tower. The second support point is a ring Mauerlat installed on the wall of the tower. Ceiling beams are designed in such a way as to distribute the load evenly at the location where the central support element is installed.
The ring girder is fixed with braces. High-quality circular roofing requires careful calculations of each component of the system. If you do not have experience in carrying out this type of work, we recommend that you contact specialists in the preparation of project documentation.
If the rafter system is made of wood, then use laminated veneer lumber for these purposes. Especially if the roofing is finished with natural tiles. The lathing under it must be highly durable and powerful.
The conical roof is finished with bituminous shingles, wood shingles or metal. The use of wavy materials on a round roof is impractical. Joining the material will take a long time and will require increased costs. In addition, the aesthetic appeal of the roof is reduced and water flows between the joints.
Types and design of conical roof
We offer you to familiarize yourself with two options for round roofing:
- dome;
- church-onion.
A dome roof, unlike a cone roof, does not have layered rafter elements. The rafter system in a domed roof is suspended. The hanging parts form a three-hinged arch, which is connected on one side to the Mauerlat, and on the other to the support ring installed on top.
To design a domed roof, you must have enormous experience and technical knowledge of “Theory of Mechanics” and “Sopromat”. Otherwise, we recommend contacting construction companies dealing with similar issues; they will help you correctly draw up drawings of the circular roof sheathing.
To calculate a domed roof made of wood, follow these steps:
- loads acting on the rafter system;
- fixation of arches on the central support and ventilation lantern;
- top of the dome part;
- locking hinge, at the top of the dome;
- appearance of ventilation holes.
A semicircular design can be achieved by making a ring sheathing. It is installed on additional racks resting on hanging rafter arches.
Another method of installing a dome roof was proposed by R. B. Fuller, an architect from America. The design is formed using triangles. This dome is called “geodesic”. The complexity of calculations in organizing such a roof and its unusual appearance have not made it popular in architecture.
There are two ways to fix the dome using the “geodesic” system:
- connector - to connect triangles, pieces of timber and special fasteners are used;
- connectorless - all the triangles are assembled in advance, and the overall structure is assembled on the roof.
Among the advantages of such a roof we note:
- the possibility of its full glazing;
- ease of snow removal;
- excellent resistance to wind threats;
- originality of appearance;
- the possibility of organizing your own greenhouse on the roof of the house.
The maximum internal volume of a geodesic roof allows you to make identical rectangular structures and increases the amount of light and air in the room. In summer, heat is absorbed by the roof, and in winter, on the contrary, it is dissipated. This reduces space heating and cooling costs. A geodesic dome does not require an expensive foundation due to its lightness. The dome structure is highly resistant to wind and weather conditions. Also, we note the excellent soundproofing characteristics of the structure, due to its extraordinary shape.
The onion roof is most often installed on Orthodox temples and churches. In private housing construction, this roofing option is less popular. If the dome diameter is less than 300 cm, its frame part is made of wood.
The specific shape of this roof is called “crane”. This version of the rafter system is called layered. To give additional rigidity to the roof, elements are installed in the form of braces and struts. They take on the maximum load. To cut out the crane, special patterns and boards are made, the minimum thickness of which is 40 mm. The central pillar serves as a support for the “cranes” and as a place for mounting the cross on the dome.
If metal is used for further finishing of the dome, then the crate is mounted on the cranes in increments of 30 cm. It is possible to finish the dome using a scaly roof. In this case, an additional element for fastening it is installed under each scale.
When restoring a church dome, it is covered with an aspen ploughshare. They are mounted in such a way as to prevent moisture from entering between the rows. Domes of this type are characterized by the complexity of design and installation. Only professionals can perform high-quality work. If the diameter of the dome is more than 300 cm, then steel is used for its frame. To fix the cranes in this case, metal spacers are used. The sheathing is made of steel strips installed in increments of 40-50 cm. Seam metal is used to finish the roof.
Conical roof construction technology
We offer the option of creating small cone-shaped towers adjacent to the house. Such a roof is not the main one, but its design requires special knowledge. The rafter system in small towers is installed in a fan-shape. The common central post is where the rafter legs diverge. An additional supporting function is performed by purlins; laminated wood is used for their manufacture. There are two options for purlins - upper and lower. Each of them performs the function of uniformly distributing the load. After developing the conical roof design, the wheels are made. The ends of the rafters are fixed on a semicircle, thus increasing the strength of all connections.
For additional stability of the roof, the lower plane of the rafters is sawn at a certain angle. Use steel angles to secure wooden parts.
When calculating the number of rafter legs for a cone-shaped roof, take into account such points as the cross-section of the material from which they are made and the interval of their installation. On the underside of the roof, the spacing between rafters should be minimal. Thus, the lathing for further finishing of the roof will be made with the smoothest possible bend. To do this, an additional spacer with a smaller cross-section is placed in the lower part between the main beam; it will make the surface more durable and neat.
Next, install the drainage gutter. Their semicircular versions are made exclusively to order. To assemble the system yourself, it is enough to use small sections of ordinary straight gutters, connecting them at the desired angle. All connections must be tight and neat.
Take care of the sheathing, which is most often created using wooden beams, flexible plastic parts or ordinary water pipes. The load-bearing capacity of the latter elements is only suitable for supporting a small-sized roof used as decoration, but not for the main domed roof. For additional strength, fold the pipes or beams in half. To fix them on the rafter system, use self-tapping screws.
The cone-shaped roof is finished using the seam method. The tiles are laid on the surface of shingles or reeds. When finishing the roof with tiles, take into account the fact that the width of the tiles increases from top to bottom. Therefore, choose special versions of conical tiles to avoid sloppy joints. Calculate the length of the rafter elements, the total area of the roof, and based on this, purchase the required amount of finishing materials.
Install trim from bottom to top. Each tile is installed with a slight overlap in relation to the side and underlying ones. At the junction of the roof and the outer wall, install waterproofing.
General recommendations for installing roofs with conical lathing
Check out the features of constructing a conical roof:
1. The slopes are brought to the roof surface at least thirty centimeters.
2. A standard beam is installed on a regular concrete floor, and the rafter system is fixed on it.
3. For a tighter connection of the end sections of the rafters, we recommend sharpening them.
4. The upper parts of the rafters are installed on a semicircular support and connected to each other using steel corners.
5. The sheathing is made of semicircular bars: long and short elements.
6. For roof waterproofing, we recommend using rolled materials laid overlapping, with mandatory gluing of all joints.
7. Before tiling, secure the drainage systems.
8. The installation interval of the sheathing is determined by the type of roofing finishing material.
9. Using tapered tiles, pre-label the elements of each row. Reduce the amount of material for each individual row.
Flexible or bituminous shingles are installed on a solid base. For these purposes, thin-sheet plywood is most often used. To create a thermal roof, additional insulation, vapor barrier and waterproofing are installed.
The plywood is cut into a trapezoidal shape and laid from bottom to top. The thickness of the layers of plywood covering should be at least 12 cm. That is, using 4 mm plywood, lay it on the base in 4 layers. Next, moisture protection and bitumen shingles are installed.
A steel ridge is installed on the top of the cone-shaped roof. For its manufacture, steel, copper, aluminum, and stainless steel are used. Additionally, if necessary, install a weather vane.
When choosing a tool for constructing a conical roof, you need to take into account the materials used for the sheathing and roof finishing. At the same time, if the sheathing is mounted from wood, then you will definitely need a jigsaw, a hammer drill, and a screwdriver. When using steel materials, stock up on a grinder with cutting discs, metal drills and an electric drill.
Video on installing a conical roof:
Domed roof installation
The house, equipped with a semicircular roof, has a hanging truss system. This is an ordinary arch with 3 hinges. One end of it rests on a ring mounted in a pillar installed in the very center of the building, and the other on a mauerlat located on the wall. Mauerlat is a log, a beam located along the perimeter of the wall and serving as a support for the rafters. The arrangement of such a system requires good knowledge of the classical “Sopromat”, the foundations of “Theoretical Mechanics”. Therefore, it is not recommended for an untrained person to independently design a domed roof for a residential building.
Covering the frame of a semicircular roof with chipboard slabs allows you to prepare the basis for laying the roofing material.
The roof becomes semicircular thanks to the ring sheathing, which is installed on special racks, resting at one end on the rafter arches. But there is another option for a domed roof, which any house or building can have. Architect from the USA Fuller R.B. proposed a variant of a semicircular roof in the form of many cumulative triangles. This design is sometimes called a "geodesic dome". It was first officially introduced in 1951, but was not particularly widespread. The main reason is the unusual design and complexity of engineering calculations.
The “geodesic dome” has obvious advantages: its surface can be completely glazed (with the same double-glazed windows). This means that there will be no problems with clearing snow. The design has very good resistance to wind loads. Often country homeowners decorate, for example, greenhouses with a similar design. A "geodesic dome" can be:
- Connector: the frame consists of pieces of wooden beams and connector locks. The entire system is mounted directly above the walls of the building.
- Connectorless: triangular-shaped panels are pre-assembled by the manufacturer and then installed on site.
Step-by-step instructions for constructing a roof
The construction of a sloping roof with your own hands should be carried out using the following technology:
- Installation of the Mauerlat.
- Installation of the rafter system.
- Thermal insulation.
- Arrangement of gables.
- Installation of sheathing.
- Roof decking.
Read how to make a sloping roof yourself in a house with an attic in a separate article.
Mauerlat installation
The ends of the rafters are attached to the mauerlat. A waterproofing layer is first applied to the installation site of the Mauerlat, for example, roofing felt laid in two layers, or a film in 2-3 layers.
The beam is fixed along the upper perimeter of the wall on studs specially prepared for fastening. The pitch between studs is a maximum of 2 m.
- For a small roof, material measuring 100x100 mm is suitable.
- And for a large roof - dimensions 200x200 mm.
The Mauerlat bars can be additionally secured to the wall using a wire tie.
To prevent the Mauerlat from losing its strength, you do not need to make many holes in it. And the location of the studs should be such that during installation they are not under the rafter legs, but between them.
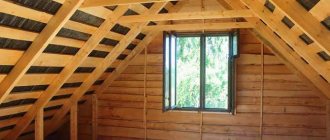
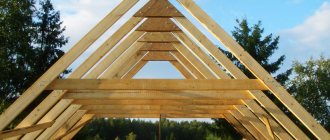
Installation of the rafter system
After installing the strapping beam, you can begin installing the rafter system. This is done in the following order:
- After installing the Mauerlat, you need to mount the floor beams. They will become the frame for the vertical racks. Beams are laid at the ends of the building, then special strings are stretched between them to determine the plane, and then intermediate beams are installed.
- Next, vertical posts are erected in two parallel lines. They are installed from the edges, after which the intermediate posts are mounted. They can be strengthened with temporary spacers, and connected to each other with purlins made of boards and secured with a screed. The step between the racks is a maximum of 2 m, and the length of the racks themselves is calculated according to the formula: ceiling height + 10-15 cm.
- Then the lower rafter legs are mounted. Each beam (with a cut at the desired angle in the upper part) rises upward. Then the upper rafters are installed. The outer rafter legs are fixed with temporary struts.
- Lastly, the hanging headstock is secured between the ridge and the tie.
Thermal insulation
First, a vapor barrier material is attached, which prevents steam from penetrating into the insulation laid on top. Then a thermal insulation layer is laid on the vapor barrier. It can be basalt stone wool (which insulation to choose for the attic floor of a house?)
Recommendation: the density of the insulation should be at least 35 kg/m³, otherwise material with a lower density will shrink over time, be compressed, deformed, lose rigidity, voids will be created inside the roof and these places will freeze strongly.
The insulation is laid in several overlapping layers to prevent the formation of cold bridges. It is advisable to choose the size of the thermal insulation material such that it is 3-5 cm larger than the pitch between the counter batten slats. Read more about the rules for insulating the attic roof of a private house here.
Waterproofing is laid on top of the thermal insulation - a breathable membrane. It is needed in order to release moisture from the insulation without creating condensation in it, but at the same time not letting moisture from the street into the room.
Arrangement of gables
The pediment of the sloping roof has the shape of a pentagon. To build it, you need to strengthen the truss, which goes first from the edge of the wall, and also make additional racks.
If the pediment has windows, then you need to remember to leave openings for them. The entire remaining surface is sheathed with “inches” and insulated.
The pediment can be mounted in two ways:
- Before roofing work. The good thing about this method is that the slopes will not interfere with the work and make it difficult.
- After installation of the roof covering. The option is convenient because the parameters and geometry of the slopes are already known and it is easier to make a pediment using them.
Creating a sheathing
Lathing for a sloping roof is like the foundation for a building. It is on the sheathing that the roofing covering will be attached.
It can be made solid or lattice:
- Continuous sheathing is used when the roof covering is ondulin, slate or shinglas. It is made from moisture-resistant plywood, which is laid out solidly on the rafter legs.
- Lattice sheathing is used when using corrugated sheets and tiles. It is made from unedged boards and laid perpendicular to the rafter legs.
The rafters are first lined with waterproofing (overlapping by 10-15 cm), which is fixed to the wood with a construction stapler. Then the counter batten slats are installed, and then the sheathing itself.
Roofing installation
The technology of work depends on the selected material. For any roofing, the sheets are first cut and then installed. When working with wavy material, self-tapping screws are attached to the bottom of the wave. If you screw them in in another place, the material will be deformed, the fastening itself will become fragile, and during gusty winds the roof will seem to be “humming” in the room.
To install the roof you need the following tools:
- screwdriver;
- hammer;
- tape measure and pencil;
- self-tapping screws suitable for roofing;
- tool for cutting sheets.
Note: if the room under the roof will be used as a living space, it is not recommended to buy copper tiles and iron as roofing, because in the summer they get very hot and the room will create the effect of a stuffy steam room.
After installing the roof, all that remains is to make the final touches - install gutters, decorative trim, ridge and snow guards. The skates are attached to the tiles with an overlap of 10 cm, and the snow retainers are mounted on self-tapping screws at some distance from the edge of the slopes.
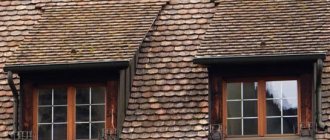
"Onion" dome
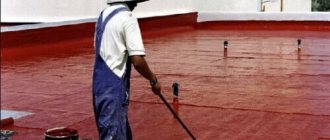
The ideal roofing material for a semicircular roof is flexible tiles.
This form of roof stands somewhat apart, because... It is unlikely that you will see a house with this type of roof today, but for Orthodox churches such a design has long become a kind of calling card in the world of architecture. However, a few centuries ago, both royal mansions and residential boyar towers had such a roof. The reason why those in power built a house with a roof of just such a design is banal - the same practicality and only partly a hint of closeness to the temple and God.
For small domes, with a diameter of no more than 3 meters, wood is used as a material for rafters. The rafter legs of the onion dome have their own specificity - a special shape called “crane”. This is an inclined rafter system in which the “cranes” resting on the central pillar are given additional rigidity by various kinds of spacers and struts installed where the greatest load is expected. To cut out “cranes”, special wooden patterns are used. For large domes with a diameter of more than 3 meters, a metal frame is required. Metal strips are used as lathing.
To this day, the domed roof is still unusual to look at. However, the practicality of this type of design, its unusualness and attractiveness will certainly find many more fans among homeowners.
Video on assembly and installation of gable roof rafter system
Building a gable roof with your own hands is not easy: there are a lot of subtleties and nuances, there are different methods of fastening and extension. Describing them in words is a thankless task. This is the case when it is better to see. Below you will find a selection of videos that may be useful to you.
Video report on how a gable roof is made
The house owner's story about the stages of construction. There are interesting technical points that may be useful.
Two types of rafter connections: rigid and sliding
Video about the two most problematic types of connections.
How to determine the angle of rafters
Arched roof - design features and installation technology
Modern private housing construction is famous for the fact that it has a large arsenal of technical solutions that make it possible to make the external and internal appearance of the house the way the customer wants to see it. This judgment is also true for the choice of roof structure, therefore, in cities, more original arched roofs have replaced traditional gable, hip or hip roofs.
An arched roof is an elegant, lightweight, ergonomic design that immediately makes the architectural appearance of the house more original, more interesting, and bolder. But the most important thing is that this roofing option will cost no more than the standard ones, if you figure out how to install it yourself.
Preparing the roof diagram
For such a stage as building a hip roof with your own hands, you need to devote enough time to drawings and photos, step-by-step instructions. All aspects are worked out in advance; sometimes the design of the structure may change during the planning stage. It all depends on:
- the wishes of the home owner;
- designer's imagination;
- financial capabilities;
- foundation capacity.
The number of constituent elements will affect how much materials, fasteners, and installation time are required.
When planning a complex project, it is better to choose the help of professionals. They will be able to correctly calculate the thickness and number of parts needed. This will have a positive impact on the reliability of the roof, its service life, as well as whether periodic repairs with the investment of additional funds will be required in the future.
The device and its advantages
An arched roof is a curved structure in the form of an arc, with the help of which residential buildings, industrial or administrative buildings are covered for the purpose of protection from precipitation, cold, and wind. Previously, it was believed that this design solution was more suitable for buildings with a specific purpose - swimming pools, greenhouses, greenhouses, shopping galleries and passages. But now arched roofs are actively used in the construction of private houses, due to the following advantages:
- Original appearance. A house with a bizarrely curved roof immediately stands out visually from similar buildings with a flat or gable roof.
- Resistance to wind loads. The aerodynamic, curved shape without sharp corners makes the arched roof invulnerable to strong gusts of wind, which often lead to roofing failures.
- Reduced snow load. The arch, which has a curved shape, does not retain snow masses on the slope, due to which the load on the supports and foundation is reduced.
- Increasing the volume of the room. Thanks to the arched roof structure, the internal volume of the house increases, making it visually more spacious and larger.
Note! Depending on the configuration and roofing material, arched roofs can give the house both an ancient, historical appearance and an ultra-modern, current look.
Advantages of dome roofs
In fact, dome-type roofs have very serious advantages:
- the attic space can be used to its maximum , with almost one hundred percent efficiency;
- You can install an unlimited number of windows on domed roofs ; there are even transparent structures completely covered with glass ;
The round roof is completely transparent Source dfasad.ru
- the round configuration prevents snow from catching on the roof plane, which reduces the load from natural precipitation to zero;
- light weight of the structure due to fewer elements and parts used;
- a dome-type roof is many times stronger and more reliable than any pitched type;
- unique appearance that differs from all other roofing structures.
Support frames
Many inexperienced developers wonder how to properly make an arched arched roof. To begin with, it is important to understand that the roof frame is the most important part of the structure, which performs load-bearing and distribution functions, ensuring its reliability and stability. To construct a roof in the form of an arch, the following types of frames are used:
- Wood. A wooden frame is a simple but effective solution for the arched roof of a private house. It is quite cheap and easy to install, but is not designed for heavy weight, so it is not suitable for roofs with a large area.
- Steel. A frame made of square steel pipes is a strong, reliable basis for constructing an arched roof; however, this is a fairly massive option that requires the installation of a foundation and walls with high load-bearing capacity.
- Aluminum. The arched frame made of aluminum is highly resistant to corrosion, light weight, good load-bearing capacity, in addition, standard profiles can be easily assembled even with your own hands. The only drawback of this option is the high price.
- Reinforced concrete. Reinforced concrete arched structures are produced for roof installation, but they are used only in the construction of industrial, commercial or sports structures with a large area.
- Frameless. To assemble arched roofs, a special self-supporting curved corrugated sheet is produced, which is installed without installing an additional supporting frame.
Important! Correct calculation of the frame structure is the key to strength, reliability, and durability of the structure. Calculations of the required load-bearing capacity are made in accordance with climatic conditions, slope and other roof parameters, taking into account the weight of the roofing material.
What is good about polycarbonate?
This is a relatively new coating that has already shown its best. A polycarbonate roof is an excellent solution for those structures that require a high degree of natural light, such as gazebos, verandas, greenhouses or terraces. You can make a polycarbonate roof with your own hands; all you need is a certain amount of knowledge and minimal skills in working with tools. In addition, you can make not only the roof from polycarbonate, but also the gazebo itself for your dacha; look at the photo, how interesting they look.
Types of coatings
Before you build a house with an arched roof, you need to take into account that not all roofing materials are suitable for this design. The covering for the arch should bend easily and retain its shape well, so the choice is very limited. Professional craftsmen consider the most common materials for covering arched roofs to be:
- Sheet steel. Roofing steel sheets are often used to cover arched roofs. They are quite cheap, easy to install and maintain, however, they have low load-bearing capacity.
- Profiled sheeting. Special arched corrugated sheeting is created specifically for arched roof shapes. It has a high load-bearing capacity, which is given to it by a reinforced profile, but at the same time it weighs little. Arched corrugated sheeting is available with a standard bending radius.
- Cellular polycarbonate. Another solution for an arched roof is cellular polycarbonate, which has a translucency level of 80-90%. This property of the roofing material, combined with its very low weight and high strength, allows for maximum use of natural light in the building.
Please note that the possible shape of an arched roof directly depends on the chosen roofing covering. Cellular polycarbonate has the maximum bending radius, which is most often used to cover structures of this shape. In addition, this material is quite easy to install using special profiles, and also weighs little.
What materials are suitable?
It is easier to use a metal frame for the rafter system. Unlike wooden beams, it can be of any shape. It all depends on the type of building:
- For the roof of a house designed for heavy loads, you can use steel trusses. Similar trusses are used for industrial buildings and hangars;
- For a gazebo, greenhouse, or balcony, you can use arched aluminum profiles;
- For a polycarbonate roof, aluminum is sufficient;
- If a heavy coating is planned (for example, ceramic tiles) - steel;
- You can make arched rafters from wood: a long broken line consisting of straight sections.
note
Installation of an arched polycarbonate roof
Translucent roofing made of lightweight but durable polycarbonate is a popular technological solution for greenhouses, greenhouses, shopping pavilions, gazebos or other elements of urban infrastructure. Installation of such structures is carried out according to the following algorithm:
- Before making an arched roof, it is necessary to calculate the load-bearing capacity of the frame and the optimal distance between the elements.
- Next, according to the calculation and drawing, a frame is made from a light aluminum profile. It is important that each arc has the same shape. To do this, first use a template.
- The frame arcs are fixed on the top trim of the house in increments of 1-1.5 meters. First, the first and last trusses of the structure are installed, and all the others are aligned with them.
- Using fixing strips, cellular polycarbonate is secured to the trusses, not forgetting to take into account the gaps for thermal expansion of the materials.
- The ends of cellular polycarbonate are protected from the penetration of moisture and dust using a special end profile.
Remember that cellular polycarbonate must be laid so that its profile is located along the bend of the arch, otherwise condensation will accumulate in the honeycombs, which will not be able to escape from there.
Video instruction
Eastern wisdom says that the windows of a house are its eyes, the front door plays the role of a mouth, and the hairstyle of a house is its roof. And just as a person’s hairstyle often determines his appearance, the roof of a house occupies the same dominant position in him. The arched roof seems to have been created specifically for those with a refined architectural and artistic taste, because it literally attracts attention and creates an unusual, sublime atmosphere in the interior of the house.
Arched or domed roofs are most often made over canopies, canopies, and summer gazebos. However, you can often find a garden house with such a roofing system, and even a private residential house. In homes with a complex layout, an arched roof can play the role of a component center, giving such a house completeness and unity.
Purpose of an arched roof
The use of arched roofs is widespread throughout the world today. Now in Russia they have begun to introduce such a design into the architectural field. In particular, such a roof is justified at the following facilities:
- Swimming pools and indoor sports grounds;
- Stop pavilions and shelters for transport;
- Greenhouses and conservatories;
- Arched country house;
- Capital buildings, such as powerful hangars, production workshops, etc.
Important: by the way, frameless roofs made of metal profiles have now been developed for the construction of hangars. Such structures have greater rigidity and strength, which allows the installation of large rooms without the use of a complex rafter system.
Additional materials on the topic
Sloping roof rafter system
More details
Attic rafter systems
More details
Calculation of the rafter system
More details
Your feedback, comments, questions
Dear visitors! We will periodically answer your questions in the comments as we are busy. In order for us to respond to you promptly (within an hour), you can: call, write a personal message or leave a request for a free consultation by phone.
Pros and cons of a semicircular roof
It is worth knowing that arched roofs carry a lot of advantages both for the house itself and for its owner. The main positive aspects of such an arc-shaped ceiling are:
- Reducing the wind load on the roof of the house. That is, moving along a sloping roof, the wind does not experience resistance, which means it does not tear off the roof and does not loosen the rafter system.
- Unhindered descent of snow crusts from the roof. This point is important, since precipitation in the form of snow puts additional pressure on the ceiling.
- The ability to fill the room with natural light (provided that a transparent roof is used).
- Significant savings in attic space. The absence of a complex rafter system ensures this.
But the semicircular roof also has some disadvantages. These include:
- Some complexity of installation. Especially if the master decides to make the load-bearing frame from wood.
- It is impossible to use any material you like as a roofing material.
Type of houses with round roofs
The main requirement for the construction of domed roofs is a geometrically correct base. And here there are two options: round or square base. If the shape of the walls of the house is a rectangle, then you shouldn’t even think about erecting a dome-type roofing structure. There is another option - a semicircular arched roof.
If the foundation of a private house is a complex structure. Or during the construction process changes were made to it, for example, new premises were completed, then in this case it is better to use a combined roof. That is, one that uses pitched and dome structures.
As for the loads from the roof on the walls and foundation, here, as in the case of other types of roofing structures, it is necessary to correlate the types of materials used to construct the walls and roof. For example, you cannot install metal profile trusses on wooden walls assembled using frame technology. If the house is built from stone, blocks or bricks, then the restrictions are reduced, and in many cases completely eliminated.
Square, circle and equilateral polygon - the basis for a domed roof Source plotnikov-pub.ru
Materials for covering the arched roof covering
As a rule, lightweight roofing materials that have a certain elasticity are used to cover roof arches. In particular, the following can be used as roofing:
- Galvanized steel sheets. Such a material, with its flexibility, is capable of simultaneously forming both a coating and a load-bearing rigid frame. Moreover, galvanized steel is resistant to corrosion.
- Plastic rolled slate. The coating is made of polymers and has excellent elasticity. This roofing material has a smooth surface and a strong structure, which allows the master to use this material as an arched one.
- Arched profile flooring. In this case, the coating has the structure of a standard corrugated sheet. The only difference between these two types of coatings is their shape. The arched one already has an arched shape. Its advantage is that such material can be mounted on the roof frame in whole fragments.
Important: arched corrugated sheeting must be ordered from the manufacturer according to the parameters of the arched roof (span width, height of its walls and arc height).
- Glued beam. With careful installation and the correct profile, you can make a wooden beam roof. And although this option is not beneficial from the point of view of durability, from an aesthetic point of view such a roof looks environmentally friendly and attractive.
- Drywall or plywood. The top of the materials will need to be covered with any roofing material such as bitumen shingles, etc.
- Light-conducting coatings (polycarbonate). Today it is the most popular for covering arches.
What rafter systems should be used for a pitched roof?
Sometimes only a single slope can smooth out complex terrain; the appearance only benefits from this.
Sloping roofs fit perfectly into the designs of spacious cottages and small frame buildings of 50 square meters. m. These Finnish eco-style houses captivate with their comfort and elegance of design.
Pitched roofs are harmonious in combination with sloping awnings. This allows you to favorably emphasize some parts of the house and focus on the design of the entrance group. Additions in the form of canopies, like weightless extensions, canopies coated with polycarbonate or corrugated sheets, look stylish.
Protruding bevels provide ample space for external lighting. Built-in lanterns softly illuminate the area around the building and create the effect of a floating roof. There are many variations on this theme.
Houses made of timber are quite capricious from the point of view of experimenting with style, but original solutions have also been invented for them. The photo shows a pitched roof of an unusual shape, covered with bitumen shingles.
More often, one ramp is used on narrow-shaped chopped bathhouses.
Operable or eco-roofs have a slight slope, enhanced hydro- and thermal insulation. A properly selected plant carpet protects against noise. By absorbing water, it reduces the load on the storm structure.
Roof frame materials
As for the materials to create the roof frame, a variety of different ones can be used. However, they should be divided into materials for use in capital industrial construction or for use in private work. So, for capital construction you can use:
- Reinforced concrete. To install such arches, complex special equipment is required, and the work will be very labor-intensive. Therefore, private craftsmen do not work with such material.
- Frameless profile sheets. It was written about them above that such material simultaneously performs both the function of a rigid frame and the function of a roofing covering.
In private construction, for the arch frame you can use:
- Wooden arched rafters. Creating such roof elements is within the capabilities of a carpenter. Or you can order such rafters from a carpentry workshop. Most often they look like arcs or half-arcs glued together from thin boards.
- Metal steel profile (square pipe). Durable and load-resistant material, but requiring some effort in bending the profile.
- Aluminum pipes. Ideal for arched roof frames. Aluminum is not subject to corrosion, is quite simple to work with and is easy to construct a frame. And when such legs are reinforced with spacers, the roof will be able to withstand any roofing material.
Important: PVC pipes can be used to construct an arched greenhouse.
Assembling a mobile barbecue
A mobile barbecue is assembled somewhat faster and does not require the same costs of funds and materials as a stationary one. The firebox is calculated according to the sample that was used for the option above. Additionally, between the legs of the grill you can make a shelf for food or pots. Handles are attached to the side edges of the roasting pan for transporting the structure. The roof for a mobile barbecue can be assembled into a semicircular one. For these purposes, you will need to cut two blanks from a metal pipe. They must be at least 50 cm longer than the length of the barbecue. After this, using a pipe bender or manually, they are given a rounded shape.
Two cross members are welded to the ends to ensure the solidity of the entire structure. Next, the roofing decking is attached. You can use a sheet of metal tiles, corrugated sheets or simply galvanized sheet metal. You can fix them using a self-tapping screw with a press washer and a drill. Aluminum rivets are also suitable. It must be fixed alternately to two arched structures, giving the sheet a curved shape. For installation on a grill, it is enough to weld four racks from a square pipe or smooth, even fittings. Various assembly drawings with dimensions can be seen below and above.
vote
Article rating
Do-it-yourself arched roof on an aluminum profile
To build a semicircular roof with your own hands, you need to prepare aluminum pipes with a cross-section of 5 cm and a length of 5-6 m. And to cover the roof, in our case, we will take translucent polycarbonate of any shade. But it is worth remembering that although such a coating is modern and attractive, it is still better to use it for installing a canopy roof over a car, a pool roof or the roof of an extension. Because in summer it will be very hot indoors under such a roof.
Important: polycarbonate tends to expand when heated under the sun. Therefore, when attaching covering sheets, it is necessary to leave a technical gap for the expansion of the roof.
Roof arc calculation
- To calculate the length of one arc and its radius, you need to take a sheet of graph paper and plot on it on a scale the width of the arch span (the distance from one wall of the house to the other) and its desired height above the span.
- Having measured everything and received the data, they are transferred to a sheet of graph paper.
- Now, in the center of the span in the diagram, we install a compass and, resting its second end with a pencil on the edge of one wall according to the diagram, we draw an even circle.
- Inside the circle you need to draw an even hexagon.
- The resulting lengths of the sides are on scale and will be the lengths of one arc, which will have to be added. In our case, for an arched roof, we will add three such lengths.
Important: the arcs of the arch can be made not from a single pipe, but from its parts. In this case, two half-arches can join at the top of the arch, forming a steeper or less steep bend.
Frame installation
The pipes must be bent using a special bend, first making cuts on the profile. It is important to remember that the more notches there are on the profile, the less steep the bending radius will be. And accordingly, the fewer notches, the larger the bending radius will be. The notches on the profile must be placed with the same spacing.
- The resulting arcs are attached with special brackets to a wooden Mauerlat. And they strengthen the structure with special stiffening ribs. You can use wood or a metal profile for this.
- The sheathing is attached along the entire perimeter of the arcs installed in increments of 50-70 cm. For polycarbonate, the lathing pitch can also vary within 70 cm. But it is better to make it equal to the width of one sheet. This will make installation of polycarbonate more convenient.
- When attaching roofing sheets, it is necessary to make holes in them for self-tapping screws in advance. Moreover, the holes should be several mm larger in order to expand the coating.
Important: to install polycarbonate, you need to use special self-tapping screws with thick washers and decorative covers.
- The roof gables are covered with any convenient material. The one from which the house box is built will look beautiful.
Advice: if you are not confident in your abilities when calculating the parameters of the arch, then use the services of professionals or at least use a special program to calculate the parameters of the arch.
Do-it-yourself installation
Depending on the material of the gazebo, polycarbonate will be laid in approximately the same ways - using a profile. I propose to consider the two most popular roof options, when the structure is made of metal or wood. The general concept of fastening is shown in the photo below.
Fastening to metal
The roof must be made in one plane, which is why laying polycarbonate is a fairly simple process. Conventionally, the entire process is divided into several stages, which must be performed strictly in turn.
- Preparation of material and tools. Calculate in advance the number of polycarbonate honeycomb plates, self-tapping screws with washers, end and connecting profiles and self-adhesive dustproof tapes. Before the sheets begin to rise to the top, you should have all the material in abundance. The screwdriver battery must be charged and the bits must be in place.
- Secure the base profile from the edge of the roof with self-tapping screws.
- Remove the bottom layer of protective film.
- Cover the honeycomb holes with dustproof tape. This is done to prevent moisture from entering.
- Insert the polycarbonate sheet into the profile.
- Fasten the polycarbonate sheet to the roof structure using self-tapping screws with a thermal washer or ordinary roofing screws. Keep in mind that the hole for the screw should be slightly larger than the size of the screw itself. A similar trick is needed to smooth out the thermal expansion of polycarbonate so that it does not burst.
- Close the base profile with the roof pressure profile. Before proceeding, make sure that the lid is securely seated in the base.
- Repeat this procedure for each sheet. Make sure that the carbonate slabs do not burst due to excessive tightening of the screws.
These instructions are clearly shown in the video, which talks about installing polycarbonate on a metal structure. Everything is told in a very accessible and understandable language, I recommend watching it.
Attaching to wood
The concept of fastening to wood is not much different from metal. For fastening, a profile is used that allows you to fasten individual sheets together and achieve a certain tightness between them so that rain or melting snow does not get into the gaps.
The instructions for attaching polycarbonate to wood are identical to metal (read just above).
I would like to show a video showing the actual laying of polycarbonate sheets on a hexagonal wooden roof.
The installation process is accompanied by cutting. Pay attention to how many people are involved in this process. When building such a roof with your own hands, difficulties may arise.
Design
The supporting structures for such roofs can be made of curved metal, wood or concrete structures made in the form of arches or trusses. It is possible to use concrete structures as load-bearing structures, but for private houses this is unjustified due to the increased cost of materials, transportation difficulties and heavy weight. There will also be a need to build stronger foundations and walls to support the concrete structure. You will also need special lifting equipment to install the truss. All this will lead to increased construction costs.
Some of the most suitable roofing options include glass, clear slate, honeycomb or. If you decide to make the roof opaque, then you can use, for example, galvanized steel or copper.
Polycarbonate allows you to create a support-free roof over small rooms. It lends itself well to bending and is used to give different shapes to roofs.
If the structure is made of metal, then it will also have significant weight. This will require strengthening the foundation and walls.
Arched roofs are most often made of aluminum profiles
. They have a number of advantages: high corrosion resistance, low weight; neat appearance, easy installation. When installing an aluminum frame, the pitch of the sheathing will depend on a number of factors: the thickness of the polycarbonate sheet, the bending radius, the method of fastening the sheets and others. In most cases, the sheathing pitch is made in a ratio of 1:2 to the width of the sheet. In this case, the type of frame does not matter. Aluminum is moisture resistant. It does not require permanent painting.
Important: When designing, it is necessary to take into account gaps for thermal expansion equal to 5 mm. per linear meter.
Calculation of the sheathing pitch depends on the parameters of the polycarbonate sheet. Standard sizes: width – 2-10 meters, length – 6-12 meters. The parameters of the polycarbonate sheet have dimensions of 2.05x3.05. In this case, the thickness parameters vary from 10 to 32 mm. It is possible to manufacture according to individual orders from individual manufacturers.
Features of panel fastening
If the width is more than 1 meter, additional fastening is used when installing the panel. This is necessary in order to avoid displacement. For fastening, 5-centimeter self-tapping screws are used, screwing them into the supports in increments of 50-60 centimeters, but no more than 20 centimeters from the joint. The distance of the screws from the edge is at least 3 centimeters. It is important to pre-prepare holes for screws with a diameter exceeding the size of the screws by 3-4 mm. – this will avoid deformation during expansion. The surface can be deformed or damaged by over-tightening the screws. Fastening must be carried out perpendicular to the plane of the panel. It is best to choose self-tapping screws made of stainless materials: for example, steel or with galvanized tips to ensure corrosion resistance. The length parameters must correspond to the sheet thickness, type of gasket and load-bearing structures. But the diameter is better to take 4 mm.
Cone-shaped steel spacers are also used for self-tapping screws. They help prevent corrosion. Their characteristics must correspond to self-tapping screws or be made of aluminum of at least 1 mm. (thickness) and with a diameter of 25 mm, with a rubber gasket. You can use thermal washers instead. This will improve the appearance. A thermal insulating tape is used between the metal and the panel at the junction. This is done in order to avoid swelling when heated.