Pumping stations are one of the parts of the home water supply system.
They are used everywhere. Regardless of the design and water source, the package includes a pumping station. The pump pumps water into the subsystem, and the hydraulic accumulator helps maintain the required pressure levels. It is in the hydraulic accumulator that such an important part as the membrane is located. She participates in all processes. A pump with a hydraulic accumulator without a membrane operates at a higher load. It is on all the time when water is needed. This also increases energy consumption. Jumps in pressure indicators in this case are not excluded.
How the device works
Upon visual inspection of the membrane accumulator in a hydraulic accumulator, it can be compared to a medical heating pad that can hold up to 100 liters of liquid.
For cold water supply, pear-shaped membranes are used. Installing a hydraulic accumulator in a water supply system protects water pipes and the entire network as a whole from overloads and resulting ruptures. The pipeline is built in such a way that when the pump starts, it initially supplies water to the storage tank. After it, water is distributed to all water collection points.
The fluid in the accumulator is filled to a certain level set by the manufacturer or home owner when setting up the device. To determine the pressure level, just look at the pressure switch located on the top of the pump. Comfortable indicators for the operation of a water supply system are 1.7-3 atmospheres.
Pressure switch for pumping stations HVSI source https://tim-dmitrov.ru
As soon as the pressure reaches a critical point, the pump stops filling the container with liquid. The water remains in this state before any tap is opened. The pressure created inside the tank will allow the formation of good pressure, as a result of which home owners will be able to comfortably use water for their needs.
Important! Thanks to the hydraulic accumulator installed in the system, it is possible to save a significant portion of electricity and increase the operating life of the device. The hydraulic accumulator is a solution to another very important problem of water supply systems - water hammer.
Advantages of a hydraulic accumulator
A hydraulic tank, properly integrated into the water supply system of a private home, performs several tasks:
- stabilizes pressure in the water supply system;
- protects water pipes from water hammer when starting pumping equipment;
- increases the operating life of the pump, since it limits the start and shutdown of the latter;
- provides compensation for water leaks from the water supply main.
Thus, the hydraulic accumulator is a very important structural component of an autonomous water supply system.
How the unit works
A standard hydraulic tank consists of three elements:
- metal case;
- rubber membrane;
- flange equipped with a valve.
In the design of a hydraulic tank, the membrane is of key importance, and the condition of this membrane must be monitored.
Main varieties
Today on sale you can find various options for hydraulic tanks, which differ in the principle of their operation, design, installation methods, as well as a number of other operational characteristics.
Depending on the installation option, it is customary to distinguish two main types of hydraulic accumulators:
- horizontal;
- vertical.
The principle of their operation is the same. You just need to take into account the fact that vertical hydraulic accumulators, the volume of which exceeds 50 liters, have an additional special valve on top designed to bleed air. During the operation of such containers, air inevitably accumulates in them, collecting in the upper part of the tank. Without the presence of special valves, complete airing of the entire system and rupture of pipes at the connections may occur. Accordingly, the installation of such a hydraulic accumulator is carried out taking into account the location of the mandatory protective mechanism.
In horizontal devices, a special drain or a small tap is installed specifically for bleeding air, located behind the hydraulic accumulator. The need to install them slightly increases the cost of the equipment used. At the same time, homeowners who do this work on their own often forget about the mandatory use of additional safety taps. This subsequently leads to problems with the operation of the autonomous water supply system.
Depending on the purpose, it is customary to divide three types of hydraulic tanks:
- painted blue - for cold water supply;
- painted red - for hot water supply;
- painted scarlet - tanks for closed autonomous heating systems.
It is customary to distinguish hydraulic tanks by their volume. Such installations can be intended for both a small country house and a full-fledged cottage where several families live simultaneously. The most popular today are hydraulic accumulators for water supply systems, the size and volume of which are 100-200 liters. They are affordable and compact in size. Such installations make it possible to provide high-quality, proper water supply to a private home inhabited by 3-5 people.
What are the advantages of using a hydraulic accumulator?
If you install a hydraulic tank, say, in an autonomous water supply system, then it will perform the following important functions.
- It will maintain the required pressure in the line.
- It will extend the life of the pump because it limits its activation/deactivation.
- Will compensate for liquid leaks from the water supply network.
- Protects the line from water hammer when the pump is turned on.
Obviously, the hydraulic tank is an extremely important component of any autonomous water supply system, and therefore the functionality of the entire water supply network depends on how stable it works.
Checking and diagnosing hydraulic tank problems
Let's start with the fact that the normal functionality of the entire plumbing system largely depends on the operation of the hydraulic accumulator. And if the water supply fails, then you are obliged to find the cause as soon as possible and make quality repairs. Otherwise, this can lead to more serious breakdowns, which, in turn, will inevitably lead to the failure of all equipment. And the most common reason is the membrane for the accumulator.
Let's look at how to find out, how to diagnose and replace this element.
As a rule, all problems can be easily fixed with your own hands. Let's get acquainted with the main “symptoms” and what needs to be done in a particular situation.
The pump malfunctions and turns on/off frequently
Most likely the membrane has failed. To diagnose this malfunction, disconnect the hydraulic tank from the water supply system, and then start draining the liquid. If air escapes during this, it means that there is mechanical damage to the membrane. The problem can be solved by replacing the failed membrane with a new one.
The faucet is leaking intermittently or there is a leak behind the air valve.
Everything here is the same as in the previous two cases.
Water pressure is weak
In this case, there are two possible reasons: failure of the pump or incorrectly selected volume of the accumulator. In the first case, the problem is solved by installing a new pump, and in the second, by carrying out calculations and replacing the product with a more suitable one.
The system pressure is too low
Everything is simple here: either the nipple is broken, or there is simply no compressed air in the container. Therefore, to solve the problem it is necessary to replace the nipple or pump up the pressure to the required level.
Water is leaking from under the flange
The reason, apparently, is a violation of the tightness of the connections. You just need to tighten the fastenings or replace the worn element.
We also recommend that you familiarize yourself with some useful tips regarding hydraulic tank maintenance. They are listed below.
- Every month, inspect the device, check whether its operating parameters correspond to the standard (the latter is individual for each specific tank model).
- If the accumulator will not be used for some time, it must be kept in a dry place, taking care that it does not come into contact with any heating devices (otherwise the membrane material may dry out and collapse).
- Check to see if there are any rusty spots at the connections or on the body.
- Check the membrane to ensure its integrity approximately every six months.
- In addition, regularly check whether there are any wet surfaces or smudges on the connections.
- Finally, if you experience any device malfunctions or malfunctions, fix them immediately!
You are also probably wondering how to check the initial pressure inside the hydraulic tank? There is nothing complicated here - just follow the instructions.
Step one. First, disconnect the accumulator from the main line.
Step two. Drain all the water from it.
Step three. Next, connect a special device to the nipple - a pressure gauge.
Step four. If the pressure gauge readings are lower than those set by default, then, using, for example, a compressor for a car, pump up the pressure to the required value.
Stages of installing a new part
Replacement membrane for hydraulic accumulator
The problem of replacing a hydraulic accumulator membrane arises quite often. It’s good that this process is extremely simple; you can do it yourself, without the involvement of professionals. And the price of components is relatively low - from 200 rubles, depending on the volume.
You must first check the compliance of the new membrane with the volume and other parameters of the battery. If all indicators match, you need to disassemble the drive. Before replacing a worn-out bulb in a hydraulic accumulator, you need to relieve the pressure in it by shutting off the flow of water and draining the remainder, then disconnect it from the power supply.
To change the aperture, you need to proceed as follows:
- Loosen the flange mounting bolts and remove them.
- Remove the damaged part through the special hole at the bottom of the tank.
- Inspect the diaphragm and assess the extent of the damage - maybe it can be repaired.
- Clean the hydraulic tank itself from corrosion and plaque, and the flange from possible burrs.
- Take the holder and insert it into the hole that is on top of the diaphragm.
- Place the membrane in the hydraulic tank, and after screwing the bolt into the holder, insert it into the opening located in the bottom of the housing.
- Straighten the neck and tighten the flange, tightening the bolts from opposite sides.
After assembling the device in reverse order, pump air into the hydraulic tank. This will allow the device to function normally. Injection is carried out using a conventional pumping device through a spool located at the bottom of the body part.
Then there is a connection to the water supply and electrical networks and the operation of the equipment is checked. The water must be connected gradually so as not to provoke a rupture of the new diaphragm.
To ensure that problems with the membrane part arise as rarely as possible, you need to ensure comfortable operating conditions for the device. In particular, ensure that there are no pressure drops or temperature surges in the hydraulic tank, and regularly carry out preventive inspections. If the device is not in use, it should be stored in a dry place, away from heating devices, so that the diaphragm rubber does not dry out or crack.
The principle of operation of the membrane in a hydraulic accumulator
In fact, the replacement membrane for the accumulator is its most important part. Without it, it will be just a storage metal tank. The membrane is a rubber bulb made of rubber. Depending on the size of the tank itself, it may have different capacities, but this does not change the principle of its operation.
Membrane inside the hydraulic tank
It is inserted inside the tank and divides it into two parts:
- Air is pumped into one by a pump.
- The second is supplied with water from the plumbing system.
The air pressure in the tank is 1.5-2 atmospheres. Thanks to this, a constant operating pressure is maintained in the water supply.
In addition, the replaceable membrane for the hydraulic accumulator performs another important task - it protects the water supply from water hammer and protects the pump from being turned on too often. It happens this way:
- for example, the pump power is 3 m3h, and the tap consumes 0.6 m3h;
- it turns out that when the tap opens, the pump immediately turns on, however, since it supplies much more water than the tap needs, it immediately turns off. And as soon as the pressure in the system drops, the pump will turn on again. Thus, it will turn on and off every second - and this can lead to the device simply burning out;
- Thanks to the hydraulic accumulator, the pump will turn on only when the pressure in the membrane drops below the set value.
It turns out that this device occupies an important place in the water supply system. And it is advisable to know how to repair it yourself. Moreover, it is not so difficult.
Rubber cylinder ruptures when charging with nitrogen
Nitrogen is pumped into balloon accumulators instead of air. The nitrogen is compressed more strongly and the tank supplies water to the pipes under high pressure.
On newly repaired batteries with a rubber bulb, the case must be lubricated before precharging. When precharging begins, nitrogen is introduced slowly.
A rupture at the end of the cylinder may indicate a loss of elasticity in the material due to the cold nitrogen gas during precharge. High-pressure nitrogen, rapidly expanding and cold, straightens the folded bulb and concentrates at the bottom. When cooled, the rubber is brittle and may break in the form of an asterisk (a).
If the balloon is inflated under the poppet valve, (b), then the casing may receive a C-shaped cut from the poppet valve.
Too much precharge in the accumulator can cause the accumulator bulb to get caught in the poppet assembly when cycling between stages.
This causes fatigue failure of the spring and poppet assembly or pinching and cutting of the balloon if the bag gets stuck under the poppet when it is forced closed. Too high pre-charge pressure will cause the rubber bladder to collapse.
For batteries with a rubber bulb, precharging is not done too low. The membrane can be crushed in the upper part of the body, then squeezed into the gas valve and punctured. One such cycle is sufficient to rupture the rubber balloon.
Sincerely, Alexey Plotnikov - water well drilling engineer. My page is here.
Types of membranes and their characteristics
If you divide the membranes according to their purpose, then there are two types: for hot and cold water supply. Membranes for protecting water supply systems with cold media have the following characteristics:
- Material of manufacture: rubber.
- The permissible temperature of the working environment is from 0 to +70°C.
- The maximum permissible pressure is 7 atmospheres.
- The material is resistant to bacterial plaque.
Membrane for hydraulic accumulatorSource https://aquapure.ru
Membranes installed in hot water tanks have the following indicators:
- The material used to make the membrane has a special composition that can withstand high temperatures.
- The maximum permissible temperature in the working environment is from 0 to +100°C.
- Withstands operating pressure up to 5 atmospheres.
Along with the described characteristics, the membrane for cold water supply has a number of disadvantages:
- Poor resistance to frequent temperature fluctuations.
- When the permissible temperature is exceeded, it deforms and loses its strength characteristics.
- Operation in conditions exceeding the permissible maximum pressure threshold leads to wear of the membrane.
- Constant compression and inflation leads to rapid failure.
Operation of the membrane, even in the correct conditions, and in compliance with all standards and rules for servicing the device, does not guarantee complete safety of the rubber “bulb” for a long period. This may be affected by external factors or poor quality of the product provided by the accumulator manufacturer.
Operation of the water supply system in conditions exceeding permissible standards inevitably leads to rapid wear of the internal storage tank. As a rule, with a high level of frequency of use, the membrane lasts no more than 5 years, after which the bulb in the accumulator needs to be replaced. Therefore, it is recommended to carry out checks once a year to ensure the integrity of the internal drive.
Membranes can also be divided according to capacity. Modern production offers devices with a volume from 8 to 2000 liters. To operate the device at home, it is enough to choose a hydraulic accumulator of 24 or 80 liters.
Material
One of the main criteria when choosing the required membrane is the type of material from which the part is made. Due to the fact that the rubber element is in constant contact with water, the material from which the membrane is made must comply with all sanitary standards and requirements.
Modern manufacturers offer five types of material:
- natural rubber;
- artificial butyl rubber;
- artificial material EPDM;
- material for heating systems type SBR;
- Nitril type material for oil and flammable substances.
For systems with process water, it is possible to use membranes made of any type of material.
Characteristics
The technical characteristics and properties of membranes depend on the type of systems in which they will be used. Manufacturers produce membranes for heating and water supply systems.
Technical features of membranes for water supply systems:
- withstand pressure up to 7 bar;
- operated in a temperature range from 0 degrees to 70 degrees above zero;
- the base is natural rubber, which has high environmental performance and resistance to the formation of microorganisms;
- White color.
Characteristics and properties of membranes for heating systems:
- base – special rubber;
- has a wide temperature range from -10 degrees to +100 degrees;
- withstands pressure up to 8 bar;
- black color.
Peculiarities
To reduce energy consumption and eliminate pressure level fluctuations in modern pumps with hydraulic accumulators, manufacturers install a special separating element - a membrane.
The shape of the membrane part depends on the volume of the container and comes in two varieties:
- oblong;
- elongated.
The base is rubber or specialized rubber. The material for the manufacture of the membrane must comply with all hygiene standards and sanitary standards. Special rubber that is resistant to mold and mildew can withstand high pressure and a wide temperature range.
Manufacturers produce two types of membranes:
- flat;
- balloon
Different types of membranes perform the same functions and have no technical differences.
Device
The hydraulic accumulator membrane is an element that allows the hydraulic accumulator to be divided into an air section and a water section. An elastic membrane is placed in the tank body, forming two spaces that are independent of each other.
The balloon membrane device is filled with water, and in the cavity between its walls and the accumulator shell there is air pumped under high pressure. A flat membrane is attached to the walls of the battery, forming two isolated spaces.
With the help of alluvial systems, water is pumped into the device until the maximum pressure level is formed. Experts set the required level using a relay on the equipment body.
Principle of operation
The principle of operation of the accumulator is to supply water to the membrane by a pump. In the cavity between the walls of the membrane and the coating of the accumulator, the pressure necessary for the operation of the entire water supply system is created.
When the value set on the relay is reached, the pumping system automatically turns off, maintaining internal pressure. This allows you to avoid changes in water pressure and ensure stable operation of the system. After the pressure drops to a minimum level, the pumping unit will automatically begin drawing water and pumping air again.
Classification of membranes by design
In accordance with this classification, the product can be:
- flat;
- balloon
Let's look at each of the varieties in more detail.
Flat products
Each such membrane for a hydraulic accumulator is fixed inside the tank, dividing it, as we have already described above, into wet and dry zones. When the pumping equipment is turned on, water begins to be pumped in, causing the membrane to compress and create excessive pressure in the dry compartment. When this pressure reaches a certain level, the pump will be turned off, and the membrane, in turn, will begin to push the accumulated liquid into the pipeline. When the pressure drops to the minimum permissible value, the pumping equipment will turn on again and the cycle will repeat.
As we can see, electricity is really saved, as well as the resource of the pumping station itself.
Balloon type products
They are also a rubber container shaped like a can or pear. The principle of operation in this case is not anything complicated and looks something like this: first, the pump pumps liquid inside this cylinder, then, when excessive pressure forms between its walls and the walls of the accumulator, it will push water out into the water supply after the pump is turned off. .
Note! It is obvious that balloon products significantly reduce the negative impact of water hammer on the water main.
Malfunctions
Most often, hydraulic accumulators fail for the following reasons:
- too frequent starting/shutdown of the pump;
- valve leakage;
- water pressure at inlet/outlet is too low.
Before identifying the reason behind the weakening of pressure, it is necessary to determine what exact pressure should be in the station’s hydraulic tank.
In this case, problems may be as follows:
- incorrect pressure;
- damage or deformation of the membrane part or housing;
- relay failure.
You can deal with the difficulties that have arisen in the following ways:
- Injection of pressure in case of its decline;
- restoration of damaged membrane;
- restoration of damaged hull;
- differential adjustment based on pump mode.
How to determine that the membrane has become unusable
In general, manufacturers claim a service life of 5 years for these products. However, in practice, this rarely happens. After all, they really don’t like membranes:
- temperature rise above the set value;
- frequent pressure changes;
- intense compression.
In practice, it is rarely possible to avoid operating the hydraulic tank in hard mode, so the service life of the bulb is reduced to 3 years.
How to determine when it’s time to change the membrane in a hydraulic accumulator:
- the pump started to turn on too often;
- The water pressure does not maintain constant pressure.
These are clear signs of damage to the membrane, however, it may also indicate damage to the accumulator housing. Therefore, before disassembling the container, it is advisable to check the condition of the tank itself.
How to check membrane integrity
The service life of the membrane declared by the manufacturer is 6-8 years. However, in some cases, the rubber accumulator wears out much earlier.
Checking the integrity of the rubber bulbSource https://proraboff.rf
How to check the integrity and whether it is necessary to replace the membrane in the accumulator:
- When water is drained, air comes out with it. This is a clear sign indicating a violation of the integrity of the membrane and requires replacing the bulb in the accumulator. Proper operation of the accumulator does not involve mixing gas and water.
- When air is released, water oozes out of the nipple. Requires checking the rubber bulb. If it is intact, then the problem is in the nipple itself.
- There is a sharp change in temperature in the mixer.
- The pump turns on and off periodically.
- The condensation formed on the outer walls of the tank indicates that the inside is in contact with cold water.
When installing the device, it is recommended to choose a vertical position with the inlet hole down. The correct position will reduce the risk of suspended particles entering with unclean water, and will also extend the life of the membrane storage tank.
Correct position of the hydraulic accumulatorSource https://terman-s.ru
Prevention
To prevent a breakdown of the hydraulic accumulator from taking you by surprise, you need to carry out periodic maintenance. It's easy to do:
- once every 3-4 months the tank is inspected for damage;
- Once every six months, you need to check the operation of the pressure gauge, pressure switch, and also check the air pressure level in the tank.
In addition, all experts recommend replacing the membrane in the accumulator every three years. Naturally, subject to its constant and uninterrupted use.
The fact is that the average service life of these products rarely exceeds this figure. Therefore, it is better to replace it in advance - this way you can protect yourself in advance from a sudden breakdown.
Previous articles Next articles
Related Posts
- 25.03.2017.
What is a hydraulic accumulator and how it works
- 25.03.2017.
How to choose a hydraulic accumulator and not make a mistake
- 25.03.2017.
What affects wear?
The membrane is a consumable element of hydraulic accumulators, which breaks or becomes deformed during operation and requires constant and timely replacement. Manufacturers of this group of products provide a guarantee of up to 5 years for the uninterrupted operation of their products.
The rate of wear and tear of a part depends on several factors:
- pressure drops in the system;
- constant compression and straightening;
- continuous friction process;
- constant and sudden changes in temperature;
- increased level of pressure.
Optimal performance
In addition to the capacity, a suitable indicator of the pressure in the unfilled hydraulic tank is equally important. This value is usually marked on the body of each individual model. It will not be difficult to calculate which parameter will be ideal in a particular case. It is detected based on hydrostatic pressure, because it depends on the height to which the liquid must be raised. For example, if the height of pipes in a home reaches 10 m, then the pressure parameter will be 1 bar
In addition, it is very important to consider that the operating pressure of the hydraulic tank should not be more than the starting pressure of the pump
For example, to ensure a stable supply of fluid in a house with two floors, you will need a high-quality hydraulic tank with an operating power level of 1.5 bar and a top power level of up to 4.5 bar. In most cases, manufacturing companies create an air pressure in the accumulator of 1.5 bar. However, in certain cases the meanings may be different. That is why, before starting to use the unit, you need to check these values using a pressure gauge. This part is connected to the hydraulic accumulator nipple.
How to replace a hydraulic accumulator membrane with your own hands
We will show you step by step the process of replacing a faulty accumulator membrane. When our accumulator failed, the space between the membrane and the housing filled with water. The purpose of the lower flange is to hold the rubber membrane in the accumulator housing. When we unscrewed the flange, water flowed out of the housing.
Preparation
When a new membrane has been purchased, you need to prepare a set of keys and proceed to the repair. First, you need to drain the water from the container itself. For this:
- the water supply to the hydraulic accumulator is cut off;
- the air is vented from it;
- water is drained.
An important point is that if air comes out of the battery when water is drained, it means that the rubber bulb is damaged. The nipple also swings in the same way - if water comes out when bleeding air, this indicates a breakdown.
The fact is that the bulb divides the inside of the tank into two independent chambers. Therefore, mixing of water and air is excluded. If this happens, then the internal integrity is broken.
Repair stages
When the water from the tank is drained, you can proceed directly to the repair. Replacing the membrane in a hydraulic accumulator is done as follows:
- first, you need to remove the flange; to do this, unscrew the nuts holding it with a wrench;
- after this, the old membrane is taken out;
We take out the old membrane - it must be carefully examined and the place of damage must be found.
Firstly, this will make sure that it is torn, and secondly, you need to assess the extent of the damage. After all, if they are small, you can try to vulcanize it; Checking where the membrane has broken - Now it is advisable to inspect the inside of the tank - most likely there will be dirt and rust in it. Therefore, it needs to be cleaned well;
- after this, you need to carefully inspect the flange - there should be no damage or burrs on it. If there are any peelings, they are smoothed out with sandpaper. The same applies to the seat - it needs to be thoroughly cleaned;
- now you need to take a new membrane, straighten it and insert it in place of the old one;
- after that, it is covered with a flange and it is tightened with nuts.
This completes the replacement process. Now, you need to do a test run of the hydraulic accumulator. To do this, it is connected back to the water supply. But at the beginning, you need to pump air into it to operating pressure, which is 1.5-2 atmospheres.
And then the water supply is turned on. At the same time, you should not open the supply valve to full capacity. This can lead to rupture of the membrane, therefore, water is added gradually.
Thus, changing the membrane with your own hands is quite simple. And this can be dealt with without any problems without involving specialists. Moreover, the cost of replacement in a specialized center can be quite high.
Dismantling
Equipment dismantling is carried out in several stages:
- disconnecting the hydraulic accumulator from the general water supply system;
- reduce air pressure using a special device located on the upper surface of the container;
- disconnect the hose and cover;
- drain all remaining water from the equipment;
- remove the cover from the pressure gauge;
- remove the membrane through a special hole in the lower part of the body;
- check the integrity of the container, remove any remaining dirt and rust;
- wash and dry the container.
Installation
Installation of the membrane is carried out in compliance with certain rules:
- insert the holder into the hole on top of the membrane;
- install the bolt into the hole in the holder;
- place the membrane in the housing and secure it with a special nut;
- install the membrane flange;
- check the hydraulic accumulator for possible leaks;
- connect the device to the general water supply system.
Preparation
Replacing a hydraulic accumulator membrane begins, first of all, with purchasing a new one. It is recommended to purchase high-quality products manufactured by leading European brands, rather than cheaper Chinese analogues, which, even with careful use of the storage device, break down extremely quickly.
Then you should prepare the expansion tank:
- Shut off the water supply;
- Vent the air;
- Drain off any remaining liquid.
If, during bleeding of air or draining water from the bulb or nipple, liquid is released, then replacing the accumulator membrane is an extremely necessary procedure that requires immediate implementation.
Repairing the diaphragm
Repair of the accumulator membrane is possible if the damage is minor. This is especially true in units with non-removable diaphragms. After all, if a rubber part wears out, the entire device will have to be replaced.
A very tiny crack is sealed using a rubber adhesive.
You can repair the part yourself using a vulcanizer for bicycle or car inner tubes. A similar problem is addressed to the tire shop. Before installing the repaired diaphragm, you need to carefully check the internal surface of the drive. Protrusions and burrs are not allowed.
Repair work will extend the life of the membrane, but not for long, on average by six months. After that you will still have to buy a new one.
How much will a replacement cost?
As noted earlier, the membrane is the element of the equipment described in the article that breaks most often. And it’s not surprising, because it constantly stretches and contracts. As for the specific cost of replacement, it depends, first of all, on the manufacturer, the type of membrane and the hydraulic tank itself.
If you continuously use the plumbing system, we recommend that you give preference to a more expensive membrane that can withstand a large number of operating cycles. Also note that an imported membrane will cost about the same as half of a new hydraulic tank. But the service life of such a product is several times longer than that of cheaper options.
What about a hydraulic tank without a membrane?
In addition to standard industrially produced hydraulic accumulators, there is another alternative option - to make such a device yourself. In fact, a hydraulic tank without a membrane will be a simple reservoir for water, since it was it (the membrane) that was “engaged” in maintaining pressure in the plumbing system. However, it is much easier to purchase a ready-made hydraulic tank - even the most inexpensive one.
To make such a hydraulic tank yourself, you will need the following equipment and materials:
- fitting;
- container with a volume of at least 30 liters;
- nipple;
- ball valve;
- gaskets made of rubber;
- 1/2 inch tap;
- sealant for sealing;
- nuts and washers for fasteners.
After preparing everything you need, you can proceed directly to the work process. The latter is not complicated, and the algorithm for the necessary actions is presented below.
Step one. First, make holes in the tank - in several places (on the side, on the bottom or lid).
Step two. In the hole located on the lid, install a 1/2-inch tap, be sure to use sealant and rubber gaskets to seal the connection, and at the end securely secure it with washers.
Step three. Place a tee on this faucet.
Step four. Take a 3/4 stopcock with a tee fitted and install it in the bottom hole.
Step five. There is only a hole left on the side - install the ball valve here.
Note! Once again, we note that all connections should be treated with sealant for more reliable fixation.
As a result, we emphasize once again that if the hydraulic tank is faulty, the plumbing system will not be able to function normally. And the cause of the malfunction is, as a rule, the membrane for the accumulator. But if you follow our tips and instructions, you can easily fix any problem that arises!
Do not forget about timely prevention - it will help extend the service life of the hydraulic tank and the pipeline itself!
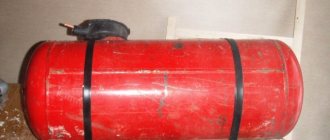
Self-production of a hydraulic accumulator
To save money, you can make a hydraulic accumulator yourself. In general, all materials are available, and the manufacturing process is not too complicated. However, at the very beginning, you need to decide on the future design of the device. And the easiest way would be to make a hydraulic accumulator without a membrane - this simple design is quite functional.
Preparation
First of all, you will need to prepare all the necessary materials:
- the most important part is the capacity. You can take a steel, aluminum or plastic tank. The volume should be within 100 liters. However, you should not take a tank that is too small; if its volume is less than 30 liters, it will be ineffective;
Plastic tankBalloon
- gaskets, you can simply prepare a piece of rubber and cut them in place;
- pressure gauge;
- sealant;
- tee and five-piece for connecting the tank to the water supply system;
- taps;
- pressure switch;
- nipple for air injection.
Blood pressure problems
This problem can be caused by a number of reasons:
- damage to the nipple - air escapes through it;
- incorrect setting of the pressure switch;
- damage to the tank body.
Sequence of actions for repair:
- First, you should check the integrity of the housing itself - if it is rotten, then the hydraulic accumulator may need to be replaced;
- If everything is in order with the housing, it is worth checking the operation of the pressure switch. It is quite possible that his settings have gone wrong;
- for this, it is worth trying different operating modes for the hydraulic tank - if the relay works, then you need to look for the cause elsewhere;
- Now you need to check the nipple - it may be bleeding air, if so, then the repair will come down to replacing it.
The pressure gauge may show incorrect values
Another reason is a malfunction of the pressure gauge. Those. it may show incorrect numbers. This point is also worth considering.
Tank installation
In general, there is nothing complicated here, but when installing it, you need to take into account some nuances:
- the container must be well attached to the base. To do this, it is best to fix it with an anchor. This is necessary because the tank will vibrate during operation;
- connection to the water supply is best done through flexible hoses;
- the battery itself should be located in such a way that it is easy to maintain;
- Do not allow the electrical cable to touch the metal surface of the battery - if it breaks down, a short circuit may occur.
Installation example
Connection diagram in the general water supply system
Making a hydraulic accumulator on your own should not be particularly difficult. The main thing is to follow the basic rules - monitor the tightness of the connections and carefully connect the pressure switch. Moreover, all the work will take little time - if you don’t rush, you can get it done in one day.

