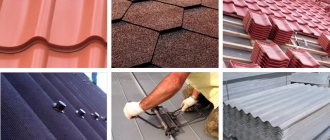
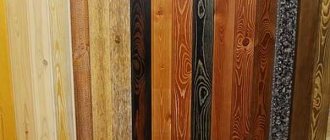
Metal tiles are sheet roofing materials with profiling made using the cold pressure method. Metal tiles are used not only in the construction of roofing, but also in the production of safes and secure entrance doors. What are its advantages and what types does it come in?
Classification by zinc coating
The zinc coating is the first protective layer applied to the surface of metal tile sheets.
It is capable of protecting the material from corrosion no worse than the top polymer layer, works in tandem with it and has great capabilities. There are three classes of galvanizing:
- III class . 80-140 g/m2 of zinc is applied to the metal surface. The layer is relatively thin, ensures operation for 5-10 years
- II class . The weight of the zinc coating increases to 140-180 g/m2. The service life of the material increases to 25 years. Metal tiles of this class are the most popular due to the optimal combination of performance and price
- I class . It has the thickest layer of zinc, the weight of which is 180-275 g/m2. Provides the longest service life (up to 50 years). Recommended for regions with aggressive atmospheric influences - coastal areas, megacities or industrial cities with a high content of smog or other chemical compounds in the atmosphere
When purchasing material, you should check the availability of a certificate , since visually the compliance of the declared and actual galvanizing class cannot be determined. The abundance of low-quality and uncertified roofing material forces us to take protective measures.
Classification by coating
The need to apply an additional polymer layer is due not only to the desire to diversify the color range of the material and give it greater decorative value, but also to the desire
to protect the zinc layer from oxidation . He is also subject to this process, although to a lesser extent. There are several types of coatings, differing in chemical composition:
Polyester
Sheets of metal tiles with a polyester protective layer are most often found on counters. This is one of the types of polyester coating that has a successful combination of performance qualities .
Polyester is resistant to temperature changes, withstands heating up to 120°C, and weakly reacts to UV rays. Special additives are added to polyester paints to increase abrasion resistance.
The disadvantages of polyester include instability to alkaline components , which may be present in rainwater in some regions. In addition, the coating has the ability to accumulate a static charge, which leads to an increase in stress between the base and the coating, creating opportunities for corrosion. This accelerates the peeling of the coating, reducing the service life of the material.
Polyurethane
A coating with increased resistance to mechanical loads . In addition, the polyurethane protective layer does not react to solvents, UV radiation or temperature. It consists of two components - a base and a hardener, which are mixed immediately before application.
The main advantage of the polyurethane protective layer is its elasticity, which compensates for thermal expansion and does not allow the material to peel off when vibration occurs. With such advantages, polyurethane-coated material is predominantly in the middle price range , which increases its popularity.
Plastisol
Polyvinyl chloride (PVC) based coating. It is distinguished by its large thickness, which contributes to high resistance to external loads and temperature influences.
The main advantage of plastisol is the ability to restore the monolithic structure of the layer when microcracks appear . Due to the large thickness, it becomes possible to apply a relief that follows the surface of leather or other materials. There are various forms of coating implementation - matte, glossy, embossed, etc.
PVDF coating
The material consists of 70% polyvinylidene fluoride and 30% acrylic. The coating can successfully withstand all external influences , both atmospheric and mechanical. Does not react to moisture, resistant to repeated freezing and thawing.
It is highly resistant to chemicals - sea salt, acidic or alkaline components, atmospheric aggressive substances and smog. Can withstand heating up to 120°C and exposure to ultraviolet radiation. The disadvantages include weak adhesion to the metal base - the material is applied to an intermediate layer of primer.
Tools
For work you will need: a screwdriver with a bat for a roofing screw, a cutting tool, a special strip to maintain the same distance between the sheathing, a tape measure, a tapping cord, a marker, sealant, and a hammer.
Professionals do not recommend using a grinder for cutting sheets, as it will burn the edges of the cut and may leave traces of hot scale on the surface. This will subsequently lead to metal corrosion.
Types by size and metal thickness
The thickness of the metal is in the range of 0.4-0.6 mm. The thicker the base metal, the longer the service life, the harder and stronger the material. The lack of movement extends the life of the polymer coating, which is not subject to vibration loads or the threat of peeling.
The width of the sheets is standardized for most types of material and is 1180 mm . The length of the sheets has a lot of options ranging from 1.5-6.5 m .
In terms of corrosion protection, the leader is KS D 377 steel with an aluminum-zinc protective layer weighing 50 g/m2.
Despite this seemingly thin and ineffective coating, the material has a very long guaranteed service life and is able to resist corrosion processes much stronger than conventional types of galvanizing. When choosing a material, you should pay attention to the grade of base steel. If the documents indicate steel KS D 377, then the metal tiles are of high quality.
Profile geometry and insole depth
The metal tile profile is primarily a decorative element. The mechanical properties of sheets are affected by the very presence of relief, in particular by the presence of longitudinal and transverse stamping, which increases rigidity in all directions.
The aesthetic component of roofing is no less important, and manufacturers, realizing this, are constantly providing new types of relief. Let's take a closer look at them:
Monterrey
Monterrey is
the most popular type of metal tile relief among users .
It is very close to the shape of natural (piece) tiles, so the covering sheet with the Monterrey profile looks natural and attractive. There are profile options with symmetrical and asymmetrical waves. Cascade
The Cascade profile occupies a special place among the types of metal tiles due to its clear and strict shape.
It has strict straight lines and resembles a chocolate bar .
The roofing sheet looks very attractive and unique. The advantages of the profile include the large width of the installation site, which increases the possibility of economical cutting. Convenient for designing complex roof structures. Modern
Modern is
an offshoot of the Monterrey waveform .
It is distinguished by sharper breaks in the edges of the sheet. Otherwise, the profile is close to the main relief options of classic varieties of metal tiles, and has standard sheet sizes and mounting areas. There are many types of metal tile profiles and new options are constantly appearing.
There is no point in listing them completely, since they have no fundamental differences and are variants of the same relief.
The sequence of installation of the rafter system for metal tiles and roofing
If the rafter system will be installed on a newly built house, and the floor beams have not yet been laid, then before starting work, for the convenience and safety of their implementation, it is necessary to arrange a temporary flooring from boards.
The sequence of installation of the rafter system for metal tiles may vary slightly, but always consists of the following main steps.
| Illustration | Brief description of the operation performed |
| The first step is to lay waterproofing material on the wall of the building. Usually, for this purpose, roofing material is selected, which is fixed to mastic or simply laid “dry”. Waterproofing can only be installed on brick or stone walls; it cannot be installed on wooden walls. | |
| The Mauerlat can be attached to the wall in two ways. In the first option - on a threaded rod embedded in a reinforcing concrete belt running along the top of the wall. In this case, the waterproofing and Mauerlat are placed on top of it. To do this, holes are drilled in the timber with a diameter exceeding the diameter of the stud by 2÷2.5 mm. | |
| Another option is to fasten it with expansion anchor bolts. A hole of the required diameter is drilled under them - directly through the Mauerlat beam into the concrete strapping belt. After installation, the anchors are tightened, which ensures reliable fixation of the Mauerlat to the wall. | |
| On top of the Mauerlat, after it is secured, the ends of the studs or anchor bolts may remain protruding. So that they do not interfere with the further installation of the rafter legs, it is recommended to cut them off using a grinder. The next step is to make markings on the Mauerlat, along which the rafter legs will be inserted. | |
| On rafters prepared along the length, cuts are made that go deeper into the board by no more than ⅓ of its width. With this cutout, the rafter leg should fit tightly onto the outer edge of the Mauerlat. | |
| If you plan to rigidly fasten the rafter legs to the mauerlat, then according to the markings, you can screw two metal corners onto the beam, between which the rafter will be fixed using self-tapping screws or a through bolt. However, the final fastening process should be carried out after the pair is connected at the ridge part. | |
| Instead of rigidly fixing corners, a sliding fastening can be used to fix the rafters to the mauerlat, which will preserve the roof structure from deformation when the walls of the house shrink, since the rafters will be able to shift, compensating for these vibrations. This approach is most often used if the walls are a wooden frame, which at first gives a strong shrinkage. | |
| The next step is to try on a pair of rafters, adjust them and secure them in the ridge part using one of the methods described above. They can be fastened after installation on the Mauerlat or on the ground, and then lifted and installed in the intended place for them. Usually, the outer pairs bordering the gables are first installed, and then a cord is pulled between them, which will mark the line for the remaining rafter pairs. | |
| After all the rafter pairs have been exposed and temporarily fixed on the Mauerlat in the lower part, they must be rigidly fastened with a ridge purlin, which is mounted under the connected rafters. Each of the rafter legs (pairs) is secured to the purlin on both sides with metal corners. | |
| After achieving the required rigidity of the upper part of the system, the rafter legs are firmly fixed to the Mauerlat. Then, in the lower part of the structure, ties are installed on each of the rafter pairs. After this, the middle is determined on them, to which the stand supporting the skate will be fixed. Struts are fixed on both sides of the rack - they will also give these unique trusses the necessary strength and stability. | |
| Assembled trusses can be made on the ground, and then, ready-made, raised to a height and installed according to the markings. But in this case, you cannot cope with the work alone, so several assistants will be needed. Finished trusses must have sufficient rigidity so that they do not deform when lifted onto the walls. Therefore, they are reliably reinforced with racks, headstock and slopes. Each of the trusses, after being raised to a height, is exposed and temporarily secured to the Mauerlat with a support board. After tying the trusses with longitudinal girders, these supports can be removed. | |
| The next step is to lengthen the rafters with fillets that will form an overhang (unless, of course, the eaves overhang was previously laid out in the length of the rafter legs). | |
| Next, a waterproofing membrane is laid on the rafter system. If it is purchased in a roll version, then its flooring starts from the eaves, with longitudinal horizontal stripes. Each subsequent upper sheet is laid on the lower one, ensuring an overlap of 100÷150 mm. The material is fixed to the rafters using a stapler and staples. If a diffuse membrane is used, it is necessary to ensure that its position is correct - the side with the markings should face the street. On top of the waterproofing, also to the rafter legs, counter-lattice slats are screwed with self-tapping screws, which press the membrane and also set the necessary ventilation gap above it. | |
| The next step is to design the roof overhang. To do this, a wind board is attached to the end sides of the rafters. On top of it, on the rafters and counter-lattice, the first batten of the sheathing is mounted. | |
| On the first board of the sheathing, at a distance of 1000 mm from each other, or under it on the rafter legs, holders for the gutter are immediately attached. Then it is recommended to install a wind-resistant metal strip on the first board of the sheathing, which will protect the wood from moisture getting on it. | |
| Then, a line is cut on the wall along which the beam is fixed. Sheathing material is attached to it and to the lower end of the wind board. At the same time, do not forget to leave gaps for ventilation or install perforated soffits into the continuous cladding. | |
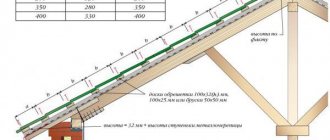
| Next, the sheathing boards are secured to the counter-lattice. Diagrams usually indicate the distance between the centers of adjacent boards. Here you need to pay attention to the fact that the distance between the eaves board of the sheathing and the next one is slightly less (25-30%) than between those that are fixed above. To make the work easier, you can make calibration slats of the required length, taking into account the pitch and width of the sheathing board - this way things will go much faster. The slats are laid on the rafters on both sides of the sheathing board, the board is installed on it - and you can immediately begin fastening it with self-tapping screws (nails). | |
| The next step is laying and fastening the metal tiles. The work can be carried out in two ways, depending on the size of the sheets of material. If the sheets are small in height and must be laid in several rows, then they are installed from the eaves. First, the sheets of the first row are laid overlapping on one wave and secured. Then, overlapping the set width, depending on the tiled relief, a second row of material is mounted on the bottom row of sheets. Moreover, the installation of each row is carried out on the same side of the slope. This is how all rows of metal tiles are installed up to the ridge. It should be taken into account that on the ridge there should be a gap between two covered slopes of 50÷70 mm in size - it is necessary for ventilation of the roofing “pie”. | |
| If sheets of metal tiles cover the slope along the entire length from the ridge to the eaves, then installation will be much easier. The first sheet of material is laid and aligned along the edge of the slope, then secured. The next sheet is mounted overlapping the first one by one wave - and this is how the rest of the covering is installed. In this case, a gap is also left on the ridge for ventilation. | |
| On the end side of the slopes, upon completion of the installation of metal tiles, wind strips are fixed. They are laid overlapping the roofing material by 100÷120 mm. | |
| The final stage of work is the installation of the ridge element, on the inner edges of which an air-permeable seal is attached. Other ridge elements can be used, but the main thing is to ensure free ventilation of the under-roof space. | |
| All metal elements are secured to the sheathing using special self-tapping screws that have a rubber O-ring under the press washer. Similar self-tapping screws with a hexagonal head for 10 are produced in various colors, so it will not be difficult to match them to the selected shade of metal tiles. | |
| After the roofing material is secured, you can, without fear of rain and without rushing, proceed to the installation of insulating material. Most often, mineral wool is used for the attic space; basalt wool is best, as it is the least hygroscopic. The mats are laid between the rafters, and the thickness of the insulation should be the same size as the height of the rafter beams or 5–8 mm less. If necessary (based on the results of calculations), two-layer insulation can be used. In this case, after laying the first layer of thermal insulation, the sheathing is mounted perpendicular to the rafters, between the guides of which the second layer is already laid. | |
| A vapor barrier membrane is fixed on top of the insulation, starting from the floor and gradually rising upward. If the vapor barrier material is purchased in rolls, then it is overlapped by 150÷200 mm. All joints must be sealed with special waterproof tape so as not to leave any loopholes for moisture to penetrate from the inside. | |
| Next, the vapor barrier is fixed with slats, which are fixed to the rafters. The lining of the attic space is subsequently mounted on these counter-battens - this can be plastic or wooden lining, sheets of plasterboard or plywood (OSB). If you plan to install the sheathing material vertically, then install a horizontal sheathing on top of the already secured counter-battens. In a word, the guide battens must be perpendicular to the direction of the finishing material - different options are possible, depending on the number of layers of insulation material and the final orientation of the guide elements. But in any case, a gap of at least 10÷15 mm is left between the vapor barrier film and the finishing. |
To summarize the publication, we can summarize that the construction of a rafter system is a very difficult process, both in calculations and in practical installation. Therefore, if you have the slightest doubt about your own capabilities, it is better to entrust it to specialists with extensive experience in this work. Only in this case will the roof be strong and reliable.
In conclusion, here is an interesting video about the installation of a gable rafter system specifically for metal tiles.
Types of front surface dyes
The use of different dyes allows you to expand the range of metal tiles and provide a lot of options for decorative roofing in accordance with the tastes and preferences of users. Let's consider the most noticeable and popular of them:
Shiny and matte polyester
The coating is designated by the letters PE or MPE (matte polyester). The most common option, inexpensive and not very thick, is 25 microns. The matte version is thicker - 35 microns. This is achieved through matting additives, mainly Teflon. There are many color options, but the coating is unstable, fades quickly and is not used for finishing the roofs of prestigious houses.
Pural
Polyurethane dye is able to maintain its working qualities in the temperature range from -60°C to +100°C. The coating layer has a thickness of 50 microns and can last up to 30 years. It is highly resistant to atmospheric influences . The cost of coating is slightly higher than that of polyester.
Purex
A specialized coating developed by Finnish chemists. Designed for use in northern conditions , low temperatures and low levels of ultraviolet radiation. It has high ductility even at the lowest temperatures, which makes the paint resistant to temperature deformation. The service life declared by the manufacturers is 50 years.
Kami TerraPLEGEL
Composite coating consisting of a double layer of polymer coating and an outer layer of quartz sand . The material has the highest cost and confidently leads among alternative options in all respects - resistance to atmospheric agents, temperature and chemical influences. A layer of sand on the surface helps to increase the soundproofing properties of the coating, since raindrops break on grains of sand and do not emit as much sound as when they hit a smooth surface.
Plastisol
Thick (up to 200 microns) PVC film . Allows you to create a relief coating that imitates the texture of various natural materials - leather, stone, tree bark and has a good set of working qualities and can withstand significant loads. High plasticity allows you to tighten cracks that arise from temperature changes.
There are many more types of protective coating. Manufacturers from all countries are constantly increasing their number and quality, presenting users with new options for the surface of metal tiles.
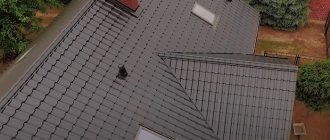
How to choose the right tiles?
When choosing metal tiles, it is important to pay attention not to the cost of the material, but to important criteria and the degree to which they meet your requirements. Let's consider the main parameters of the roof:
- Color. In this regard, the choice is completely subjective. If the shade does not play a big role for you, choose among four universal colors: brown, graphite, green and chocolate. Practice shows that these shades look organic with any façade. If you want to experiment with designs, there are dozens of different tones available.
- Coating. Can be matte or glossy. The difference between these options lies not only in how the roof will look, but also in its performance properties. Thus, matte metal tiles are generally more durable and resistant to negative external factors due to the additional layer of protective coating.
- Profile. Unlike the previous parameter, the type of profile does not affect the properties of the roof. It determines the appearance of the roof, as well as how easy it will be to install. The fact is that complex profiles may require additional cutting of sheets during installation. This not only stretches the installation, but also increases the consumption of metal tiles.
- Thickness. For houses located in a temperate climate, it is recommended to buy sheets with a thickness of 0.45 to 0.55 mm. If the building is located in a region with a harsh climate, it is better not to save money and buy even thicker metal tiles. This is especially important if the area where the house is located often experiences hail, heavy rain and snowfall.
What you definitely shouldn’t do is openly skimp on metal tiles. This will ultimately lead to the need for roof replacement within a few years of the roof being installed.
Recommendations for choosing metal tiles
When choosing a material, the average user first of all considers its decorative qualities. This is an important factor, but we should not forget about the technical characteristics of the material , since they can say a lot about the upcoming service life and preservation of appearance.
It is necessary to pay attention to the following indicators:
- thickness of the zinc layer . The minimum thickness is 80 g/m2, the maximum is 275/m2. The greater the thickness of the layer, the more reliable the protection of the metal from corrosion.
- type of coverage . The most common option is polyester, but its qualities are somewhat inferior to other types
- metal thickness . The larger it is, the more resistant the metal tile is to mechanical stress, for example, during installation or repair work.
- manufacturer . A well-known and reputable company cares about the quality of its products, guarantees quality and durability, which cannot be said about unknown manufacturers of roofing materials
- guarantee period . Its value indirectly indicates the properties and quality of the material
If in doubt, you should consult the seller and ask for product certificates. If there is no certificate, you should look for other stores.
Comparison with other materials
Despite the variety of hard and soft roofing materials, metal tiles still remain an extremely popular option. This is due to a number of its advantages over competitors. So, compared to soft bitumen roofing, metal tiles are more durable and resistant to negative environmental factors, fireproof, and most importantly - much cheaper.
Metal tiles outperform Euroslate (aka ondulin) in terms of service life by an average of 10 years. It retains its shade longer, and the color range is much more varied than that of ondulin.
Metal tiles are superior to a number of solid roofing materials, among which is its prototype - ceramic tiles. Metal is superior to ceramics in strength, durability, ease of installation, unpretentiousness to operating conditions, and cost.
Life time
Most manufacturers set fairly long service life for their products - 25, 30 or even 50 years . No one can confirm the long deadlines yet, but practice shows a noticeable discrepancy with the declared and real indicators. The reasons for this are considered to be difficult climatic conditions, installation or operation errors, and the purchase of counterfeit material.
To increase the service life of the material, you must initially purchase a high-quality coating and follow all manufacturer recommendations regarding installation technology. This will help maximize the service life of metal tiles.
Roofing work
Installation of metal tiles must be carried out following general rules, the main ones are presented below:
- Installation begins from the roof ridge. The position of the first sheet is checked - it should protrude relative to the cornice at a distance of about 5 cm;
- Each subsequent sheet is mounted on top of the previous one;
- After installing three sheets, check for parallelism to the cornice;
These are just the most general points; naturally, before making a roof, you will have to fully study the relevant literature or contact specialists.
Noise insulation
One of the generally accepted disadvantages of a metal roof (not only metal tiles, but also corrugated or corrugated sheets) is loud noise during rain . The problem can only be solved by installing a heat insulator, which at the same time serves as a sound insulator.
There are no other solutions to the problem. The best option, although the most expensive, is to use liquid polyurethane foam , which is applied directly to the roof from the inside (attic) side. The use of conventional materials is somewhat worse in terms of sound insulation, but is quite acceptable.
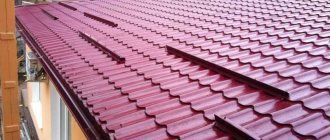
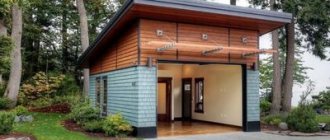
Half hip roofs
The spectacular half-hipped roof made of emerald green metal tiles combines beautifully with the creamy pink plaster on the facades of the house.
Metal roofing with a bronze finish is an exclusive roofing option for a country estate.
Photo: iix32.ru
If the walls of a country house are painted beige, then a roof of a darker, brown tone will look most advantageous.
A neutral gray metal roof is the best choice for homes built with terracotta and red bricks.
Manufacturers in the Moscow region
The Moscow region has quite a few production organizations engaged in the production of metal tiles. In this matter, the regional affiliation of the material is not very important; the technology and materials used in manufacturing are much more important. Modern equipment allows you to obtain a high-quality product regardless of where it is installed.
The products of craftsmen from the Moscow region have stable parameters and are widely in demand on the market due to their balanced cost and quality. We work with M28 UNIKMA metal tiles and are certified specialists and winners of the UNIKMA 2018 roofers tournament.
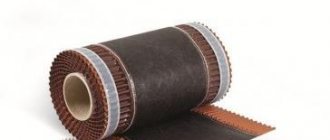
Installation of the valley
The planks are fastened with an overlap of 20-40 cm. In this case, it is necessary to move from the cornice to the ridge. The end of the lower cornice strip is formed under the side. Near the ridge, a seal is made on the last strip.
Sheets of metal tiles suitable for the valley are cut approximately 7 cm from the axis of the laid plank. The valley itself is fixed with self-tapping screws, the cut edge of the metal tile is attached at the points of contact with the strip.
It is possible to decorate the edges of the cut metal tile sheet using special overlays. The latter are laid starting from the bottom of the roof, the overlap should be approximately 10 cm. The overlays prevent snow from blowing under the sheet cuts and make it easier for water to roll into the valley.