A remote heating control system allows you to control air parameters in a house or other facility from a distance. Remote temperature monitoring and the ability to change it will be suitable for owners of country houses and dachas, where it is necessary to maintain the temperature even in winter, even if no one lives there. This significantly increases the service life of furniture, wallpaper, household appliances (no high air humidity, etc.)
Having remote control of room temperature allows you to:
- Prevent the temperature from dropping below zero in the event of a breakdown of heating equipment - the property owner will learn about the emergency situation, so he will take action.
- Save energy resources by maintaining the lowest possible air parameters and warming the house only when the owners arrive. Savings reach 50%!
- Save the resource of expensive heating equipment by operating it most of the time in a gentle mode.
Types of remote heating control systems
There are two types of remote monitoring systems for heating an object, differing in the method of transmitting information and commands:
- via the Internet;
- via GSM.
Let's look at these types in more detail.
Control via GSM
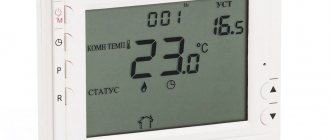
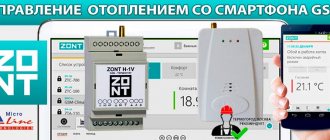
This is the simplest type of remote control of a heating system. Its main element is the GSM thermostat (also called the GSM module). Essentially, it is a computer that provides:
- Maintaining the values of indoor air parameters programmed into its memory, depending on the day of the week and the current time.
- Transmitting information about the temperature and breakdowns of the heating system via SMS messages or calls to the user’s phone.
- Reception of SMS commands to change the heating operating mode and their execution.
A GSM thermostat has a controller that actually controls the heating equipment with connectors for connecting temperature sensors in rooms and outside the house and a boiler to it (usually the portable sensors themselves are included in the delivery of the thermostat) and one or more slots for SIM cards. Expensive models have a socket for connecting an Internet cable to the thermostat to expand the capabilities of the system. For example, organize dispatching, connect additional heating devices. To strengthen the signal, the thermostat also has a GSM antenna.
Remote control of the temperature of a country house via GSM is a common type of remote heating control. Its advantage is its affordable price and operation without wired Internet in the house.
Flaws:
- limited functionality;
- You need to pay for mobile phone service.
Internet control
The standard system configuration is as follows:
- an Internet gateway that connects to your home router;
- thermostat with programmer;
- radio control unit for the boiler.
The owner of a country house (dacha, etc.) uses a thermostat with a programmer to set the heating operating mode for the week. The same thermostat, via a Wi-Fi network, transmits information about the current temperature through a router to an Internet gateway, which sends it via WIRED Internet to a computer (tablet, smartphone) to the home owner. He can use commands (installation of software is required) to adjust the set operating mode of the thermostat, which controls the boiler through its radio unit.
In the extended version, you can control the operation of several heating devices via the Internet - boiler, radiators, “Heated floor” system, etc. To do this, it is necessary to install the appropriate radio units on this equipment. To work, you need to install a special application on your PC, tablet or smartphone.
The advantage of such a system is the widest possible functionality:
- control several heating devices;
- provide individual parameters for each room;
- providing complete information about heating operation;
- convenient reporting;
- dispatching capability.
Minus two:
- Technical - wired Internet is required, which in many cases is problematic for country cottages and houses. You also need a router.
- Financial – the system is more expensive than the control option via GSM.
DIY sensor
See the following video for an assembly example:
You can assemble the device discussed in our article yourself. For example, it is not difficult to make a Wi-Fi temperature sensor by connecting a wireless module labeled ESP8266 and a DS18B20 temperature sensor.
Of course, you will have to tinker with a soldering iron and purchase other circuit components, such as a 4.7 kOhm resistor, LED indicators, wires and a USB-UART-TTL adapter. But, in general, there is nothing particularly complicated in this design. The scheme is reminiscent of those that children assemble in amateur radio clubs and schools of pioneer houses.
So, the model in question is programmed and configured on the basis of the popular Arduino hardware and software platform, the best in the design class today. On Internet sites there are many instructions for creating fully functional electronic crafts.
We have provided this information solely to encourage you on the path of technical creativity!
Weather-compensated heating control
Regardless of how remote temperature control at the dacha is organized - using the Internet or GSM, in both cases it is possible to organize weather-dependent control. This implies the formation of commands depending on the parameters of the external environment. To do this, install an external thermometer (sensor) connected to a GSM thermostat or a thermostat connected to the Internet.
Taking into account external factors saves energy resources for heating. The principle of saving is simple. The smaller the temperature difference between outside and inside the room, the less water in the heating circuit needs to be heated.
Temperature measurement
An LM35 sensor was used to measure the temperature.
The sensor produces a voltage proportional to degrees Celsius, 10 mV/ºC. Simple and convenient. The sensor supply voltage is from 4 to 30 V. If you turn on the internal reference voltage source of 1.1 V in Arduino (for this you need to enter analogReference(INTERNAL); in setup()), then degrees Celsius can be calculated using a simple formula: DEGREES CELCIUS = READ VALUE x 0.107. The read value is the one we get from the analogRead() function: val = analogRead(analogPin);
English discussions on the topic LM35 and Arduino: https://playground.arduino.cc/Main/LM35HigherResolution
At the beginning of testing, the temperature sensor was placed on long legs above the Arduino board and showed 28 - 29 ° C at an ambient temperature of 25 ° C. I already started to panic that I had done something wrong, but as soon as the sensor was moved away from the board, the readings began to correspond to reality. By the way, as it turned out, the air temperature near the floor is 1.5 - 2 degrees lower than on the table.
How to choose a GSM module
The main component of any remote heating control system is a thermostat or GSM module. There are a large number of models on the market with different prices depending on functionality and brand.
For an inexpensive option, choose models that have standard functions, which we wrote about above. More expensive GSM modules allow you to program the heating operating mode for a week.
Consider the number of connectors for connecting sensors. Their number ranges from two to ten.
The most expensive models have a connector for connecting an Internet cable, as well as additional sensors - motion, smoke, etc. That is, the system also has security functions.
Receiving SMS messages
To receive SMS in text mode we need:
- AT+CMGF=1\r – enable text mode if there is any doubt that it is enabled.
- Decide whether we need to save SMS on the SIM card or in the module’s memory, or whether it’s enough to simply send them to the UART. There is an AT+CNMI command for this. Since we did not want to save the SMS in memory, we used this command with the following parameters: AT+CNMI=3,2,2,0,1\r
When a received SMS is sent to the UART in text mode, it consists of two lines:
- +CMT: “70123456789”\r\n – the first line contains the sender’s number
- Text of the message\r\n – in the second – the text of the message.
First, we look at what number the message came from, then what exactly came. Comfortable.
What else can you do?
- you can program, for example, sending messages when there is an abnormal increase or decrease in temperature or a suspicious rate of change
- you can connect via GPRS to some server that will store data on temperature changes over the past 20 years, build beautiful graphs and identify hidden patterns
- Finally, for village houses with wood stoves, it is recommended to connect the device to a robot that throws wood into the stove
- I'm waiting for your options)
A set of devices for remote monitoring from the OWEN company.
In this article we will look at the composition of the monitoring kit, preliminary setup and programming principles, distinctive features and advantages of OWEN devices.
In the wide range of automation devices produced by the OWEN company, programmable relays PR200 () have been available for several years. They compare favorably with other similar devices in the following characteristics:
— availability of analog inputs for connecting temperature, pressure, humidity sensors, etc.;
— presence of relay outputs for control and signaling (on or off);
— presence of 2 RS485 ports for communication with other equipment;
— a two-line indicator on which you can display messages in Russian;
— control and settings buttons.
Thus, this device can be programmed and configured to measure 4 signals 4...20 mA, 0...10 V or 0...4 kOhm. Along with measurement, the device is capable of maintaining these parameters at a certain level and signaling emergency situations.
And in order to monitor these parameters on a smartphone, just install the OWEN Cloud application: ( ) and connect the PR200 to the Internet using one of the gateways:
- PM210 - https://www.souz-pribor.ru/catalog/industrial_automation/ustroystva-svyazi/pm210/;
— PE210 —
— PV210 —
Equipment setup.
PR200 is programmed using the free OWEN Logic program.
To demonstrate programming, we give a simplified example of an algorithm that was used in one of the country houses in the city of Sviyazhsk, Republic of Tatarstan.
On the left side of the working field the PR200 inputs are conventionally designated (AI - analog inputs, I - discrete inputs), and on the right side the output devices (Q - discrete outputs (relays), AO - analog outputs, F1, F2 - green and red LEDs) .
We connect the temperature sensor to the first analog input. To read the readings, we use an analogue converter of a suitable type (all additional blocks and macros (templates) are located on the online server and can be downloaded for free).
In the same way we can connect 3 more sensors (Fig. 1)
In order to see the measured temperature on the device screen, we make the following settings:
— create local variables in the memory of the PR200 device (Fig. 2).;
- create “Screen1”. We call it (for example, “outside temperature”). We indicate the created variable on our screen;
— we perform the same actions with the following inputs (Fig. 3).
Now we are preparing our device for remote reading of measured values. To do this, we create network variables (for transmission to other devices over the network) and bind them to our inputs (Fig. 5,6).
You can now customize your page in OWEN Cloud. The setup consists of 4 sequential steps:
— registration on the page: ( )
— adding a communication device. (in our case, the PM210 gateway was used (Fig. 8))
— adding a device (we are adding an RS485 device)
- adding readable parameters - our network variables with their addresses in OWEN Logic (Fig. 9)
A distinctive feature of our kit is its versatility, i.e. it can be used to remotely control the room temperature, pressure in the system (for example, water supply), and the level in the container (whether water or bulk materials). Reconfiguring the device for different tasks takes very little time and effort. This is especially convenient for engineers or companies that deal with similar projects on an ongoing basis. It is possible to replicate ready-made automation projects and create your own library of algorithms for subsequent implementation.
