Temperature sensors used in boilers can be internal and additionally external (remote). Internal ones regulate the operation of the boiler depending on the temperature of the coolant, which implies not the most accurate measurement method and the presence of inertia. External temperature sensors transmit information about the air temperature indoors or outdoors, which allows you to accurately regulate the power of the boiler unit and stably maintain the set temperature level even with constant sudden changes in weather conditions.
The cost of external sensors ranges from 1,300-2,500 rubles; you can connect and configure their operation yourself.
How does the sensor interact with the boiler?
Depending on the boiler model, there are 2 ways of interaction: directly and through the room thermostat.
You can connect a temperature sensor directly only to boiler models with this capability (appropriate automation and terminal block/connector on the boiler); this capability is reported in the technical specifications of the model. For example, models such as the Baxi ECO Four line, the Baxi LUNA-3 line, Buderus Logamax U072, Viessmann Vitopend 100-W and most other modern models of gas boilers have the ability to connect temperature sensors.
Connection of external control is directly supported by both electric and solid fuel boilers.
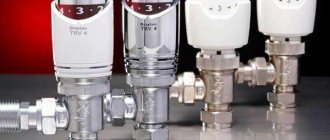
If the boiler has a simple, low-functional automation system, it is better to connect an external sensor via an electronic room thermostat with programming capabilities. Programming the operation of the boiler allows you to set a pattern for the operation of the heating system, for example, reducing the temperature to 15 degrees during working hours when the owners are not at home, which will allow you to significantly save on heating, regardless of the type of fuel used. The cost of a good thermostat is about 1,500-3,000 rubles, but if used correctly, it will pay for itself within a few months of operation.
An example of a room programmable thermostat (model – Teplocom TS-Prog-2AA8A).
A room thermostat already has a built-in temperature sensor that measures the temperature in the room in which it is installed. To implement weather-dependent control, you need to purchase a universal outdoor temperature sensor. Thermostats that already include an outdoor temperature sensor are sold extremely rarely. However, the package often includes a temperature sensor for heated floors.
How to choose a room thermostat and save up to 30% per month on heating
In general, to organize an optimal control scheme for the heating system, three temperature sensors are sufficient: external indoor, outdoor and for heated floors.
Where can I buy
Electronics for heating boilers are available for purchase in specialized stores in your city. But there is another option that has recently received significant improvements. You no longer need to wait a long time for a parcel from China: the AliExpress online store now offers the opportunity to ship from transshipment warehouses located in various countries. For example, when ordering, you can specify the “Delivery from the Russian Federation” option.
Follow the links and choose:
| Thermostat for gas boiler with Wi-Fi and remote control, 3A | Smart Wi-Fi thermostat Tuya for boiler | Smart Wi-Fi Touch Thermostat, Wireless |
| Digital LCD Thermometer with Water Temperature Gauge | Thermostat for gas boiler TUYA, wireless | Intelligent Thermostat, Temperature Controller |
Design and principle of operation
Thermal sensors are in most cases heat-sensitive liquids or metals placed in a small sealed housing: when heated, heat-sensitive liquids expand, and the metals form a resistance or thermoelectric effect (when the contacts of connected conductors are at different temperatures).
Thus, with the help of the mechanical action of temperature-sensitive elements, information is transmitted to the thermostat or directly to the boiler automation, which regulate the burner power and turn the boiler on or off. Information from external temperature sensors is always a priority, which means that the thermostat sets the boiler operating mode (up to complete shutdown or unscheduled ignition) regardless of the internal automation program.
Outdoor models are additionally placed in a plastic protective case that protects them from mechanical stress and moisture.
What it is?
A water pressure sensor is a device for automating the water supply system and regulating the speed of water flow. At the slightest change in pressure, it automatically turns on and off the pump station or pump. For these purposes, it is equipped with two response thresholds - upper and lower. If the water pressure level decreases to the lower threshold, the sensor closes the contacts and activates the pump. If the pressure rises to the upper threshold, the contacts open, as a result of which the pump is de-energized.
Existing types
Classification by temperature measurement method
- thermocouples are the very first and highly accurate sensors, but the accuracy of their readings is quite difficult to take and interpret into an automation program. Their action is based on the interaction of two different metals soldered together. When they are heated, a weak electric current occurs;
- thermistors are simpler to interpret and more accurate sensors, the action of which is based on an increase in the resistance of heat-sensitive materials as the ambient temperature increases;
- pressure sensors - their action is based on the expansion of a heat-sensitive liquid or gas when heated, which creates a certain pressure in a closed volume;
- digital are modern sensors (digital thermometers) that work on the principle of calculation and conversion. They are distinguished by high accuracy (up to 0.5°C) and a wide range of measured temperatures (from -55°C). Well-known examples are DS18B20, LM75A.
Wall-mounted outdoor temperature sensor in a protective housing.
Classification by placement method
- overhead – applied to pipes, radiators or water heated floor systems;
- submersible - immersed in a coolant, for example, again, in a system of water heated floors;
- room - weakly protected from external influences, having a small range of measured temperatures and therefore intended for measuring air exclusively indoors;
- outdoor - resistant to mild mechanical stress and moisture, often additionally protected by a housing, have a higher range of measured temperatures.
Please note that there are no small wireless sensors, since they require at least a controller to power them, read them and transmit the signal. Therefore, a thermostat that includes a room sensor can be wireless, but not the small temperature sensor itself for the heating boiler.
Where to install
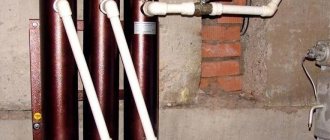
DT is set extremely close to the controlled parameter. So in double-circuit boilers they are placed on the return line before entering the boiler, at the outlet from it in the supply pipeline, at the outlet from the unit in the DHW circuit.
DT for monitoring the outgoing temperature of flue gases is installed at the outlet of the boiler in front of the mouth of the chimney. Wireless diesel engines for the boiler unit are placed directly on the controller or on the gas shut-off valve. Wired - connected by the option designated by the equipment manufacturer.
How to choose a remote temperature sensor
The choice depends on how the sensor will interact with the boiler: directly or through a thermostat.
Connected directly to the boiler
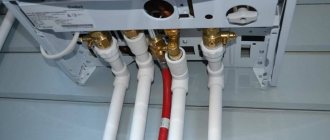
The choice here is small: as a rule, these are 1-3 models developed by the same manufacturer as the boiler. Their compatibility with specific models or lines of boiler models is indicated in the technical specifications and instructions. The cable for connecting the temperature sensor to the boiler (usually two-core with a cross-section of 0.5 mm2) must be purchased separately. The exact requirements for cross-section and resistance are indicated in the sensor instructions.
Connectable to thermostat
External temperature sensor for the Gira 130200 thermostat.
In rare cases, an outdoor sensor is included with a room thermostat, but most often a sensor for measuring the temperature of heated floors is included in the kit. To take into account the outdoor temperature, universal outdoor temperature sensors are connected to the thermostat: from Gira, Tim, Shuft (ATF2-NTC10K) or Teplolux (TST02). It is important to pay attention to:
- range of measured temperatures - for example, for Teplolux TST02 it is from +5 to +45 ° C, which is not applicable in the cold season;
- degree of moisture protection;
- measurement accuracy/error – an error of +-1°C is considered acceptable, a good result is +-0.5°C;
- cable length - as a rule, a 2-6 m long cable is already connected to the temperature sensor.
Correct operation
When operating temperature sensors, the instructions of the boiler and measuring device manufacturer must be strictly followed. In order to ensure the accuracy of measurements, the sensitive element must have the greatest contact with the medium being measured; in addition, it will be necessary to promptly maintain the measuring device and calibrate it within the time limits indicated in the instructions.
Specifics of diesel engine operation in compliance with safety regulations:
- The diesel engine is installed in the environment that must be controlled and regulated by heat exchange;
- during installation, all negative factors that could change the sensor reading must be excluded;
- It is prohibited to operate the meter with damaged insulation;
- It is forbidden to disassemble the sensor yourself;
- All repair and maintenance operations are performed with the meter's networks completely disconnected from the 220V voltage.
How to connect a temperature sensor to a boiler
An outdoor temperature sensor for a heating boiler is installed on the outside of the wall of a heated building in compliance with the following requirements:
- the wall should be exclusively north or northeast to avoid direct sunlight. If a hit is still expected, it is necessary to protect the sensor with a visor;
- If possible, it is necessary to avoid installing the sensor in places of high humidity and a high degree of mold formation;
- the wall must have a thickness and degree of thermal insulation sufficient to prevent the sensor from heating up with the heat of the heated room;
- It is also not recommended to install the measuring device near an air conditioner, chimney, exhaust or supply ducts, or any other structures that can affect the measurement results.
The sensor itself is attached to the wall with anchor bolts, for example 5x25, connected to the corresponding connector/terminal of the boiler or thermostat using a two-core cable (cross-section and resistance parameters are indicated in the temperature sensor instructions), the connections are hermetically sealed with a coupling.
Correct installation and connections do not cause any special problems, since detailed algorithms are always described in the instructions.
An example of an installation algorithm from the instructions for the Baxi temperature sensor.
Temperature sensors do not require adjustment or calibration, and their performance and accuracy are tested in practice (at room temperature).
DIY Installation Tips
These devices have gained popularity and are already used everywhere. They are mounted on: radiators, heating circuits, heating boilers and other devices responsible for heating rooms.
Before installing the heat sensor, it is recommended that you read the instructions that came with it. The instructions describe the main features of installing the device and the conditions for its use. The instructions will also help in choosing a place to install the sensor based on its technical specifications and purpose. (every equipment must have this document)
Connecting the heat sensor to the radiator
There is no need to install a heat sensor on each element of the heating system of a house or apartment. The regulations indicate that a temperature sensor is mounted on a battery only if its power is 50 percent higher than the thermal output of similar systems.
If there are two heating radiators in the room, the thermostat is installed on only one radiator. Installation is carried out on a more powerful radiator.
The valve of the device is mounted on a pipe responsible for supplying water to the place where the battery connects to the heating system. In some cases, it is necessary to remove the water supply.
This manipulation is carried out using tools designed for cutting pipes. The installation of the thermal head itself is carried out without special equipment. After completing the installation of the sensor, you will need to align the marks previously installed on the device and the housing. Next, you need to fix the head by gently pressing it with your hand.
Before installing the device on the radiator, you should make sure that the heating pipe tap connecting to the battery has been closed.
Installing a heat sensor on the radiator piping
The temperature regulator is installed in the hole in the radiator plug, located along the water supply to the radiator. It is important to ensure that the device is installed in a horizontal position. This will make it possible to eliminate the influence of water temperature and valve on its operation. If a single-pipe heating system is installed in the house, then the installation of a bypass is included in the installation diagram of the heat supply regulator. Such a jumper guarantees the free flow of water in the heating system from the pipes supplying water to the batteries.
The thermostat can be used in a bellows connection. However, before doing this, it is recommended to study the relevant instructions for installing thermostats.
Installation of air heat sensor
The temperature sensor should be installed in the coldest room, where there are no drafts. Installation in the kitchen, living room, hallway or boiler room is not recommended. This is due to the fact that this can lead to malfunctions of the heating control system.
When choosing a place for the thermostat, it is important that the sun does not fall on it and heat it up. Also, it should not be installed near radiators and heating system pipes.
Installation of the temperature sensor is carried out as follows:
- a hole is made in the wall to install the fastening;
- the front panel is removed from the sensor and then it is installed in the place previously prepared for its installation;
- the contacts are connected to the heating cable, and the sensors are connected to the terminals.
- At the final stage, the power cable is connected, and the front panel is returned to its place.
If you encounter problems with self-installation, it is recommended to seek professional help. It is important to make sure that the technician has experience in installing similar sensors.
Prices
| Manufacturer (intended for manufacturer's boilers) | price, rub. |
| Specialized | |
| BAXI | 1 400 |
| Protherm S010075 for boilers Panther, Cheetah, Skat | 2 550 |
| Ariston | 2 100 |
| Ferroli | 1 100 |
| Universal | |
| Shuft ATF2-NTC10K | 2 100-2 250 |
| Gira 130200 | 2 280-2 900 |
Connection nuances
Let's talk a little about how to connect such a device. Ceiling or wall heaters can work normally, but the efficiency of the built-in thermostats is very low, because the sensors will not be triggered by the temperature in the room, but due to the heating of the body of the heater itself. Therefore, the correct installation scheme involves remote placement of control parts. The installation of a thermal regulator must be carried out taking into account the zonal use of such a device, otherwise it will be incorrect. To carry out this procedure correctly, you must adhere to a number of standards:
- if a ceiling heater is installed, then it would be better to place the thermostat somewhere further away on the wall; such installation of a heater of the type in question requires installing a regulator there, but not far from the device;
- It is better to place the regulator from the floor at a height of 150 centimeters;
- installation will depend on the chosen mounting option - if the heater is built-in, then you will need to groove the wall, and devices for installation on the wall require a box for power cables and a thermal sensor;
- if the installation diagram requires placing the device on the outer wall of the building, then thermal insulation material must be installed under the housing, this makes it possible not to cause accidental activation of the relay;
- The selected area for installing the temperature regulator should be located relatively far from windows, doors and heating equipment.
Typically, the thermostat is equipped with two pairs of terminals that are connected to the electrical panel and the heater itself. If, in accordance with the diagram, several heating devices are supposed to be turned on, then they must be turned on in parallel. Then two connection options will be possible:
- when there are so many wires coming from the thermostat that it corresponds to the number of connected devices;
- when only two conductors come from it, which alternately supply energy to the equipment.
During installation, it is necessary not to confuse the connection points of the neutral and phase conductors, because a number of models of electric regulators are very sensitive to this point. In addition, it is planned to install a contactor or magnetic starter. If it is needed, then the output type terminals of the thermostat are connected to the control relay, and the heaters are connected through contacts located on the starter.
Features of choice depending on the floor covering
Sensors for the “warm floor” system are divided according to the type of coating they are installed under. However, the installation differs.
Under soft cover
A temperature sensor mounted under carpet, linoleum, or cork flooring is a small cylinder attached to the end of a piece of cable. Place it when the screed is completely set. To do this, a narrow groove is made in it.
Under hard surface
Mounted, for example, under wood, tiles. The temperature sensor here is larger and covered with gel that protects it from damage. Its installation is somewhat more complicated and can be direct or using a mounting box.
Adjusting parameters
When purchasing a sensor, the owner can proceed in various ways. It can leave the factory settings. This makes sense in cases where the pump operates under standard conditions.
If the design used has its own characteristics, then it is better to configure it yourself. How to do this is described in detail below.
After installation, it is necessary to adjust the minimum and maximum pressure values. It is important that the difference between them is approximately 1 atm. Before making adjustments, perform the following steps:
- All pump elements are disconnected from the network. Now you need to completely drain the water from the pump.
- You need to check the pressure level in the boiler. To do this, you can use any available pressure gauge.
- It is necessary that the pressure be equal to 1.5 atm. If it is less, you need to pump up water.
- If it is exceeded, you need to lower it by pressing the nipple.
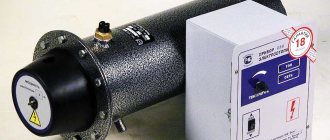
Electronic pressure switch Source kty.com.ua
After the boiler has been prepared, it is necessary to begin the adjustment procedure. Here, as an example, we consider a mechanical type sensor. The adjustment is carried out as follows:
- To begin the adjustment procedure. The pump must be turned off. Then drain the water completely. Check the pressure gauge readings. It should show zero value.
- Start filling the boiler with water. When the process is completed, it is necessary to measure the pressure again. This value must be fixed.
- Now you need to drain the water to get the minimum pressure value. It is also fixed.
- Using a nut, the springs are approximately adjusted so that they correspond to the desired value. Weaken a spring with a smaller diameter. Using a nut, the compression of a larger diameter spring is adjusted. It must be remembered that when tightening it increases the minimum response pressure, and when unscrewing it decreases it.
- Fill the system with water, then drain it. It is necessary to determine the moment when the pump will automatically turn on. If it is more or less than required, additional adjustment of the spring is carried out.
- Start adjusting the spring with a smaller diameter. It is tightened to set the value at which the pump will turn off. Compression will lead to a decrease in the difference between the maximum and minimum pressure values, and weakening will lead to an increase in this parameter.
- Check the set values. To do this, start the pump and determine at what pressure value the shutdown will occur.
- If the maximum value is not set accurately, then by tightening or unscrewing the nut, adjust the degree of compression of a small diameter spring until the parameter is set accurately.
When the pressure thresholds are accurately set, the adjustment procedure is completed.
Gas boiler pressure switch Source stroy-podskazka.ru