The need to replace an old bathtub can come at the most unexpected moment. The family budget does not always provide a reserve amount for this type of repair. As an alternative, an acrylic bathtub insert can be used, the cost of which is much cheaper. And you can do the work yourself. The main thing is to understand the essence of the process and understand all the nuances.
We suggest you figure out how to install a liner in an old bathtub, thereby avoiding a complete replacement of the plumbing. We will tell you what to look for when choosing an acrylic tab, and also provide step-by-step instructions for installing it.
What you need to know about acrylic bathtub cover: main features
Bath covers were invented several decades ago, and today they are widely used both abroad and in Russia. With their help, you can give an old bath a decent look without spending a lot of money.
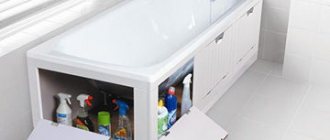
PHOTO: stroyportal.ru Restoring a bathtub using linings will cost relatively less than buying new plumbing fixtures
In order to restore the inner surface of an old bathtub, it is best to use special devices - acrylic linings. This is a cover that needs to be attached on top. In just a few hours, the product’s appearance and performance characteristics are restored and the bathtub takes on its normal appearance again.
PHOTO: expert-n.info A bathtub after restoration using liners is almost impossible to distinguish from a new one
Installation highlights
First of all, it must be said that acrylic liners can only be found for standard bathtubs. For everything to work for a long time, the shape must match perfectly, so they are molded according to the sample. In essence, they make the same bathtub, but from polymer. That’s why this technology is also called “bath in bath.”
If you decide to improve the appearance of your bathtub using this technology, you will need to measure it accurately. The proposed dimensions 150x70 or 170x70 don’t say anything, you still need to know the depth.
How to measure a bathtub to purchase an acrylic liner
In addition, the bath should be standard and have thick walls, which gives a small change in size under load. The ideal case is cast iron bathtubs. With their thick walls and large mass, they are the best support for the insert.
You can also install an acrylic liner in a steel bathtub, but only if it bends very slightly. The thing is that when the size changes, acrylic also bends. If the bends are too significant, then after some time the liner will crack. Therefore, if your old bathtub is sagging, give up the idea of installing an acrylic liner; it may be better to restore the coating using self-leveling acrylic. Another option is to make a rigid pedestal (from bricks, for example) under the bathtub, which will prevent it from sagging.
Preparing the bath
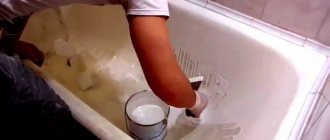
Before starting work, the bathtub must be thoroughly cleaned. If it has a trimmed side, the trim must be removed. When finishing, use a tile edge; you don’t have to remove it if the edge is at least 1 cm free. After this, you need to carefully remove traces of silicone, cement, glue - in general, clean the edges down to clean enamel. Next, remove the connected drains.
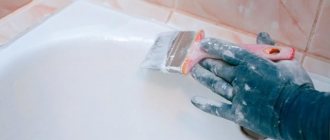
Next, wash the bath itself. Moreover, it must not only be washed from dirt, but also thoroughly degreased to improve adhesion during installation. Then, wipe it thoroughly with a sponge and baking soda. You need to rub every centimeter thoroughly, including the sides. Afterwards everything is washed off and the bath is dried.
Prepared bath - enamel removed
The second way to prepare your bathtub for liner installation is to remove the enamel. This can be done manually using sandpaper mounted on a block, or using an attachment on an angle grinder (a flap sanding wheel works best). After the enamel is removed, everything must be washed, then also degreased and dried.
Which method is more reliable? Second. But such preparation takes a lot of time and effort. The first method, if done correctly, works no worse.
Preparing the Liner
When preparing the insert for the bathtub, you need to cut its sides to the required size and make holes in the right places. To do this, place the liner in the bathtub, mark all the necessary places and remove it.
Although the liner is light, it is voluminous. It is very convenient to install and remove it. Suction cup handles (for carrying glass) are helpful, or a wide luggage strap running under the bottom can help.
We install the liner, mark the lines along which the sides need to be cut and mark the technological holes
Having pulled out the liner, we cut it along the marked lines. This can be done with a jigsaw or hacksaw. It is advisable to find a special blade for plastic, but you can try a regular one for metal. The main condition is that the edge must be smooth, without burrs. If necessary, the edge can be sanded, but the adjacent surfaces of the bathtub must not be scratched.
You can use a grinder to trim an edge only if you are a master of it and can cut exactly along the intended line. To cut holes you need a screwdriver or drill and bits of the appropriate size. With their help we make holes for drainage and overflow. To secure the edges, stock up with clamps.
Installing the liner
The acrylic insert is installed in the bathtub on two-component polyurethane foam. You cannot use ordinary construction material; it will not give the desired effect. The technological holes for draining and overflowing are coated with a layer of silicone sealant. In this place, tightness is very important, since many problems arise precisely because water penetrates between the liner and the bathtub body. Therefore, we do not skimp on the sealant; we apply it in a thick shaft. It is better to put two rings on it for safety.
An example of applying foam under an acrylic bathtub insert
After this, we use two-component foam to create a grid over the entire surface of the bath. The distance between the foam strips is about 10 cm, smaller at the bottom. The application pattern is arbitrary, but the substance should be distributed evenly. You can use a photo as a basis. The foam must be applied quickly, the polymerization start time is 15 minutes, before this time the liner must be installed in place.
Next, the acrylic insert into the bathtub is installed in place and crimped well. The bottom requires more effort - you need to squeeze it carefully. And also press the liner well around the holes and along the sides. Secure the edges with clamps.
The next stage is installing the drain. The overflow can be left for later, but a drain will need to be installed. In the case of a siphon, figure out in advance whether there are enough threads to install it in a bathroom with an insert.
After the drain is installed, the bath is filled with water almost to the overflow hole and left there until polymerization is completed. The specific period depends on the foam; it can be found on the packaging. Water is poured so that the expanding foam does not bend the liner.
Water prevents foam from bending acrylic
While the foam polymerizes, seal the joint between the insert and the bathtub around the perimeter. To do this, use white or transparent silicone sealant (not acrylic). To prevent the silicone from subsequently darkening or developing fungus or mold, look for formulations with antibacterial components. You can also use aquarium sealant. It is definitely not affected by fungi, it has been verified. After this, you can restore the border around the perimeter of the bathroom.
That's all, the installation of the insert in the bathtub is completed, after the foam has polymerized, it is ready for use.
Advantages and disadvantages of acrylic bath liner
Advantages of the method of restoring the surface of the bathtub using linings:
- installing the lining and updating the bathtub takes no more than two hours, repairs and installation are simple, but special equipment is required;
- the ability to correct serious defects such as stagnation of water and improper tilt;
- during the restoration process there is no need to touch walls and other surfaces in the room;
- cost-effectiveness is the main plus. Installing a new bathtub will cost much more than updating an old one;
- the material has low thermal conductivity, due to which the water drawn into the bath cools more slowly;
- the service life of the bathtub is increased to 15 years;
- A coated bathtub removes dirt and plaque much easier;
- the surface of the bathtub is completely restored, even if there were deep cracks on it.
PHOTO: blitz-remont.ru There are several shade options to choose from, you can easily choose an overlay that matches the color
But acrylic inserts also have some disadvantages:
- in order to care for the treated surface, you need to use special products;
- restoring the damaged insert entirely is impossible, so it is replaced;
- The mechanical strength of the linings is not high. Damage can occur if a pet jumps into the bathtub and grabs it with its claws, or a shampoo bottle falls;
- If the installation is carried out incorrectly, the tightness of the liner is usually broken. Because of this, moisture accumulates under the bottom, which after a few months leads to the formation of fungus.
PHOTO: bitu.ru Installation work has high requirements that must be met
Bathtub restoration technology with acrylic from A to Z
Although the process of restoring bathtubs with acrylic does not present any particular difficulties, you will be able to obtain a durable snow-white acrylic coating only if the master who will restore the bathtub, or you yourself during your own restoration, will strictly follow the technology of restoring the surface of the bathtub with liquid acrylic.
Unfortunately, on the market there are many different types of well-promoted advertising intermediaries, fly-by-night companies and inexperienced craftsmen offering bathtub restoration services, but not following bathtub restoration technology.
The likelihood that you will run into such unfortunate masters is very high, since they have neither experience nor their clients and do not spare money on advertising, since they simply have no other ways to get orders.
By turning to them, you will only waste time and money, and the acrylic coating on your bathtub will soon, at best, simply turn yellow, and at worst, fall off.
Having familiarized yourself with the technology for restoring a bathtub with acrylic, you will be able to understand already at the stage of placing an order from the answers to your leading questions of a manager, dispatcher or master that these people have seen enough of the most contradictory videos on the Internet, but they do not even know about all the nuances of the technology for restoring bathtubs.
So, restoration of bathtubs with acrylic consists of 2 stages:
— Stage 1 – preparing the bath for restoration; — Stage 2 – covering the bathtub with acrylic.
Preparing the bathtub for restoration
First of all, remove from the bathroom all unnecessary objects that are located above and near the bathtub. If there is a curtain, it can be removed. If a washing machine is installed in the bathroom and dusty work will be carried out, the machine is sealed with protective film or cellophane.
If there is a corner along the wall along the perimeter of the bathtub and if you decide to replace it with a new one, the corner is dismantled, and the surface of the side of the bathtub is cleaned of glue or silicone sealant and then sanded.
If there are remains of cement mortar, tile adhesive, old non-factory paint or acrylic, rust or limescale on the surface of the bathtub, the surface of the bathtub is sanded using an angle grinder USHM-125, popularly called an angle grinder with a special attachment and a cleaning disk.
If the surface of the bathtub has previously been properly cared for and does not have the above-mentioned contaminants, sanding the surface is done with moisture-resistant sandpaper manually or using a special attachment on a drill.
When using a power tool, never turn it on at high speeds to avoid overheating of cast iron or metal, as well as the formation of microcracks, since in such places the adhesion of the applied coating to the surface will be very low.
After sanding is completed, the surface of the bathtub is treated with a special professional product to prepare the bathtub for restoration. Thanks to its special chemical composition, the product eats away fatty and other organic compounds from micropores. After finishing the treatment, the surface of the bath is thoroughly washed with warm water and dried.
You can degrease the surface using a special degreaser, solvent, acetone, or baking soda. Since liquid acrylic from different manufacturers is not always compatible with different degreasers, solvents and acetone, therefore, in each case, depending on the brand of acrylic, check the possibility of using it with different degreasers, solvents and acetone.
To do this, ask what acrylic will be used to restore the bathtub and what will be used to degrease it. Then go to the acrylic manufacturer's website and read the instructions, which will indicate whether certain solvents and degreasers are allowed. This way you can easily understand who you want to place an order with for bathtub restoration.
Degreasing is also possible using baking soda, which is compatible with all brands of acrylics and enamels. Add a little water to baking soda or Pemolux in an amount of 150-200 g to obtain a slurry consistency. Using a sponge, rub the pulp onto the walls and bottom of the bath and leave for 15 minutes.
Then the surface of the bath is thoroughly washed with warm water and dried. There should not be a single wet area left on the surface of the bath, otherwise the adhesion of the applied coating in this area will be low and the coating will soon peel off in this area.
The next step is to dismantle the plumbing, the so-called drain-overflow. The excess acrylic will flow into the drain hole of the bathtub. In this case, only the covers are unscrewed, and the siphon itself is not dismantled. A disposable plastic cup or other container with a volume of at least 0.5 liters is placed under the drain hole.
The areas under the drain and overflow covers are processed and sanded. If it is not possible to remove the old cast iron drain, in this case the drain and overflow are cut off with a grinder and after the bath has completely dried, a new trim is installed.
If, for financial reasons, it is expensive to change the piping, the old cast-iron drain can be left alone. In this case, the overflow is sealed with masking tape, and a disposable plastic cup with a volume of 0.2 liters is inserted into the drain hole so that the acrylic does not get into the sewer pipe and clog it.
Areas with deep chips and cracks are puttied and, after the putty has dried, sanded with fine-grained sandpaper.
To protect the walls and floor from acrylic, use masking tape and old newspapers to seal the perimeter walls along the side of the bathtub and the tiles on the floor under the bathtub. To prevent water droplets from falling onto the acrylic-coated surface of the bathtub, place a plastic garbage bag on the faucet and shower head.
Bathtub coating with acrylic
Preparing the components of the working mixture for application: pour the hardener, which comes with the kit, into the jar with the base. There is no need to observe any proportions - the bottle of hardener contains exactly as much as is necessary to obtain a working mixture.
In this case, it is necessary to maintain the temperature regime - the temperature of the base and hardener must be at least 22 degrees Celsius. Cold base can be warmed by placing the jar of base in a bucket of hot water for 5-10 minutes. If the base overheats, you need to let it cool to bathroom temperature.
Then the mixture is thoroughly mixed with a clean wooden stick with a diameter of 1-1.5 cm or a spatula for at least 10 minutes until a homogeneous sour cream-like mass is obtained. A stick from the back of an old wooden crib is best suited for this.
For mixing, it is not recommended to use a drill or other power tool with attachments such as a mixer, since in this case a large number of air microbubbles are formed in the resulting mass, which may not come to the surface due to the thickness of the mixture, and during the drying process of the acrylic they will be pushed out and form on the dried surface. minicrater surfaces.
The lifespan of the prepared working mixture depends on the amount of hardener added to the base and the speed of its hardening, and is 30-40 minutes for comfortable use, of which 10 minutes have already passed for mixing the base and hardener.
Therefore, when applying acrylic to the surface of the bathtub, you cannot hesitate; all actions must be quick. To apply acrylic to the surface, use a 0.5 liter disposable plastic glass or a cut-off bottle containing a hardener.
The mixture is applied to the sides of the bath, starting from the farthest corner. Acrylic, flowing down the walls, covers the entire surface and collects at the bottom. To evenly distribute the acrylic along the walls of the bath, a rubber spatula is used. Acrylic is distributed with horizontal movements of a spatula along the walls, and then from the bottom up with vertical movements.
By the end of application, the acrylic itself is smoothed and leveled. To check, you need to shine a flashlight over the entire surface and make sure that it is all evenly painted. If unpainted areas are found, use vertical movements of the spatula to lift the acrylic from the bottom upward to the unpainted area.
The masking tape is removed along the wall. If there are uneven areas at the junction of the side of the bathtub and the wall after removing the tape, they can be straightened by taking a cotton swab, dipping it in acrylic, and running it along the joint. At the very end, use a spatula to remove drops of acrylic from the sides of the bathtub.
After 16-24 hours, depending on which hardener was used, the drain and overflow are installed back, after which the bathroom can be used for its intended purpose.
Materials used for the manufacture of acrylic inserts for cast iron and steel bathtubs
The technology for producing acrylic inlays assumes that already cut sheets will be laid on a special molding machine. Then the workpiece is heated to a certain temperature, it becomes plastic and is immediately applied to the bath, taking the desired shape.
The final cost of the work depends on what material is used. Most often in the production of inserts they use:
- PMMA (polymethyl methacrylate) . This type of raw material is also called plexiglass; it is thermoplastic. PMMA has a snow-white, smooth surface and is highly resistant to abrasion. The insert does not quickly deteriorate under the influence of chemicals;
- ABS plastic . It is an impact-resistant and thermoplastic material made from resin.
PHOTO: expert-n.info With the correct choice of material for the insert, long-term operation and a guarantee against surface abrasion and damage are ensured
Inlay manufacturing technology
An acrylic insert used to restore the appearance of an old bathtub visually resembles a cover placed on top. It allows you to return lost performance qualities to a sanitary container in a matter of hours.
This restoration option has been used for several decades by Americans, Europeans, and for 2 decades by our fellow citizens. This is an affordable and convenient way to get the desired result without unnecessary dirt.
This technology involves putting a thin liner on a powerful frame from an old bathtub that has lost its visual appeal.
The most important thing about an acrylic liner is its quality. Therefore, when choosing this product for home, you need to pay attention to manufacturers with a good reputation. Otherwise, even a conscientious installation will not save the situation - the insert may burst after a month of use.
The plumbing market offers liners made from the following materials:
- medical acrylic;
- two-layer plastic – ABS/acrylic;
- ordinary plastic;
- technical acrylic.
Regular plastic and technical acrylic are used by unscrupulous manufacturers. They present their products as high-quality products at an affordable price. But such savings will backfire in just the second month.
Plumbing medical acrylic (PMMA) has been replaced by two-layer acrylic for the last couple of years. The fact is that ABS/acrylic material has the best performance qualities. Thus, it is more impact resistant compared to fragile acrylic.
The technological process of manufacturing inserts is complex and requires the skill of a craftsman and the availability of expensive equipment. In artisanal conditions, the production of high-quality products is impossible.
The plant has all the necessary equipment from foreign manufacturers. The material is also foreign and meets hygienic requirements.
To make liners, they take a single-color sheet of cast acrylic with a thickness of 0.6 cm and, under the influence of vacuum and high temperature, give it the desired shape on a machine. For molding, special molds made of aluminum or synthetic composite are used.
Two-layer plastic is essentially a monolithic material that can be molded in the same way as pure acrylic. It is important that the thickness of the acrylic layer is 0.5 cm or higher. Indeed, in products with a 2 mm layer, the operating surface is quickly damaged.
The overwhelming number of foreign manufacturers and all domestic ones use ABS/PMMA material. The upper hygienic layer has dirt-repellent and antimicrobial properties, and the lower one ensures the reliability of the product.
The shape of the old bathtub is important. Not all models can be purchased with an acrylic liner. Large factories have up to 20 different dies for the production of inserts for the most common cast iron and steel products. If during the measurement process it was discovered that the bathtub is non-standard, then you will have to choose an alternative upgrade option.
Factories produce only a certain number of earbud models. After all, the cost of the form itself is quite high, so making it to order for each client is unprofitable
You should not trust private manufacturers who promise to make an insert for a specific model. It will be very expensive and no one can vouch for the quality of the product.
Also, in the case of a non-standard model, you cannot buy a slightly smaller liner. According to the “bath within a bath” restoration technology, it should be like a second skin, worn over the old product.
Performance characteristics of acrylic liners by type
Depending on what material was used to create the insert, you can say with almost 100% accuracy how long it will last and what properties it will have. Before choosing one type of material, you should familiarize yourself with all the main types and their characteristics.
PHOTO: expert-n.info The performance characteristics of the bath depend on the type of insert used
Molded liners
Caring for cast inlays is very simple and not painstaking, since they have a flat and smooth surface. There are small pores that quickly become clogged with dirt if left untreated, so it is recommended to wash the bathtub after almost every use. If contamination does appear, it can be easily removed.
The service life of the product is about 10 years. It is important that during installation all rules are followed and the integrity of the material is not compromised.
Attention! The cost of processing material is no more than 30% of the cost of the entire bath.
It is important to note that some manufacturers supply the market with cheap cast inlays. If funds are limited, they can also be used. But, since acrylic sheets are very thin, damage to the surface can occur very quickly.
Low quality acrylic is also sold at a low price. You can distinguish poor quality acrylic from good one by the presence of a yellowish tint and large pore size. A good insert should be smooth and even.
PHOTO: badentegel.nl
PHOTO: stroy-podskazka.ru
PHOTO: master-2.ru
Composite liners
In the manufacture of this type of liner, two main components are used: acrylic and ABS plastic. The first is applied in a thin layer to a ready-made plastic base. Such a product is practically no different in appearance from a cast one, but costs less.
It is worth paying attention to such inlays if the cost of an inlay made of pure acrylic turns out to be very high. However, such a product does not have high strength. The average service life is 5 years. After this time, even the most high-quality and well-installed product will wear off the acrylic layer.
PHOTO: static1.bigstockphoto.com
PHOTO: stroy-podskazka.ru
Secrets of acrylic inlay longevity
It is the quality of the insert itself that ensures 70% of the service life, and 20% for correct installation. The remaining 10% are the conditions for care and use of the product. Thus, the last step towards the longevity of the installed liner is proper operation and care.
When a good liner was purchased, but it was installed by a crooked master, water begins to accumulate under the coating. Over time, it stagnates - mold appears and a disgusting aroma appears in the bathroom. But this situation can be overcome as a result of competent repair work, and the insert itself will last for a long time.
You can use the updated bathtub in an acrylic case in the same way as the old one. You can’t just pour boiling water into it, throw knives and bricks.
Do not leave burning candles unattended on the sides of the bathtub - they can fall and burn a hole in the acrylic layer
If you are going to renovate the bathroom, it is better to cover the surface of the container with film and a soft cloth. After all, tiles knocked off the walls can severely damage the acrylic layer. Do not drop a dismantled sink or toilet - the liner may crack. Further restoration will be impossible - only removing and gluing in a new one.
As for caring for the acrylic liner, it is afraid of abrasive liquid and powder products. Also, it does not tolerate long-term stagnation of dirt.
After using the updated bathtub, it should be treated with a soft soapy sponge and rinsed with water. To wash the liner, you can use products produced for acrylic bathtubs.
In case of deep scratches and small cracks and other types of damage, the acrylic liner can be restored. To do this, purchase a special repair kit, restorer and polishing paste. To ensure that the tone of the applied product does not differ from the original coating, it should be purchased from the same manufacturer.
Manufacturers of acrylic liners for bathtub restoration
When choosing acrylic liners for bathtub restoration, you should pay attention to several large and trusted manufacturers:
- ISComp LLC . In the production of overlays, a unique, industrially developed and patented method is used. All products are high quality and certified. The client can choose a specific size and color.
- Plastall . The company supplies materials for the restoration of both cast iron and steel bathtubs. Several offices have been opened in Russia, in countries far and near abroad. The manufacturer offers liquid acrylic for restoration and ready-made inserts.
- SevenLux . The company's office is located in Togliatti. High-quality German equipment is used in production. The technology is completely original, which is confirmed by relevant certificates.
- "Multiplast" . We supply high quality products that fully comply with all current standards and requirements.
PHOTO: ekonomihatti.com Every high quality product manufactured in official production must have a certificate
Production method
The production technology is simple and clear. In terms of the workpiece, an acrylic plate is used. This plate has a thickness of 5-7 mm (or less, depending on the integrity of the supplier). Acrylic made in Austria and Germany is recommended for use as blanks, since it is the most reliable, non-toxic, and retains its properties better than others for many years.
High-precision equipment is used for production. It should be taken into account that only one machine is used for one liner, since it takes into account all the settings for the corresponding model. That is, a matrix is installed on the machine, which will “stamp” the finished product.
The bathtub liner is quite thin and can sag
To form the desired shape, a vacuum forming method is used. The acrylic blank is placed on the machine, then it is heated and, by acting on conditional points of the sheet, which are predetermined by the software, the material is deformed according to the specified parameters.
The method is such that when the desired temperature is reached, acrylic is blown into the matrix using a vacuum method. That is, a sheet heated to the required temperature completely fills the matrix space.
This allows the output product to match the ideal dimensions in the bathroom. After the required parameters are achieved, the workpiece is cooled, framed in accordance with the shape of the bathtub, defects are corrected and sent to the shelves of our stores.
The procedure for determining the insert size if you decide to buy an acrylic bathtub liner without installation
If the price of the finished product is high, you can carry out the installation yourself by selecting a tab of a certain size. You should pay attention to the following parameters:
- bathtub length, measured along the outer edge;
- length of the bathtub inside, without sides;
- depth, measured next to the drain;
- width at the head and above the drain.
PHOTO: static.tildacdn.com Measurements must be taken carefully to get the most accurate figure
If you can determine all the parameters, you can purchase the insert without installation.
Features of choosing acrylic inserts
Before installing a new liner in a peeling bathtub, you need to choose a quality option. After all, the market is replete with tempting offers, and no one is immune from the desire to save money. But the savings must be justified - it is better to do the installation work yourself than to buy a cheap fake.
To buy a good insert, you should follow the basic rules. Firstly, a quality product must have accompanying quality documents, a manufacturer’s warranty of at least 3 years, a factory logo and recommendations for use and care.
If the seller does not show documents confirming the quality or the warranty period is a year or less, then it is better to bypass such an insert. Even when the low price tempts you to buy
Secondly, the factory earbuds are covered with a protective film on top. It should be removed only before use, when all gluing work is completed and everything is dry.
Thirdly, the plumbing product should not be translucent. You need to check whether the selected option meets this requirement by looking through the insert into the sun, a lit lamp, or shining a flashlight from the back.
Fourthly, the acrylic surface of a high-quality insert is flat and smooth. Scratches and chips on the purchased copy are unacceptable. If the product was delivered by a courier, then you should sign the documents and release it only after a thorough inspection of the delivered goods.
If the product is flimsy, translucent, or, even worse, bends under your hand, then you should refuse the purchase. It has nothing to do with the acrylic liner
Fifthly, the thickness of a high-quality acrylic coating is from 5 mm. This must be confirmed by accompanying documents.
Sixth, you need to buy only from trusted companies. Conscientious manufacturers with a good reputation have no point in deceiving their clients. Thus, LLC ISKomp, Plastall, SevenLux, Multiplast and Grand Plast have proven themselves well on the Russian market. They use Austrian raw materials and German equipment.
Seventh, the size of the purchased liner must clearly correspond to the size of the bath being updated. To do this, before purchasing, you should measure the height, width and depth of your container. It is unacceptable to take a smaller or mismatched insert, even if the seller states otherwise. His arguments that all the voids will be well filled with polyurethane foam speak of unprofessionalism.
To correctly take the measurements of your bathtub, you need to measure its internal and external length at the top, the width at the head and legs, and also the depth
Acrylic insert or bath replacement: choosing the right option
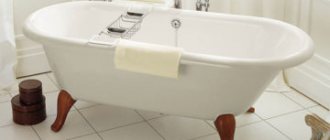
To give the bath a normal look, you can purchase a new product or use acrylic inserts. The first option is preferable, however, if funds are limited, you can use overlays.
PHOTO: dr-vann.tomsk.ru A finished insert costs less than new plumbing fixtures
If your plans do not include a major bathroom renovation, then inserting a liner may solve the problem temporarily. Installation is done manually, and knowing the exact shade and size of the bathtub, you can choose the most suitable insert.
Advice! In order for the insert to fit and last a long time, you need to choose a product that was produced at the factory.
How to choose an acrylic liner for a bathtub - recommendations from our editors
To ensure that the liner lasts for many years, you should pay attention to several details when choosing:
- liner surface. It is important that it is smooth and silky to the touch, without large pores;
- the material must be white without any tints;
- thickness - the more, the better. Acrylic bends slightly when pressed, but no more than 2-3 millimeters.
Advice! If the product fully meets all the requirements, it is worth checking with the seller about the wall thickness and what material the liner is made of.
Why choose acrylic?
When deciding for yourself whether an old bathtub needs an acrylic liner, you need to pay attention to its significant advantages. Perhaps friends or relatives have already used it and have had a positive experience. It’s good to cooperate with a company that officially represents the manufacturer and has good reviews from real people.
The acrylic insert has an aesthetic appearance. It is endowed with dirt-repellent properties. The polymer itself has no pores in which bacteria can multiply, so the product is safe for bathing children and people with delicate or sensitive skin.
Also, allergy sufferers can safely take a bath - the acrylic insert has a natural snow-white color. No dyes are used in the production process.
The updated bathtub is strong and stable, because the old container, tested over the years, acts as a frame, and the new liner has a safe and beautiful surface
The PMMA material applied on top of the ABS layer is resistant to minor scratches. If damage does occur, it can be repaired using a special acrylic repair kit.
Another advantage is ease of maintenance. A soft sponge and soap solution are enough to clean the surface of the acrylic insert.
But all this applies only to high-quality products that have the appropriate documents from the manufacturer.
Sometimes you may encounter the unfortunate experience of installing an acrylic insert. Here, most often, the owner’s excessive savings are to blame. By choosing a cheap Chinese shell instead of a high-quality liner and hiring a crooked craftsman to install it, you get a beautiful cheap bathtub for 1 week/month. After a short time, the pseudo acrylic liner will burst beyond repair.
How to install an acrylic liner in a bathtub: sequence of steps
When performing installation yourself, you must follow the instructions exactly.
PHOTO: i.vanna46.rf The main condition is compliance with the work technology
Preparing the bath
Sequence of work:
| Illustration | Description of action |
| Thorough cleaning of the bathtub. The side is beaten off and washed. Using a grinder, remove all the trim and clean out dirt. | |
| The surface is degreased. Special compounds are used, which are then washed off. The bath needs to be dried. Install a siphon. Make sure that the connection is completely sealed. |
Preparing the Liner
The insert also needs to be prepared before installation:
- The technological edge to protect the liner is cut off.
- Using special nozzles, adjust the hole for drainage and overflow. It is necessary to accurately measure the space.
- Install a siphon. Make sure that the connection is completely sealed.
Then the installation process begins:
| Illustration | Description of action |
| The entire bottom of the bath is evenly coated with three-component foam. | |
| The tab is installed. Particular attention should be paid to the bottom and sides. It is important to press the box firmly. | |
| Then the excess sealant is immediately removed and the drain grates are secured. The bath is filled with water to check the quality of the installation. | |
| All seams are sealed with a sealant with a high water resistance rating. And the last stage is filling the bath with water. This will help press the pad as tightly as possible to the bottom. |
Video: installing an acrylic liner in the bathroom
Which insert should you choose?
Before installing an acrylic liner, you must select it correctly. The service life of the bath will depend on this. First, you need to measure the plumbing equipment where the acrylic liner will be installed. This will give you the opportunity to choose the ideal product according to its dimensions. When choosing, do not neglect the help of consultants.
When contacting our company, our specialists will help you make the right choice. They will measure the tub, select an insert, and install it correctly.
Restoration of bathtubs with liquid acrylic: advantages and disadvantages of the method
For standard bathtubs, restoration is not difficult; you just need to use a ready-made insert of a suitable color. However, if the design is non-standard, the liner must be made to order, which greatly increases the cost.
An alternative option is liquid acrylic. Its characteristics are much higher than those of epoxy paint. When carrying out work, acrylic is poured onto the surface and carefully distributed on the surface.
PHOTO: plastol.ukr Liquid acrylic can be used to treat a bathtub of any shape
Removing the bathtub insert
Violations in installation technology lead to unpleasant phenomena:
- If there is not enough foam, the insert may burst under load.
Broken acrylic liner - If the drain hole is not carefully sealed, water will flow between the walls, bloom, rot and begin to “smell.”
In these cases, it becomes necessary to remove the insert. This is done using a grinder with a small cutting wheel. They cut it in some places and pry up the acrylic to remove the insert.
Acrylic liner care
In conclusion, let's say a few words about caring for the acrylic liner.
Since acrylic is a non-porous material, you can use almost any product to wash it, for example, the one you use to wash dishes. The only thing is that you should never wash the bathtub with metal sponges or brushes, since they are quite likely to leave marks on the acrylic.
Also, to avoid scratches, it is not recommended to bathe large pets in an acrylic bathtub without a special mat.
But if damage does appear, you can get rid of it using liquid acrylic, which you can easily find in any modern construction supermarket.
With the help of liquid acrylic and a special polishing mixture, chips and cracks in an acrylic bathtub can be eliminated without a trace
Installing an acrylic liner (video)
As you can see, installing an acrylic liner is not particularly difficult. The main thing is to use only high-quality materials and strictly follow installation recommendations. And in this case, we are sure that your old bathtub will really get a “new life” and will serve you for many years to come. Good luck with your renovation!
Sergey Kolosov
Born in 1977 in Donetsk, Ukraine. Graduated from the Donetsk Polytechnic Institute (now Donetsk State Technical University) with a degree in Automated Control Systems. Worked at the Donetsk Metallurgical Plant. In 1997 he moved to Moscow, where for 8 years he worked in several construction teams. Upon returning to Donetsk, he opened his own small enterprise for the production of metal-plastic windows. Today, due to the political and economic situation in the region, unfortunately, production had to be curtailed. But, as they say, “every cloud has a silver lining.” But now I can share my experience with the readers of this site. I hope you find it useful. Why can I be considered an “expert” in the field of renovation? Well, firstly, I graduated from one of the best specialized universities in the country and in some matters I am a certified specialist. And, secondly, and this is the main thing, while working at the Moscow “shabashki” I had to do almost all types of repair work - from bricklaying to artistic wall painting. And almost always there were real masters of one thing or another next to me, so there was someone to learn from. Of course, I did not become a “super master” in all areas of repair. But, nevertheless, all my advice is based mostly on personal experience. Although, of course, it cannot do without the support of the “omniscient” Google and Yandex. But from them I select for you only the latest and best facts, carefully process them, separate out all the nonsense and fluff, and only after that present them to you. Considering that the last phrase is very reminiscent of a ketchup advertisement, I will finish my “literary attempts”. I’d better start writing a new article, which, I really hope, will help you solve one of the many problems that arise in the process of improving your home. Good luck with your renovation!
Types of liners used in repairs
Among the many methods for manufacturing parts from methyl methacrylate, manufacturers most often use the following:
Molded liner
Production of a cast liner using the pressing method
The first is the so-called cast method, when an acrylic cover for the bathtub is “cast” from a thick sheet of acrylic, heated to the required temperature by vacuum molding, replicating the shape of the original as accurately as possible. Molding is performed on a polished aluminum die, providing a high gloss finish to the final product. The overlay can also be molded using a matrix of heat-resistant synthetic composite, which, due to its lower cost and labor-intensive processing, replaces aluminum models.
Products made on different matrices cannot be distinguished externally, and the lower cost of the composite mold affects the final cost, which is beneficial for both the manufacturer and the consumer.
However, an acrylic bathtub insert made using cast technology by an unscrupulous manufacturer from a sheet of polymer thinner than necessary is fraught with several hidden dangers. Stretching the heated polymer along the shape of the matrix leads to a decrease in wall thickness. If the manufacturer uses a thinner material than necessary, the walls may be so thin that they may not be able to withstand the load of even the water added to the bath. Therefore, when buying an acrylic “insert” for your bathtub, it is worth asking what the initial thickness of the material from which it is made. If the seller does not provide such information, you can look at the approximate thickness of the sheet on the sides, but it is better to refrain from such a purchase, despite the installers’ arguments that the liner will rest on the metal walls of the old bathtub.
ABS plastic earbuds
An insert made of durable ABS plastic is cheaper than a bulk one
The second manufacturing method, which is used by manufacturers of acrylic bath liners, is to use cheaper ABS plastic, which is the basis of the finished product, covered with a thin layer of acrylic. The technological process of applying acrylic makes it possible to obtain a strong monolithic connection in which the materials cannot be torn away from each other without destruction. Despite the monolithic design, the plastic bath liner made using this technology has one significant drawback.
Bathroom restoration kits. Review of kits and alternative to enameling
The thickness of the acrylic layer, as a rule, does not exceed 0.2-0.3 mm and the slightest damage or scratch will require complex repairs. And if a thick layer of acrylic can be polished relatively easily, then in the case of using ABS plastic extruded with acrylic, special materials and rather complex repair technologies will be required.
Such products are cheaper than acrylic ones, have a similar original appearance, but their service life is much shorter. The insert, the manufacturing technology of which involves the use of a base made of ABS plastic, is easier to mold than products made from pure acrylic, which is used most effectively by manufacturers to simplify the technological process.
Vinyl liners
Vinyl liner installation technology
Some buyers are looking for vinyl bath liners to renovate. This is a somewhat erroneous understanding of the name of construction materials, common among non-specialists. Vinyl is the common name for polyvinyl chloride, a material different from acrylic that is widely used in the manufacture of windows, clothing, car awning fabrics, artificial leather and building materials, but has nothing to do with the manufacture of plumbing fixtures.
The high popularity gained by the quick bath-to-bath method, used in the restoration of old plumbing equipment, determines the presence of a wide range of products in the production program of many manufacturers. More than twelve varieties of inserts are supplied to retail chains. Manufacturers offer plastic bathroom inserts for almost all cast iron and steel models that were installed in Soviet-built houses and for some more modern models.
The selection may be difficult for owners of apartments built in so-called Stalinist buildings. For example, it is unlikely that there will be a ready-made “sit-up” insert for a one-room “Stalin” bathtub, where bathtubs of non-standard sizes were used.
Please note: If the plastic insert in the bathtub does not fit in size or configuration to the installed plumbing fixture, you will have to use the method of restoring the bathtub with liquid acrylic, or buy new equipment.
Major manufacturers of quality earbuds
Products from foreign manufacturers are often not suitable for domestic bathtubs
The possibility of inexpensive repair of worn enamel using the bathtub method, and even with the possibility of improving the performance characteristics of the installed equipment, causes increased demand among buyers for plastic bathtub covers, which, with certain skills, can be installed independently. As you know, demand creates supply.
Products from foreign manufacturers generally do not fit the dimensions of metal Soviet bathtubs, manufactured in compliance with GOST standards and having strictly defined dimensions, and the quality of installation of the product and the durability of its operation depend on how exactly the base and the plastic insert in the bathtub match each other.
Domestic enterprises, using technologies and materials from Dutch, German and English companies, have launched the production of high-quality products adapted to domestic standard sizes of plumbing equipment. Domestic-made acrylic bathtub inserts are no different from imported ones in terms of quality, but they are much more accessible and cheaper.
Advice: The Moscow company ISKomp LLC, which produces high-quality white and colored bathtub liners, Togliatti and SevenLux, has a good reputation in the market for bathtub repair kits. Cherepovets Multiplast is not far behind them, producing a wide range of products for bathroom-to-bathroom repair technology. The north of the European part of the country is supplied with quality products by the St. Petersburg enterprise Grand Plast.
These enterprises have their own extensive network of dealer centers and directly cooperate with many well-known construction companies in the regions, which have a sufficient staff of highly qualified specialists who can correctly take measurements and install an acrylic liner in the bathroom in the shortest possible time. Options for the work performed are presented in the photo, and the factory warranty for the installed product will be a pleasant bonus for the consumer.
Is the game worth the candle?
Acrylic liner extends the service life of the bathtub but requires careful handling
How much does a bathtub liner cost if this technology has become so popular? If we take into account the cost of dismantling and recycling the old bathtub, the cost of purchasing new equipment, then even taking into account all the additional costs, the cost of an acrylic bathtub liner will be from 35 to 50% of the cost of a new bathtub with a very high quality of the repaired product.
Which is better - a free-flowing bathtub or an acrylic liner? Choosing a bath restoration method
And although the cost of an acrylic insert in a bathtub is significantly higher than the cost of materials for enamel, including self-leveling acrylic compositions, this repair method ensures such a long service life of the restored equipment that it is comparable to the service life of a new product, and self-leveling technologies can only delay the need for replacement by 5 - 7 years.
When calculating the budget for the upcoming repair, it is necessary not only to take into account how much the insert into the bathtub costs, but also to clarify the costs of paying the installer, because the service life of the repaired bathtub depends on the quality of the installation and the type of adhesive materials used.
Important! Negative reviews that have appeared online that the liner has peeled off from the base eloquently indicate that some, so to speak, “masters” use the addition of ethylene glycol to ordinary polyurethane foam, intended for completely different work.
Can I install the liner myself?
Installing it yourself will save you some money
You can install the liner in the bathtub, as shown in the video, yourself, by correctly indicating to the manufacturer the dimensions of the installed equipment. To strictly follow the technology, you need to watch the training video several times and conditionally perform all the necessary actions right in the bathroom, simulating all technological operations.
If you manage to fit within the time frame provided by the technology, then the insert into the old bathtub can be installed independently, but when you are not sure of the quality of the work, it is better to invite a specialist.
Before placing the acrylic liner in the bathtub, all preparatory operations must be carried out very carefully. Release the sides of the bathtub to the required height and width, clean the surface of the old enamel from grease, rust and limescale, because the adhesion force will depend on this, so that the acrylic insert for the bathtub does not come off during use.
After gluing the insert and installing the drain plumbing fittings, do not forget that the plastic insert in the bathtub must be filled with water to a certain level to create a pressing force and evenly distribute the glue until it dries completely. After the time specified in the instructions, you can use the bathtub in full and enjoy the results of your own labor.
Pros and cons of installing a tab
The plastic liner may come off if the technology is not followed.
Overhead acrylic bathtubs allow you to repair old equipment that is absolutely unsuitable for further use with an erased layer of enamel and numerous chips, while receiving undeniable advantages:
- A durable metal frame combined with a high-quality acrylic coating combines the positive qualities of both materials, eliminating their disadvantages;
- Insertable bathtubs in an old bathtub can be painted in one of the six colors offered by the manufacturer, which expands the possibilities of designers in the color design of interiors;
- Thermal conductivity is significantly reduced, which increases the duration of water procedures without adding hot water and leads to direct cost savings;
- By installing acrylic bathtubs on an old bathtub, the owner receives 50% or more savings on equipment replacement, excellent appearance and performance characteristics of a full-fledged acrylic bathtub;
- The service life of the liner is comparable to that of a new product.
But this method of repair also has its disadvantages:
- Low resistance of the liner surface to sharp objects and abrasive materials;
- The overhead bathtub may peel off from the base if the technology is not followed and low-quality adhesive materials are used;
- Aggressive chemical liquids used for cleaning can ruin the appearance of the surface, which will lead to the need for repairs.
How to clean an acrylic bathtub at home
All housewives face the need to clean plumbing fixtures. Before washing an acrylic bathtub, it is worth understanding what the material from which it is made is.
Acrylic is a hard plastic that was first used for dental prosthetics, and then became very popular for the manufacture of plumbing fixtures. Caring for an acrylic bathtub is very simple, and they are also very light and comfortable, so they quickly replace the old and heavy cast iron ones.
How to clean an acrylic bathtub? Most stains can be easily washed off the surface of the bathtub with plain water and a sponge without the use of cleaning agents. Since the material is scratched quite easily, the products used for cleaning should not be abrasive, i.e. contain small insoluble particles. It is also not recommended to pour boiling water into the bath.
The more often you clean your acrylic bathtub, the better. After all, it is much easier to regularly wash off small stains than to later try to clean and scrub away deeply ingrained stains. After each use, it is recommended to rinse the bathtub with water and a mild detergent, such as liquid soap, and then wipe dry with a rag or old towel.
It is recommended to clean the bathtub at home with more active substances once every 2-3 weeks. The product must be applied to the entire surface, let it sit for a while, and then rinse thoroughly.
To prevent yellowing from constantly dripping water on the bathtub, you need to monitor the serviceability of the taps and repair them on time. If the surface has already turned yellow, then the rust should be cleaned with special products designed to remove it.
If the tap water is hard enough, then deposits regularly appear on the acrylic bathtub - the so-called water stone. To remove it, you can use appropriate cleaning products or simpler folk methods - for example, periodically making a weak acid solution.
Fill the bathtub with water at room temperature. Add 1-2 liters of a weak solution of vinegar or citric acid and stir it thoroughly. Leave for 12 hours. Drain the water, rinse the bath thoroughly and wipe dry with a soft cloth.
It is better to care for an acrylic bathtub using mild detergents, such as those used for washing dishes. Liquid and regular soap also work well. To clean the bathtub, you can rinse out an old bottle of shampoo or shower gel that has run out, because they usually still have a lot of product left on the walls.
Such soft compositions can be left on the surface of the bath for a long time without the slightest risk of damage. How to clean an acrylic bathtub if it has become dull and yellowed? To restore its shine, after washing it is lubricated with polishing compounds. Powders like Pemolux, Biolan and Comet, which clean due to mechanical friction, are not recommended for use.
Then the question arises: how to safely clean an acrylic bathtub? The effect of liquid and paste products is more based on chemical removal of contaminants, so they can be used without the risk of damaging the surface.
However, they usually contain substances that are quite aggressive to the skin, causing irritation and allergies, so it is better to clean the bathtub while wearing rubber gloves. So, how to clean an acrylic bathtub if preference is given to industrial products? There is a group of products that have proven themselves in practice.
Bass is a liquid cleaner used for cleaning bathtubs and showers at home. Cif is a universal product for all surfaces in the bathroom.
“Acrilan” - as the name suggests, this is a special product for acrylic bathtubs and other similar surfaces. It comes in the form of foam and copes well with mechanical, chemical and biological contaminants and yellowness.
Although acrylic can repel dirt, long-term use takes its toll.
- The process of use can lead to the following types of pollution:
- Yellowness. If we compare acrylic with steel plumbing fixtures, the former does not become yellow over time. You can clean an acrylic product using special means.
- Limescale. A similar defect is caused by tap water, which contains a lot of metal salts. To get rid of such plaque, you can use a folk remedy - citric acid.
- Colored spot. Colored dyes can cause red, blue or other colored spots to appear on a polymer product. But due to the smooth surface, the pigment does not penetrate deeply. Any cleaning product will easily solve this problem.
All about restoration using the “fill bath” method
A self-leveling acrylic bathtub is considered the most convenient way to quickly and without destruction to update an old bathtub.
But even this modern technology has its drawbacks. What are the pros and cons of the method, we will consider further.
You can restore a bathtub with self-leveling acrylic - this is one of the easiest ways. At the same time, it is possible to choose any color of the coating
Arguments in favor of acrylic
Acrylic is a relatively new material, which first began to be used in the 90s of the last century thanks to Finnish manufacturers. Its use makes it possible to create a perfectly flat surface, very smooth, without pores or streaks.
The positive properties that distinguish acrylic from other materials for restoration (for example, from epoxy enamel) are the following:
- it is durable, retains performance characteristics for up to 15 years;
- provided that the work is carried out correctly, the paint covers the surface well, filling all the cracks and roughness, creating an absolutely even layer;
- Even a non-professional can apply liquid acrylic, however, in order to avoid annoying mistakes, you need to know some nuances;
- Compared to enamel, which takes up to 7 days to dry, acrylic takes about 3 days to dry;
- The pouring bath method can be used for products made of cast iron, steel, plastic, of any size and configuration.
Self-leveling acrylic has good adhesion. This property is especially important if the house has a good-quality bathtub made of quality material, but which has lost its appearance.
Old cast iron bathtubs are quite good in terms of their performance characteristics: the thick layer of cast iron does not bend under weight and has poor thermal conductivity. By updating the appearance, you can significantly extend the life of the product.
Disadvantages of a self-fill bath
When covering a bathtub with acrylic, some inconveniences may arise. For example, when sanding a bathtub, the house is filled with smoke and dust, and the solvent that some craftsmen use when sanding has a strong odor. Therefore, during the work, it is better to send children and family members prone to allergic reactions to friends or relatives.
When carrying out restoration, you need to be very careful. Although acrylic is easier to work with than enamel, even experienced craftsmen sometimes have troubles: the tiles adjacent to the side can get dirty, and the surface of the bathtub can turn out uneven.
Another problem that can arise when treating a bathtub with acrylic is poor-quality surface treatment before applying it. As a result, a poor connection between two homogeneous or dissimilar materials occurs, and the coating begins to swell, turn yellow, and form cracks and pockets.
Water gets under the damaged layers, and this worsens the sanitary condition of the bathroom, because bacteria and fungus develop in such hard-to-reach places.
It is necessary to choose acrylic paint for bathtub restoration very carefully; cheap material may turn out to be a fake and undo all the work: the acrylic will become covered with bubbles, turn yellow and begin to peel off