When planning the installation of a fence, the question always arises about how to fix the supports. But for each site, the solution is selected individually, since it is necessary to take into account the type of soil, the depth of groundwater, the type of fence structure, and more.
For massive fences on stable soils, it is recommended to choose concreting of pillars - this guarantees that the fence will last a long time. Concreting is done using several methods. By following the recommendations, you can do this yourself.
We recommend that you read:
- At what distance can you build a fence from your neighbor's house?
- Standards for planting trees in relation to the fence of a neighboring plot
Why is concreting necessary?
The main goal of this fastening method is to extend the service life and increase the stability of the structure.
Installation of supports with concrete mortar:
- Prevents the structure from loosening and makes the fence more resistant to wind loads.
- Increases the load-bearing capacity of the structure.
- Protects metal poles from corrosion.
But it is important to understand that supports can only be concreted on stable soils.
If you do this on heaving soil, then when it gets cold, they will simply start to be pushed out and the surface will become cracked.
You should not use the solution even if the groundwater level is high; in swampy areas it is better to choose other options.
It is important to maintain the proportions of the ingredients when mixing the solution so that it does not turn out too liquid or thick.
Which method of mounting supports to choose?
Before finalizing the installation method for the supports, all factors must be analyzed. It is very important to consider points such as:
- fencing weight;
- sail structure;
- soil characteristics, in particular its moisture;
- financial opportunities.
Concreting is undoubtedly the most reliable method. However, if it is impossible to complete it, do not be upset. If everything is done correctly, supports installed without pouring concrete will not lose strength and will hold the fence for a very long time.
Types of fence posts
They are selected based on whether the fence will be temporary or permanent and what kind of fabric will be used to fill the sections.
Popular types of supports:
- Wooden. Recommended for lightweight fences made of picket fences, unedged or edged boards, and timber. Suitable for fences made of chain-link and PVC mesh. But even with proper treatment of wood against rotting and insects, its service life is limited. Follow the link to see detailed recommendations for choosing and properly installing wooden fence posts.
- Asbestos cement pipes. Less popular because they require careful installation. The pipe cavity is filled with concrete or left empty. Plugs are attached to the top, otherwise water that gets inside in winter will freeze and lead to the formation of cracks. Asbestos-cement pipes are used for fences made of concrete, welded or chain-link mesh.
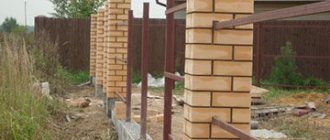
- Brick. For this type of support, you will need to competently draw up a masonry scheme and estimate the consumption of materials. For reliability, a metal pipe or a bunch of wire rods must be installed inside the trench, which will serve as reinforcement and strengthen the supports. Then cover them with bricks. Concreting of such fence posts should not be done spot-on, but rather poured together with a strip foundation. They are used for sectional fencing made of brick, stone, corrugated board, metal picket fences, and forged structures. Instructions for choosing materials, different masonry technologies, step-by-step installation of brick pillars.
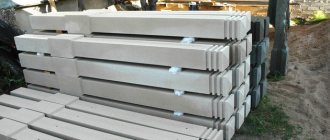
- Concrete. It can be delivered to the construction site in finished form or can be created at home. They look good in combination with spans made of concrete, stone, corrugated board, and forging. In the last two cases, to fasten the sectional material, even during the construction of the supports, it is necessary to fix special embedded parts. Concrete pillars must be installed on stable soils in warm weather so that they have time to shrink.
- Metal. The basis is taken from profile pipes of round or rectangular cross-section. The average section is 60*60 mm with a wall thickness of 2–3 mm. These are optimal supports for both lightweight and massive fences. In the absence of an anti-corrosion coating, they require pre-treatment with protective solutions. Tips for choosing metal poles.
When installing temporary fencing at a dacha, poles made of wood or metal can be driven into the ground. Hammering is also suitable as the main method of fixing small-diameter supports under a chain-link fence or PVC mesh.
But in order for a massive decorative structure to last longer, it is still better to concrete the pillars.
Selection of installation technology
The technology for installing support structures depends on the properties of the soil. Before installing structures, a geological analysis of the area should be carried out, which will reveal the depth of freezing and the level of groundwater. In areas with heaving soil, it is not recommended to concrete the supports. Heaving soils can increase in size during the freezing process, and during the period of thawing of snow masses, they can turn into water, which contributes to soil subsidence. Melt water also contributes to the destruction of the concrete base.
Pillars are hammered in places with hard soil; areas with sand and clay soil are recommended to be concreted. The method of driving in supports does not require much time and is used for non-permanent structures.
Return to contents
We carry out calculations
For sectional fencing made of corrugated sheets, siding, or metal picket fences, it is worth choosing a distance between spans of no more than 2.5 m, or better yet, less, in order to reduce the windage of the structure. A large distance between the posts will gradually lead to the skew of the fence.
The number of transverse or longitudinal logs is determined by the height of the structure. For a 1.5–2 m fence, two pieces, located 25 cm from the top and bottom of the canvas, are enough.
The consumption of the solution depends on the depth of pouring the pillars.
Determining the depth of concreting the supports
It is considered to be the soil level below the freezing point. For example, if the soil freezes to 1 m, then the depth should be taken with a margin of 1.1 m.
For most regions, the optimal depth is considered to be 1.5 m.
It is important to take this value into account when selecting the height of the pillars. So, for a two-meter fence it is necessary to take supports 3.5 m high.
To ensure the job is done well, you can order the services of craftsmen. They will not only install the posts, but also the entire fencing on a turnkey basis.
Requirements for intake pipes
If you don’t want to spend time, effort and money repairing the fence in a year or two, then you should immediately worry about constructing posts that are sufficiently strong and reliable. These should be supports that will be able to cope with the weight of not only the spans of the fence, but also with dynamic loads.
It is very important to correctly calculate the safety margin so that the fence around the summer cottage can withstand the effects of wind, snowdrifts or animals. The selected posts for constructing a fence for a summer residence must be designed in such a way as not to deteriorate the appearance of the fence itself . Therefore, if they look out of place against the background of the main structure, then you need to deal with them in such a way that they are hidden from others.
Preparing the site, materials and tools
The construction area is cleared of debris and vegetation. Markings are made using rope and wooden pegs.
Since metal supports are the most convenient to install, let’s consider the concreting process using them as an example.
To work you will need:
- Crushed stone of small or medium fraction. Used as a filler for concrete mortar.
- Clean sand.
- Cement grade M300 or M400.
- Drill with a diameter of 160–180 mm, length up to 2 m.
- A grinder and several metal discs.
- Hacksaw for metal.
- Construction level from 60 to 120 cm long.
- Marker and tape measure 5 m.
- Wire rods for reinforcement.
- Waterproofing material.
- Plastic sewer pipe with a diameter of 110 mm. For one pillar you will need a piece of 75 cm.
A wheelbarrow and a shovel will come in handy.
For a small amount of work, the solution is mixed manually in a trough or with a construction mixer. For a larger amount of solution you will need a concrete mixer.
Peculiarities
The main difference between butting and concreting is that the compacted pad is completely permeable to moisture. It is a drainage system at the base of the pillar, which allows the method to be used when constructing barriers in soils subject to frost heaving, that is, a change in volume during freezing.
As soon as the ambient temperature becomes negative, all the moisture in the soil begins to freeze. When water passes from a liquid to a solid state, its volume increases, that is, heaving occurs. This is a huge headache for builders. Butting allows you to neutralize this effect. Since a drainage layer is formed around the support and does not retain moisture, there is nothing to expand there.
Another characteristic feature is the plastic base, made by filling crushed stone (stones, gravel, etc.) with sand. The resulting buffer allows you to compensate for the pressure of the lower layers of the soil.
Types of concreting and pouring pillars
Let's look at the methods of fastening supports that are suitable for different fences, and evaluate the advantages and disadvantages of each of them.
Methods of fastening supports: from left to right. 1 – driving method, 2-3 partial and full concreting, 4 – crushed stone butting, 5 – installation on screw piles.
Dry
Quite a simple fastening method. Significantly reduces construction time. It is used to install a temporary or permanent fence in a country house, around a private house.
Suitable for lightweight fabric such as chain-link, boards, picket fence.
Sequence of work:
- Use a drill to make a hole of the required depth.
- We wrap the post with roofing material or coat it with mastic.
- We level the support and, if necessary, attach spacers to the sides.
- Fill the hole to the top with a mixture of sand and cement.
- Sprinkle with water and tamp.
Among the advantages of this method:
- This is the optimal solution for clay soil or loam. The pillar will not stick out of the ground under the influence of frost.
- Installation speed. In a day you can secure all the supports for the country fence.
- The simplicity of the work allows you to do it yourself and not use special equipment.
For reliability and stability of the installation, it is recommended to weld a metal plate or spacers to the bottom of the posts.
Dry concreting is not suitable for wet, moving soils and massive, heavy fences.
Spot
Performed in the following sequence:
- Using a drill, we make 1.5 m deepenings. We tamp the bottom.
- We fill the bottom with a 30 cm sand cushion.
- We roll a piece of roofing felt into a sleeve and place it in the hole. It turns out to be a waterproofing glass.
- We insert a pillar into it. We check the verticality with a level.
- Mix a solution of M300 cement, crushed brick, and crushed stone.
- If necessary, we weld spacers to the post.
- Pour the finished mixture into the hole.
You can continue working with concrete pillars only after the solution has completely hardened.
Pros of spot filling:
- Suitable for any type of soil, with the exception of swampy ones.
- The supports can withstand heavy loads, so this is how you can fix fence posts made of corrugated sheets, bricks, or metal profiles.
- Resists well to environmental influences.
- If the technology is followed, the service life exceeds 20–30 years.
Among the disadvantages of spot filling, the labor-intensive process and the need to strictly adhere to the level of installation of supports are noted.
If you make holes in heaving soil that are not deep enough, the pillars will simply begin to be pushed out of the ground under the influence of frost.
Partial
This type of concreting should only be used on stable soil for structures that do not carry a high load on the pillars. Suitable for fence:
- made of PVC mesh;
- chain-links;
- welded gratings;
- picket fence;
- boards;
- polycarbonate.
Photo: partial concreting of a square profile pipe
Unlike spot or full concreting, such fixation significantly reduces material costs and construction costs.
To secure the poles into the prepared holes, they can be rammed or simply driven into the ground.
The technology is similar to spot pouring, but only the lower part of the hole is filled with concrete. Time is given for hardening - up to 5 days, after which the top is covered with crushed stone and sand.
A second option for partial concreting is possible, when the bottom of the pit is compacted with a cushion of crushed stone and sand, and the top is filled with mortar.
If you want to make a small plinth for the fence, then you should build formwork for each post in advance.
Complete
This method has many modifications. Most processes are similar to partial concreting, only the well under the support is filled to the top with one solution.
There is another option for complete filling, when in addition to the well, the internal cavity of the column is also filled with concrete. In this case, it is important to place plugs on the support on both sides so that water does not accumulate inside.
3D model of the installed support
The bottom of the pillar must be waterproofed with roofing felt and wrapped in plastic film.
Used on stable soils under heavy fences. This method is reliable, ensures the durability of the structure, but requires a lot of materials and labor.
Using a strip foundation
Arranging the tape will take longer than any of the concreting methods, but the integrity of the foundation and pillars will make the fence more resistant to weather influences and wind loads. Suitable for rocky, sandy, heaving soil.
On stable soil, a shallow tape will suffice.
Regardless of the chosen method of fastening the poles, it is important to take a responsible approach to each stage of the work: from the purchase of building materials to the completion of installation. Then the fence will last a long time and will not need repairs.
Types of columnar foundations for different soils
The foundation is laid at different depths depending on the type of soil.
The buried one falls below the soil freezing line by at least 1 meter, which guarantees its strength and reliability. Suitable for heaving, problematic soil types, such as clay and marshy soil.
Shallow-depth is laid to a depth of 70 cm below the freezing level. Suitable for sandy and rocky soils.
Not buried - no more than 50 cm. It can be chosen if the soil is strong, durable and not susceptible to all sorts of disasters depending on the weather.
Often the top layer of soil is removed and replaced with a less problematic one. This is suitable for extremely wet soil. A foundation with a rund beam will save you if the soil is swampy or if the building is made of heavy materials. These include brick, stone, metal structures.