Armopoyas (reinforced concrete belt), also known as seismic belt – a very strong monolithic strip along the perimeter of the building and load-bearing walls made of aerated concrete.
The objectives of the armored belt are to significantly strengthen load-bearing walls to increase their load-bearing capacity, in order to avoid cracks and other deformations due to uneven shrinkage of the building, roofing, wind and other loads.
The armored belt firmly holds aerated concrete blocks together, distributes the load evenly and creates structural rigidity.
Height and width of the armored belt
Ideally, the geometry, reinforcement and concrete composition of the reinforced belt are determined by calculations.
Usually the width (thickness) of the armored belt is equal to the width of the wall, 200-400mm, and the recommended height is 200-300mm.
But it would be wiser to make the width of the armored belt a little thinner than the wall, so that there is room for insulation to reduce cold bridges. Extruded polystyrene foam (EPS) is best suited for this task, as it insulates heat well. There is also the option of pouring an armored belt into ready-made aerated concrete U-blocks, but see this further in the text.
Kinds
The installation of armored belts when constructing the walls of an aerated concrete house is mandatory; it must comply with building codes and the design.
As a rule, the following types of armored belts can be installed in a house :
- Sub-foundation or grillage. The walls of a strip foundation are installed on such a system. Such a belt combines the pillars of a pile foundation into a single structure. It is installed under the supporting structures of the building. For it, rods Ф = 14 mm are used, which is tied with a steel rod Ф = 10 mm in increments of 200 mm.
- Basement , mounted between the walls and the base of the house, after the construction of the foundation, under the load-bearing walls, regardless of whether the foundation protrudes above the ground or not, especially in the case of installing floor slabs.
- Interfloor or unloading is installed with the aim of strengthening wall structures and distributing loads from the floor throughout the entire foundation and frame of the building. An important difference of such an armored belt is that the system does not allow the walls to separate. The number of interfloor armored belts directly comes from the number of residential floors.
- Under-roof (or top) for attaching the Mauerlat, distributes the loads from the roof.
Why do you need an armored belt in an aerated concrete house?
- In case of uneven shrinkage of the house, during seasonal heaving of the soil, during earthquakes, the armored belt maintains the geometry of the building.
- An armored belt can level walls horizontally.
- Adding rigidity to the entire aerated concrete building.
- Local loads are distributed evenly across load-bearing walls.
- The high strength of the armored belt allows you to attach all important structures to it, for example, a power plate.
Pouring concrete
To fill the armored belt, use a solution prepared on the basis of concrete of at least M200 grade. The mixture can be ordered from the factory or prepared independently. For concrete of a grade not lower than M200, the proportions are as follows: part M400 cement, three parts sand, 5 parts crushed stone. If concrete grade M250 is being prepared, the ratio is as follows: part M400 cement, two parts sand, 4 parts crushed stone.
It is advisable to add water to concrete in small quantities, since otherwise the structure of the armored belt in a house made of aerated concrete may not be strong enough. It is better to add a plasticizer. The water ratio should be approximately this: for 10 parts of cement, take 5-7 parts of water. When preparing the solution, it is advisable to vibrate it with a special vibrator or poke it with a bayonet made from a piece of reinforcement.
The armored belt is poured one time to ensure the solidity of the structure (we get a monolithic belt). While the concrete is setting, it must be periodically sprayed with water to prevent cracks from appearing as it shrinks.
After removing the armored belt formwork, wait for the concrete to fully gain strength (up to 28 days) and continue work: laying partitions, walls, roofing, etc.
An armored belt in a house made of aerated concrete is a mandatory structural element, which in the future will provide the building with sufficient rigidity, strength, and a long service life. Provided the work is carried out correctly using high-quality materials, it is possible to achieve the best result and protect the aerated concrete structure from any loads and external negative influences, including earthquakes.
Armobelt under the Mauerlat
The Mauerlat must be firmly attached to the load-bearing walls with studs and anchors. The rafter system itself, the weight of the entire roof, snow and wind loads create a significant bursting force that can break unreinforced walls. An armored belt under the Mauerlat solves this problem, and it will be performed in the same way as under the ceiling.
Brick belt on aerated concrete walls
It is a regular brickwork, additionally reinforced with reinforcing mesh between the rows.
The construction of such a belt is extremely undesirable, since brickwork, even with reinforcement, is less durable than a monolithic concrete structure.
Two or three rows of bricks will not ensure uniform distribution of loads on the wall structure , which can lead to cracks in it, or even complete destruction. Therefore, such a risk is not justified.
Nevertheless, this option is most often used by unscrupulous builders due to the ease of execution and savings for the developer.
The installation of a reinforced belt for wall structures made of gas silicate blocks is a mandatory measure. It will ensure high-quality operation of the building and extend its service life for many years.
Armored belt frame, brief instructions
- The framework of the belt reinforcement must be continuous.
- The armored belt must be on all load-bearing walls.
- The overlap of longitudinal reinforcement is at least 800 mm.
- The frame is made of two rows of reinforcement, two rods each.
- The minimum thickness of longitudinal reinforcement is 10 mm.
- It is advisable to use long (6-8 meters) reinforcement bars.
- The diameter of the transverse reinforcement is 6-8 mm.
- The pitch of transverse reinforcement is 200-400 mm.
- The reinforcement on all sides must have a protective layer of concrete of at least 5 cm.
- Longitudinal and transverse reinforcement are connected to each other with knitting wire.
- At the corners, the longitudinal reinforcement must be bent, and try to overlap further from the corner.
- The frame must be strictly horizontal.
Calculate the distance between the reinforcement bars based on the thickness and height of the reinforced belt, taking into account the protective layer of concrete, at least 5 cm on each side.
Embedded studs
Sometimes, in order to secure the Mauerlat, studs with a diameter of 12 mm or more are pre-installed on the armored belt, protruding 3-4 cm above the Mauerlat. The installation step of such studs is 100 cm: they are attached to clamps with knitting wire.
As for the question of the feasibility of making a Mauerlat in the presence of a reinforcing belt, then indeed, theoretically, the rafters can be fixed to the belt. However, in practice this will require a significant number of additional measures. So it’s much easier to go the traditional route of using a reinforced belt under the Mauerlat.
Scheme of reinforcement of corners and junctions of the armored belt
Creation technology
To ensure a long service life of the reinforcing belt, it is performed in several stages in compliance with the technology developed by the project.
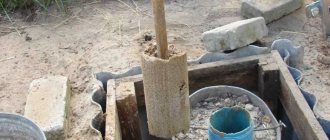
Installation of formwork
To install the armored belt, special formwork is used , which can be assembled from formwork boards, bricks or U-blocks made of aerated concrete.
Reinforcing bars are placed inside the formwork structure and filled with concrete mortar, which is first done manually with a mixing attachment to a drill or using a concrete mixer. The second option is more preferable, since a lot of solution will be required.
The most affordable and budget formwork option is considered to be wooden, made from 20 mm boards . They are built up along the perimeter of the walls with bars, and secured on top with special ties. The lower part is screwed with self-tapping screws to the wall blocks.
Reinforced frame
The technology for tying reinforcement is simple, but it must be done very precisely according to the pattern and dimensions indicated in the project, since it is these parameters that will determine the endurance of the entire wall structure.
The process of knitting the reinforcement cage:
- First, a base with a square cross-section is constructed from 4 rods. Ribbed fittings are secured with jumpers.
- Proceed with the installation of the main fittings.
- For fixation, take a pliable wire and strengthen it with longitudinal elements at a level of 40 mm from the edge of the wall.
- After 2 rods, they are joined with short jumpers every 250 mm.
- Then the vertical components are mounted using a similar technique.
- After which the longitudinal rods are screwed to the vertical components.
In the process of constructing an armored belt for aerated concrete walls, it must be made with the least number of assembly seams; such requirements will ensure the uniformity of the structure.
Fill
This is the final stage of making a seismic belt for such walls. This operation can be performed using ready-made concrete mortar , but you can prepare it yourself at the construction site. For this purpose, mixing is carried out in the ratio: 1: 3: 5 - these are the proportions of cement, sand and crushed stone. Add water little by little to the pre-mixed mixture until a solution of the desired thickness is obtained (thick sour cream).
Pour the concrete solution immediately without interruptions. Make sure that air voids do not form, so periodically pierce the thickness of the uncured concrete layer with a rod. The formwork is dismantled 5 days after the solution has completely hardened.
Use of chemical anchors
To attach a wooden beam to a wall where there is no reinforced belt, you can use chemical anchors. They appeared on the market not so long ago, but have managed to prove themselves well. Chemical anchors are divided into the following types:
- Capsule design. An ampoule containing a special composition is inserted into the hole made under the anchor. After contact with air it begins to harden. A pin is driven into the prepared hole, which breaks the tightness of the ampoule. After 30-45 minutes, the composition in the hole polymerizes, forming a reliable connection.
- With cartridge. The anchor design contains a pipe filled with a polymer composition. A dispensing gun is used to supply the mixture into the hole. The polymer hardening time is about 45 minutes.
Comparison of conventional metal and chemical anchors Source ack-nn.ru
Chemical anchors, despite their high cost, are very reliable. The service life of such connections reaches 50 years. The polymer composition penetrates deep into the pores of aerated concrete, providing a high degree of adhesion.
Blitz tips
- When pouring the cement composition, you should ensure that the elements of the reinforced mesh do not touch the walls of the formwork.
- To increase the functionality of the armored belt, a frame made of reinforcement is installed on the surface using a level.
- The strength of concrete after it is poured is facilitated by periodic moistening, especially in hot weather. It is recommended to moisten the structure every day for five days. The best effect is achieved by covering the moistened surface with plastic film.
- The formwork can be removed after a week, but it will function as intended only after two weeks, when the cement mixture has completely hardened.
- If you plan to insulate the unloading belt, then you should not make it flush with the wall. Experts recommend shifting the formwork inward with the further purpose of filling the resulting niche with insulating, heat-insulating material.
- There is no need to spend money on a reinforced belt if there is strong soil not saturated with water under the foundation, brick walls, and also when building a one-story house with wooden beams rather than reinforced concrete panels.
Video description
The advisability of using an armored belt or its absence is described in the following video:
It is recommended to fasten the Mauerlat to aerated concrete without an armored belt using anchors 500 mm long. The installation technology is as follows:
- A waterproofing layer is laid between the wall and the wooden beam. It will prevent the penetration of moisture, which leads to the development of mold. To create waterproofing, you can use roofing felt.
- The wooden beam is laid in its design position. Markings are made to indicate the installation locations of the rafters.
- Taking into account the position of the rafter legs, holes are made for installing anchors.
- The fastening element is driven until the washers under the nut stop.
- The anchors are tightened tightly, ensuring the rigidity of the created structure.