Plywood is often used when an apartment is being renovated, a new house is being built and a subfloor needs to be prepared. This building material is durable and relatively inexpensive.
However, there are several important nuances that you should pay attention to when choosing and installing. Plywood for the floor should not emit harmful chemical fumes (due to glue) and should have a high degree of water resistance. Not every species can boast of this.
Benefits of using plywood for flooring
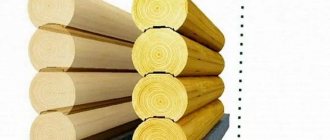
Plywood is a durable material made from wood veneer. The veneer layers are arranged alternately in the longitudinal and transverse directions, which gives the material flexibility. The degree of environmental friendliness depends on what kind of glue was used in production.
If you lay plywood on a concrete screed, then during operation the plywood sheets will bear the brunt of the impact. Microcracks form in the wood, but they do not affect the quality of the floor.
The wood building material from which the subfloor is made has good contact with any external finish. This has a beneficial effect on the condition of the floor for many years. The surface remains smooth, without cracks or bends.
Another advantage of using plywood is ease of installation. This material is easy to cut into pieces and quickly installed. One person will be able to carry out all the work with minimal experience and the most ordinary construction tools at hand.
Plywood has low thermal conductivity, which reduces heat loss in the room. And if you take sheets of the highest grade and fine grinding, then you can use them for final finishing.
Plywood quality as a factor influencing its choice
As for quality, there are four groups:
Scheme of floor insulation with plywood.
- Almost no external flaws.
- There are knots and veneer inserts.
- There are cracks, knots and other defects.
- There are multi-colored stripes, knots, cracks, veneer inserts, and so on. This type of plywood is the lowest grade, but the quality of gluing of individual layers is very high, which allows it to be used as a rough floor covering.
Here it becomes clear that the choice should be based on the purpose of application. If plywood is needed only for insulation, then you can choose the cheapest one, but if it will be used both as insulation and as a finishing coating, then you need to choose the best one in terms of appearance.
Where not to use
Despite all the advantages, plywood sheets are not recommended for use in rooms with high humidity. This is their minus. Plywood is not installed in bathhouses, swimming pools, showers, or bathrooms. Of course, there are moisture-resistant laminated varieties, but their price is high, so not everyone will want to use them over a large area.
It is not recommended to cover the floor with plywood in rooms with strong temperature changes, for example, in unheated dachas. Excessive heat after freezing may cause the sheets to warp.
Recommended heating systems for wooden surfaces (plywood, OSB, parquet)
It is recommended to use low temperature underfloor heating systems (with underfloor hot water flow temperatures up to 55°C). The surface temperature of the finished wooden floor should not exceed 29°C even in the edge areas. Favorable values: from 26 ° C to 27 ° C.
Distance of heating pipes under plywood
To limit temperature pulsation on the surface (at a given maximum temperature, low pulsation brings a higher average temperature and therefore higher heater output), when heating floors with hot water, the distance between the heating pipes should be from 10 to 20 cm.
Thermal resistance
It should be taken into account that there is a reasonable ratio of thermal resistance of the layers above the heating element (cement screed or dry screed and top surface) and below the heating element (thermal insulation).
What kind of plywood to lay
Before laying plywood on the floor, you need to familiarize yourself with its characteristics:
- The brand for residential premises must be FC. This is the safest option, although its moisture resistance is not very high. Laminated products are also used, but they are more expensive;
- For safety reasons, choose E1 or E0.5 class;
- Inexpensive grades 3 and 4 are suitable for subfloors; for finishing floors, you need to take a higher grade. The designation of grades 2/2, 2/3, 1/2 and the like is often found. This is how the grade of veneer is indicated from different sides;
- the humidity of the sheets should be no more than 15%, the lower it is, the better;
- plywood used for the subfloor must have a thickness of at least 12 mm; for finishing, a value of 10 mm is allowed. Laying in two layers is possible. In workshops, workshops, and public spaces with high traffic, the thickness can reach 2.5 cm;
- For subfloors, unsanded plywood, designated NSh, is suitable. It can also be polished on one side - Ш1.
Laminated plywood with a mesh texture is used primarily for transport floors. It is suitable for finishing on terraces, country houses, outbuildings.
The dimensions of the sheets are chosen in accordance with your own needs; they are not of fundamental importance for installation. It must be taken into account that the larger the leaf, the greater its mass. The process of transportation and manipulation during installation becomes more complicated. To avoid tension in the material under load, large sheets are sometimes cut. When gluing to a screed, it is convenient to work with squares of 75 x 75 or 60 x 60 cm. Elongated strips are suitable for joists. In large rooms they may not be cut.
Domestic manufacturers offer good quality plywood, which is quite suitable for flooring. The same applies to Western European brands. As for Chinese goods, you need to be careful when choosing, because there are products that do not meet the standards. For example, the declared thickness may be greater than the actual thickness.
Types and scope of application of penofol
Main types of material
| TYPE | COMPOUND | APPLICATION |
| A | Foiling only on the outside | Used in combination with polystyrene foam |
| IN | Aluminum foil lining on both sides | Can be used without additional materials |
| WITH | Self-adhesive type, foil-lined on one side. On the other hand, it is impregnated with a contact adhesive composition. | Installation is carried out without the use of additional adhesives. |
| R and M | The foiling is one-sided, has a relief base | Suitable for interior and exterior work |
| Super NET | NET – means network. Double-sided foiling. | It is used for thermal insulation of pipelines, heating mains, air ducts. |
| A.L.P. | Laminated penofol. A cellophane film is applied over the foiling. | Widely used in agricultural work. |
You may find the brand "Penofol 2000"
- This is the cheapest type of penofol. It is of low quality and less durable.
Scope of application of penofol
The scope of application of insulating material is extensive. The main thing is to choose the right type of penofol.
In construction
reflective heat insulator is used:
Other applications:
- Refrigerators, refrigerators, vans.
- Cars.
- Railway carriages.
Necessary tools, materials
for installation work:
- Wooden beams.
- The slats are 15–20 mm thick.
- Antiseptic.
- Adhesive composition for certain types of penofol.
- Dowels, self-tapping screws for fastening the frame.
- Aluminum tape for gluing joints.
- Scissors.
- Furniture stapler.
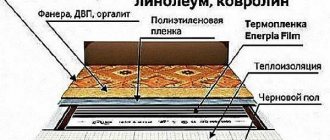
Subfloor laying options
Plywood is easy to lay on a flat concrete screed in an apartment. Sheets 12 mm thick are glued to the surface, having first checked its horizontalness. The height differences should be no more than 2 mm, otherwise you need to fill it for leveling and wait until it dries completely.
Note! For any installation, gaps of 2.5–3 mm must be left at the joints of sheets, and 1–1.5 cm away from the walls. This will avoid deformation due to changes in temperature and humidity, and there will be no creaking or sagging.
Plywood sheets are laid with a slight offset so that there is no clear joining of the four corners. This installation increases the strength of the floor covering.
The most common installation method is on wooden joists. It can replace the screed. The surface is perfectly smooth and can be used for any finishing. The logs can be adjustable. How to perform such installation will be discussed below.
When there is a difference in height on a wooden floor, fastenings in the form of studs or screws are used, which allows you to level the surface without the use of joists. This is an interesting installation method in which fasteners (screws, self-tapping screws, studs) are drilled over the entire area at the same distance from each other. The height of their heads should be at the same level. You can check this using a laser or a regular level. The hardware must be screwed in evenly. Foam is squeezed out between the fasteners and a thick plywood sheet is laid on top.
Electrical
Modern manufacturers of electrical equipment answer the question of how to heat the floor under linoleum. The desired microclimate is created not by retaining heat, but by additional energy expenditure. The cost of the device is determined by the complexity of the technology used.
Film heated floor
The heating element is produced in the form of sheets. The canvas is laid on a heat-reflecting layer and runs on mains power. Low-power thermal film (up to 150 W/m2) continuously maintains a comfortable floor temperature and prevents overheating.
Infrared
Transparent polyester fabric is fire resistant and moisture resistant. The heating element is mounted directly under the linoleum without the use of cement or putty. This type of insulation is recommended for loggias, where it is effective and safe.
Infrared film floor
Electric
This heating method is suitable for any type of flooring except parquet. Heating cables are laid on the thermal insulation material, and a thermostat is mounted against the wall. The entire system is connected to the electrical network. After the inspection, the structure is filled with cement and linoleum is laid.
Installation on joists
If you need to insulate the floor, level it or raise it, then use logs. Installing a plywood floor on joists with your own hands is more labor-intensive.
It is recommended to take plywood with a thickness of 12 mm or more. You can use two layers of 9 mm sheets or take sheets of different thicknesses, but so that in one layer they are all the same. The top layer can be laid out from thinner sheets. The total thickness of the plywood covering can reach 25 mm. The second layer is laid so that the joints do not coincide with the first.
Beams with a cross section of 70 x 50 are used as logs. Beams and plywood sheets must be kept at room temperature for several days before they are mounted. Moreover, the plywood should be in a horizontal position so that there are no bends.
The logs are screwed with anchor bolts to the concrete base or with strong screws to wood (if, for example, the installation is on an old wooden floor). The first log goes at a distance of 30 cm from the wall, then subsequent logs are laid in increments of 50 cm, strictly parallel to each other.
Note! To screw plywood sheets to the joists, use only high-quality yellow wood screws.
The screws must be completely screwed in and not break. Their length must be at least three times the thickness of the plywood sheet.
The tools used are a circular saw, a laser level, a meter and a screwdriver. It would be a good idea to impregnate all wood materials with fire protection.
The walls do not always go straight, so the first sheet must be leveled using a level and a square. Next, the sheets are measured, cut with a circular saw and laid out on the surface. The layout should be staggered so that more than two corners meet at one point. And we should not forget about deformation gaps.
Self-tapping screws can be fastened quickly if you drill countersink holes in advance. It is convenient to use a screwdriver with a countersink. The distance between the screws is 20–30 cm. In this case, there must be at least 8 fasteners on one sheet.
After the floor is laid, everything is secured, the remaining joints are sealed with special mastic.
Conclusion
These instructions can be used not only for leveling the floor with plywood in a wooden house with your own hands. In a similar way, with minor additions to laying technology, surfaces in brick buildings are leveled. Follow the publications on our website and you will learn a lot more new things from our specialists.
To make it clearer for you, we have presented a video in this article, watch and do it.
Leveling with plywood sheets
In old houses there are floors with worn wooden planks. If the wood is not rotten, then it should not be removed. It is enough to remove the old paint, remove debris, and level the floor with plywood sheets on top. Such multi-layer flooring will be an excellent thermal insulator. As finishing you can use laminate, linoleum, parquet boards.
Laying plywood on a wooden floor is carried out in the same way as on a screed, leaving expansion joints (gaps). Secure the sheets with self-tapping screws, twisting them so that the cap is recessed. Then they smooth everything out with a sander, filling the cracks and recesses with putty. If a parquet board is to be installed, then the underlay is covered.
Plywood should not be laid under a wooden plank floor. Natural wood is quite massive; materials from it are laid directly on the logs.
General provisions
Before proceeding directly to laying plywood, let's make sure that this step is necessary.
Main reasons
An example of an old plank floor
It's all about the unevenness that appears on the plank floor over time. Some boards sag, others diverge, and still others are completely deformed under the influence of various factors. As a result, undulations form on the floor surface and cracks appear. If the differences do not exceed two millimeters, then you can still do without drastic measures, but if they exceed, then the base must be leveled.
The fact is that such modern coatings as, for example, laminate or parquet have special locking systems, which, if there is curvature in the floor, become loose and become unusable.
In this case, the tile will simply crack, and even linoleum with a creaky and dilapidated rough layer will not look respectable. Therefore, it is necessary to create another reliable, even and durable layer, for which plywood is ideal.
Advantages of plywood
Wood laminated board
But why then plywood?
Let's take a look at the advantages of this material:
- Relatively light weight. That is, the pressure on the logs will not increase much, and it is much more convenient to work with light material.
- High strength indicators. Despite the lightness and small thickness, the sheets of wood-laminated board are very durable and can withstand significant loads.
- Simple installation instructions. Next we will analyze it in more detail.
- Smooth surface. Sanding of plywood is always carried out with very high quality, making such products an excellent basis for any decorative coating.
- Moisture resistance. Thus, the finishing layer will be protected from dampness coming from below.
- Acceptable price. The technology for producing wood-laminated boards is not expensive.
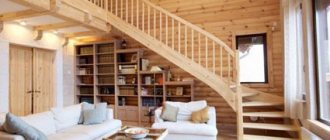
- Versatility. You can make both the walls and the ceiling from plywood in a wooden house.
It is even possible to cover the walls with plywood in a wooden house