Am I the only one who feels like an idiot talking to a fashion designer? I hang, I hesitate, I mumble. Their ideas are often shocking: brick and broken glass in the bedroom, mirrors in the kitchen, transparent toilets. The last one is laminate on the ceiling. And after all, “people are eating up,” oddly enough. Fine. He who pays calls the tune.
Since it has become so fashionable, I’ll tell you how to attach laminate flooring to the ceiling correctly. We’ll also talk about the pros and cons of the material itself so that you understand what you’re up against.
Choosing laminate for ceiling cladding
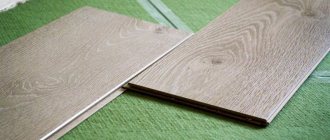
You should immediately discard the idea that a durable laminate is needed for cladding. No one will walk on it, so all attention should be paid to appearance. It is also worth focusing on the method of fastening the locks and the material of manufacture.
- Choose only one designer laminate ceiling model in one room. Do not try to select material options to create different combinations and patterns. The effect will be unsuccessful.
- Pay attention to the material from which the laminate is made. It can be chipboard, MDF, fiberboard. Accordingly, the elements for installation will need to be suitable. Also, do not try to choose the same designs from different raw materials. For example, MDF and chipboard or chipboard and fiberboard. There should only be one set.
- Laminate should be thin and light. If it is not docked correctly, it may fall out, and this is unsafe. Moreover, heavy structures on the ceiling are extremely undesirable.
- Don't forget about the shade. The color of the finished coating should be in maximum harmony with the decor in the room. The ceiling should not be very contrasting or, on the contrary, invisible. We need to find a “golden mean”.
- Choose a coating pattern so that it does not contradict the style of the interior. Light and delicate lines are more suitable for a rustic or Provence style. But the clearly visible cut lines of the wood will emphasize the loft or English design.
- Buy laminate from only one batch. Otherwise, the sets may not match in size and may differ by one or two shades in color. This will be very noticeable.
- When buying laminate for the ceiling, you should take care of some reserve. Purchase laminate 15% more than the required quantity, calculated according to the estimate. Spare fragments will help correct the situation in case of deformation during installation.
- Pay attention to texture. It comes in glossy (smooth) and matte. The first one is reflective, so it is ideal for rooms with limited space.
- Avoid too many joints. They will play a negative role on the ceiling area, and it will appear smaller. To get rid of this problem, it is better to use long slats.
- It is better to ignore the abrasion class. It will be impossible to evaluate it during operation. This parameter is taken into account only when laying panels on the floor.
Materials and tools
Installing laminate flooring on a wall will require purchasing the following materials and tools (the latter can be asked from neighbors or friends or rented):
- several packs of lamellas;
- ceiling and floor plinths;
- gel for lubricating locks;
- a set of spacer wedges or slats;
- fastening material depending on the chosen fastening method (glue, screws, profile, clamps);
- stepladders or construction platform (gantry);
- jigsaw for cutting lamellas (you can use a hand saw for wood);
- screwdriver for working with self-tapping screws;
- wooden or rubber mallet;
- bars for padding panels;
- construction square;
- level;
- pencil or marker;
- metal ruler 1 m long;
- spatula.
Flow calculation
Before visiting a hardware store, you need to calculate the required amount of materials - laminate and fasteners. You can do this yourself using the following algorithm:
- is the area of the wall. If it has windows or doors, then their area is minus from the result obtained;
- the final result increases by 10-15% when laying horizontally or vertically and by 20% when laying diagonally;
- the adjusted figure is divided by 2 - this is the average amount of laminate per package per m2. The number of packages is always rounded up to the nearest whole number.
Advantages and disadvantages of laminate ceilings
Laminate is a finishing coating that tends to have both disadvantages and advantages. Let's look at the positive qualities:
- strength and durability;
- attractive appearance;
- dirt and dust are practically invisible;
- a wide range of models with different patterns;
- the material is clean and non-flammable.
Installation of ceiling lights in a laminate ceiling in a living room Source remontnik.ru
Laminate ceiling combined with the floor Source mykaleidoscope.ru
The disadvantages of the cladding include:
- it is necessary to consider the installation technology;
- It is impossible to fasten alone, an assistant is needed;
- afraid of moisture (but different coatings combat this).
Important! It is better not to do additional decoration of the ceiling, as there is a high risk of spoiling the appearance of the laminated panels.
There is no point in looking for a specialized ceiling covering. Laminate all goes the same way only on the floor, but has different categories of wear resistance. Accordingly, you can take the thinnest look on the ceiling.
Kitchen ceiling made of laminated brown panels Source mykaleidoscope.ru
Fragmented ceiling cladding with laminated panels in the kitchen-dining room Source pinterest.at
Finishing the ceiling with a smooth, non-shiny laminate Source centro-pol.ru
Types of laminate for masonry
Laminate flooring can be:
- ordinary;
- structural;
- glossy;
- matte;
- waxed;
- "oiled wood"
For a non-standard ceiling, you should choose coatings with reflective properties. They will add richness and style to the room. For the rest, it’s better to rely on personal preferences.
Multi-color brown structural laminate ceiling Source evrostil37.ru
Ceiling decoration with laminate with the ability to build in lamps Source modernplace.ru
Laminate sizes and their features
When using laminate for cladding, size plays a primary role. The material has individual parameters for length, width, thickness. Square panels with dimensions of 40x40 cm will look very interesting on the ceiling.
There are also volumetric parts of 40x120 cm, as well as 20x200 cm. Each size has its own peculiarity. For example, the longest options are more suitable for wide but small rooms. They are able to visually compensate for the excess width in the room. Square panels have a place in halls and hallways.
Interesting laminate flooring in the bedroom ceiling Source dekor.expert
Thickness is an equally important factor. There are models from 6 to 12 mm. It is better to choose medium ones for the ceiling. Since they will be durable and moderately light. In addition, they will save free space under the ceiling.
Ceiling cladding with light brown laminate panels Source sdelaipotolok.com
Criterias of choice
When choosing a laminate for a ceiling, consider the following factors:
- Dimensions. Laminate is produced in the form of standard products with standard sizes. The most commonly used panels are 14x120 cm. For large rooms, you can choose lamellas measuring 20x200 cm. Square tiles of 40x40 cm are also available for sale. This parameter is selected taking into account the dimensions of the ceiling and optimal cutting of the material with minimal waste during cutting. Laminate is available in thicknesses of 6, 7, 8, 10 and 12 mm. Panels with a thickness of 6-7 mm are quite suitable for the ceiling.
- Color. When choosing the color of the laminate, an important nuance should be taken into account. The light color of the ceiling visually expands the entire room, and the dark background visually lowers the ceiling. It is important that the ceiling color scheme is in harmony with the design of the entire room and the furniture. The floor and ceiling should not be the same color. The most popular laminate colors for ceilings are bleached oak, Karelian birch, light walnut, ash, and pine.
- Design solutions. The ceiling with laminate coating fits into modern design styles - high-tech, modern. When simulating natural wood, laminate is suitable for options such as rustic, country and Provence style. If you purchase material for valuable wood species, you can design it in the Empire style. Stone imitation is suitable for Gothic.
- Manufacturer. The quality and durability of the coating is guaranteed only by trusted laminate manufacturers. Among Russian companies, Kronospan stands out. Among the foreign manufacturers, the following companies can be distinguished: Kronostar and Klassen (Germany), Berry-Alloch (Belgium-Norway), Pergo (Sweden).
You need to purchase laminate for the entire ceiling at once. It should be remembered that in different batches the material may differ in shade, which means that if the calculation is incorrect, it is very difficult to purchase an identical laminate. When assessing the need, it is recommended to make a reserve of 12-15 percent.
Methods for attaching laminate flooring to the ceiling
In order to cover the ceiling surface with laminate, you can use two methods: by attaching it to glue or by installing it on a frame. Each option consists of several stages.
Ceiling decoration with laminate masonry with open niches for lighting Source in.pinterest.com
Important! After purchasing the laminate, let it sit for a couple of days in the room in which you will install it. This will allow the material to get used to the environment. This action is mandatory and does not depend on how the fastening will be performed.
Installing laminated boards on the ceiling with your own hands Source remontnik.ru
Gluing brown laminate inside the house to the ceiling Source remontnik.ru
Preparing the walls
Before laying laminate on the wall, it must be prepared. Attaching lamellas using the adhesive method requires a hard and uniform surface, with a height difference of up to 3 mm per 1 m (the difference is compensated by the glue). To eliminate surface defects (depressions, cracks and significant differences in height), it is primed and then plastered, in case of significant defects, or putty, in case of small differences. How to properly level a wall can be found in the material “Plastering walls on lighthouses with your own hands”, where detailed instructions are given for performing the work.
If the wall is initially flat, then first remove the old finish, then prime it with a deep penetration primer, and then putty.
In case of large defects, it is cheaper and easier not to level the walls, but to install a sheathing made of wooden slats or metal profiles 2-4 cm wide.
Wooden sheathing.
Metal sheathing.
There are 2 ways to attach the grille strips to the wall:
- perpendicular to the laid laminate panels at a distance of approximately 40 cm from each other;
- parallel to the slats so that the locking connection falls exactly in the middle of the slats.
When working, it is necessary to constantly check the vertical and horizontal of the surface being formed with a level.
Installation of laminate flooring with glue
In order to use this method, you need to prepare your work surface. In this case, it should be made perfectly even. Installation is carried out in this sequence.
- The coating is leveled by applying multi-layer putty or screwing plasterboard structures. The last option is appropriate only if the room has high ceilings. Otherwise, it will take up useful centimeters.
- Apply the adhesive sequentially to the ceiling and start attaching the panels from the far corner. To avoid holding the panel for a long time, install supports. This could be a mop placed on a cabinet or table. Just be careful not to damage the structure.
- Then attach the next piece of laminate. Try to carry out all gluing work in stages. There is a great risk that the entire ceiling, once fixed, may collapse. Don't forget the sealant. It is advisable for them to coat all the ends of each panel.
In this method, it is better not to rush in order to get a beautiful and even ceiling.
How to choose the right material: 6 important points
There is no special ceiling laminate
The main purpose of this material is flooring.
And soundproofing too
If the decision to cover the ceiling in a non-standard way arose because of noisy neighbors above, without installing special soundproofing material it will not become noticeably quieter.
Design: Uglova Design
Design: Uglova Design
The abrasion class of the material can be safely ignored
Obviously, no one will walk on it. But resistance to moisture is an important parameter, especially in the kitchen, insulated loggia, and bathrooms. Always choose moisture-resistant material.
Need fewer joints? Take long planks.
In this case, it is important to take into account the proportionality of the slats and the ceiling: for example, narrow slats will fit better in a narrow corridor, and wider slats will look more appropriate on the ceiling of a spacious square living room.
Instagram: @kasm_interni
Instagram: @kasm_interni
Carefully check the shades and sizes of the planks, eliminating chips and mismatches.
It is clear that for floor coverings it is important to carefully check the purchase, but in the case of flooring, a defective plank can be hidden under a cabinet or sofa. You won’t be able to do this with the ceiling: every “jamb” will be visible.
Take some material in reserve.
Experts advise taking 13-15% of the calculated volume.
Design: Meridith Baer Home
Design: Meridith Baer Home
Frame installation
This type of laminate ceiling finishing does not require special surface preparation. It is not necessary to first level the ceiling to the level. Recessed lamps can be easily installed in such structures. However, the constructed frame steals the useful height of the room. When starting installation, follow the algorithm below:
- Prepare the surface. Fill the cracks and collect loose pieces of lime and plaster. Prime the surface. Next, distribute the electrics, lay the cables in the corrugation, and mark where the lamps will be installed.
- Mark the frame. To do this, determine the lowest point in the ceiling. Make an indent down from it so that it is equal to the height of the lamp. Add 2-3 extra centimeters on top. Transfer this point to the walls. A water level is useful for this. Connect all marks with a special mounting cord.
- Purchase galvanized profiles or wooden blocks. Select the installation pitch of the planks so that it corresponds to 50 centimeters. When screwing the frame, make sure it is strictly parallel. It is important to obtain a perfectly even structure. Fix the profile guide parts along the window.
- Direct installation. Place a layer of insulation into the prepared frame. Choose the one that is lighter in weight. Next, waterproofing is laid (necessary for installation in the bathroom or kitchen). Start closing the panels from the far corner, do it sequentially. Lay the second row offset by half of the previous plank. The result will be an imitation of brickwork. Upon completion of work, install baguettes around the perimeter of the room, install lamps in pre-cut places.
On a note! Fastening to the laminate sheathing is done with nails without heads or special clinkers, which are used when covering surfaces with clapboard.
Private questions
During the work, questions arise that are not discussed in the main material.
Where to start
When laying the floor, the rule is: you should start from the left corner farthest from the door. When finishing the ceiling it is ignored. You can start from any angle, focusing on your working hand. For right-handed people - from the far or near left, for left-handed people - vice versa.
Mounting lamps
For recessed lamps, a hole is cut with a crown. For overhead lighting fixtures, drill a large hole and pull out the wiring with a hook.
How to bypass pipes
The most difficult moment when installing a ceiling occurs when passing pipes. Here the operations are performed in the following sequence:
- when approaching the pipe, the panel of the next row snaps into place and fits close to the pipes;
- Mark the middle of each pipe with a pencil;
- the panel falls to the floor;
- use a tape measure or ruler to measure the distance from the channel on the wall to the middle of each pipe;
- a mark is made on the laminate in the middle of the pipe - you should get a small cross;
- using a drill or crown, holes are drilled with a diameter larger than the size of the pipes by 2 cm (due to the cut, the diameter will decrease);
- the end of the lamella is cut off in the center of the holes;
- on the outside of the pipes, the panel is snapped into a locking connection and moved close to the obstacle;
- Between the wall and the pipes, the end of the panel is glued to the side strip and the main body of the panel. Additionally attached to the sheathing or frame with finishing nails, glue or self-tapping screws;
- a protective cover is installed to hide the larger diameter.
Ready-made solutions for decorating laminate flooring in a room on the ceiling: 5 interesting ideas
There are several variations for placing laminate on the ceiling. The choice of such tactics is primarily influenced by the format of the room and the height of the ceilings. The fact that the owner wants to portray is also taken into account.
Laminate ceiling that accentuates attention Source dvabrata39.ru
Focuses attention
This method will be the best alternative for those rooms that have some defects in the interior design. They also focus on the ceiling if they plan to emphasize its geometry. With the help of laminated panels you can cover not the entire ceiling, but some part of it. This approach will create effective zoning.
Installation of laminate in an unusual shape, starting from the walls and ending with the ceiling Source realt.onliner.by
Letter "G"
In this case, not only the ceiling, but also one of the walls is used for cladding. Only a separate fragment of the ceiling will be involved in the finishing. This design looks great in spacious kitchens. This is how they separate the cooking or dining area and delimit the kitchen from the living room.
Arranging the ceiling, floor and walls in the bedroom with laminated panels Source sense-life.com
Along with the floor and walls
The floor, walls and ceiling can be covered with one laminate model. This approach creates a separate space. Inside it there is a sleeping place, a playground or children's playground inside the house, a hallway or a separate bathroom. In modern designs, this technology is very appropriate and plays the role of zoning perfectly.
Design of a multi-level ceiling using laminate Source design-homes.ru
With repetition on the floor
If the ceiling surface matches the floor, it will visually align the room and make it complete. Here it is important to maintain the geometric shape of the floor and ceiling so that they are symmetrical. You shouldn’t focus your attention on the same material. You can lay out the same area on the floor with decorative stone or tiles of a similar shade, just like laminate on the ceiling.
Which laminate is better for finishing walls?
A very difficult task faces the consumer when choosing a laminate. Here it is necessary to solve several problems simultaneously:
- choose the texture and color of the finishing material to match the style of the interior;
- ensure that the laminate regulates the space and geometry of the room;
- at the same time, it performed its main function - finishing;
- The cost was affordable for the family budget.
When choosing a material for finishing a room, first of all you need to take into account financial capabilities. However, in the case of laminate for walls, everything is much simpler: there are many options to choose from, but they are all identical in quality and durability - this material does not experience any stress on the walls.
Therefore, class 21 slats with a thickness of 6 mm (produced specifically for walls) will last as long as class 33 products with a thickness of 12 mm. Therefore, there is no need to overpay for a higher quality finishing material if the end result is the same.
Attention: lamellas of class 21-23 do not have locks and are attached only with glue.
The next thing you need to pay attention to is how to attach the slats to the wall. If it is flat or sheathed with sheets of OSB or plasterboard, then the best option is adhesive, without a tongue-and-groove system. This is the simplest installation technology: the slats are attached to the wall with “liquid nails” or special types of glue.
Attention: laminate thicker than 6 mm cannot be glued to glued plasterboard - the entire system may collapse under the weight of the finish. The problem is solved by additionally fastening the gypsum board to the wall with self-tapping screws (with self-tapping dowels if the base of the wall is concrete).
The issue with uneven walls is resolved differently. They can be plastered, but it is expensive, messy and time consuming. But you can make everything much simpler: install a wooden frame made of slats (plywood), on which the finishing will be attached. In this case, two types of fastening are suitable: tongue-and-groove and click.
The tongue-and-groove method of fastening lamellas is based on special devices: clamps, which are attached to the slats and hold the laminate by the ridges, without interfering with closing the connecting lock between adjacent panels.
The click method of fastening the slats to each other (when the lock is clicked, a characteristic sound is heard - that’s why it’s clicky) is based on more modern locks. The assembled wall panel is attached to the wall surface with self-tapping screws (along the perimeter), decorative nails (evenly along the entire wall), or glue. The nail heads are sealed with special pencils, and the heads of the hardware are hidden by the plinth and side profiles.
After solving technical issues, aesthetic ones are resolved. For each room in the apartment, designers have their own recommendations.
Living room
The living room, or, in the old way, the hall, is the place where the owners demonstrate their status. Therefore, finishing all the walls with laminate will look ridiculous. Partial wall covering with lamellas is encouraged here. The combination of aged laminate with stone, decorative plaster or fabrics looks rich.
Light, cool shades are selected for the living room on the south side of the apartment and warm ones on the north side. The slats look impressive near the fireplace and in the area where the TV is located, especially if it hangs on the wall (in this case, the laminate finish has another function: decorative - all the wires going to the TV are hidden). The living room is the type of room where there are no restrictions on the imagination of the designer or owners.
Bedroom
The most acceptable solution for the bedroom is to decorate the wall at the head of the bed with laminate. The lamellas imitating natural wood look very rich and respectable. Textiles of the same shades look harmonious with this type of decoration. Sconces or paintings attached to a wall finished with laminate will add charm to the room.
Hallway
According to the tradition that arose in the early 60s of the last century, the hallway in Khrushchev-era buildings was upholstered with clapboard, which is practical and beautiful. Therefore, “God himself ordered” to decorate this part of the room with laminate, as people say.
In the corridor, with the help of finishing material, you can highlight different zones using the texture and colors of the lamellas. They cover either one wall or the lower part of all walls, and try gluing wallpaper or putting decorative plaster on the upper part. Both options look very impressive.
Kitchen
Laying laminate flooring on the wall in the kitchen has more practical than aesthetic value. Here the work area and eating area get very dirty, but the slats are easy to clean. Moreover, they are much cheaper than tiles. At the same time, laminate can imitate various finishing materials: cork, stone, wood, tile.
The only thing you need to remember is that moisture-resistant laminate of class 31-33 is purchased for the kitchen.
Bathroom
In the bathroom, all finishing materials are subject to extreme exposure: temperature changes and humidity fluctuations. Under these conditions, most experts will advise abandoning the idea of laminate walls in this room.
But even for such conditions there is a laminate - waterproof lamellas of class 31-32 with a thickness of at least 8 mm (attention: waterproof, not moisture resistant). Practice shows that it can withstand the existing extreme conditions. How long this will continue is still unknown, there are no statistics.
Loggia and bankon
Finishing the walls with laminate in the loggia allows you to get an additional seating area. Attempts to lay laminate flooring on the walls on the balcony often lead to negative results even after insulating this part of the apartment - in winter the slats become unusable.