From the author: Hello, dear reader. Are you replacing floors? Then you are exactly at the right place! But the meaning of the expression “change floors” implies not only replacing the floor covering. If you are 100% sure that your floor is perfectly flat, then, of course, you can limit yourself to just laying linoleum. But in my practice, this only happened in 1 case out of 10. Today we will look at the question of how to properly lay OSB on the floor under linoleum to protect you from disappointment during repairs.
If you buy new, beautiful linoleum and lay it on an uneven surface, your joy from the purchase will not last very long. No matter how expensive and high-quality the material is, on a floor with defects it is destined to last half its intended service life, so soon you will have to change it again.
The first stage is preparation of the coating: OSB or concrete floor
Indeed, the technology for laying linoleum includes, first of all, thorough preparation of the primary coating. It's hard to imagine laying a finishing coat on a dusty or uneven concrete slab. The same applies to wooden bases. Everything must be even and smooth, otherwise all the work will go down the drain.
The beginning of preparation is leveling the base. How to lay linoleum on an uneven surface? You just need to level it out. All irregularities and cracks on the concrete floor can be smeared with putty, and the newly formed areas can be sanded. When carrying out more major repairs, certain areas of the subfloor can be completely replaced with new ones. A self-leveling mixture can be used on top of the new concrete screed, thanks to which the preparation of the base will be faster and better.
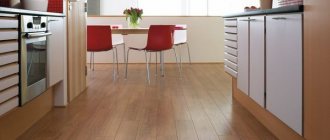
If we talk about laying on oriented strand board (or OSB), it is worth noting that such material is ideal for any floor covering. The rules for laying linoleum on OSB are much simpler than on a concrete floor. This type of coating seems to have been created specifically for future linoleum. There is nothing difficult about handling this flooring yourself.
A wooden floor is best leveled using sheets of plywood that are laid on top of the base covering. In order to understand how to lay linoleum on a wooden floor, you need to understand what the preparation of this very wooden floor looks like.
For those who are interested in whether it is possible to lay old linoleum on new linoleum, it is worth saying that in general, such a possibility is provided, but it requires even more careful preparation. Firstly, not every type of covering is suitable for laying a new one over it. Secondly, it must be cleaned of dirt, dust and baseboards. Thirdly, the old floor must be stretched tightly, otherwise both coverings will “dance” under your feet. In view of such complex preparatory work, many choose to completely dismantle the old coating. The procedure goes much smoother when the old coating lies somewhere in a city dump, and not under your feet.
The easiest way is to lay the finished floor on an OSB board. This type of coating is ideal for linoleum, and leveling it and preparing it for installation is quite simple.
Practical use
Using OSB, you will get a smooth and rigid base on which you can safely lay linoleum, laminate, parquet and even tiles. Here are the main functions of this material:
- installation of subfloor . OSB-3 and OSB-4 are quite often used for this purpose. Note that slabs can be laid on both the top and bottom sides of the joists;
- surface leveling . We already know that any floor covering requires a level floor. By installing OSB on top of a wooden or concrete floor, you will make the surface perfectly flat;
- heat/sound insulation . OSB consists of 90% natural materials (wood chips). Thanks to this, OSB boards have thermal insulation properties and can be considered as a universal insulation material. And thanks to the multilayer structure, the plate perfectly absorbs vibrations (noise).
Peculiarities
OSB or OSB – there is often confusion with this abbreviation. In fact, everything is simple: OSB is an oriented strand board, and this is what the material should be called correctly, everything is in accordance with the requirements of the Russian language . When they say OSB boards, they are making a mistake. This is due to the mixing of OSB and OSB (Oriented Strand Board). The English title in translation fully corresponds to the Russian one.
The material is made from long, at least 6 cm, wood chips. This is coniferous wood chips that are mixed with synthetic wax and resins. In general, binding elements make up from 5 to 10% of the total mass. Wood dust and small chips from the raw materials that will be used for the slabs are removed. And this helps the material to be more flexible and stronger, and this also increases its cost.
Why OSB is a good substrate:
- not subject to rotting;
- practically does not swell in water, retains its shape after drying;
- not afraid of mold and fungi;
- burns low;
- has high elasticity;
- demonstrates excellent soundproofing characteristics;
- cuts well;
- lends itself (and very well) to subsequent paint and varnish treatment;
- allows the possibility of gluing sheets.
Some factors do not directly relate to the laying of linoleum, but give an accurate description of the material as a whole. Together with the low price, this all makes the material very popular. And they consider it necessary to put OSB under linoleum, since it is stronger than, for example, chipboard, it demonstrates low sensitivity to humidity, and meets eco-standards. As for the linoleum itself, even before laying it, you need to take into account some important points.
Features of laying linoleum on OSB:
- you should never bend the material - the surface of the slab will not help it further straighten;
- linoleum should rest for at least a day in the room where it will be laid for acclimatization;
- if you lay linoleum at low temperatures, it will break;
- the adhesive installation method is used extremely rarely, if the room is less than 20 square meters - almost never, the material lies flat under its own weight, pressed against the baseboards;
- The optimal room temperature for laying linoleum is from +20 degrees.
The main rule for laying linoleum is a good substrate. If there are no complaints about it, in 99% of cases the linoleum lays down without problems.
What is OSB?
Pox is, let's say, a sandwich that can consist of 3 or more layers. Two (top and bottom) layers are pressed boards made from wood chips. The chips are laid lengthwise in the outer layers of the slabs and across in the inner ones. Therefore, the board as a whole is called oriented strand board. The shavings can be impregnated with boric acid, wax, and formaldehyde resins. Between the layers there is insulation, which can be used as polystyrene foam, as well as polyurethane foam.
Osp board (OSB)
Price for OSB board
pox plate
| Manufacturer | Length | Width | Thickness | price, rub. |
| Arbec LP Norbord | 2440 | 1220 | 6.3 | 390 |
| Arbec LP Norbord | 2440 | 1220 | 8.0 | 435 |
| Arbec LP Norbord | 2440 | 1220 | 9.0 | 450 |
| Arbec LP Norbord | 2440 | 1220 | 9.5 | 450 |
| Arbec LP Norbord | 2440 | 1220 | 12 | 620 |
| Arbec LP Norbord | 2440 | 1220 | 15 | 860 |
| Arbec LP Norbord | 2440 | 1220 | 18 | 990 |
| Kronospan | 2440 | 1220 | 9 | 420 |
| Kronospan | 2440 | 1220 | 12 | 540 |
| Kronospan | 2440 | 1220 | 15 | 695 |
| Kronospan | 2440 | 1220 | 18 | 820 |
| Kronospan | 2440 | 1220 | 22 | 995 |
| Kronospan | 2500 | 1250 | 9 | 440 |
| Glunz | 2500 | 1250 | 9 | 680 |
| Glunz | 2500 | 1250 | 12 | 890 |
| Glunz | 2500 | 1250 | 15 | 1120 |
| Glunz | 2500 | 1250 | 18 | 1330 |
| Glunz | 2500 | 1250 | 22 | 1620 |
| Kalevala | 2500 | 1250 | 9 | 460 |
| Kalevala | 2500 | 1250 | 12 | 600 |
| Kalevala | 2500 | 1250 | 18 | 910 |
| Kalevala | 2800 | 1250 | 12 | 730 |
OSB is mainly used in construction and furniture production. Marked and used as follows:
- OSB-1 – for the production of furniture, packaging or surface covering;
- OSB-2 – in dry rooms for the installation of load-bearing structures and surfaces;
- OSB–3 – in rooms with high humidity;
- OSB-4 - for structures that are subject to heavy loads, as well as those located in places where humidity is high.
OSB can be varnished on one side, covered with laminate, tongue and groove, or on two or four sides.
OSB (Oriented Strand Board)
The plate is a rectangle with the following dimensions:
- thickness from 8 mm to 38;
- length – 2440 mm;
- width – 1220 mm;
Above we have given the dimensions of a standard slab. Sometimes you can find OSB on sale with dimensions of 1.25 meters by 2.5.
The advantages of OSB are as follows:
- low cost;
- light weight;
- easy and well processed;
- durable;
- moisture resistance;
- does not dry out, does not delaminate, does not rot;
- mold and insects are not infested.
Unfortunately, there are restrictions on the use of OSB. During pressing, the chips are impregnated with resins that contain toxic substances. They constantly release volatile compounds of these substances into the environment
Therefore, when choosing a stove, you need to pay attention to how much of these substances is released by a particular brand of stove, and in what area it is allowed to be used
Comparison table of building materials
Laying linoleum on chipboard with your own hands
In order to protect the chipboard from fungus and mold, before laying it on the floor you will need to treat it well with a wood antiseptic and then dry it thoroughly. Before spreading linoleum on chipboard, it needs to be given a few days to acclimatize. To do this, linoleum is spread in the room for some time while the chipboard boards are fixed and installed before laying linoleum on them.
Depending on what material the subfloor is made of, chipboard fastening can occur in different ways. For wooden floors made of planks, wood screws are used for this. It is important if there is a need to lay a substrate under the chipboard in order to somewhat level the floor and insulate it.
If chipboard is laid on a concrete base, then there are also several options for how this can be done. Laying linoleum on chipboard is done directly on concrete floors without any attachment to them. But there is one caveat here, since in this option the concrete floors must have a very smooth appearance.
The second way to lay linoleum on chipboard on concrete floors is to secure the slabs to special wooden logs. This method allows you to achieve better evenness of the wooden base in the end and good thermal insulation subsequently.
After the floor surface is leveled with chipboards, you can begin laying linoleum. To fix linoleum to chipboards, a special adhesive mastic is used. The mastic must be applied either to the chipboards themselves or to the back side of the linoleum.
Laying technology
Various rough coatings or structures can be used as the basis for installing OSB. Each type has its own styling features.
Dry screed
The possibility of arranging a floor without dampness and a long wait for the wet coating to dry forces homeowners to pay attention to dry screed. As such, fine expanded clay is often used, when leveling it it is customary to use unique beacons that allow you to indicate the level of installation
OSB boards are laid on the prepared surface, pressed tightly into the expanded clay, after which a finishing coating is attached to them. This method can only be used in utility rooms (in the attic of a private house).
Concrete screed
In the case where it is intended to install OSB slabs on a concrete screed, it is recommended to adhere to the following sequence of actions:
- Special marks or beacons are installed that record the required filling level (the distance between them is selected based on the convenience of leveling the future coating, that is, approximately 50–60 cm).
- The correct installation of the marks is checked using a building level (if there are deviations, they should be leveled in the horizontal plane).
- You can proceed to preparing the solution, which must have the appropriate condition (not too thick and not very liquid).
- The prepared composition is poured into the place intended for forming the screed, after which it is carefully leveled.
The screed should set completely in about a day, after which it will be possible to start laying the floor. It will gain final strength only after 14–15 days (this depends on the air temperature in the room).
When laying OSB on floors along joists in wooden houses, special attention is paid to such an important point as proper selection of the dimensions of the supporting structure. This applies to both the thickness of the bars themselves and the distance (step) chosen between them. Particular attention to parameters is explained by the fact that OSB is a complex system, the further behavior of which cannot be predicted
The situation is aggravated in situations where it is planned to install a warm floor under the rough covering
Particular attention to the parameters is explained by the fact that OSB is a complex system, the further behavior of which cannot be predicted. The situation is aggravated in situations where it is planned to install a warm floor under the rough covering.
This is why it is so important to lay OSB correctly when supports in the form of logs are used for this. To comply with these requirements, the size of the bars is selected as follows:
- their cross-section should be 50 x 50 or 40 x 60 mm (depending on the thickness of the material);
- the distance between the support bars is selected starting from 40 cm;
- its exact value is determined by the dimensions of the products being laid.
Expert advice. With the above parameters, it is most convenient to use slab samples with a thickness of 15 to 17 mm.
If the flooring pitch is increased to 50 cm, the thickness of the OSB for the floor along the joists is chosen to be no less than 22 mm.
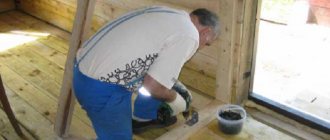
On a wooden floor
The so-called substrate for OSB on a wooden floor is an intermediate (rough) base, the use of which is considered the best option. Its presence will give the entire structure additional stability, and will also significantly reduce the load on the slab itself. The function of an auxiliary base can be performed by a coating of moisture-resistant plywood or an old floor.
Note! The old floor can be used only if the flooring is in good condition (if there are no clearly visible defects on it). When preparing an old floor, you should scrape off the remaining paint on it, and then carefully sand the surface and repair any existing scratches and cracks.
Then they must be sanded and treated with a special protective compound (antiseptic). Only after completing all the preparatory procedures can you begin laying the slabs themselves
When preparing an old floor, you should scrape off any remaining paint, then thoroughly sand the surface and repair any scratches or cracks. Then they must be sanded and treated with a special protective compound (antiseptic). Only after completing all the preparatory procedures can you begin laying the slabs themselves.
Preparation of materials and tools
To install OSB boards on the floor, you must have a set of tools.
A set of woodworking tools
From this set you will definitely need:
- jigsaw or fine-toothed hacksaw;
- hammer;
- hammer drill or drill with operating modes for concrete and wood;
- a set of twist drills for wood and impact drills for concrete;
- nail puller or pliers;
- screwdriver;
- laser or bubble building level;
- grinding machine;
- gun for working with sealant.
In addition to the plates themselves, consumables are needed:
- material for sealing joints (acrylic putty, parquet varnish, acrylic or silicone sealant);
- dowel-nails or self-tapping screws for fixing the slabs to the base base.
To lay linoleum on OSB, the base should be prepared:
- roulette;
- steel guide bar or long ruler;
- masking and double-sided tape;
- roller (disc) knife;
- month-shaped knife;
- regular and serrated spatula;
- adhesives - construction adhesives for fixing sheets to OSB and “cold welding” for joining sheets;
- rolling roller;
- skirting boards.
For the final installation of plastic skirting boards with cable ducts, you will additionally need fittings (corners, plugs, transitions) and dowels and nails.
Dowel-nails and corners for skirting boards
Surface preparation
It will not be possible to lay the rolled material perfectly if the surface underneath it has unevenness and differences in height. Therefore, first you need to properly prepare it.
To level the floor with an OSB slab under linoleum you will need:
- boards with a section of 3×8 cm;
- OSB boards of suitable size;
- screws with plastic dowels;
- self-tapping screws;
- rule length from 1 m;
- Sander;
- material for sealing seams.
After all the necessary tools are prepared, you can proceed directly to the installation of the frame:
- At the first stage, the boards are laid. The step length depends on the thickness of the OSB board chosen.
- Using spacers of various thicknesses, level the boards so that they lie at the same level. A rule is used for this. It is laid on any 3 joists and checked that the position is stable.
- The boards are secured with screws and dowels or anchors.
- OSB sheets are laid next. The joints between them must fall exactly on the frame joists, and the dimensions of the slabs must be selected based on this. Fastening to the boards is done using self-tapping screws in increments of 30 cm.
- Using a sanding machine, smooth the joints.
- The seams are sealed with elastic sealant or putty designed for working with wood. This stage will protect the slabs from moving, and the owners from a creaky floor.
Tools and materials
The purpose of laying the slabs is to “reanimate” the old floor, leveling the base, which will allow the linoleum to lie without any complaints.
What will be useful for this work, which precedes the lining of linoleum:
- hammer;
- nail crowbar;
- drill, drills, and hammer drill;
- screwdriver;
- laser/bubble level;
- the plates themselves;
- fasteners – usually these are hardened self-tapping screws, the length of which is from 45 mm;
- washers for screws (if possible).
There will be additions to this list, because the installation principle depends on the type of floor. For example, for a concrete floor you will need to purchase additional glue.
It is imperative to ensure that the OSB itself is ready for installation. The slabs are laid on the floor in the room before they are fastened. It is necessary to pay attention to the fact that when laying there are no straight cross-shaped seams - for this, the slabs are laid staggered, offset - 50%. There must be a gap of at least 10 mm between the wall and the slabs. The sheets should not touch each other closely. The minimum gap that must be between them is 3 mm.
It is necessary to make gaps, because they prevent the slabs from creeping onto each other and do not allow the coating to deform. And the material can change if the humidity of the room changes.
In order to lay linoleum, you will need:
- the coating itself, checked for defects, acclimatized indoors for 2-3 days;
- double-sided masking tape;
- wallpaper knife, stationery knife, blade;
- long ruler;
- cold welding.
Nailing and gluing linoleum is not at all what should happen. This is the wrong technique, although it is still used “to be safe.”
Step-by-step instruction
And now it’s worth saying in more detail about such an item as correcting substrate unevenness. The presence of seams from slabs is a problem that is almost impossible to get rid of. But you can minimize visual issues by eliminating differences in heights of adjacent panels. The edges must be carefully rubbed or sanded. A sander will be the best assistant in this matter.
It makes sense to check the entire area of the substrate, since bulges are sometimes found on the slabs. They are “organized” by incorrect transportation of the slabs, but sometimes it is also due to illiterate installation. And these irregularities also need to be eliminated.
So, if the substrate is prepared with high quality, all irregularities are eliminated, there should be no problems with laying linoleum. The installation itself starts with the need to decide how the material will lie, because every owner wants there to be less waste.
Laying plan for linoleum.
- The area of the room is measured , a plan is drawn, and the location of the material is determined on paper.
- The linoleum is laid out so that the material extends 5-10 centimeters onto the walls. Take a sharp knife (you can use a wallpaper knife, or even a blade). Using a ruler, cut off the places where the entrances to the walls are located, exactly where the entrances lie in a straight line.
- Once the straight spots are trimmed, you can move on to the door frames. There you will have to cut along a different vector, more complicated. There is no need to rush; you will have to cut linoleum with almost pinpoint precision. That is, the tactics of small, leisurely cuts will be optimal.
- If there are semicircular areas, you need to make cuts straight from the edges. That is, first the linoleum is laid on the slab, and only then the material is cut off.
- If the linoleum installation will consist of a number of pieces, you will definitely have to stick adhesive double-sided tape under the joints. The evenness of the joints must be clear. But if it doesn’t work out that way, you can overlap the edges of the linoleum. This will be within 3-5 cm. You can fix them with double-sided tape so that they do not move. You can make a double cut by making a cut at the jointed edges.
- By removing the cut fragments, you can form beautiful joints. It will be very difficult to notice them.
Many people are interested in the topic of fastening joints using cold welding. When the material is laid, masking tape is glued to the edges. The tape will act as a protective layer.
If the tape has sealed the seam, you need to go over it with a blade, freeing up space. And then the cold weld is carefully squeezed into the seam. After 10 minutes (approximately), the composition will harden, and the masking tape can be easily removed.
Leveling the OSB floor with a linoleum board
The most difficult task is leveling the base for the future linoleum covering. If the slabs are planned to be laid directly on a wooden floor, then the surface of the floorboards is sanded or milled in order to increase the contact area and level the base horizontally.
The gaps between the floorboards are not sealed; if there are “weak” boards, they are nailed “crosswise” together. The situation is considered more complex when there are rotten or destroyed joists under the wooden floor. In this case, it will be necessary to remove the floorboards, sew repair beams onto the supporting beams and lay the material back.
Before laying linoleum, the seams must be filled with sealant.
On uneven concrete foundations, it is most often necessary to lay a self-leveling layer; using a simple concrete screed it is quite difficult to adjust the surface to a more or less horizontal state.
How to glue linoleum to OSB board
Linoleum flooring is usually laid over oriented strand board without the use of adhesive only if the flooring needs to be replaced in a small area. In this case, only the joint lines between the OSB boards are glued.
For gluing linoleum, you can use water-based acrylic adhesive compositions, both domestic and foreign. For example, the excellent Italian glue “POVICOL PROBOND” or the Soviet PVA-M.
The best solution is considered to be polyurethane adhesives, for example, Legnopol 2000, Basf Fast 3000, Ecosimp. It is worth considering that the strength of these adhesive compositions is so great that it will be impossible to tear off incorrectly glued linoleum from the particle board.
You need to lay linoleum towards the exit, as you will still need to roll and squeeze out bubbles
How to lay linoleum on chipboard
In order to avoid swelling of the linoleum, after gluing it to the chipboard, it is necessary to expel as much air as possible from under it. This is done using a metal roller or, at worst, a heavy object with a non-sharp surface.
If the room has a large area and one sheet of linoleum cannot handle it, then after installation you will end up with a joint between the sheets of linoleum, which will have to be sealed using cold welding.
To do this, it is imperative that the seams between the linoleum be thoroughly cleaned of dirt and dust, and only then apply a cold welding mixture to them. Depending on the work performed on grouting linoleum seams, they may need to be sanded with medium-sized sandpaper.
So, this has described the entire process of laying linoleum on chipboard. If necessary, you can also make a warm floor under a wooden floor; in particular, linoleum was laid on chipboard on pre-laid wooden logs.
How to prepare various substrates for laying tiles Training Center
Ceramic and porcelain tiles are some of the toughest flooring materials. They need a subfloor that can accommodate this without any wobble or movement. If ceramic or porcelain tiles are installed on an uneven surface, you risk allowing the tiles to crack or become loose. Here are some instructions on how to prepare your subfloor for tiling.
Laying tiles on concrete
Repair all cracks and uneven areas in the concrete subfloor before installation—especially important if the tiles are bonded directly to the concrete. For a subfloor with large cracks, consider removing a large section of the concrete slab and replacing it with a new one instead of sealing all the cracks
If there are severe cracks in the concrete slab, smooth it with concrete filler or a similar compound. If the concrete floor is new, it must be allowed to cure for 28 days before laying the tiles. Cleanliness is paramount. In addition to any surface materials, be sure to remove any grease stains or other substances that have stained the slab as best you can. A cement backerboard can provide a strong, flat surface for tiling if you have a wood subfloor.
Laying tiles on plywood
- A plywood subfloor must be structurally sound and can withstand installation. Tile floors are heavy, and tile is a hard material. It will break or move if the surface bends under load.
- Remember that you will need a very flat surface to work with. If necessary, sand the plywood to level the subfloor.
- Plywood must be installed over a matching subfloor and must be at least 1 1/8 inches thick when combined with the subfloor. Interior plywood and chipboard are not considered strong enough for tile installation.
Can tiles be laid over linoleum or vinyl?
- Yes, non-cushioned vinyl and linoleum, which have a strong structure and are free from excessive movement, can act as a suitable base for tiles.
- No, soft vinyl is not a suitable subfloor. You will need to remove the vinyl flooring and any remaining adhesive used to install the vinyl.
- In some cases, the vinyl itself can be removed, but not the adhesive. Use the type of thin set recommended by the board backer manufacturer.
- If this seems difficult, you can lay down a backing board with a thin layer.
Is it possible to lay tiles?
- Yes, you can either leave the existing tile floor in place and apply a thin layer directly over it, or you can remove the tiles with a hammer, depending on how high you want the floor to be in relation to doors and other interior features.
- If the existing tile floor is installed over a layer of mortar, it may be difficult to remove the tiles without removing most of the mortar layer.
- If you are laying tile directly over an old tile floor, sand the existing tile using sandpaper. Clean with degreaser and test the bond in a small area overnight.
- Also check the floor height with the height of doors and cabinets. Any good solvent can be used to install a new floor.
Unsuitable subfloors for tiles
Subfloors to avoid when installing tile are those that are prone to bending, expanding, shrinking, or warping. Any excessive movement will weaken the tile and cause grout. Unsuitable subfloors must be replaced or covered with a suitable underlay. Here is a list of prohibited subfloors:
- Soft Vinyl
- Vinyl installed around the perimeter
- Veneer
- Chipboard
- Chipboard
- Chipboard
- Hardwood Floors (Strip)
- Luan plywood
- 0008 Metal boards OSB 98
What kind of subfloor will you install ceramic tiles on?
Still looking for the right tiles for your renovation project? Click here to view our stunning selection of ceramic and porcelain tiles.
Laying linoleum with glue
Before fixing the floor covering, you need to give it time to take its final shape, and only then trim it.
How to lay linoleum:
- Cut out the selected linoleum. Measure the room and decide which side the covering will lie on. Add 2 cm from each edge “to accelerate” and apply markings. Cut off the excess using an iron ruler and cutter or household scissors.
- Lay the linoleum on the floor and carefully straighten and smooth it with a plastic spatula.
- Leave it like this for 6 hours for thin models and for 1-2 days if the linoleum is thick. This is necessary so that the coating fully expands and acclimatizes to the level of humidity and temperature, and subsequently does not become lumpy or deform linearly.
- When the material has rested, trim it so that the edge does not reach the walls by about 0.5 cm.
- If the room is covered with several strips, they must be laid end to end. Overlapping is unacceptable. Even thin linoleum is thick enough that over time it will begin to wear out in such problem areas.
- Roll half of the coating into a loose roll.
- Coat the floor near the roll with glue. The strip should be approximately 30-40 cm wide. To prevent the strip from moving, place weights on the free end.
- Work from the center to the edges, pressing the linoleum with a roller or soft spatula. This is necessary to strengthen the grip and expel air bubbles.
- Then repeat the operation with the second half of the linoleum.
Advice Some craftsmen, when adjusting linoleum, use a hacksaw. Having twisted the material tightly, they make marks and simply saw off the piece so as not to cut along the entire length. The main thing is to ensure that the roll does not tear or get knocked down, otherwise the cut will be uneven and the linoleum will deteriorate.
Choice of coverage
In rooms where traffic is higher - in the living room, hallway, kitchen, install semi-commercial. It is more durable and wear-resistant thanks to a protective layer of 0.4–0.6 mm. Keep in mind that thickness is not an indicator of quality. It is needed only to hide minor irregularities.
So, for a coating 4 mm thick, the protective layer can be only 0.2 mm (or even less). And with a thickness of ±1.5 mm, the top layer can be 0.5 mm or even 0.6 mm. Accordingly, the second option is preferable.
If we talk about manufacturing companies, the brands Tarkett (Germany), IVC (Belgium), Sinteros (Germany-Russia) have proven themselves well in Russia and Eastern European countries. The latter is a subsidiary of the Tarkett brand. Of course, there are other brands in Russia that produce high-quality products, but, as a rule, the presence of these three companies in stores is wider than others.
Now you have some knowledge of how to install OSB under various types of floor coverings. Remember that the expression “change floors” in most cases is not limited to replacing the old linoleum/laminate with a new one. Its meaning lies deeper, and in the literal sense too.
All the best, and see you again!
To glue or not
Before laying linoleum, you need to decide whether you will glue it or not. There is an opinion that it is not necessary to glue it in houses and apartments. It is pressed against baseboards, furniture, large appliances, etc. All this “holds” him in place. Sometimes it works, sometimes it doesn't. It usually works on hard semi-commercial and commercial types of coating, but does not work on softer - household ones.
It's a matter of thermal expansion. In the summer, when it’s hot, linoleum expands, “creeping out” from under furniture and appliances. In the fall, it shrinks to its previous size, but does not return under the furniture. Waves and bumps form. Therefore, the majority agrees that it should be fixed.
If you don't glue it, it might look like this
Just keep in mind that linoleum either does not need to be glued at all, or glued completely. Glue it in some places - you are almost guaranteed to get humps and swelling after a while.
Characteristics of OSB boards
General information about OSB boards
Unique physical and mechanical characteristics, at a relatively affordable price, make OSB boards increasingly popular in various fields of construction. With the help of this material, floors can be perfectly leveled and laid, and with minimal effort, low costs and saving time. In addition, even a home owner inexperienced in the art of construction can handle the installation of slabs on the surface on his own.
Before studying the technology of installing OSB boards, it is necessary to briefly consider their characteristics and compare them with other similar materials.
It must be said that oriented strand boards, in some of their technical and operational characteristics, are superior to other materials of a similar purpose. But, due to their design features, they most often cannot be used as a finishing floor covering.
Oriented strand boards are made from wood chips laid in several layers in a longitudinal-transverse manner. On the outer layers, chips are usually placed along the length of the slabs, and on the inner layers - across. The layers are bonded together under pressure with polymer resins.
The diagram clearly demonstrates the principle of the structure of OSB boards - the intersection of the directions of wood chips in the outer and inner layers of the material
Thanks to this technology for manufacturing OSB boards, they have improved physical and mechanical properties compared to some other similar building materials.
The main characteristics of oriented strand boards are shown in the table:
| Parameter name | Indicators |
| Slab thickness, mm | 10; 12; 15; 18; 22; 25 |
| Density, kg/m³ | 630 |
| Thermal conductivity, W/m×K | 0.13 |
| Linear expansion at humidity 70%, % | 0.15 |
| Deviation from the width and length of the slab, mm | ± 3,0 |
| Thickness deviation, mm | 0,3÷0,8 |
| Humidity of slabs, % | 4,0÷12,0 |
The characteristic features of OSB boards during their installation and operation can be outlined as follows:
- High moisture resistance. When testing in laboratory conditions, the material was completely immersed in water for 24 hours. As a result, the swelling was only 18÷25%. And at the same time, the slab was not destroyed, and its strength was preserved.
- Durability and long service life. Oriented strand boards can withstand high loads and extreme conditions. Thanks to the multilayer structure of the material, the plates hold fasteners well.
- Easy installation of large-format sheet material.
- The low cost makes such slabs affordable, even if the amount allocated for repairs is limited.
- OSB boards, manufactured in accordance with technological requirements, consist of 96% natural materials. Therefore, they can be called conditionally environmentally friendly. If slabs are purchased for use in residential premises, you should choose material marked E1.
Due to their technical characteristics, oriented strand boards are excellent for subfloors under decorative flooring.
- The slabs have a perfectly flat surface. Therefore, they can easily level wooden floors made from ordinary wooden boards and deformed during long-term use.
- Each slab covers a fairly large floor area. The most common sizes are 2240x1220 mm and 2500x1250 mm. And this corresponds to 2.98 and 3.125 square meters. When laying them, the surface will have a minimum number of joints. Therefore, they are ideal for arranging a base for flooring consisting of small-format elements - laminate, parquet boards, parquet, vinyl tiles, etc.
Strengthening and leveling old plank floors using OSB boards
- OSB boards have self-supporting ability and stable geometry. Therefore, they can be used as a rough floor covering, fastening them to frequently installed joists or sparsely left floorboards. Thanks to these same qualities, slabs can be used to strengthen an old wooden floor, increasing its load-bearing capacity and rigidity.
- Since the slabs consist of several layers of wood, which itself has sound and heat insulating qualities, covering them to some extent can protect the room from extraneous noise. In addition, an additional layer attached to the wooden floor will help reduce heat leakage from the rooms.
OSB subfloor. The space between the joists can be filled with thermal insulation, and then “sewn” on top with the same slabs.
- OSB boards are not afraid of moisture, so they can be used to create a subfloor structure on joists. Moreover, by sheathing the logs with them both above and below, it is possible to fill the resulting space with one of the insulating materials.
In the table below, for greater clarity of information, comparative evaluation characteristics of various board materials made from wood raw materials and having approximately the same purpose are given.
| Name of the estimated parameters | Rating on a five-point scale | |||
| MDF | Chipboard | Plywood | OSB boards | |
| Strength | 2 | 3 | 4 | 4 |
| Resistance to external weather influences | 1 | 2 | 3 | 3 |
| Stability of dimensional parameters | 2 | 3 | 3 | 3 |
| Weight | 2 | 2 | 3 | 3 |
| Manufacturability of machining | 3 | 4 | 4 | 5 |
| Manufacturability of surface painting | 5 | 3 | 3 | 2 |
| Probability of material defects (delamination, presence of sinuses, knots) | 5 | 4 | 3 | 5 |
| Final average score | 2,86 | 3,00 | 3,28 | 3,57 |
Types of OSB boards
Today, construction stores offer several varieties of oriented strand boards. They differ in characteristics, and therefore in purpose. Therefore, when choosing a material for a specific area of construction or repair, it is necessary to pay attention to this factor.
OSB boards on sale may vary in quality, purpose, and price.
- OSB-1 - this material has very low moisture resistance and strength, and is not of particular quality. Therefore, such slabs are most often used only for auxiliary work.
- OSB-2 boards are already of much higher quality, but their moisture resistance indicators are still not outstanding. They are, as a rule, intended for use in dry rooms in those structures where contact with moisture is completely excluded.
For arrangement and leveling of floors, it is necessary to use OSB-3 boards.
- OSB-3 is a universal product that can be used for covering surfaces both in dry rooms and in rooms with high humidity. They are used to cover walls, lay them on wooden floors when leveling them, and arrange floors along joists.
- OSB-4 have a thickness of 15÷25 mm and are most often used for the construction of load-bearing structures in rooms with any level of humidity or even in outdoor conditions. They can also be used for flooring as a subfloor.
Plates can have different linear dimensions, but the most common are those dimensions that have already been mentioned above. However, you need to pay attention to this parameter when purchasing material. This way it will be possible to reduce waste when cutting them.
Expert advice
As a rule, laying linoleum is not as difficult as the initial installation of the sheets themselves on the floor. This is where difficulties arise, and then it seems that the linoleum was laid incorrectly - defects are visible, there is no smoothness. But the point is precisely in the installation errors of the OSB.
There are several ways to lay the slabs and secure them. It depends on what base the slab is to be laid on.
How to lay OSB on a concrete floor.
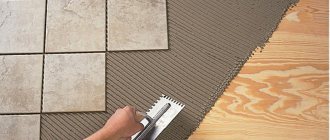
- A special adhesive is applied to the underside of the material for installation; it is made on a rubber element. It is convenient to apply the glue with a notched trowel. Using this composition, the slab can be evenly glued to the concrete base.
- The slabs are fixed to the floor with driven dowels, the pitch between which is 25 cm.
- Now you need to blow out the expansion gaps with polyurethane foam and wait for it to dry completely.
- The foam that has gone beyond the gap must be carefully cut off with a stationery knife.
When laying sheets on boards, the process becomes more troublesome.
How to lay OSB on a plank floor.
- It is necessary to clearly determine where the unevenness is concentrated in the floor. This is done as a rule, at a building level.
- Loose floorboards must be secured with self-tapping screws. If the boards are pretty rotten, they need to be taken out and replaced with new ones. This stage of preparation cannot be skipped.
- If it so happens that the wooden floor is not just old, but rather dilapidated, it is necessary to completely replace the floor and joists. If the joists have not yet been affected by rot, spot repairs will be sufficient.
- Varnish and paint can be removed from old boards - this can be done conveniently with a sanding machine.
- Small cracks and other irregularities of the same scale must be filled with putty, and then sanded with sandpaper.
- When the floor is ready, the OSB must be laid out on the floor. Joints in the shape of the letter X should not be allowed. The seams in each subsequent row must be shifted so that the joints take the shape of the letter T.
- We must not forget about the expansion gaps; between the slabs they are 3 mm, and from the slab to the wall - 12 mm.
- The sheets are attached to the floor with self-tapping screws, the length of the screws is at least 45 mm, and the average pitch is 25 cm.
- The floor will probably have to be reinforced additionally, so laying a second layer of OSB is not that uncommon . The seams of the top layer are placed with an offset of approximately 25 cm relative to the first layer.
- All expansion gaps are filled with polyurethane foam.
The most difficult thing in laying linoleum on OSB is to cut it clearly so that there is no visual deformation of the coating. But it is equally important to prepare the base, lay the slabs themselves correctly, and remove height differences. This is the main technological secret.
For more information on how to lay linoleum on OSB boards, see the following video.
Installation of OSB panels on a concrete surface
When laying an OSB floor on a concrete surface, the use of joists (boards laid across the room) is the most preferable option. OSB is secured to the joists using nails or self-tapping screws. When choosing a method, it is worth considering that the cost of self-tapping screws is more expensive, the speed of driving nails is higher, especially when using a nail gun (nailer). When installed on self-tapping screws, OSB boards can be dismantled without damage; they have better holding capacity. Installation of fasteners is required around the perimeter of the slab and in the corners, if there are intermediate beams. The interval for fixation is not standardized; they are guided mainly by their own feelings. In addition to the standard installation method, OSB can be glued to a concrete floor using universal installation adhesive. This option is used mainly when there are low ceilings in the apartment, when installing joists is problematic.
Helpful information! The glue can be of any brand and must be compatible with concrete and wood.
Before starting work, the concrete is primed with acrylic primer (if necessary, with water-repellent parameters) or glue diluted with water. To stick USB boards onto a concrete surface, use a notched trowel with a tooth length of 4 to 6 mm. Its height is selected depending on the size of the existing irregularities. For protrusions larger than 4 mm, the most prominent ones must be removed by grinding or a leveling screed must be poured. When laying in this way, you need to leave an interval of about 5-8 mm between the OSB panels and the wall, as well as gaps between the sheets. To eliminate voids along the edges of the room, blocks of damper tape and foam plastic are rolled out under the wall. The joints between OSB sheets are filled with elastic sealant for subsequent placement of linoleum, vinyl tiles or carpet.
Helpful information! The sealant must remain elastic after drying - it will perform a compensatory function, otherwise it will collapse.
Choosing a step for installing logs and their height
When calculating the optimal lag pitch, you need to consider the price parameters of the material - with the same quality, the cost may vary depending on the region or if you are located in the vicinity of a board production plant, in this case you can reduce costs. Additionally, you need to focus on the size of the OSB sheet - the slabs must be joined on the beams. The height of the logs is calculated depending on the planned properties of the floor. With additional sound and heat insulation, appropriate materials are placed in the free space; the parameter in this case depends on their thickness.
How to prepare the surface before installation
When installing an OSB floor on a concrete surface, logs are pre-installed and fixed using fastening bars at certain intervals. OSB boards are placed on the surface, marked and cut to size. The bottom layer is treated with a waterproofing emulsion, the sheets are attached with self-tapping screws to the joists. At the final stage, a vapor barrier material or thermal insulation is installed. Installation of the second layer occurs in a similar way.
When laying OSB on a concrete floor, you should adhere to the following rules:
- An interval of 4 to 6 mm in length is created between the USB floor plate and the wall;
- The slabs are not joined closely; a distance of 3 to 5 mm is left;
- When laying, matching seams are not allowed (to form “cross” patterns).
Is it necessary to apply waterproofing?
An OSB floor is characterized by increased water resistance, despite this, after 3-4 years of operation the ends of the sheets can become deformed; outdoors the process is most intense. The slab will take on a dark shade and begin to crumble into splinters. You can avoid negative consequences by using waterproofing OSB sheets. Treatment with colorless water-repellent impregnations is suitable with a minimum of funds. OSB floors can be coated with yacht varnish, alkyd or oil paints, and acrylic compounds.
Important! Before painting with acrylic suspension, you need to test the paint on an inconspicuous area of the slab. This will help you choose a different paint option if the OSB boards swell.
Advice from professionals
Despite the fact that today there are quite effective, safe and durable adhesive compositions, if you have to lay OSB on floorboards, it is best to limit the use of glue. It is believed that on plank floors, OSB sheets and linoleum should be fixed pointwise, leaving most of the surface free. This will preserve the system of logs and beams. In addition, laying the material is not the most difficult thing; you still need to think about how to remove it in the future during the next major overhaul.
Which self-leveling floor is better
Where does any good renovation begin? Off the floors! It is necessary to clearly understand what floors will be in an apartment or house, because the floor is the foundation of the entire home.
Self-leveling floors are becoming more and more popular. Self-leveling mixtures are used for self-leveling flooring, which means it is very easy to install and easy to use. Many people wonder what self-leveling floors are best for an apartment, because there are several types of them? The most convenient option for an apartment may be a finishing self-leveling floor. However, there are several types of them - polyurethane, epoxy and epoxy-urethane. And in this case, which finishing self-leveling floor is better? Which self-leveling floors are best to choose is a question for a specific person; the approach here is purely individual. This may depend on where you plan to install the flooring, as well as how much money you have available.
Features of self-leveling floors
Self-leveling floors have advantages over conventional coatings:
- they do not shrink;
- they do not need expansion joints;
- they level themselves to a horizontally flat surface;
- the coating can withstand heavy physical loads;
- the floor hardens quickly;
- The coating of the final self-leveling floor is completely environmentally friendly.
Finish self-leveling flooring is an ideal solution for an apartment, but if you plan to lay parquet or linoleum on top of such a floor. tile or laminate. A cheaper version will suit you - a cement or gypsum based screed. It hardens quickly and levels the floor, but does not have a beautiful finish so that you can leave only a self-leveling floor. You will have to put another covering on top. This type of self-leveling floor is ideal for rooms where you first need to level the floor.
Anyone can install a self-leveling floor using the instructions on the packaging, so you can save on a construction team. The finished floor looks great - no worse than tiles, it is very easy to clean and you don’t have to worry that cracks will appear in the floor and it will have to be replaced.
With the help of such a cabinet it is easy to revive the interior, add lightness and originality to it. We will talk about the features of sliding wardrobes with a sandblasted pattern in the article.
Today, the ceiling is a full-fledged detail of a modern interior, so its design should not be neglected. We will talk about the options for a modern ceiling in the article.
Such designs look stylish and elegant, and they are also easy to install. We will talk about the features of single-level stretch ceilings in the article.
Thanks to their versatility, originality and durability, such coatings are incredibly popular today. In this article we will find out which self-leveling floor is best to choose.
Is it necessary to glue linoleum on a wooden floor?
Many people, when renovating their home, lay linoleum without glue and achieve excellent results. So why is this material needed?
In fact, its use provides a number of advantages:
- The service life of linoleum increases by about 20%. This primarily applies to thin materials. On a smooth wooden base, such a coating often wrinkles or peels up - over time, microcracks and holes will appear at the bend. Glue is insurance against such problems.
- The tightness of the floor is significantly increased. The seams are sealed with special mixtures, so that moisture (for example, if your upstairs neighbors flood you, a pipe bursts, or you simply do a bad job of wet cleaning) will not end up under the linoleum. Accordingly, you don’t have to worry about the floorboards swelling, the linoleum warping, or the smell of rotten meat and mold appearing.
- The appearance of the room is more attractive. Even with long-term use, waves, swelling and other noticeable deformations do not appear on the linoleum.
So, if you glue linoleum to a wooden floor, you can avoid many problems in the future.
Adviсe
A few tips will help improve the quality of the final work.
- After gluing, linoleum is smoothed well with a metal roller. This procedure will help expel the remaining air underneath, and then there will be no swelling on the floor. Any heavy, non-sharp object can be used for smoothing.
Adhesive for linoleum - If several sheets of linoleum are laid in a room, then after the material has been laid, all joints are treated with a special adhesive to seal the seams. Then the joints will be airtight and will not lift up over time.
- It is best to use double-sided tape for attaching linoleum only in rooms with an area of less than 20 m2. In other cases, there is nothing better than adhesive mastic.
- After treating chipboard with antiseptics, the sheets of material must be thoroughly dried before starting work.
- Before gluing, linoleum must rest indoors for several days.
Laying chipboard on joists
Linoleum can be laid on almost any flat surface. A prerequisite is the absolute absence of grooves and tubercles. Otherwise, all these flaws will be visible on the surface of the already fixed linoleum and will spoil the overall appearance of the final work. That is why chipboard can be used to level the floor - the surface of the slabs is smooth. But this, unfortunately, is far from the best option for creating a subfloor.
Reviews of OSB board for linoleum flooring
Vasily Stepanovich Lun, 64 years old, Moscow:
From experience I can say that OSB under linoleum can only be laid in heated rooms. It is easy to work with the sheet, it sands perfectly, you just need to avoid allowing individual sections to hang and remain without support on the concrete or board. Otherwise, a crack will appear, and the linoleum may crack. It crumbles a lot if you cut it with your hands, so before laying it, you need to sweep the floor until it shines.
Kapitonov Sergey Pavlovich, 38 years old, Chelyabinsk:
They laid OSB directly on the concrete; there was no money for linoleum, and it took them a long time to choose. After a month, they wiped the path on the lining with their soles, tried on the linoleum, and it was visible on the surface. I had to putty and sand. The material is soft, so you need to immediately lay both the substrate and linoleum.
- DIY self-leveling floors
- PVC floor tiles
- How to make dry floor screed with your own hands
- DIY dry screed Knauf: instructions, reviews
How to easily remove linoleum
Disclosure: This post may contain affiliate links. I may receive a commission at no cost to you when you make a purchase through my link. As an Amazon Associate I earn from qualifying purchases. Click here to read my full disclosure policy.
Removing linoleum flooring doesn't have to be a problem. Find out how easy it is to remove old flooring!
If you're renovating an old home, you know what old linoleum flooring is like. It is glued to the subfloor and is very difficult to remove. They say you can just lay new flooring on top of the linoleum, but in my experience it's always better to start with a clean slate. If you're going to spend time on this, do it right!
The trick to removing old linoleum is a heat gun! So simple, right? And I've partnered with HomeRight to share how easy it is to remove linoleum using the HomeRight Dual Temperature Heat Gun. This small gun is inexpensive but can be used in many situations, especially when renovating a home.
I must be crazy because the paint on the two-tone Blue and White Two-Tone Kitchen is barely dry and I'm already tearing out the other room. Our downstairs hallway bathroom is a guest bath and the only room in the house that hasn't been touched. After going through a crazy 6 week kitchen remodel, we decided we could survive in this tiny room. So last week I grabbed a hammer and fired up the demo!
When we lifted the vanity, we discovered that there was a second layer of subfloor on top of the original flooring. But since the new flooring was only where there was no vanity, that meant that layer had to go. And guess what we found underneath...
Isn't it vintage? I'm sure you've seen the same (or very similar) old linoleum in your parents' or grandparents' house. As much as I loved the old stuff, that had to go too. Since the old linoleum was only installed on the floor where there was no vanity, we needed to remove the linoleum to create a smooth surface for our new floor. It can be frustrating... but after learning so much by removing the linoleum from our kitchen, I knew there was an easy way to redo the linoleum and I'm so excited to share it with you!
How to easily remove linoleum
Supplies:
- HomeRight dual temperature hair dryer
- Utility knife
- Heavy Spatula I specified heavy because there are cheap ones that are very flimsy and won't make this job any easier. You'll need something heavier, but don't worry, it's not that expensive.
- I said it's easy, but it takes time. I love listening to audiobooks while I do simple tasks like this to keep me going.
Select the location where you want to start removing the linoleum. There is no right or wrong place. I like to start in a corner so I can work in stripes across the room.
Using a utility knife, cut the linoleum into approximately 12-15 inch strips. This will make the next steps more manageable.
I don't like cutting strips all over the floor at once. Just cut one strip and work on it, then cut and repeat. This gives your back a break from bending and cutting, and also gives your knees or butt a break from sitting and scraping if you do it this way.
Once you have the flooring cut to size, you will need to remove the top layer of linoleum. Just grab a corner and pull.
Mostly only the top layer will come up, but there may be places where the adhesive is worn out and these can also be removed with a little tug. Hooray!
Now it's time to pull out the heat gun. The HomeRight Dual Temperature Heat Gun has 2 settings. Beautiful and simple! For the flooring I used the high setting.
Turn on the hair dryer and point it at the old linoleum left after removing the top. You'll want to work in small sections, about 3" x 6" at a time. Slowly move the heat gun back and forth over the small section to heat it up.
Then turn off the gun and scrape the heated linoleum off the floor with a putty knife. It just curls right off the floor into very nice little strips.
After that piece is gone, heat a new small piece and repeat. How simple it is. But remember, I didn't say it was quick, however, it is worth having a nice smooth floor to lay your beautiful new floor on.
To keep things going, I held a two-temperature heat gun in my left hand and a putty scraper in my right hand. It kept me from putting the hot gun on the floor and made it easy to heat, scratch, heat and scratch.
Please note that the heat gun has a safety feature to prevent it from overheating. When I started scraping the linoleum, I kept it on while scraping. Instead, I let it run continuously for about 15 minutes. Then it wouldn't turn on again because it was too hot. After cooling down (about 60 minutes) it turned on again and worked great. So be sure to turn it off while cleaning to prevent overheating!
Unfortunately, our vintage linoleum hid a dark secret...
The subfloor under the toilet and next to the bathtub had water damage and was destroyed. I didn't find it until the linoleum was installed. So, after scraping the first half of the room, we knew we needed to completely remove the subfloor and replace it to give the bathroom floor a strong, solid surface for the new floor.
After using the HomeRight Dual Temperature Heat Gun for easy linoleum removal, you'll love everything you can do with it. Two heating settings make it very useful in the home.
- The low setting is great for removing old stickers, paint, softening caulk and more.
- The high setting is very useful for removing varnish streaks, removing vinyl, bend softening plastic, and more.
Now it's time to install our new subfloor so we can get a little further along with this bathroom remodel!
.
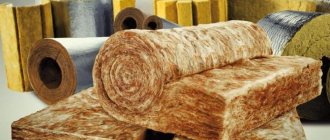
Why is it needed, what types are there?
The underlay prevents the material from coming into contact with the floor. It serves for:
- Compensation for unevenness of the base. If the base has defects, they will be reflected in the coating. All the depressions, cracks and tubercles will be drawn on its surface. This will subsequently lead to destruction. The material underneath, by compensating for small irregularities, will protect the linoleum from premature wear.
- Soundproofing. This is especially helpful in apartment buildings, where noise from the lower floors is clearly audible.
- Thermal insulation. In rooms located on the first floors, the floors are always cold. The same applies to apartments under which non-residential premises are located. Floors in houses built on the ground also require additional insulation. In this case, it is an excellent insulation.
There are several types of insulating materials
Jute
Jute backing consists of fibers of plant origin. This is a unique material made from natural jute fibers. It contains a fire retardant that prevents rotting and burning. It is able to absorb and remove moisture over time without getting wet.
Jute backing
Cork
This type consists of crushed tree bark. Its production process eliminates the use of synthetic substances. However, it has the best thermal and sound insulation properties.
In addition to its high price, cork material has another significant drawback. Due to its low rigidity, its surface bends under heavy furniture. And this leads to deformation of the linoleum.
Cork backing
Linen
The linen underlay maintains natural ventilation between the floor and the floor covering. And this prevents the appearance of moisture and fungus. Since flax is used in the manufacture of this material, it is an absolutely natural product.
During the production process, the material is treated with fire retardants, which prevent insects from infesting and prevent rotting.
Linen backing
Don't know what to use to keep the room warm and dry? Use a backing that contains equal proportions of linen, jute and wool. It has additional wear resistance and thermal insulation properties.
Linoleum backing made of flax, jute and wool
Foamed
Regarding this type, experts have long come to the conclusion that it is not suitable for linoleum. It quickly wrinkles and loses its shape without performing its functions.
Video: what should be the base for laying floor coverings
In order to unambiguously answer the question about the base, you need to know exactly the technical characteristics of a properly constructed floor base, intended specifically for installing linoleum. So the basis should be:
- durable;
- as hard as possible;
- absolutely dry;
- flat – smooth changes of 2-7 mm are acceptable;
- without oil and grease stains;
- no traces of old paint.
Popularity of tongue and groove connections
Not ordinary, but tongue-and-groove slabs have gained particular popularity. It is explained by the presence of the tongue-and-groove system, which allows you to create the most durable and motionless base. Due to the fact that there are no gaps between the slabs, the subfloor is as durable as possible. Especially if the joints of the plates are glued with a special glue - in this case the structure will be as airtight as possible, not requiring the installation of waterproofing.
Tongue and groove connection
Thanks to the tongue and groove, another goal is achieved - uniform distribution of the load across the entire floor. And this type of connection is much stronger and more reliable than between sheets of plywood nailed to the floor.
Advantages and disadvantages
Large construction factories are constantly searching for and creating new products that will minimize the costs and time of home improvement. That is why they came up with and improved OSB boards, which can be used for rough and finishing coatings at the same time.
Advantages
The uniqueness of the OSB product lies in a number of factors. No special skills or equipment are required to work with OSB. In terms of price, this product will be cheaper than any analogue.
Other advantages:
- Oriented strand boards have a high leveling rate.
- Lightness of flooring. Even a beginner can handle the procedure.
- There is no need to apply much effort or involve labor.
- Significant savings in installation time.
- Excellent performance indicator.
During testing and research, the product was immersed in water for a day and then studied. The result pleasantly surprised the technologists. In 24 hours, the material absorbed only 18% of water. This is a record figure that no other floor covering can boast of.
The slabs are cheap, durable and reliable Source www.perm.build2last.ru
The researchers did not record any destruction of the slab layer, and the strength indicator remained unchanged. Laboratory studies also confirmed:
- long service life of OSB;
- ability to withstand high loads;
- multilayer allows you to hold fasteners;
- durability in extreme conditions.
The large-format sheet is easy to cut, and its impressive dimensions allow you to cover a large area in a short time.
Working with OSB boards is easy Source stroimaterialytorg.ru
See also: Catalog of companies that specialize in finishing materials.
Flaws
This material may delaminate over time. After long-term use, you can detect the presence of sinuses and knots, because the base is wood shavings.
Multi-layering of the material is one of the disadvantages Source chudopol.ru
Despite this drawback, in other indicators, the slabs are superior to competitors in quality, stability and stability.
How much does the material and labor cost?
The price of the material depends on the type of linoleum and wear resistance class. In residential premises, household or semi-commercial linoleum is more often used. The average price of household samples is 300–400 rub./m2, semi-commercial – 400–500 rub./m2.
The cost of laying linoleum depends on the list of preparatory work and the area of the room. In most cases, for Moscow or the Moscow region, a turnkey package of work, which includes preparing the old floor, laying the covering and installing skirting boards, costs around 600 rubles/m2.
Often you have to deal with a situation where the price of installation changes during the execution or after completion of the work. To avoid getting into an unpleasant situation, before ordering services you need to study the price list, clarify unclear points and conclude a detailed agreement.