- home
- Construction and renovation
- Floor
>
>
⬎
Without further ado, let’s begin presenting this instruction. Laying laminate flooring is not a difficult task if you do it carefully, take your time and know the important points. I will try to present everything in order, in the most accessible form.
So, packs of laminated panels have already been purchased and have been stored for a couple of days in the room where installation will take place. I deliberately skip calculating the number of panels, because there is no universal formula - 90% of the calculation depends on the length of the room and the size of the die. A clearer understanding of the issue will come through the learning process.
We agree that the required quantity was calculated for you upon purchase. Well, if calculations are still necessary, I suggest using our calculator.
Preparing the base
As a standard, the base is considered sufficiently leveled if the differences do not exceed 2mm. by 2 m. I’ll add on my own behalf: laminate is not afraid of more significant changes, the main thing is that there are no sharp “steps”.
If laying is done on a screed, then the latter must dry (at least 2 weeks). There is no need to seal various sinks and local potholes - this is why laminate is popular in budget renovations.
Whether the base is wooden or concrete, it must be cleaned of local deposits of putty and other dirt (which is sure to remain after rough repairs).
Particular attention should be paid to the angles where the walls meet the floor: in 9 out of 10 cases, these areas are not treated in any way during the repair process, and are written off as “being covered with baseboards.” Therefore, the corners, as a rule, have beads and are rounded. I usually walk around the perimeter of the room with an old chisel/chisel and knock down the sagging.
The floor is thoroughly swept/vacuumed. If the base is very dusty, it can be primed with a deep penetration primer.
See also: “Screed for any floor covering”
Tool
Let's look at the main tools for installing laminate flooring; in fact, the list is small:
❶ Jigsaw. This is the most necessary and important tool. You can, of course, use a wood saw with a fine tooth, but it will be quite difficult to make longitudinal cuts. Therefore, we will still focus on the jigsaw. In addition, you cannot cut out round holes for pipes with a hacksaw; you will have to select a drill for wood with a large diameter.
Such a file does not “tug” the tool, unlike a reverse tooth. Chips on the workpiece are minimal.
You should purchase several fine-tooth files for your jigsaw. Many panels cut just fine with regular saws, but it is best to have saws with the tooth pointing downwards. Then the risk of chipping the laminated coating will be minimized. Files with neutral (straight) teeth have also proven themselves to be good - the teeth on such a file are directed perpendicularly, neither up nor down.
❷ Hammer. There is nothing to discuss here, everyone knows what he looks like.
❸ Plastic wedges. These items are sold with a laminate installation kit or separately. In general, it is not important to use them; you can get by with pieces of the laminate itself. 20-30 pieces will be enough for work.
I would like to pay special attention to the boss (found in installation kits) - a block for padding the laminate. The thing is completely useless, due to the fact that the locks are completely different. If you purchased such a block with a set, I advise you to throw it away; using it will only damage the locks.
A clamp - a special bracket, which is also included in the set - is a more useful thing and can come in handy. However, it is not an indispensable tool - in 9 out of 10 cases it can be perfectly replaced with a pry bar or chisel. Therefore, if it is not available, we will make do.
❹ Tape measure 3-5 meters, pencil.
❺ A small square, with sides 20-30 cm. An important and necessary tool.
❻ Minor installation, pulling out. Can be replaced with a large chisel, but it's best to have both.
Chaotic laying method and mosaic
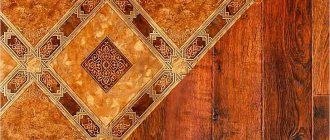
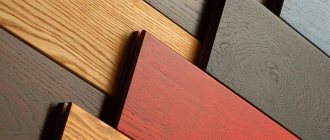
It is also called "variegated deck". This is a rather original and extraordinary way of styling. It uses details of contrasting bright colors or with different patterns. Laminate planks are laid chaotically. The floor looks modern and unusual, but at the same time bright and attractive. Similar color schemes are also used in symmetrical masonry.
They also sell material that, when assembled, will resemble a mosaic panel. This is a special designer type of material, it is quite expensive.
Substrate
I think there is no point in singling out any type of substrate as being of higher quality - they are all quite good.
The cheapest foamed polyethylene fully satisfies all requirements. The only note is that you should not choose a substrate thicker than 2 mm, the floor on it will sag unnecessarily when walking. If there is a need to raise the level of the finishing coating, then it is better to use other materials, for example fiberboard sheets. The disadvantages of foamed polyethylene include slight subsidence over the years - 1-2 mm.
Cork backing does not sag, but is more expensive. By and large, it is no different from polyethylene.
A backing made of thin EPS sheets is also no worse. However, this material is very inconvenient for flooring: there are many seams and they all need to be taped.
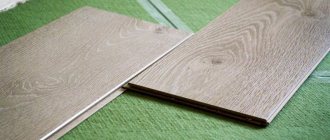
Whatever underlay you choose, it is not necessary to spread it over the entire area - I spread it as I lay the laminate.
What laminate is used for flooring installation?
Before you begin laying the laminate, you need to select it correctly. First, let's pay attention to external indicators:
- Single-strip laminate is chosen. If the work is carried out with this type, then the final installation will look like it is covered with solid wood. This method differs from others in that in this way you can visually expand the area of the room, and the design is done in a country style. This installation will emphasize the strict features of the interior and at the same time its classic style;
Single lane option
- Laminate consisting of two strips. The installation is slightly different from the previous one in that the method of laying two strips is used. Due to this, the floor becomes similar to parquet;
- Material having three stripes. This is basically a laminate called deck board. In appearance, it looks like parquet, but the color palette is very different. Therefore, each buyer has the opportunity to choose the color that suits his interior;
Three stripe option
- The product is similar in appearance to tiles. This type of laminate is installed mainly by those who love ceramic coatings, due to the fact that this type is similar to tiles. After installation is completed, the surface will have the appearance of a ceramic coating and the texture will be the same;
- Laminate made to order. This option becomes the most expensive, as it is carried out according to an individual design project. You can choose from ready-made material, or you can make your own special layout.
Custom-made coating
Attention! The installation method for custom-made laminate can be varied and this should be discussed with the manufacturer at the time of ordering.
Seam sealant
In general, I would recommend refraining from buying sealant, because often something that is closer in properties to glue is sold under the guise of sealant. It is not recommended to glue locks together; this can lead to unpredictable defects during operation. If the panels stick together, it will be extremely difficult to disassemble part of the covering to replace some boards without damaging the locks and edges!
Sealant is needed to protect locks from moisture. Some manufacturers impregnate locks with something like paraffin, in which case there is no need for sealant. This type of laminate is not difficult to recognize by picking the lock with your fingernail. If the locks are not impregnated, when installing even in a dry room, there is a risk that the floor will creak.
If you nevertheless purchased a laminate with non-impregnated locks, it’s okay, you just need to be more careful in choosing a sealant by contacting a competent sales consultant. Having purchased a sealant, you can test its properties by coating and testing two pieces of laminate. After a couple of days, separate them. If the lock opens freely, the sealant remains elastic and can be easily removed - everything is in order.
Alternatively, instead of sealant, you can use impregnation for locks and treat each panel with this solution before installation.
TOP 3 laminate manufacturers
| Photo | Name | Rating | Price | |
| #1 | Tarkett | ⭐ 97 / 100 | More details | |
| #2 | Kronospan | ⭐ 95 / 100 | More details | |
| #3 | Quick-Step | ⭐ 92 / 100 | More details |
Quick-Step
pros
- warranty service life – 25 years;
- large selection of decors;
- There are models for wet rooms;
- no burnout observed;
- secure locks.
Minuses
- chemical odors are felt;
- marriage is common.
Quick-Step laminate
Kronospan
Kronospan laminate is produced in Russia and has a German level of quality, and also meets the highest European standards. The Russian buyer really liked the product.
Kronospan
pros
- simple installation;
- decent technical characteristics;
- excellent price/quality ratio;
- environmentally friendly and harmless to health;
- abrasion resistant;
- a wide range of.
Minuses
- there are unreliable locks;
- There are defective lamellas.
laminate Kronospan
Tarkett
The Tarkett company produces various floor coverings: laminate, parquet boards and linoleum. During the existence of the company, it has taken a leading position and entered the top five world leaders in the production of floor coverings.
Tarkett
pros
- a wide range of;
- high strength and reliability of layer connections;
- long service life;
- reliable lock;
- easy to install and operate;
- affordable price.
Minuses
- It is not advisable to use in places with high humidity;
- low sound and heat insulation.
Tarkett laminate
Selecting a layout
The first thing you need to decide is how the longitudinal seams will be located: along the light from the windows or across. Usually chosen along the light, in the direction from the window. However, this is not an axiom, it is a matter of taste or other considerations.
Typically, layout refers to the amount of displacement of each new row relative to the previous one. Let's consider three possible options.
Ladder or actual layout
(or chaotic). The panel manufacturer always recommends a minimum displacement of the transverse seam of the next row, usually 30-40 cm. This means that the displacement can be any, but not less than 30 cm. When laying, in fact, an equal displacement is obtained on different rows, provided the room is rectangular in shape. The floor pattern is a “ladder” with an arbitrary offset. The most economical option.
The layout is realized by placing the trim from the last panel at the beginning of a new row. This is possible only if the cutting is more than 30-40 cm (the exact minimum run-up is indicated by the manufacturer on a specific model) or less than the whole panel at the same distance.
This layout can only turn out to be chaotic if, when finishing a row, there is too short a piece left - you will have to insert an arbitrary piece. Or there are a lot of leftovers from the previous installation and they need to be used. The main condition: you need to observe the minimum displacement of the transverse seams in relation to the previous row - usually the manufacturer indicates this value and it is 30-40 cm.
Laying in half
. The beginnings of each row alternate with whole panels and halves. Thanks to this, the painting of the canvas is obtained in the so-called “checkerboard pattern”. Often the most expensive option in terms of material.
Layout in thirds
- each new row increases or decreases by a third of the length of the panel. In a simple way: the first row starts with a whole panel, the second with a trim equal to 2/3 of the length of the whole panel, the third with 1/3. The fourth row begins with a whole die. The picture of the floor covering is obtained in the form of a “ladder”. Usually a more economical option compared to half installation.
However, efficiency is primarily affected by the length of the panel and the length of the room, or rather their ratio. If the length of the room is divided by the length of the panel without any residue, laying it in half will have virtually no residue. But such an exact match is rare. In general, to accurately calculate the laminate, you don’t need all sorts of calculators, of which there are plenty on the Internet, but to draw several rows on paper to estimate the amount of waste.
Good to know: when using plain panels without a chamfer, there is no visually noticeable difference in how the laminate is laid: chaotically, in thirds or halves (in a checkerboard pattern). The layout becomes noticeably distinguishable when there is a chamfer at the transverse seams or when each panel has strong differences in tone along its length.
On a plain laminate without a chamfer, the transverse seams are not noticeable, so it does not matter much which layout is chosen.
The presence of a chamfer distinguishes each panel well, so the installation option already plays a role in visual perception.
Factors that determine the start of work in a room
The stereotype that has developed over the years about the place to start installing lamellas is explained by the desire to hide the connecting seams - located parallel to daylight, they become invisible. However, this does not take into account many factors that have appeared recently and force us to reconsider the question of what angle to start laying laminate flooring from. Among them:
- production of lamellas with V and U-shaped chamfer and embossed surface;
- laminate assembly method;
- furniture arrangement;
- traffic intensity.
Laminate with chamfer and embossing
The development of technology has allowed laminate manufacturers to produce panels with chamfers and embossing, which in some cases misleads even professionals - they cannot distinguish the laid floor covering from the natural material, so naturally the slats imitate boards made of various types of wood.
However, such an effect is only possible by moving away from the classical canons of floor installation. It is necessary to lay the laminate so that the light emphasizes the presence of a chamfer, which becomes possible with side lighting or at an angle. In the first case, the laying is called transverse, in the second - “diagonal”.
Laminate with bevel.
When laying transversely, problems arise when bypassing heating pipes - it is difficult to close the lock with a minimum of lamella cuts. Therefore, here you need to start from the left, if you stand facing the window opening, the corner of the outer wall and lay it parallel to it.
For reference: for some reason, for many novice finishers, the recommendation to start work from the far right corner of the room or from the left, if you are facing the window opening, causes bewilderment: the heating pipes in one room are to the left of the window, in another to the right. Note that the location of the pipes does not in any way affect the location where work begins. The recommendation is addressed to right-handed people - it is more convenient to snap the end lock into place. Naturally, for left-handers the recommendation will be mirrored.
The presence of embossing does not always require a departure from the classics.
Structural texture. Light embossing is applied to the surface of the panels, giving the laminate a rough finish. It looks more noble compared to a smooth surface, but has nothing to do with exact imitation. You can start from the right corner, parallel to the light flux, and from the left, parallel to the outer wall.
Structural texture.
Register. The most effective and expensive option for simulating natural boards is embossing in register (True-Touch Deep Nature). Here, manufacturers managed to imitate even wood fibers. You can emphasize the effect of a “living” floor only by starting installation from the left corner of the wall with a window.
The texture of laminate with the effect of aged wood (Aged Wood), manual processing (Handscraped or Handcrafted) and infinite board (Infinite Board) do not require special daylighting. Therefore, they can be laid in any direction and start from any angle.
Laminate assembly method
In practice, the following methods of laying lamellas are used:
- along the light stream;
- across;
- diagonally;
- “herringbone” - laminate panels are located at an angle of 90 degrees to each other;
- labyrinth - artistic layout of laminate.
The slats are laid parallel to the light from the window to hide the connecting seams. Here the beginning of the installation is classic: the far right corner.
Cross laying is becoming popular with the advent of new types of laminate: embossed and chamfered. Here the floor panels are laid perpendicular to the light. Work should begin from the left corner of the wall and lay parallel to the wall with the window.
Diagonal installation can be carried out both for design purposes and as needed. Here it is possible to start from a corner, but in this case it is difficult to immediately reach the desired laying angle. The correct solution in this situation is to lay the first lamella in the middle of the room.
Laying diagonally.
Laying laminate flooring at right angles to each other does not impose any restrictions on the starting point of work. This can be any corner of the room.
Where to start laying laminate flooring in a room with an artistic approach to laying out laminate panels (labyrinth) is known only to professional builders - mosaic tilers. But there is no big secret here: the work always starts from the center of the hall (it is there that mosaics are used in most cases, since they do not look good in small rooms), exactly under the chandelier, if it is hanging.
Only this approach allows you not to trim the mosaic laminate panels near the walls - the free space is covered with slats, which in each case run parallel to the side of the laid rectangle (square).
Possible laminate laying schemes.
Furniture arrangement
The problem area of lamella strips is a weak lock. To avoid the side legs of a bed or sofa from falling onto one slat panel (leading to rapid destruction of the lock), installation should be carried out parallel to the installed furniture. If the sofas are located along adjacent walls or are corner, the solution is to lay them diagonally. How to start work in these cases can be seen above.
Traffic intensity
In hallways and corridors, due to constant foot traffic, parallel-laid lamellas begin to creak. The problem is solved by diagonally laying lamellas, which can be started from anywhere in these rooms.
Laying diagonally.
When laying in the whole apartment
The question of where to start laying laminate flooring in an apartment is resolved a little differently. Completely different requirements apply here: do not damage the already laid floor when installing laminate in other rooms. Therefore, in an apartment, installation begins in the back room and ends in the hallway.
Another nuance: do not lay laminate flooring as a continuous carpet in adjacent rooms - with changes in humidity and temperature, the slats often rise. Therefore, it is a mandatory requirement: to make a threshold in the door. In a situation where there is no doorway between the corridor and the kitchen, a threshold still needs to be made - there is a high probability of the floor raising when it expands.
Features of locks
The vast majority of laminate flooring is available with two types of locks on the transverse edges: conventional and easily assembled (the so-called “Quick-step”).
Conventional locks are latched by connecting the ends at an angle and then lowering one of the panels. This type of flooring is assembled in rows: first, all transverse seams in the row are connected, and then the assembled row is snapped at an angle to the already laid canvas.
Easy-to-assemble panels are mounted one at a time: the longitudinal seam is connected at an angle, then the die is lowered and snapped into place with the previous one. This coating can be assembled either in rows or with a ladder.
There is information on the Internet that there are transverse locks of the “LOCK” type - they supposedly snap into place in the stacked position by tapping the row from the end. From my own experience and the experience of my colleagues, I can say that I have never seen such locks. It is quite possible that such castles exist (existed), but I am inclined to believe that someone wrote something stupid, and others simply stole it. Unfortunately, this phenomenon does occur.
Often, for panels with conventional locks, you can find similar nonsense in the attached instructions: a row is assembled without connecting the transverse locks, and then these locks are connected using a clamp and a hammer. However, in reality the design of the lock does not allow this. As a result, when trying to connect the transverse seams, either the locks or the place where the clamp stops break. This suggests that you cannot always trust the manual from the manufacturer, especially an inexpensive one.
In the above-described options, the longitudinal locks are connected in the same way: at an angle, followed by lowering. Laminate flooring with more complex locks is very rare. Mostly they are found in square dies, which are assembled without spacing subsequent rows. Such locks are assembled in the same way, at an angle with lowering, however, to snap the lock into place, you must lower the attached panel lower than the previous one. This can be done by placing a small gasket, a few centimeters thick, such as a square, under the already laid one.
The canvas with “complex locks” is assembled in separate panels: first the transverse lock is attached, and then the longitudinal one. Such locks do not fall apart when the row is slightly lifted to attach new dies.
Herringbone and square
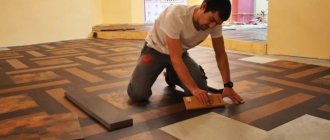
To place laminate planks in a herringbone or square pattern, you need to purchase a special type of laminate. Its panels are equipped with specially designed locks and are smaller in size, which allows installation at an angle of 90°. Parquet is most often laid out in the same way.
Before purchasing and subsequent installation, you should ask the seller whether it is possible to install such a laminate in exactly the way planned. There are about fifty different options for placing laminate boards in squares. It can be closed or open, and the herringbone can be single or double. Some of these styling methods are called English dressing.
Herringbone pattern layout
In one pattern you can combine up to 50 different board options: light, dark, with different patterns. The installation can look like a stepped ladder with alternating light and dark shades.
Gaps from walls
Laminate flooring is installed using the so-called “floating technology”. This means that during operation the canvas can change its position within small limits. Changes in temperature and humidity cause the coating to change in size and this should not be prevented. If the panels have nowhere to expand, the coating will swell, something will prevent the narrowing and the seams will come apart.
That is why laminate cannot be glued or nailed to the floor, and it is also necessary to ensure technological clearances from walls and pipes. Most manufacturers recommend gaps of 8-15 mm, and usually the size of the gaps for different areas is not indicated, only a general recommendation. However, it is quite logical to conclude that for small areas the gap can be made smaller, but for a large area a larger gap is needed.
The theory is of course good, but practice shows that in most cases laminate narrows
. Therefore, the gap must be made such that it is covered by the baseboard with a margin for narrowing. Recently, many plastic skirting boards with a closed gap of 15 mm have appeared. - this is not enough. A standard PVC skirting board with a cable channel (meaning not the cheapest) covers 20-25 mm. from the wall.
Based on the gap to be closed plus the margin for drying of the canvas, 15 millimeters is the maximum gap that should be left. However, this is usually the maximum value recommended by the manufacturer, so it is better to take something in between - 1 cm. In most cases, the gap is 10 mm. more than enough. The exception is large installation areas, for example throughout the entire apartment without thresholds - there you should be more sensitive to this issue.
When installation is carried out in one room, it may be necessary to minimize
gaps. There can be many reasons, as an example - connecting laminate to tiles with a special profile that covers less than a centimeter. Therefore, it is possible to create gaps only near two of the four walls - there is no gap on one side, but there is on the opposite side.
About the advantages and features
The advantages of this flooring include ease of installation (often you can do it yourself) and relatively low cost. Therefore, if you give preference to laminate, you can save a considerable amount, since you will not have to involve specialists in the work. In principle, even a person far removed from repair and finishing work can handle the installation. Of course, if you follow the step-by-step instructions. Which, in fact, is what this material is dedicated to.
What do the images on laminate packaging mean?
On a note! The installation procedure itself is associated with other stages of floor finishing, such as choosing a suitable material and preparing a rough base. Some points will be omitted in the article, because they are already covered in other publications (links are provided below), where everything is described in detail. Well, let's get started!
Formation of the first row
For an objective understanding, it should be noted that you can start laying laminate flooring from any convenient point in the room, even from the middle. However, in the vast majority of cases, this convenient place is the far wall without doorways.
It is more correct to choose a left-to-right layout for assembling panels; this will allow you to place “groove” type locks on already laid panels. Thus, assembly will be carried out by inserting the tenons of new panels into the grooves of already assembled ones - this is much more convenient.
For the first row, the required number of panels is assembled, connecting them together in transverse locks. There should be a strip from wall to wall. The last plank is sawed taking into account the gaps - the assembled row should have the necessary gaps on the left and right. Then the entire row is moved towards the starting wall, spacer wedges are inserted to form a gap.
Without a doubt, the first row will not be able to be aligned in a perfect straight line - there is minimal play in the transverse locks and therefore the panels may deviate from the straight line. To form a straight row (still not ideal), panels with overlapping seams need to be inserted into the longitudinal locks of our strip, like a second row, but without connecting the transverse locks. This temporary measure will help level the first row as much as possible and adjust the spacer wedges along the starting wall.
The rare wall from which installation begins has a perfectly flat plane, so the gap may vary, and in some places it may be unacceptable. Therefore, it is quite possible that the first row will have to be disassembled and the connection to the wall will have to be cut in some places. After sawing, the row is reassembled and leveled with additional panels, and wedges are inserted.
General information
Before describing the basic methods of laying laminate flooring, it is worth understanding what laminate flooring is.
Design
The laminate consists of the following parts:
- The top layer is a transparent coating that protects the previous decorative layer.
- Under the protective coating there is a paper layer with some kind of pattern, which, as a rule, imitates wood or some other material.
- Below is a central, reinforced layer of chipboard, which gives the laminate its shape and strength (read: “We lay chipboard under the laminate with our own hands”). In addition, this layer is equipped with locks that determine how the strips will be joined together.
- The lower part of the panel structure consists of moisture-repellent paper, which is impregnated with resin to give it these characteristics.
Basic laminate installation
Covering subsequent rows is the simplest operation in the entire process. Depending on the type of locks, the panels are mounted one at a time (Quick-step locks) or a row is first assembled in transverse locks, and then the row is docked to a common panel.
Tip: Before installation, carefully inspect each panel for chips and damage, especially edges and corners. Broken planks are best used in the last rows or trimming.
It is not always possible to join locks manually, without the help of a hammer. Therefore, it becomes necessary to knock the row|panel. As mentioned above, the “boss” from the installation kit is not suitable at all - the locks always have different shapes and this device is unlikely to match in shape.
A piece of covered laminate is ideal for tapping rows - it is inserted into the adjustable panel with a lock, and the hammer blows fall on the auxiliary piece. However, you should remember that the material of the panels is quite fragile and do not be overzealous in your efforts. I would like to note that the homemade “boss” should be placed in the same plane as the panel being processed - if you hold the boss at an angle, there is a high probability of chipping the top, decorative layer.
This device fits perfectly with locks - after all, it is made of the same material!
How to measure the last panel in a row? When the row is assembled without the last panel that needs to be cut, the whole panel is applied to the wall, overlapping the row and taking into account the gap. Important: the transverse lock we need must be located against the wall. Use a pencil to mark the location of the cut. The panel is sawed off.
A square is used to mark an even cross cut.
Straight parallel laying
The most common styling is straight. With it, laminate panels are placed parallel to the walls of the room. When starting work, you should remember that installation is carried out from the doorway. Segments of material can be positioned across or along the line of light. As noted above, if there are many joints, then it is better to place the sheets along the lighting.
Lay the cladding along the line of light, choosing the long side of the room as the starting wall. A positive feature of this method is that with this placement, seams or gaps do not cast shadows, so they are not so noticeable.
This method is used if the flooring needs to look holistic and smooth. Direct installation is best used in rooms where window openings are located along the short side. If light enters the room from several sources, for example, in corner apartments, then the seams will become noticeable precisely during a certain period of lighting, and the appearance of the pattern from the light will also change. In such cases, it is worth experimenting and choosing the most optimal option according to your aesthetic preferences. You can also use another laying method, for example, diagonal or checkerboard.
If the room has more than one window opening, but two or more, focus on the largest one. A rectangular room will look square if the longitudinal edges of the laminate panels are laid across its longest side. It is better to decorate a room with two windows located on different sides with laminate laid in a herringbone pattern or diagonally.
Scheme of perpendicular placement of floor elements
Installation near pipes
If pipes come out of the floor, they need to be bypassed with a gap, similar to the walls. The gap should be at least 10 mm. First, a hole for the pipe is marked on the panel, taking into account the gaps. Then the round hole is sawed out or drilled - whichever is more convenient.
To insert the pipe into the panel, the hole must be extended to the closest edge - this can be a cut to the wall or to the lock. The sawn piece is simply placed in its designated place after installing the panel.
The resulting gap around the pipe can be left as is or closed with a special overlay - the so-called “guard”, which comes in various wood-like colors. You can also use a collapsible plumbing reflector as a decorative element, but it has a big drawback - its silver color.
Do not fill the space around the pipe with any sealant or putty - the panel will lose the ability to “float”.
How to cut laminate evenly
You can cut laminate boards:
- jigsaw (most convenient);
- hacksaw;
- hand-held circular saw.
To prevent burrs from forming on the front surface when cutting, it should lie “face” up. To ensure that the cut is even, guides are used - rulers (bars) made of metal or wood. When using a hacksaw, the ruler should not allow you to “climb” onto the desired half.
The square can not only be used for drawing lines, but also used as a guide when cutting
When cutting crosswise, it is more convenient to use squares. It is pressed against the long side, the second serves as a guide.
Laminate in the doorway
When installing near a doorway, a contradiction arises: on the one hand, it is necessary to maintain a gap between the laminate and the wall, on the other hand, not every cash out will close such a gap. However, there is a way to combine these contradictions.
Before laying, the walls in the area where the cash strips are fastened are processed to form recesses. Thus, the cashing covers all the cut edges of the panels, and there is a gap under the cashing.
It seems possible to make recesses both with doors already installed and without them. If the height of the door frame does not allow laminate to be inserted, then the frame is sawed off with a fine-tooth hacksaw.
During a major renovation, the most correct sequence would be to install the laminate followed by installing the doors.
When the walls of the opening are made of plasterboard, the recesses near the cashings are made with several movements: the plaster is cut off in the right place with a sharp knife.
How to design difficult places
How to lay laminate flooring is theoretically clear. If you already have laminate flooring, you can practice on a small area - then it will become clearer. But there are always some problem areas in the rooms that you don’t immediately understand how to fix. In any case, there are two such areas - pipes and the door frame. How to lay laminate in these places so that you can’t find fault? In principle, this is not difficult. You need a ruler, a drill with bits, a hacksaw and pads that will close the gap at the pipes.
There's no need to do that
Connection to the door frame and threshold
In order for the laminate to lie nicely and without gaps near the door frame, it is advisable to lay it with the frame already installed. If you haven't installed the doors yet, you have time to get started while the laminate is curing. When installing the box, you need to make it a little shorter - the saw blade should fit between it and the floor. If the box is already standing, you can trim it.
How to beautifully design a joint with a door frame
When laying, the laminate is slipped under the racks, so there will be no gap. But how to design the joint between a laminate and another coating is a whole separate topic. And if the doors open onto a tiled corridor, there are additional methods for joining laminate and tiles. The simplest and most obvious is the threshold. They come in different varieties, so there are already a lot of options here. If you don’t like the thresholds at all, there is a cork compensator. It's almost invisible.
How to beautifully bypass pipes
The second difficult place to decorate beautifully is the pipe exit from the floor. We cannot live without heating and there are pipes in almost every room. Let us remind you once again: there must be a gap of at least 5-7 mm around the pipe. Having placed the board against the wall, mark the middle of the pipe with a pencil at the required distance. We measure the diameter of the pipe, add 2 cm to this value (at most 1.5 cm), we get the diameter of the hole that needs to be drilled in the laminate. It is difficult to find a drill with such a diameter, but a “crown” type attachment is possible.
How to go around pipes with laminate if they are on a short part of the board
After making a hole (or two, if necessary), draw a straight line through the center of the holes and cut off part of the board along it. We install the laminate, insert the cut piece behind the pipes. If everything is done as it should be, great. We coat the joint with glue (universal, for wood) and install everything completely. And we close the gap with overlays. They are available in wood color, white, black, and shiny. There are plastic or metal-like ones. In general, options are possible.
If the pipes are on the long side of the laminate
If the pipes fall on the long part of the laminate board, the technology changes slightly, but the essence remains the same. You just need to cut out the area in the form of a trapezoid.
Source
Outer row
When we have reached the final wall during the installation process, all that remains is to lay the last row. Usually the outermost row does not consist of the entire width of the panels - all of them will have to be sawn lengthwise.
Apart from the longitudinal cut, the installation is no different. The only issue is that it is not very convenient to join due to the presence of a wall. To apply mechanical force from the wall to the edge panel, a pry bar or large chisel is well suited; they are used as a lever.
Sometimes the last row is only 1-2 cm wide. You have to saw off a narrow strip from entire panels, this happens quite often. There is nothing negative about this.
It is more convenient to first assemble the outer strip along its entire length and only then carefully insert it into the locks of the previous row
The assembled last row may need to be tapped - this is done without a hammer, by inserting a pry bar or chisel into the gap from the wall. Usually this is enough. If you still need more force, I use the clamp from the kit and a hammer.
It is necessary to knock out locks at the last strip no matter how wide it is. When the strip is too narrow, it needs to be further trimmed from top to bottom (second part of the photo). Only then will the locks come together in the correct position.
It's time to end on this note. Today we did not discuss diagonal installation and installation without thresholds - in fact, there are no special differences, only nuances. Due to the resulting publication being too long, we will address these issues in future articles.
See also: Laying laminate flooring without thresholds throughout the apartment
What type of fastening is it suitable for?
There are two types of fastening. The method and type of installation depends on this indicator. Each type of fastening implies the presence of a groove on one element and a tenon on the other. The only difference is their appearance and method of connection.
- Click . Quite a simple connection method. So named because of the characteristic sound during connection. For installation you only need the components and your own hands. Laying occurs as follows : install the first board, then bring the next one at an angle of 45 degrees, insert it into the groove and snap it into place. If necessary, you can tap the board with the back of your hand.
- Lok . The next method is somewhat more complicated than the previous one. It also assumes the presence of a groove and a tenon. Only they are slightly different. If in the first version the groove is adjusted so that the tenon fits into it easily, then this is a tight connection. Therefore, for installation you will additionally need a rubber mallet. It happens as follows : the boards are laid sequentially, then you need to precisely adjust their position, then insert the tenon into the groove and hit the board with a mallet so that the tenon fits tightly into the groove.
For the deck look, both types of locks are suitable. But locks like locks are better suited. It will be easier to lay them using the deck method, because in boards with this type of locks, longitudinal locks are first connected, then longitudinal ones.
