Electric welding is a method of joining metal fragments (profiles, pipes) by local melting of the metal. It is heated to the desired temperature using an electric arc using a welding machine that converts alternating current into direct current.
An electric arc is formed on an electrode - a metal rod. In the area of the arc, a special environment is created that simultaneously melts the metal, but does not allow it to come into contact with air and oxidize.
Using welding, you can create a tight connection between two pipes, in which there is a risk of leakage, as with flange or coupling joints. To do this, it is important to make a high-quality weld by fusing the metal on the edges of both pipe sections. Welders use several basic types of seams, depending on the type of metal, the thickness of the elements being welded and their relative position:
- butt welding is the most common method of welding pipes, in which they are located opposite each other, connected by sections;
- in a T-bar - two pipe fragments are arranged perpendicularly in the shape of the letter T;
- angular - parts are located relative to each other at an angle of 45 or 90 degrees;
- overlap - one piece of pipe is flared and put on top of another, then welded.
Important! Steel pipes for heating and water supply systems are butt welded or corner welded. This gives the most reliable and durable seam.
In addition to the connection method, there are also several types of welds that are used in certain cases:
- horizontal seam - performed when the pipes are positioned vertically (most often used in the installation of water supply and heating systems);
- vertical - the connection is made with a mutual horizontal arrangement of pipes, in which the master makes vertical movements with the electrode (from bottom to top, top to bottom, etc.);
- ceiling - during welding, the electrode is located under the part being welded, the welder has to hold his hand above his head;
- bottom - in contrast to the ceiling, the electrode is located on top of the parts being connected.
The most convenient way of welding is using a bottom seam, in which the specialist clearly sees the working field and can rotate pipe fragments for faster and more productive work.
Ceiling joints are usually not used when constructing an engineering system from scratch, because this method is quite inconvenient (the welder gets tired quickly, has difficulty seeing the working field, and drops of molten metal may fall on him). A ceiling weld is usually used for repairs when a worn or deformed piece of pipe is cut out and a new one is welded in its place.
Types of welds and joints
Electric welding is a method of joining metal fragments (profiles, pipes) by local melting of the metal. It is heated to the desired temperature using an electric arc using a welding machine that converts alternating current into direct current.
An electric arc is formed on an electrode - a metal rod. In the area of the arc, a special environment is created that simultaneously melts the metal, but does not allow it to come into contact with air and oxidize.
Using welding, you can create a tight connection between two pipes, in which there is a risk of leakage, as with flange or coupling joints. To do this, it is important to make a high-quality weld by fusing the metal on the edges of both pipe sections. Welders use several basic types of seams, depending on the type of metal, the thickness of the elements being welded and their relative position:
- butt welding is the most common method of welding pipes, in which they are located opposite each other, connected by sections;
- in a T-bar - two pipe fragments are arranged perpendicularly in the shape of the letter T;
- angular - parts are located relative to each other at an angle of 45 or 90 degrees;
- overlap - one piece of pipe is flared and put on top of another, then welded.
Important! Steel pipes for heating and water supply systems are butt welded or corner welded. This gives the most reliable and durable seam.
In addition to the connection method, there are also several types of welds that are used in certain cases:
- horizontal seam - performed when the pipes are positioned vertically (most often used in the installation of water supply and heating systems);
- vertical - the connection is made with a mutual horizontal arrangement of pipes, in which the master makes vertical movements with the electrode (from bottom to top, top to bottom, etc.);
- ceiling - during welding, the electrode is located under the part being welded, the welder has to hold his hand above his head;
- bottom - in contrast to the ceiling, the electrode is located on top of the parts being connected.
The most convenient way of welding is using a bottom seam, in which the specialist clearly sees the working field and can rotate pipe fragments for faster and more productive work.
Ceiling joints are usually not used when constructing an engineering system from scratch, because this method is quite inconvenient (the welder gets tired quickly, has difficulty seeing the working field, and drops of molten metal may fall on him). A ceiling weld is usually used for repairs when a worn or deformed piece of pipe is cut out and a new one is welded in its place.
Threads (GOST 8969-75)
Threads , as well as bends, are made using the following method: a pipe of the required diameter is taken, then a section of the required length is cut from it, and an external thread of a certain length is cut on one side of this section using special equipment. The main difference between a thread and a squeegee is that the squeegee has threads cut on both sides, while the threads have one, because the other side of the thread is welded to the pipe. Threads are used to connect water and gas pipes, in heating systems, plumbing, gas pipelines and other systems operating in non-aggressive environments (water, saturated water vapor, flammable gas, etc.). In the picture below you can see how the threads look schematically:
Threads:
As can be seen from the schematic image above, the threads are a cylindrical part with an external thread cut on one side. The threads of the threads are cut on a lathe using a cutter. Threads are used using a sealant, at an ambient temperature not exceeding 175°C and a pressure not exceeding 1.6 MPa. Threads are manufactured in accordance with GOST 8969-75 and can be manufactured in just one design. In the figure below you can see how this design looks schematically:
Threads in accordance with GOST 8969-75 can be made of steel, galvanized (galvanized threads) or uncoated. The diameter of the threads according to GOST 8969-75 varies from DN 15mm to DN 50mm. In the table below you can see the parameters of steel threads manufactured in accordance with GOST 8969-75:
| Conditional diameter Dу, mm | Thread d | Length, L, mm | Thread length, mm | Weight without coating, kg |
| 15 | 1/2″ pipe | 60 | 9 | 0,07 |
| 20 | 3/4″ pipes | 60 | 10,5 | 0,075 |
| 25 | 1″ pipes | 60 | 11 | 0,14 |
| 32 | 1 1/4″ pipes | 70 | 13 | 0,19 |
| 40 | 1 1/2″ pipes | 70 | 15 | 0,27 |
| 50 | 2″ pipes | 80 | 17 | 0,38 |
Below is an example of a symbol for threads according to GOST 8969-75:
If you require other characteristics of threads manufactured in accordance with GOST 8969-75, then you can view them by downloading this GOST from our website.
Using the above table on our website, you can always accurately calculate the cost of transportation costs because... it indicates the weight of all existing threads in accordance with GOST 8969-75.
Our company can supply threads made of grade 20 steel with and without galvanized coating (steel threads, galvanized steel threads).
Some tips for performing quality welding
The quality of welding depends on proper preparation for welding work, the choice of electrodes and process technology, which is somewhat different when connecting joints.
Selecting suitable electrodes
The quality of the weld largely depends on which electrode is used for welding. It is a thin metal rod with a special coating. The inner part of the electrode serves as a conductor to create an electric arc, and the coating ensures its stability and also participates in creating the weld.
Based on the type of core, electrodes are divided into consumable and non-consumable . In the first case, the product is based on steel wire, in the second - a tungsten, carbon or graphite rod.
Based on the type of protective coating, electrodes are divided into:
- cellulose - marked “C” - used for labor-intensive and complex welding work with large-diameter pipes, on long technological lines;
- rutile acid - “RA” - the most used type of electrode for welding water supply and heating utilities;
- rutile - “RR” - can also be used for welding water supply and heating pipes, they are distinguished by greater thickness and better quality of the weld;
- rutile-cellulose - “RC” - provide a more durable seam when using the vertical joining method;
- universal - “B” - suitable for welding pipes of various diameters and thicknesses, in a wide temperature range.
Another classification of welding electrodes is the diameter of the rod. The strength of the electric arc, which can cope with pipes of a certain thickness, depends on it:
- 3 mm – electrodes are suitable for welding pipes up to 5 mm thick;
- 4 mm – electrodes allow you to weld up to 10 mm thick, as well as make multilayer metal seams.
Attention! In addition to the thickness and material of the electrode, for high-quality welding it is also necessary to take into account the current strength, which depends on the method of connecting the pipes. For example, for a simple butt joint an arc of 80 to 110 amps is suitable, but for lap welding you will need to switch the machine to 120 amps.
Using clamps
Reliable and practical hose clamps are widely in demand in a wide variety of industries. Due to their ease of installation, they are used for industrial and domestic purposes. When joining pipes, you can first plug them on both sides to ensure greater strength and reliability.
A clamp for connecting pipes is relatively inexpensive
Experts use a variety of types of clamps:
- For hoses;
- With hinge bolt;
- Spring.
A metal clamp can be used in all types of fastening. For fixation, such products are made of galvanized or stainless steel, and bolts or screws are used to tighten them. If they are used for a plastic pipeline, rubberized seals can be used to avoid damage to the shells and reduce vibration and noise.
In case of increased mechanical loads, it is necessary to use power clamps. Their design allows them to withstand very large loads along the clamp while maintaining integrity. Plastic clamps are used for fastening water and sewer pipes. Their design is similar to metal ones, but they are much less expensive.
Pipe connections can be made in a variety of ways, it all depends on your own preferences.
How to make the right seam
To make a high-quality seam, proper preparation of the pipe for welding is necessary. The quality of the pipe edge is decisive for a durable and airtight seam.
For example, for butt welding, the pipe cut must be strictly at a right angle. Before starting work, it is thoroughly cleaned with sandpaper 1 cm from the edge of the pipe, then oil, paint, metal dust are removed and degreased.
The welding technique depends on the cross-sectional shape, thickness and diameter of the pipes being connected. Simple round pipes for heating systems are welded using a simple continuous seam, moving the electrode along the surface of the pipe until the two pieces are completely welded.
For relatively thin pipes (up to 6 mm), a two-layer weld is suitable; for thicknesses from 6 to 12 mm, three-layer welding is used. Massive and thick pipeline fragments are connected with four or more seams.
The seams are performed alternately, one after the other. The next seam can be started only after the previous one has cooled. To achieve a high-quality and beautiful seam, you need to periodically remove the slag formed at the welding site by lightly tapping the pipe with a hammer.
Features of welding rotary and non-rotary joints
To make a high-quality rotary joint (where two pipes are connected at a certain angle), you can use a special rotator, which fixes and provides the most convenient access for the welder.
In the absence of a device, you will have to rotate the pipe manually, using an electrode to treat a section of the pipe cross-section of 60-110 degrees.
When making a rotary joint manually, the diameter of the pipes is first welded 2/4 from the outside in two layers, then unfolded and the joint is welded using all three or four layers.
A fixed joint is much easier to make: combine two pipe fragments and make several welding points (for example, in the form of an imaginary cross, or only on two opposite sides). Cook the pipe, starting from the bottom point, moving the electrode to the top section.
Method number 3. Fitting
If profile pipes need to be connected to bends and branches, special fasteners - fittings - are placed at the ends. There are fittings for external and internal use, and according to their purpose they are divided into:
- crosses, tees (to create branches of different or identical sections);
- couplings (to join straight sections);
- squares (to create elbows and turns to change the direction of the pipe).
The pipe is installed inside the fitting
The fitting is installed inside the pipe.
The assembly algorithm is as follows:
- first you need to put crimp nuts on the ends;
- then you need to install rings - clamping/clamping/sealing;
- after this the fitting is put on;
- at the end you need to tighten the nuts at the ends to hold the parts together.
Fitting for connecting round pipes
Prices for connectors for profile pipes
connector for profile pipes
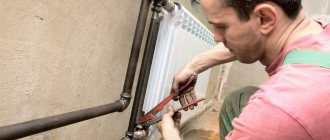
Welding safety rules
The electrical welding process poses three potential hazards:
- receiving electrical injury from contact with live wires or electrodes;
- skin burn from molten metal;
- Arc flash burn of the retina.
To avoid undesirable consequences, you should take care of electrical insulation: use special rubber mats and galoshes, ground the welding machine, and insulate the conductors.
It is important to use personal protective equipment - special gloves, as well as a protective helmet or face shield.
Electric welding of water pipes is one of the most reliable ways to achieve the necessary tightness of the circulation circuit. The seams obtained using this technology are resistant to pressure, mechanical loads, and corrosion.
Unfortunately, even if all requirements are met, pipes may leak during operation. This occurs due to external loads for which metal structures are simply not designed, as well as due to natural aging and wear of the material.
In such a situation, you have to act immediately and eliminate leaks in an already used pipeline.
What difficulties may arise
During repair welding of water pipes using electric welding, the quality of the seam from contact with water will be low. This repair of defects is a temporary measure. It is not provided for by GOST. When water pressure increases and the system is pressurized, the seam formed during welding can crack. Not all welders undertake this type of work. Surfacing of metal in the damaged zone often leads to multiple fistulas around the welding zone, because during welding the oxidation process is activated by contact with water. Instead of one fistula, many are formed.
Welding a pipeline containing water is a technologically complex job for a number of reasons:
- Due to the steam generated from the water during welding, you have to periodically wipe the mask; the work area is difficult to see.
- Water constantly cools the welding working area and prevents the metal from penetrating to great depths. Setting occurs immediately and crystallization begins.
- When pipelines located under the ceiling leak, work clothes get wet from the water. This is fraught with breakdown of current. The hand twitches and the electrode gets stuck.
Need for work
Welding a pipe with water may be required in the following cases:
- Leaks formed as a result of exceeding standard loads or poor-quality installation work. Disconnection in such cases is not welcome, especially if we are talking about main pipelines supplying water to large residential areas.
- The need for a tie-in. Draining liquid from the entire system involves significant temporary losses, so the matter is often limited to turning off the circulation pumps. This measure helps reduce pressure in the circuit, making work easier.
Main difficulties
Welding pipes under pressure is not an easy task, and not every specialist will undertake it.
Problems are associated with the following phenomena:
- the pressure of the liquid does not allow the required temperature of the weld pool to be reached, it is extremely difficult to achieve the required coefficient of adhesion of the deposited metal to the base;
- When water comes into contact with hot material, large volumes of steam are produced. The welder has to work in conditions of limited visibility, the mask fogs up, he has to constantly wipe it, get distracted, waste time;
- It is very difficult to work when the pipes are located at a height, under the ceiling. Water can drip onto the welder, and it can be awkward to hold heavy equipment.
What are surges
A squeegee is a connecting piece that looks like a short tube with a short thread at one end and a longer thread at the other. The locknut and the entire coupling are put on here.
It is recommended to take pipe bends with a sufficiently long thread, otherwise all the parts will not fit in the threaded area, and then you will need to increase the distance between the connected ends of the pipe and the bend, as a result, the strength of the connection will be reduced.
This connecting part is most often used when laying water pipes. Therefore, it must be treated with anti-corrosion agents.
The most common types of metal pipe fittings are:
- Nickel plated. These bends give the pipeline a more beautiful appearance, therefore they are most often used in residential premises. However, they are more expensive compared to conventional steel parts.
- Galvanized. They are used in open areas where the pipeline will be affected by atmospheric phenomena.
- Steel. Used for pipelines laid in the ground. To prevent the formation of corrosion, they are painted.
Gosstandart defines the following dimensions of pipe fittings:
- 150×50×65×17 mm, where the first value is the length, the second is the internal diameter, the third is the length of one threaded section, the last is the length of another threaded section;
- 130×32×55×13 mm;
- 110×15×40×9 mm.
Selecting a tool and setting up equipment
Despite all the difficulties, working with pipes under pressure is quite feasible. The main thing is to correctly adjust the operating modes and select the appropriate tools.
For example, the best electrodes for welding water pipes are as follows:
SSSI 13/55. Universal elements that allow you to repair pipes made of steel, regardless of the degree of alloying and carbon content.
The formed seam is characterized by an optimal combination of strength, ductility and toughness, and can withstand high operating loads without the formation of repeated fistulas and destruction. Beginners may be afraid that the electrode sticks to the metal during operation, but it is very easy to get rid of this; you just need to lengthen the arc.
In just a few minutes of work you can develop a good skill and feel all the subtleties and advantages of the electrode.
MGM-50K. New development optimized for work with pipes under pressure.
The main feature is that a gas bubble is formed around the arc, displacing steam or liquids, which improves the conditions in which welding is carried out, facilitates the task, and allows one to achieve the desired result.
The electrode is suitable for working with pipes made of both high carbon steel and low alloy grades. It is allowed to work on contaminated surfaces and metal that already has signs of corrosion damage.
Watch an interesting video about which electrodes are best to use for welding pipes:
It is also useful to adhere to the following recommendations:
- Increasing the current will help achieve the required arc stability; the likelihood of electrode sticking will be reduced due to the fact that the deposited metal quickly cools and sticks to the base.
- The electrodes are pre-heated, and the work area is heated with a gas burner. The flame evaporates the liquid leaking from the pipe, increasing the level of adhesion of the deposited metal to the base.
- When choosing voltage, you should focus on your own preferences.
Beginners should know that:
- alternating current forms a more stable arc, making it possible to work even under an impressive layer of water, but the final quality of the seam is not too high;
- direct current, in turn, helps to achieve maximum penetration depth of the deposited metal and weld strength, but direct work in an environment of high humidity is more difficult.
Useful video for beginners on how to weld a pipe with water when repairing a heating main:
Fistula removal
How to weld a water pipe using electric welding with the maximum degree of reliability? The exact instructions depend on the nature of the damage. Let's start with how to eliminate a fistula in a water pipe, that is, a round hole from which liquid oozes.
In this case, you need to take a position that allows you to clearly observe the boundaries of the damage, and the electrodes are held perpendicular to the base to minimize the volume of water falling on them. Work is carried out from top to bottom until the hole is completely hidden by the deposited metal.
The procedure is as follows:
- metal is fused to the upper part of the fistula;
- 2 blows are made with a hammer immediately after the arc goes out. This promotes compaction of the material and eliminates pore formation;
- the cycle repeats from top to bottom;
- if there is thinning of the walls along the edges of the hole, they are strengthened using the method described above;
- when steam stops oozing out, the pipe wall becomes stronger. The current is set to a minimum to prevent through burning. The required volume of material is gradually deposited;
- To increase strength, the formed seam is tapped.
This video shows in detail how to weld a fistula in a pipe (lower position):
Forming a cut-in
Welding under steam pressure can also be performed if it is necessary to install an auxiliary channel for its outlet.
The installation of the insert must be preceded by the installation of a ball valve. This will help not to shut off the system completely, but to stop the flow of steam or water to a separate section of it, which will simplify further work.
The process looks like this:
- a pipe equipped with a ball valve and thread of the appropriate type is fitted to a certain section of the pipeline;
- the applied part is scalded, while maintaining the original integrity of the pipeline;
- the tap opens and a hole is drilled through it in the main pipe;
- the drill is pulled out, the water supply is stopped by turning off the tap;
- a squeegee equipped with a winding is installed, a new pipeline branch is closed;
- the tap opens.
The pressure level in the system in this case can be any. During operation, the minimum current should be maintained to prevent damage to the main line.
When selecting the diameter of the drill, you need to keep in mind that the formed hole must be wide enough to ensure efficient operation of the new pipeline branch.
Watch a video about inserting a steel water pipe under pressure:
Heating
They installed biometallic radiators for me. So far they haven’t really given me any heat, but the house is rrrrrr. how cold it is. I consulted with you here. I installed steel pipes, not polypropylene. They also installed a bypass. But here’s a question for you. It seems like the plumber did everything well, he connected the system to check if there were any leaks. Basically, I had to do welding several times at the junction of the bypass to the horizontal pipes. And there such welding is almost as big as a fist and still flows. What is the reason? I also asked, but the water in the pipes will flow as much as possible, that is, is the pipe not narrowed with such welding? I was reassured. Here The other day I need to turn it off again and welding again. Well, I think maybe it’s doing something wrong, but I don’t understand this and am silent.
Masters online: 220 Orders per week: 2,306 Offers per day: 1,269
The whole reason is in the hands of the plumber. The slag from welding prevents him from welding well. Usually they are welded using gas welding, but it is a hundred pounds using electric welding. Hence the size of a fist.
At a construction site, for example, few people cook with gas, due to the cheapness of the electrode; maybe the plumber is just a mediocre cook?
Yes, it looks like he's not a very good welder. I would advise him to cut out this unit with a weld seam the size of a fist, and carefully weld a new one. There is a danger of endless welding of fistulas in this “fist”.
Good afternoon Alexander! It turns out that when you connect heating under pressure, there is a high danger of these fistulas or something. Now the pressure in the pipes without heating is low. I also thought, maybe paint several layers of paint, and if you cut it out, you’ll probably need a new pipe again. I’m with I’ll contact you on Monday, then the work will be half welded again and I’ll tell him what you said. But I’m very afraid that the pipes will burst, that is, the seams won’t hold up.
Of course yes, but I would advise using threaded connections if the person doesn’t know how to cook :-)
Elena, hello. No “maybe paint in two layers” - definitely, cut and digest. It is advisable to invite another welder. In this matter, savings are inappropriate. Repairs at your place, and probably at your neighbors’, will cost much more. Good luck.
an electrode in his mouth and two fingers in a socket.
We make with modern materials and don’t mess with welding. It’s one thing to weld new iron and quite another to weld it to rotten pipes. The problems with polypropylene pipes are certainly no more than with metal ones. Experience 13 years.
From the riser, the horizontal and bypass pipes are completely new, and the old ones were cut off by a plumber. Only I myself wanted such pipes, and not polypropylene. Sergey, you advised me, remember. I made steel pipes based on your advice.
Lenochka, you are confusing me with someone, we discussed the diagram of your system and how to clean it. After reviewing our correspondence, I did not find any advice to do it in metal. And in general, I’m not saying that metal is bad, it’s just that we make it in reinforced polypropylene. We haven’t been involved with welding for a long time for reasons like yours. Perhaps you didn’t have the opportunity to make it with polypropylene. The plumber knows best on the spot. Please do not confuse me with other Sergei.
I wonder if it's leaking or getting wet? It would be nice to show it with a photo. Electric welding will not break through phlegm. If you leave it, it may *take a long time*. But another welder is better, and you need good electrodes. I cook with Ano-36 electrodes. There are no problems. Very rarely it can freeze and it can be cooked under pressure. And the pipes are good. And it's good.
It’s leaking, yes, I paid this welder 14,000 thousand for such work, there is not even a contract, but if he has a conscience, if something happens, he must correct the defect. I will ask on Monday what electrodes he used to weld. I have now taken photos and will send them as a file.
This is what a welder did for me, where it is leaking.
Elena, if after the crossbars you put American joints or crossbars, then all the welding is visible and can be easily welded. Secondly, the jumper should be placed closer to the radiator and not closer to the riser. Third, you need to put a wet rag on the floor and then the parquet and linoleum will not be so dirty from welding. Fourth, it won’t break through 100%, it’s just not pretty. Fifth, I ask for 5000 rubles for such work. Usually they don’t pay money until it is verified that the work is good. It is very rare that something cannot be verified. They can't give me water. Today I changed the heating riser and left without checking. Sixth, such welding can be welded under pressure with a high current. If it doesn’t digest, there won’t be a flood. Keep calm.
Peter, thank you for your answer. Let's hope that there will be no worries about this during the heating season. Does it really matter that the jumper should be closer to the radiator? If this has already been done, then I'll see how it heats this winter. If it's bad, then next I’ll have to consult with you again on this forum for a year. I can see for myself what’s not done beautifully. But warmth is more important to me. I’m so tired of freezing in my Khrushchev apartment.
Yes, if they turn on the heating, everything will quickly dry out and tighten. But you can overcook it, of course.
Peter, what is “wonder”? If you overcook it, does that mean you have to cut it off first?
Of course, there is no danger of breaking through this seal. It will just be difficult for a welder to weld the place where it gets wet - where the scale sits is unknown, and the cycle “turning off the riser - boiling - starting the riser” can last forever. This overlap in the form of a massive seam was the result of a welder’s mistake in handling the tape measure: judging by the photo, in the upper horizontal pipe he burned a hole for the jumper a couple of centimeters closer to the cross than on the lower pipe. Then I burned another hole nearby and welded up the unnecessary one. What happened is not dangerous, and there is even significant hope that when the heating starts in October, the drops will boil by themselves. Reworking the work is possible only by your strong-willed decision, and the strict position “I will pay when there is no leakage.” Although this is not really necessary.
It will tighten - when there is heating circulation, the dirt from the inside will clog the leak or it will be sweating. This always happens. I started cooking like this 10-13 years ago. So Alexander Gordienko also confirmed that he would not break through. Keep calm.
Of course, purely from a human perspective, all that remains is to somehow console. And if, in fairness, the money was paid, then the work should have been done. Not with such a joint, not with a leak. And when they pay money and receive that they have to wait until the joint boils, in order to hide the terrible appearance, pour more paint and hang opaque curtains. Well, this is some kind of nonsense. Perhaps with such qualifications he also melted the inner diameter, not quite of course. But I think if you cut the joint, there will be good snot inside. To be fair, this city should be forced to be remade. Don’t reassure, like (oh well, live with it, others have had it worse, and nothing works). It shouldn't be like this, it's disgusting. And you can’t justify such things, it’s doubly disgusting. The best advice is not to put up with it, but to fight and get the result for which you PAID! Tomorrow, such a specialist will shit in ten more apartments, and he will get away with everything. Because a dozen people will say, okay, no big deal.
Thank you Igor for comforting me. I only posted some of the photos. In addition to these two welds, there is also something on the jumper when welding the “Duck” pipe to the radiator. There are generally 2 seams on the “duck” on horizontal pipes. I noticed after welding the radiators are attached crookedly .She told me to redo the work. I had to cut the pipes, and again make the second seam by welding. In short, the whole pipe was in seams. I agree that it was not done professionally. It just turned out to be a lesson for me that I couldn’t immediately find a professional in this matter. The job was done, and time will tell what the result will be.
rip off this welder's hands. It cannot be welded because when welding there is water in the pipe, it instantly boils in this place and pushes out the metal, cools it and prevents it from being welded. All the resulting clubroot must be cut off. drain the water from the pipe. and brew normally. You will only save yourself with paint if there is never any pressure in the pipe, so this option is impossible.
Why is it not possible? You need to know how. If you can’t cover all the water, it leaks a little. So what should I do? You can either brew it or simmer it. I want to ask you, did everything work out 100% well for you? Didn't anyone cut off their hands? 10-13 years ago my welding was bad. Right now it's 99% great. Sometimes it freezes, then I brew it under pressure.
Selection of electrodes
The first thing you will need to carry out welding work on heating pipes or other structures is electrodes. Not only the reliability of the resulting welds and the tightness of the system, but also the process of performing the work will depend on the quality of this consumable material.
An electrode is understood as a thin steel rod with a special coating, which allows for a stable arc during the electric welding of pipes, and is involved in the formation of the weld, and also prevents oxidation of the metal.
The classification of electrodes involves division according to the type of core and type of outer coating.
Depending on the type of core, there are the following electrodes:
- With a non-melting center . The material for such products is graphite, electrical coal or tungsten.
- With a melting center . In this case, the core is a wire, the thickness of which depends on the type of welding work.
As for the outer shell, the many electrodes that are found on the market should be divided into several groups.
So, the coverage could be:
- Pulp (grade C) . These products are mainly used for welding work on large cross-section pipes. For example, for the installation of pipelines for transporting gas or water.
- Rutile acid (RA) . Such electrodes are optimal for welding metal heating or water pipes. In this case, the welding seam is covered with a small layer of slag, which can be easily removed by tapping.
- Rutile (RR) . This type of electrode makes it possible to obtain very neat welding seams, and the slag formed during the work process is very easily removed. Mostly such electrodes are used at corner joints or when welding the second or third layer.
- Rutile cellulose (RC) . With such electrodes you can perform welding work in absolutely any plane. In particular, they are very actively used to create a long vertical seam.
- Basic (B) . Such products can be called universal, because they are suitable for welding thick-walled pipes and parts that will be operated at subzero temperatures. This creates a plastic, high-quality seam that does not crack or deform over time.
Heating registers
Welding risers, heating registers, and batteries of heating elements is no different from joining conventional pipes. The only thing that should be taken into account before working with them is more thorough preparation of the joints (cleaning and grinding). Heating radiators and registers should be mounted strictly level to avoid distortions.
Before cooking cast iron radiators for a heating system, you need to consult with specialists. The fact is that, unlike steel products, it is quite difficult to make a high-quality weld on a cast iron part without some experience in such work.
If you have some experience, you can change heating pipes at home on your own. At the same time, we must not forget about shutting off the riser so that the coolant does not leak out. It is better to replace it in the warm season, when the heating is turned off.
Types of welds and pipe connections
There can be several ways to weld pipes using electric welding:
- placing the parts end-to-end - in this case the pipe sections are exactly opposite each other;
- T-joint - this pipe welding technology implies that two pieces of pipe are placed perpendicularly, in the shape of the letter “T”;
- overlap fastening - in this option, one of the pieces of pipe is flared so that it can be put on another;
- corner connection - that is, two parts are placed at an angle of 45° or 90°.
When welding pipes using electric welding, the following seams can be made:
- horizontal - in this case, the pipes to be welded are located vertically;
- vertical – these are seams on a vertical section of the pipe;
- ceiling - in this case, the electrode is placed at the bottom of the part, above the worker’s head;
- lower - respectively, seams, for which you need to bend down.
Please note that when working with steel pipes, the connection must be end-to-end, with mandatory welding of the joint to the thickness of the wall of the product. The optimal solution in this case would be to use a lower rotation seam.
There are several more recommendations on how to weld pipes using electric welding:
- When carrying out welding work, you should hold the electrode at an angle of 45° or slightly less, then the molten metal will get inside the pipe being welded in much less quantity.
- If you are making a T-joint or butt joint, you will need 2-3 mm electrodes. In this case, the optimal current for reliable sealing of the system is in the range of 80-110 amperes.
- To reliably weld an overlap joint, the current must be increased to 120 amperes, and similar electrodes can be used.
- The optimal height of the weld should be 3 mm above the surface of the pipe. Only after achieving it can the work be considered completed.
Separately, it is worth dwelling on profiled products. Welding of such pipes must be done pointwise. This means that they first grab two points on opposite sides of the profile, then move to two other points, and so on until the entire pipe has warmed up. After this, they begin to make a continuous weld around the perimeter of the pipe.
Preparation for the process
Before starting welding, you must make sure that there are no flammable materials or explosive substances nearby. If there are any, it is better to protect them with some kind of non-flammable material and place a container of water nearby just in case. The surfaces and edges of the pipes near the weld must be cleaned. Then you need to securely secure the grounding and check the integrity of the cable. The required current is set on the transformer of the welding machine in accordance with the thickness of the pipes being welded. After this, light the arc by slowly moving the electrode at a distance of 5 mm from the pipe surface at an angle of approximately 600, as a result of which sparks should appear. Then the electrode must be moved to the welding site, keeping it at the same distance from the pipe.
Advice! Because the electrode will decrease during welding, it should be brought closer as necessary so that the distance does not change. If the arc does not ignite, then expand the current until sparks appear. If you still fail to light the arc, then go pick up a thicker electrode.
In most cases, for rotary joints, the current on the welding machine with an electrode thickness of 3 mm and a pipe up to 5 mm must be in the region of 100 to 250 A, and for non-rotary joints - 80-120 A.
Preliminary work with parts
Before welding a round pipe, it needs to be prepared for work, that is, pre-process the joints and clarify all the details. To do this, the pipes are first diagnosed for compliance with a number of technical characteristics required for the installed system, in particular, water supply (read: “Which welding of water pipes is better - types and features of welding”).
According to the instructions, the following conditions must be met:
- Geometric dimensions.
- Availability of a quality certificate, in particular if it is a pipeline for drinking water.
- Perfectly round shape of pipes - no defects in the ends in the form of a flattened or oval section are allowed.
- The same thickness of pipe walls along their entire length.
- The chemical composition of products must comply with Russian GOSTs for certain systems. This information is obtained from technical documentation or laboratory tests.
Next, you can begin to actually prepare the pipes for joining and welding.
The preparation process includes the following stages:
- check the evenness of the cut at the end of the pipe - it should be 90º;
- the end and an area 10 mm from it must be thoroughly cleaned until a metallic shine appears;
- all traces of oils, rust, paints should be removed and the surface at the end of the pipe should be degreased.
The last thing to take care of is the correct end configuration. The opening angle of the edge should be 65º, and the dullness should be 2 mm. Additional processing will allow you to achieve the required parameters.
This work can be done with a chamfer, trimmer or grinder. Professionals who work with large diameter pipes use milling machines or gas and plasma cutters.
Generally accepted rules for piping installation
Installation is carried out manually. The crowbar serves as a lever for positioning the pipes; a wooden spacer must be provided between them and the crowbar. If the lever cannot fulfill its purpose, professionals recommend using a jack.
Upon completion of the pipeline installation, it is necessary to check the correct placement of the sealing gasket in the socket. A thin metal plate, 0.5 to 0.8 mm thick, is inserted between the smooth end and the socket. The plate must be in contact with the rubber ring. Then it moves around the circumference of the pipe, and at the end the location of the ring in the socket is checked: the distance from the plate to it should be the same along the entire circumference.
If the pipeline is installed at sub-zero temperatures, it is necessary to carry out the work with extreme caution and use only silicone lubricant. If the pipeline is installed using the socket method in a residential (warm) room, then liquid soap can be used as a lubricant for their smooth end and socket
Subtleties of electric welding
If round pipes are welded, the seam on them must be continuous. This means that once work has begun, it cannot be interrupted until a continuous weld has been formed. When working with rotating and non-rotating joints, electric welding of heating pipes should be performed in several layers. Their number will depend on the thickness of the pipe walls.
The dependence of the number of layers on the wall parameters is expressed in the following quantities:
- 2 layers of welding seam are performed on pipes with a wall thickness of up to 6 mm;
- if the walls vary between 6-12 mm in thickness, 3 layers will be required;
- all other products, the wall thickness of which is even greater, require the application of 4 layers of seam.
It is worth noting that each subsequent welding layer can be applied only after the previous one has completely cooled. All resulting slag must be removed before application. Read also: “How to properly weld pipes using electric welding – theory and practice from a master.”
In addition, it is worth considering a number of important features:
- What polarity and current should be used (constant or alternating) will depend on the wall thickness of the pipes, their material and the shell of the electrodes. All information must be indicated in the instructions for the electrodes.
- The thickness of the electrode rods affects the current required for welding. You can estimate this indicator by multiplying the thickness of the rod by 30 or 40. This way you can calculate the current strength in amperes and set it on the welding equipment.
- The speed of work execution has no regulated value. You just need to make sure that the arc doesn’t stay at one point for too long, otherwise the edge will burn out and you’ll have to start all over again.
To make your work easier, before starting to weld gas pipes using electric welding, you can assemble the joints.
Specifications
The squeegee looks like a piece of pipe with threads on both sides. The segment must be straight or angular. On the short side, the thread consists of 5 turns, and on the long side, it consists of 20 turns or more, up to 30. The short end of the thread is connected to the pipe of the equipment, for example, a gas boiler or battery, and the long end is connected to another pipe. A coupling of a selected size with a lock nut also “goes” along the long thread.
A coupling with a seal is placed on the other pipe to seal it, which is pressed with a lock nut. The latter can be linen tow, plumbing thread or other materials.
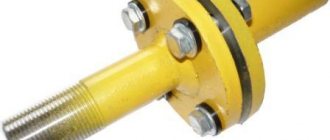
The bends are made of metal, often “reinforced” with a zinc coating. If you require a decent appearance of pipes, it is possible to purchase elements with nickel plating. Often two numbers are indicated on the marking of the run, for example, 75/76. This says that the outer diameter of the product is 76 millimeters and the inner diameter is 75 millimeters.
The parameters (the length of the threads, its diameter and the size of the thread in inches) must be observed in accordance with GOST and correspond to the dimensions of the installed pipeline, for example, 25 millimeters (1 inch). The maximum diameter of the drive is 50 millimeters, the minimum is 15 millimeters. If the diameter of the pipeline itself is larger, then the solution to the problem is achieved through the use of flanges.
The maximum length of the fitting is 160 millimeters (for a diameter of 50 mm), and the minimum is 110 millimeters (for a diameter of 15 mm). These indicators can again be found in GOST. However, in practice, reality often does not meet the standards, so it is better to measure everything yourself and buy parts of the required length.
There is a classification of surges depending on the scope of their application: short, long and compensating. The latter are used for plumbing fixtures, batteries and other devices in order to minimize deviations within 5 centimeters detected during installation. The length of short runs is from 10 to 15 centimeters, and long ones are about 30 centimeters. The length of the compensating slopes varies from 13 to 17 centimeters.
The long thread of the short type is from 5 to 9 centimeters, and the short thread is from 9 to 17 millimeters. In general, the dimensions of the short side are the same for all types of bends. The long side of long bends also varies from 5 to 9 centimeters. The long side of the compensating surges ranges from 7.5 to 10 centimeters.
The main advantages of using squeegees include:
- simple installation without a welding machine;
- no need to invite a specialist;
- the appearance of a special unit that simplifies disassembly in case of need for repair, cleaning or replacement.
By the way, dismantling occurs in the following sequence: first the nut, then the coupling, then the drive itself. Disassembly is carried out using a lever wrench.
Among the disadvantages is the likelihood of a leak due to a lack of tightness.
Assembling connections
This process should be performed in the following sequence:
- The pipes should be fixed in a vice or other device, connecting them end-to-end. Next, you need to grab the connection point using an electrode in 2-3 places. If these are only 2 points, then make them on opposite sides of the circle.
- In the case where only one connection point is made, the final welding of the joint must begin from the opposite side.
- Please note that the electrode thickness for pipes with a wall thickness within 3 mm should be no more than 2.5 mm.
And some more useful information regarding the welding technique.
If you are working with pipes whose wall thickness exceeds 4 mm, then their connection is made using two seams - a root seam, running through the entire thickness of the steel, and a roll seam, which is a roller 3 mm high.
When making vertical seams on pipes with a cross-section of 30-80 mm, welding is carried out in two steps - first a seam is made at ¾ of the length, and then everything else.
When you make a horizontal seam in several layers, in each subsequent approach the electrode should move in the opposite direction.
The end (locking) points of a seam made in several layers must be placed in different places.
Installation features
The drives are placed in the right place, using special couplings.
The bracket is screwed onto the reinforcement or fastening element, with the side with short grooves. In the process, you need to use sealing tape, paste or flax.
A crimp ring and a nut are screwed onto the opposite side for joining to the end of a pipe with a shortened cut, on which hemp is wound in advance, FUM - tape or a special paste (how to connect a PVC pipe with a metal one is written in this article).
Using rotational movements, we screw the coupling onto the end of the hollow object, connecting it to the drive.
In order to press the nut well against the connecting element, the area between the coupling and the nut must be wrapped in tow.
If the drive needs to be used in conjunction with a ball valve, then the part is attached to the end of the valve.
This solution greatly simplifies the task of dismantling the segment you need, and even an inexperienced home craftsman can handle this.
Most often, dismantling must be done to clean the system from scale and accumulated rust.
Remember! The more accurately the axes of the parts match, the easier you can make the connection.
Working with rotary and non-rotary joints
The technique of welding pipes of different diameters with rotating and non-rotating joints requires special mention (read also: “How to weld non-rotating pipe joints - a step-by-step guide”).
Among the rules for performing such work are the following:
- It will be convenient to make rotary joints in a rotator. It is desirable that the speed of work and rotation of the mechanism be the same.
- The point of contact between the metal and the arc (weld pool) should be located 30º below the top point of the pipe installed in the rotator, on the side opposite to the direction of rotation.
- This work can also be done manually. To do this, the pipe is rotated 60-110º each time to make it convenient to work with.
However, the most difficult work will be when turning the pipe 180º.
In this case, it is better to divide welding into 3 stages:
- First of all, 2/4 sections of the pipe are welded in 1-2 layers along the outer radius of the bend.
- Next, the pipe is unrolled and the remaining part of the seam is welded, completing all the layers at once.
- At the end, the pipe is rotated again and the remaining layers of seam are added to the outer part of the bend.
Welding of fixed joints is carried out in two stages.
The working method is as follows:
- The pipe must be visually divided into two sections. The seam in this case will be horizontal, vertical, and ceiling at the same time.
- Welding begins from the bottom point of the circle, smoothly moving the electrode to the top point. Work in the same way on the opposite side.
- In this case, the arc is made short, with a length equal to ½ the thickness of the electrode core.
- The height of the roll seam can reach 2-4 mm, it all depends on the thickness of the pipe wall.
The final stage of welding work is quality control of the joints.
Checking the reliability of connections
Often you will have to control the quality of the weld seam and the tightness of the system yourself by visual inspection.
To do this, first the seam must be cleaned of slag and tapped with a light hammer. Next, visually inspect the seam itself for chips, cuts or cracks, poorly cooked pieces or burns through, as well as other defects.
The last step will be to measure the thickness of the seam. To do this, you can use standard instruments, as well as probes, templates and other devices.
Please note that the gas transmission or water supply system must also be checked for leaks. To do this, perform a test run of the liquid under pressure.
Safety rules when working with a welding machine
An important point when carrying out any electrical work, including welding metal pipes, is compliance with safety regulations. If they are neglected, a variety of injuries can occur, such as thermal skin burns, arc flash burns to the retina, electric shocks, and others.
Therefore, before starting work, you should perform the following steps:
- current-carrying conductors and components of the welding machine must be insulated;
- the body of the welding equipment and additional devices must be grounded;
- overalls and gloves must be absolutely dry;
- wear galoshes or lay a rubber mat in a small room for additional insulation;
- To protect your eyes and face, you should wear a protective shield when working.
Results
Thus, we have partially explained how welding work should be performed on electrical equipment. Of course, for the job to be successful, you must have some practical skills. However, thanks to the information presented in the material, you will know where to start practicing. If you follow our recommendations, you will definitely be able to weld metal pipes at a decent level.