Many young families are familiar with the situation: they bought a one-room apartment, have almost no money left, but want to live in comfort. Even if you have a modest budget, it does not mean that you need to live without repairs to the screed-plaster. You can do budget renovations in a one-room apartment with your own hands. To do this, you will have to study video tutorials and master classes on the Internet on how to hang wallpaper without bubbles, lay laminate flooring without gaps and paint ceilings. But the main thing is that you will have to travel a lot to construction stores and markets to find building materials at a reasonable price.
Budget renovation in a one-room apartment in the dining room
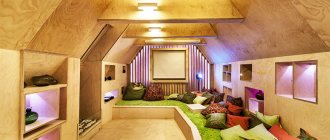
Budget renovation in a one-room apartment in an industrial style
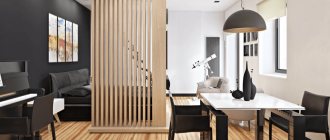
Budget renovation in a one-room apartment with wood
We look for and select inexpensive building materials for renovation
Even if you are doing a budget renovation and trying to save on a lot, do not forget that you cannot skimp on your own health and safety. To prevent a small budget renovation of a new one-room apartment from turning into big problems, when choosing furniture and any building material, do not forget simple recommendations.
Budget renovation in eclectic style
Budget renovation of the bathroom of a one-room apartment
Budget renovation in a one-room apartment with a concrete ceiling
First, make a clear plan in which you need to describe in detail what repairs you will do in each room and what materials to use for this. Don’t forget to write down all the little things: screws, nails, glue, primer. The financial success of the renovation depends on how correctly and clearly you can plan everything. When the plan is ready and everything is calculated, you can go to the hardware store. It is better to make purchases in stores with wholesale prices and look for products on sale. The most important thing is that when you find yourself in such a shopping center, do not get confused by the rich assortment and buy everything only according to plan.
You can make beautiful repairs using materials from domestic manufacturers. But before making a choice, it is worth reading reviews about their products. If laminate is cheap, but they don’t say anything good about it on the forums, don’t buy this product. You need to save wisely and try to find the golden combination of quality and price.
In the store, be sure to check the expiration date and pay attention to the tightness of the packaging and composition. Even if you want to renovate your apartment cheaply, do not buy toxic materials. They are cheaper, but can cause great harm to health. Under no circumstances should you buy such materials for children’s rooms or bedrooms.
Study the performance characteristics of materials. Pay attention to whether they tolerate high humidity and temperature changes well. For example, in rooms with high humidity there is no need to install laminate flooring - it will quickly swell and you will have to choose a new coating.
Budget renovation in a one-room apartment IKEA
Budget renovation in a bright one-room apartment
Budget renovation in a one-room apartment in Khrushchev
Do-it-yourself apartment renovation, where to start: work plan
Do-it-yourself apartment renovation, where to start - this is a question every homeowner has asked himself at least once in his life. As a rule, this upcoming event evokes positive emotions among those who have received or purchased their own housing for the first time. Those who have already dealt with the work of putting their apartment in order know how much trouble they bring, and how much effort they will have to put in to achieve the desired result.
Do-it-yourself apartment renovation where to start
But, if the time has come to renovate your apartment, you will have to be patient and a decent amount, the size of which depends on what type of repair you decide to carry out.
Types of apartment renovations
The renovation can be major or cosmetic, covering the entire apartment or its individual premises. But you should know that repairs in some rooms may be more labor-intensive and require greater costs and effort than work in other rooms.
Major renovation
Major work involves renovation from scratch in a new apartment or redevelopment with replacement or transfer of installed elements in an old home. The scope of work will depend on what changes it is decided to make in the apartment.
A major renovation involves a radical change in the appearance of the apartment
The total scope of work may consist of the following activities:
- Apartment layout. This may include demolishing or installing partitions, combining or dividing rooms, moving or widening doorways. If at least one of the listed actions is planned, then you should definitely consult with a specialist who will determine whether this process is possible. All repair work related to the dismantling or installation of walls in a multi-story building must be confirmed by the permission of the commission of the management organization.
- Replacement and relocation of plumbing fixtures, radiators, electrical sockets, installation of additional lighting.
- Replacement of windows and doors.
- Replacement of old ceiling walls and floors.
- Embedding furniture, if this process is included in the plans.
A major refurbishment of an apartment is a lengthy process that cannot be done in two days or a week, and the rooms will have to be emptied of furniture and all things, as they will interfere with the work or may be damaged by building materials. You may have to carry out repairs one by one in each of the living rooms; in this case, you will have to take care of purchasing thick plastic film to cover the doors from construction dust and dirt. But, as a rule, major renovations still imply that the family will have to live in another place for this time.
Redecorating
Cosmetic renovation usually involves replacing decorative trim in one, several or all rooms. It may be that after removing the old coating, you will have to make adjustments to the corners, surfaces of the ceiling, walls and floor.
Cosmetic repairs are usually limited to updating the interior decoration
When performing cosmetic repairs, preparing surfaces for new decorative materials can be called one of the most important processes. No matter how expensive the chosen wallpaper, linoleum or paint is, if they are laid or applied to uneven surfaces with chips, they will not achieve the expected effect. Therefore, in order for the decorative finish to look properly, leveling the surfaces using putty or self-leveling flooring is indispensable.
Having chosen a repair option that is suitable for a particular apartment, you can proceed to further work.
Drawing up a repair plan
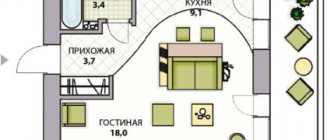
The first thing that needs to be done is to draw up a plan of the apartment, which will display exact data on the area and height of the ceilings of each of the rooms, with or without partitions, in a word - in the form that the apartment should appear after the renovation work.
Careful planning of upcoming work always comes first
General rules for planning repairs
The design project should show the desired color of flooring, wallpaper, as well as at least an approximate arrangement of furniture. Using this project plan, it will be easy to calculate the necessary building materials and accessories for each of the apartment’s premises. Of course, it won’t be possible to take everything into account, but this will save you from some mistakes that are typical for unprofessional craftsmen:
- Taking into account the arrangement of furniture and various household equipment, you immediately need to determine the location and number of electrical sockets and switches.
- We must try to avoid shortages of certain finishing materials, since if they have to be purchased in addition, it will be very difficult to perfectly match the shades of the same tiles or wallpaper.
- Having completed a project in color, you can visually verify the correctness of the decorative coatings chosen in color and how they will harmonize with the shades of the furniture.
In the process of drawing up such a plan, many ideas for decorating the premises may appear, so it is recommended to make a project in several color schemes, and then choose the option you like best.
The plan can be drawn up using a computer program or on a regular A4 sheet. It must be carried out in compliance with the dimensions corresponding to the real ones, but on a reduced scale.
If the plan is drawn up manually, then having drawn it once, then you need to make several photocopies on which you can apply different shades or different furniture arrangements.
Having a graphic plan will allow you to “play” with finishing styles and furniture arrangement
You can draw up a plan of the entire apartment to see its full color scheme or make a design project for each of the rooms.
In addition, it is very convenient to put a stage number on each of the plans, and plan specific work on each of them. For example, on one of the drawings you can show the redevelopment of walls, on another - electrical wiring and placement of sockets, as well as connecting various devices, on the third - the future arrangement of furniture and color scheme.
Dividing a room into zones
To know where to start renovating each room, you need to determine what will be located in it.
- In a children's room, it is advisable to separate, if space permits, the sleeping area from the play area or from the child's activity area.
- The kitchen should be spacious, so it must also be properly divided into zones, defining a work and dining area, as well as the installation of various appliances.
- If you plan to divide or combine a bathroom, then on the first drawing you should measure and indicate its dimensions and arrangement of accessories.
The proposed redevelopment of the premises or their division into zones must be taken into account
- If you are planning to remodel a one-room apartment with the desire to divide it into two separate rooms, you need to measure everything very carefully both in the drawing and on site. In this case, you need to immediately determine the thickness of the partitions, since they also occupy a certain area.
Sometimes such redevelopment can also affect the hallway, since in some apartments it occupies a fairly large area. Here it is important to determine what kind of design the partition has that separates the hallway from the rest of the rooms. If it is capital, then you cannot touch it without permits.
- If it is not possible to divide the room with a partition for some reason, you can install a cabinet or shelving as a “barrier”. It is also worth noting on the plan.
Selection of materials for decorative finishing
In the next plan-drawing it is worth understanding the finishing material and its color, since the comfort of being in the room will depend on these factors. When deciding on a finish, you need to choose it wisely. Naturally, the safest for human health is natural material such as cork, wood, paper, ceramics and the like, however, some types cannot always be used due to the high price or inconsistency with the chosen design. So, what materials can be used for different rooms:
I want to make the children's room bright and cheerful. However, everything needs moderation
- Children's room and bedroom for adults. For rooms of this purpose, it is necessary to make maximum use of natural finishes that do not cause allergic reactions, are “breathable” and have soundproofing qualities. If a major renovation is being carried out, then before installing decorative finishing, the walls can be provided with a soundproofing layer - materials such as Texound, acoustic plasterboard, cork and others are suitable for this. When finishing walls and ceilings, it is best to use plastering and coating with water-based paints or pasting with paper or cork wallpaper. Today in construction stores these materials can be found for every taste and color.
Living room decoration usually involves calm colors, designed in a certain style.
- Living room. For this room you can choose a wider range of finishes. Here, the floors can be covered with linoleum, laminate, parquet, carpet, cork and other modern materials.
What you need to know about linoleum?
Despite the fact that many new floor coverings have appeared, linoleum is not at all going to lose its position in popularity. Useful information about the types and rules for choosing linoleum is posted in a special publication on our portal.
To decorate the walls, plaster and painting, gluing with cork, paper, non-woven, vinyl, textile, glass wallpaper and other options can be used.
The ceiling can be plastered, covered with a suspended ceiling, a single or multi-tiered suspended structure, or covered with wallpaper.
A modern solution - a suspended ceiling!
In this matter, there are perhaps no limits to the imagination of creative owners. In a special article on the portal dedicated to self-installation of a suspended ceiling , you can find out a lot of useful information and even, perhaps, choose one of the options for decorating your own apartment.
- Hallway. Materials for the walls and floor of the hallway must be highly resistant to abrasion and easy to clean, since dirt and dust from the street first enter this room.
The floors can be covered with linoleum or ceramic tiles.
The decoration of the hallway should be dominated by materials that are resistant to abrasion loads and easy to clean
The walls are covered with vinyl wallpaper or covered with plastic, wooden or laminated lining.
The ceiling in the hallway should be made light, since this room most often lacks natural light. Therefore, a light-colored suspended ceiling with built-in lighting is perfect here.
- Bathroom. A combined or separate bathroom must have a moisture-resistant finish that is easy to wet clean and is not afraid of household chemicals. The traditional material for these rooms is ceramic tiles - they do not hide the already small area of the rooms, and are also a durable, non-wearing and easy to clean material. Ceramic tiles are perfect for finishing both walls and floors.
Finishing a bathroom requires a completely special approach.
In addition to tiles, plastic panels have recently been increasingly used to cover bathroom walls, especially since today construction stores offer a wide range of this material.
The ceiling in the bathroom can be made of the same plastic panels, moisture-resistant plasterboard for painting, but the best option for a bathroom or combined bathroom would be a suspended ceiling.
Special requirements for the ceiling in the bathroom!
High humidity, high probability of direct jets of water - all this imposes specific requirements for finishing. How to decide on the type of ceiling in the bathroom - read the special article on our portal.
Color spectrum
An important role in the design of apartment rooms is the color scheme, as it should fully contribute to the creation of a comfortable environment. Therefore, this factor must be considered very carefully.
The harmony of the design of the rooms will depend on the shades being correctly selected to each other. In this process, you can rely on this table.
Table of recommendations for selecting colors for room decoration
To make the room light, you should choose soft white and beige warm shades. This is especially true for the ceiling surface, since its light color enhances electric lighting. Therefore, quite often in modern interiors the lampshades of lamps and chandeliers are turned not down towards the room, but towards the ceiling.
You always want to make a children's room bright so that its colors evoke joy and optimism. However, you should not get carried away; you must remember that the child will not only play in this room, but also relax, so it is recommended to decorate the recreation area in calmer colors.
A bedroom for adults should be conducive to relaxation, and therefore it is recommended to decorate it in pastel soft and fairly light shades, which will help you fall asleep pleasantly in the evening and wake up in the morning with an optimistic mood.
The color selection affects the psychological and physical state of the body, since if a person does not get enough sleep or rest properly, then his vital activity and immunity decrease, so you should take the selection of shades very seriously.
Dark shades in combination with lighter colors can only be used in a well-lit room, otherwise they will have a very depressing effect on the psyche, especially children.
Having decided on the materials and their colors, measure all the surface areas on which the selected finish will be produced. Next, a list of necessary materials is compiled, indicating their quantity.
Tips for purchasing materials
With the list compiled, you can go shopping for the necessary materials.
The purchase of materials should not be accompanied by attempts to save on quality
- It must be said right away that you should not purchase everything you need for repairs on spontaneous construction markets, where, although the prices are lower, no one will give a guarantee of quality. Counting on such “savings”, sometimes you have to pay double or even triple the price. Cheap material applied to walls or laid on floors is unknown how it will behave, and you may still have to soon replace it with a high-quality one. And this is not only unnecessary expenses, but also wasted time and effort. Cleaning surfaces from new low-quality finishes is an extremely unpleasant task, as the mood will be completely ruined. Therefore, it is recommended to purchase building materials from a trusted seller who can provide quality certificates for all products.
- You need to purchase material with a reserve of approximately 15% of its total calculated volume. This approach will help you do your work calmly, without fear that something will be missing. By the way, you can immediately clarify whether the store accepts the remaining surplus back - this approach is often practiced.
- When choosing products based on quality, you should inspect them very carefully, and also study the certificates that you need to request from the seller. For example, when purchasing materials such as ceramic tiles, laminate or wallpaper, you must check the product lot number on the packaging - it must be the same, otherwise products in different packages may differ significantly in shade and even in quality. This difference can sometimes be noticed only during the work process, by combining piece pieces or canvases from different batches side by side - this point can also complicate the process of high-quality repairs.
- You need to take the choice of new doors and windows very seriously, since replacing them later will be quite difficult and expensive, since this process will certainly affect recently renovated surfaces.
A reliable entrance door is a guarantee of safety and comfort
The front door not only protects from uninvited “guests”, but also ensures that a comfortable microclimate is maintained in the apartment. It is not cheap, and in order to avoid mistakes when choosing an entrance door , read the useful information in a special article on our portal.
- You need to carefully choose bathroom accessories. You should not succumb to fashion trends and purchase plumbing items made from newfangled materials, as they may not always be suitable for specific cases. First, it is recommended to study their characteristics and calculate all the pros and cons.
- Heating radiators are also carefully selected. Nowadays, you can find these devices made from various materials on sale, but not all of them are suitable for installation in a central heating system. When purchasing radiators, you should rely not only on their operational capabilities, but also pay attention to the manufacturer and the availability of a quality certificate.
Useful information about heating radiators
These heat exchange devices cannot be selected only from the point of view of their appearance - it is necessary to take into account their operational capabilities and thermal power, depending both on the area of the room and on some other important criteria. All this can be found in a special publication on our portal dedicated to the choice of heating radiators.
- A few words need to be said about the compositions that will be necessary for treating surfaces before installing finishing materials on them - these are various primers and antiseptic solutions. Such products will create better adhesion between materials and protect walls and ceilings from mold stains.
Once the necessary materials have been purchased, the repairs can begin step-by-step.
Stages of repair and construction work
Comic diagram clearly demonstrating the stages of repair
Surface preparation
One of the most important stages in carrying out any type of repair is the preparation of surfaces, since this will determine how neatly and firmly the finishing materials will adhere to the walls and ceiling. The preparatory stage includes such activities as cleaning surfaces of old coatings and repairing detected defects that may have appeared during the operation of the property.
1. The first step is to remove old wallpaper or paint from the walls.
Wallpaper can be removed in several ways, depending on how tightly it adheres to the wall:
- Using a spatula, which is used to pick up the canvas and carefully remove it completely or in large pieces.
- If the wallpaper is glued securely and does not want to come off, you need to wet it with water using a roller, and carry out these manipulations several times. When the paper gets wet, it can be easily removed with a spatula.
Cleaning walls of old wallpaper
- The third option is suitable if vinyl wallpaper that is sufficiently resistant to water is securely glued to the walls. In this case, they can be steamed using a special device - an iron or a steam generator. If you don’t have such a device, but you have an iron with a steam function, you can use that, but you can’t put a metal surface on the vinyl. It is brought at a distance of 100÷150 mm to the wall and treated with steam. After this, the old decorative coating should move away from the wall and it can be carefully removed with a spatula.
The paint coating is removed using a hair dryer or a sander with a brush attachment installed.
2. Next, you can move on to cleaning the ceiling. If the ceiling plaster has cracks and chips, and there are no plans to make a suspended ceiling, then the old whitewash, and sometimes even the plaster, will have to be removed. This process is quite labor-intensive, and it is also carried out using water, which is first used to soak the surface, and then remove the old coating with a spatula or a grinder with an iron brush.
The “weak” places of the old plaster must be cleaned
If a suspended structure is to be installed, then it is not necessary to remove the coating from the ceiling - it will be enough to treat the surface with an antiseptic and strengthening primer.
3. The next step is to remove the covering from the floor. However, when making cosmetic repairs, sometimes this process is not carried out, especially in cases where the floor is in good condition and is quite satisfactory to the owners.
Often you have to resort to dismantling old floors
4. After removing old coatings, cracks or other fairly large defects will definitely be found on the walls and joints of planes. They need to be sealed, otherwise they may show through the new decorative finish.
To do this, small cracks are expanded, primed and sealed with cement mortars, putty or sealant. Wide cracks or crevices, which sometimes appear at the joints of surfaces, can be filled with polyurethane foam.
5. After cleaning the walls, the electrical cable is laid out if it was planned to reinstall the sockets. To run cables in some rooms, you may have to cut grooves in the walls to hide the wiring in them.
6. If the heating circuit is being replaced, then while the walls are cleaned, markings are made for brackets for radiators, and holes in the walls are also prepared. This needs to be done on walls without finishing, so as not to spoil it later.
Replacement of windows and doors
The process of removing and installing these interior elements is usually carried out by specialists, since this is quite labor-intensive work that requires certain skills and precision, and special tools. Therefore, if you do not have such work experience, then it is better not to take on such work yourself.
It is recommended to entrust the replacement of windows and entrance doors to specialists
This recommendation especially applies to window frames, since their quality installation determines how protected the apartment will be from the cold.
It is also better to entrust the installation of the front door to qualified specialists, because the safety of your home will largely depend on the reliability of its installation.
Interior doors are installed at the final stage of work, so this work can be postponed for now.
Dismantling and installation of partitions
The next stage is the dismantling or installation of the partition, if it is planned and permits have been obtained for this work. Both the construction and demolition of the wall can be done independently.
How difficult is it to build a lightweight interior partition?
If you know the technology and carefully carry out the work, you can completely cope with such a task on your own. How to construct a plasterboard partition , and what materials are needed for this - this information with detailed instructions can be found in a separate publication on the portal.
You can also dismantle the partition between the bathroom and toilet yourself if it is built from brick or plaster boards. For this process you will need a hammer drill, a sledgehammer and, possibly, a grinder with a metal disc - if the partition is reinforced with a reinforcement grid.
Demolition of a partition to create a combined bathroom
This is not to say that this work will be easy, but as a result you can get a fairly large room in which it is quite possible to carry out the planned redevelopment.
Aligning the ceiling and walls
When the windows and doors are installed, and the repaired cracks and gaps are completely dry, you can proceed to priming work. This process is simple, anyone can perform it - the main thing is to carry it out carefully, without missing a single section of the surface. The primer is applied with a roller, and hard-to-reach areas are treated with a brush.
Then, after the primed walls and ceilings have completely dried, they need to be leveled. To do this job, you need some experience, so before diluting a large amount of putty, you should try your hand at a small area of the wall, applying a little solution.
If the walls have a fairly smooth surface with minor flaws, it will be enough to use a putty compound. But in the case when the surface has large distortions, leveling will have to be carried out by plastering along the beacons. However, if the space of the room allows, then leveling the walls can be done with sheets of drywall.
A very labor-intensive, but very important stage - leveling the walls
Whatever technology is used to level the surfaces, after the layer of plaster and putty has dried, the walls and ceiling should be primed again.
The ceiling requires perfect alignment if it is not planned to be covered with a suspended or suspended ceiling.
How to properly level the ceiling surface?
The process of leveling the ceiling for painting is quite complicated and requires special skill. Therefore, if you decide to do this work yourself, you should pay attention to the recommended article on our portal.
The process of leveling surfaces also includes finishing slopes on window and door openings. They can be decorated with plasterboard, plastic panels or plastering.
Leveling the floor
The next, fifth stage, is leveling the surface of the floors. This process in an apartment can be carried out in different ways - this is a self-leveling mortar, a dry screed, or installing the floor on joists and then covering it with plywood or other sheet material.
All these processes can easily be carried out independently, after carefully studying the technological instructions, which can also be found on our portal.
Use of self-leveling building compounds
One of the methods for leveling the floor surface is the use of special building mixtures. The technology of self-leveling floors is described in detail in the corresponding publication on our portal.
If you are not sure that you will be able to efficiently cope with such work on your own, then it is better to turn to specialists.
Decorative wall decoration in living rooms
The next step is finishing the walls - covering them with wallpaper or painting. These works are not so complicated, and can be done on their own, so you can save money on them.
If the decoration will be done with wallpaper, and it has a certain pattern, you need to immediately calculate its step so that the pattern matches perfectly on the wall.
Wallpaper will probably never lose its popularity
Before cutting the canvas, the wall is marked vertically and horizontally. The lines are drawn using a colored cord along the ceiling and one of the corners. The first wallpaper will be aligned along the vertical outer line, and subsequent ones will be oriented towards it and the upper horizontal color stripe.
You can paint the walls yourself, but be especially careful.
If you plan to paint the walls, then it is carried out using a roller, which is placed on a special rod for convenience.
Wallpaper glued and dried on the walls is framed along the top line with a foam or paper border, which completes the overall design of the room.
Installation of flooring in rooms
The process of laying the flooring must be carried out very carefully so as not to damage or stain the decorative finish of the walls. If linoleum or carpet is laid on the floors, then before fixing it with glue or under the baseboards, it is laid out and left for about a day so that it straightens out. Canvases of this material are cut in length, approximately 10÷12 mm less than the length of the room, and in width they are laid 5÷7 mm from the wall. Such gaps are necessary for free thermal expansion of the material.
Linoleum laying process
It should be noted that any material laid on the floors must have such gaps. So, when laying laminate, special inserts are used, which are removed only after the covering has been laid over the entire area of the room.
Finishing work on the floor is completed by installing skirting boards
The installation of the flooring is completed by installing the skirting boards.
Installation of interior doors
Interior doors are installed at the last stage of work, so as not to make a mistake in the height at which the door will be installed, since the leveling layer and floor covering will raise the floor and change the floor level.
Rules for installing interior doors
If you still want to save money, you can try installing interior doors yourself . To do this, we recommend using the tips posted in a separate publication on the portal.
In listing the stages of work, the issue of carrying out renovations in the bathroom was deliberately omitted. This event has its own nuances that must be considered separately.
Bathroom renovation - a specific event
This room has a lot of features that need to be taken into account when carrying out repairs and decoration. in detail about renovations in the bathroom .
This is the approximate procedure for preparing for renovation in an apartment and carrying it out step by step. It is quite understandable that the homeowner wants to do this at minimal cost, relying on his own strength and abilities. But you should still soberly assess your capabilities - it is possible that the optimal solution would be to turn to specialists.
At the end of the publication, there is an interesting video with expert advice on carrying out the initial stages of renovation in an apartment.
Video: where to start renovating an apartment
Choosing paints for budget repairs
To create an original room design, you can use inexpensive paint for walls and ceilings. The stores offer dozens of paints that differ in composition and characteristics:
- acrylic;
- water-based;
- oil;
- alkyd;
- latex;
- water-dispersed;
- silicone.
If you choose high-quality paint, it will adhere well, smell nice and retain its original color for a long time. When renovating a one-room apartment yourself, it is best to paint the walls. It will be much faster than gluing wallpaper. The paint will hide all wall defects: chips, scratches, unevenness. And if you glue wallpaper, you will have to putty the walls, which will bring additional costs.
Budget renovation in a one-room apartment in a laconic style
Budget kitchen renovation
Budget renovation in a one-room apartment with stucco molding
An inexpensive option is oil paints. They look nice, but don't last long. A wall covered with such paint does not breathe, which affects the microclimate of the room. Alkyd paints are more expensive, but they are wear-resistant and do not retain color for long. You can create a stylish interior design with them, because they can be tinted and search for your ideal shade.
Silicate paints withstand any mechanical stress, “breathe”, and are not afraid of fungus and mold. But due to the special composition, which includes liquid glass, such paints are expensive and are not sold in all construction stores.
Affordable to average-income buyers, water-soluble paints are easy to apply and retain color for a long time. Acrylic paints are most often used in interior design. They are not afraid of sunlight, moisture, protect walls from mold and corrosion and have excellent elasticity. Such paints are more expensive than other types, but they can transform an ordinary Khrushchev-era building beyond recognition.
Budget renovation in a one-room wooden apartment
Budget design and renovation in a one-room apartment
Budget renovation in a one-room studio apartment
Saving on repairs: what you can and what you can’t
Remember a few simple saving rules.
- You cannot save on thermal insulation and waterproofing materials.
- Without a doubt, it would be unwise to skimp on quality. You cannot order materials from dubious suppliers, from unknown manufacturers with a controversial reputation.
- You can save a lot of money on a brand. Look for analogues, alternative options, do not hesitate to ask consultants in the store.
- Good savings on textures and colors of materials. Fashionable options are much more expensive.
- You can make a catchy finish partially. For example, decorate the front wall with more expensive materials.
In addition, savings on fittings and components for windows may be negative. You save once, and then it turns out that it is precisely because of these small details that windows and doors quickly begin to fail, create problems and irritate with unpleasant sounds.
Which wall covering to choose?
To make an inexpensive design for a one-room apartment, you need to choose the right wall covering. To decorate the walls in the apartment you can use:
- wallpaper;
- paint;
- wooden panels;
- plastic;
- tile;
- a natural stone;
- decorative plaster;
- brick.
For repairs in economy mode, paper wallpaper, paint, brick, tiles and plastic panels are suitable. Other types of coatings are more expensive. Wallpaper and paint can be used to decorate the walls in the hallway and room. In the kitchen and bathroom you can combine tiles and plastic. Paper wallpaper looks beautiful, but wears out quickly. On the other hand, this is a good reason to refresh the walls in a couple of years.
Budget renovation in a one-room apartment minimalism
Budget renovation in a one-room apartment with furniture in the living room
Budget renovation of the interior of a one-room apartment
Sixth stage, final
And at the end of the main finishing, you need to start installing the floor plinth, rosettes, door frames and decorative elements.
In the bath and toilet, if it is separated by a partition, you can begin installing plumbing accessories:
- Faucets.
- Hangers.
- Mirror and other accessories.
For studio apartments, it is very advisable to make repairs immediately along the entire perimeter of the room, because without walls, construction dust will spread faster and unhindered.
This is especially true for dirty types of work, for example:
- removing wallpaper,
- whitewash,
- old paint,
- removing windows and doors.
If you do not have enough funds to make a major overhaul in the entire studio apartment at once, you should first tackle the remote part of the room, and only then pay attention to the hallway.
This is very important, because it is highly undesirable to carry cement mortar around the renovated room. By the way, the rule of moving from the farthest part of the room also applies during a complete renovation. This is especially important during the finishing of a living space.
Choosing inexpensive flooring
If you want to renovate a one-room apartment inexpensively, save on flooring. Give up the idea of laying parquet or natural stone - it’s expensive and definitely not suitable for a tiny studio. Suitable for decorating the floor in a one-room apartment:
- linoleum;
- laminate;
- tile.
Laminate looks no worse than parquet and decorates the simplest interior. It does not require the same maintenance as parquet. Linoleum does not look as impressive, but is cheap. You can put a beautiful high-pile carpet on it. For the bathroom, it is better to choose inexpensive floor tiles. For rooms with high humidity, no better coating has been invented. Even if it’s not Italy, but Russia.
Budget renovation is simple
Budget renovation in a one-room apartment with partitions
Budget renovation in eco style
First stage
So, the first stage exists to prepare such an important document as an estimate for the renovation of a studio apartment.
After the financial issue has been resolved, we move on to preparing the premises:
- Removing old wallpaper.
- Doors.
- Windows
- Coverings for floors and partitions.
It happens that after completing the renovation of a room, a part is discovered that they forgot to break.
Now you will have to carefully dismantle the structure very carefully, so as not to damage the finished apartment, not to spoil anything and not to litter too much.
To avoid such troubles, after everything unnecessary is broken and thrown away, inspect your original walls again and make sure that all the work that the first step implies has been completed.
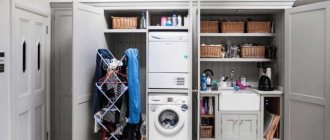
Selection of inexpensive materials for the bathroom
The bathroom can be renovated inexpensively, but beautifully. To do this, you need to use inexpensive tiles, drywall and plastic panels. Think through the design down to the smallest detail: cover ugly pipes with plasterboard and top with tiles or plastic. Using siding will save on tiles.
Buy domestically produced sanitary ware, bathtubs and sinks. The ceiling can be painted with water-based paint. And if possible, it is better to sew it up with plastic.
Installation of communications
Maintaining engineering communications in proper condition is very important, therefore, during the repair process, it is important to replace external (water supply, heat, gas) and internal communications (plumbing, sewerage, ventilation and heating systems, air conditioners and electricity).
Installation of electrical equipment begins with marking its location, marking electricity consumers, protective and emergency shutdown devices.
Before repairing gas equipment, check that the meter seal is correct. Pipes made of metal or rubber can be connected to the system.
Heating is recommended to be done using bimetallic radiators with a connection made of PVC pipes. This is the most common option for an apartment. Carry out an additional calculation of the average temperature for winter, heat loss of buildings and structures, as well as the power of devices, which must meet the requirements for a comfortable stay in the room.
Plumbing repairs include replacement of pipes. The sewage system in the house must be designed taking into account the rules of safety and comfort of use. Consider the location of forced or forced ventilation to avoid the formation of fungus and mold. Refrigeration and heating equipment must be integrated into it.
Budget and simple ideas for renovating a one-room apartment
If you don’t know how to make budget renovations in a one-room apartment, take note of a few current ideas. There is no need to spend money on building plasterboard partitions.
The room can be divided into zones using curtains, screens, lights, or using different wall and floor coverings.
Budget renovation in a one-room apartment with panels
Budget renovation in a gray one-room apartment
Budget renovation in a one-room apartment with a mirror
The room will seem more spacious if you use light finishing materials for decoration and glue photo wallpaper to one of the walls.
To prevent the interior from being too small and cramped, it must have bright accents. These can be pieces of furniture, part of a wall or floor, painted in a contrasting color. Try to plan your space so that every square centimeter is used rationally. Then your home will be cozy, spacious and functional.
Roof restoration
First, you should inspect the roof from the inside. Check the condition of the rafters and decking, then the outer surface of the roof. In rainy weather, you can see if there is any damage and where the leak is. Thanks to this, there will be no need to waste material on entire areas.
Sometimes you only need to replace the roofing material and coat the edges of the patch with bitumen mastic.
If the roof is metal, the complexity of the work depends on the degree of damage. If they are small, you can use silicone putty or make patches from burlap heavily soaked in paint. Sometimes a steel patch is enough. In other cases, the entire sheet needs to be replaced.
To insulate the roof from the inside, you can use mineral wool or liquid insulation - penoizol or polyurethane foam.
Features of renovating a small hallway
In a one-room apartment, it is important to properly think through the renovation of the hallway. If you choose an apartment in a new building, give preference to those apartments where there is a niche in the hallway. It can be used as a wardrobe.
For the hallway walls, it is better to choose a light, warm color scheme. Lay brown laminate or linoleum on the floor, and decorate the space in front of the entrance with tiles. The hallway should have several light sources at different levels, then it will seem spacious.
Budget renovation in a modern one-room apartment
Budget renovation of the hallway
Budget renovation with a bar counter
Renovation of a large room in a one-room apartment
Such a room will simultaneously serve as a bedroom, living room, office and nursery. To make everyone feel comfortable in it, you need to use a popular design technique for zoning space.
Even at the renovation planning stage, consider such a division. To highlight each zone, you can use a different floor covering or several types of wallpaper. The sleeping area can be raised onto a podium, and the office can be fenced off with a screen. Even choosing a cheap renovation, a large room can be made functional. You just need to abandon the idea of building structures from plasterboard and making a multi-tiered ceiling.
Daylight
According to standards, 10% of the total area of the house should be windows. In previous years, builders installed small structures to significantly reduce heat loss. Ordinary glass was inserted into them, but they let the cold through.
Today preference is given to plastic structures. They are high quality and comfortable.
Important features of kitchen renovation
To make your own renovation cheaply and beautifully, you need to think through every detail and be especially careful when choosing decorative materials for the kitchen.
In a small kitchen there is no need to install plasterboard frames, use wallpaper with a catchy pattern, make suspended ceilings, or clutter it with unnecessary furniture and small objects. To decorate walls, it is better to use light finishing materials, choose transformable furniture and give preference to the minimalist style. With the help of lighting, it can be divided into a dining and work area. Give preference to natural finishing and decorative materials, then the room will turn out cozy.
Budget renovation in a stylish one-room apartment
Budget renovation in the hallway in a one-room apartment
Budget renovation in a one-room apartment in retro style
Living room
This room will become the face of the entire apartment. Therefore, materials from a more expensive price category are usually chosen here.
The ceiling is decorated with stretch fabric. Depending on the style of the living room, you can decorate it with photo printing, use tones other than the usual white, decorate it with stucco or friezes. A wide selection of such decor will help you realize the most unusual room renovation with your own hands.
You can search for interesting ideas for such a transformation on the Internet or come up with it yourself using personal photographs. A multi-level ceiling will add unusualness to the ceiling design.
Decorating the ceilings in the living room with wallpaper or ceiling tiles is still popular. As they say: “Cheap and cheerful.”
For walls, choose more pretentious non-woven or vinyl wallpaper, wood panels or laminate. For unusual design, decorative plaster, liquid wallpaper, and fiberglass are used.
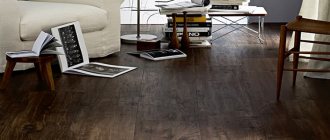
The flooring used is parquet or boards, laminate, cork, and carpet.
Subtleties of renovation in the bathroom and toilet
When planning a new renovation of the toilet and bathroom, include the replacement of pipes in the estimate. In old houses they often leak. After replacing communications, you need to hide them in a niche or closet. This will give you extra storage space.
To decorate each of these rooms, it is better to use two types of tiles. Dividing a wall horizontally with two colors makes the room feel larger. Combine tiles with siding - this will reduce the overall cost of repairs. If possible, you can install a shower in a small bathroom, then the room will be more spacious.
Redevelopment of premises
These works mean changing the configuration of the room with possible changes to the technical passport of the house or apartment.
Residential renovations may include:
- installation of gas appliances with the laying of additional supply networks or replacement of outdated equipment, change of location;
- replacing kitchen fireplaces or gas stoves with household electric stoves;
- replacement and installation of engineering and technological equipment to optimize electricity and water consumption;
- laying new or replacing existing pipelines, electrical networks and equipment for the installation of shower stalls, washing machines with increased power;
- dismantling or moving partitions and doorways;
- replacement or reconstruction of bathrooms.
Inexpensive balcony repair
Do not use the balcony in a small apartment as a storage area for unnecessary things. If you empty it of rubbish and carry out renovation work, you will get a study, a place for games, a bedroom.
There is no need to skimp here. So that you can stay on the balcony in winter, you can insulate it and move the battery here. For finishing you can use wallpaper, plastic panels, laminate or linoleum. Even a cheap renovation will transform an old balcony.
Budget renovation in a one-room apartment with a painting
Budget renovation in a small one-room apartment
Budget renovation in a one-room apartment
Making a screed
Assess the condition of the surface and remove the old coating. Get rid of any dust, preferably using a construction vacuum cleaner. Next you need to prime the surface.
Next, the floor is reinforced and guide beacons are installed along which the rule will move. The first beacon is installed at a certain distance from the wall, the minimum offset is 20-30 cm. The thickness of the screed must be at least 4 cm at the highest point.
Then you can start making the cement-cement mortar, either by mixing it yourself or using building mixtures for floor screed. The solution is leveled along the beacons until a smooth and even surface is obtained. Everything is done in one day with at least one room filled.
Upon completion of the work, the beacons located just above the base are removed, and the seams are additionally sealed with the same mixture of sand and cement in a 1:1 ratio.
Modern planning ideas or how to increase the area in a one-room apartment
Even a small apartment can be made spacious and comfortable if you remodel it correctly. Designers propose to demolish everything unnecessary in such an apartment and turn it into a single space. Do not forget that such work can only be carried out after agreement with the management company.
You can demolish the wall between the kitchen, room and balcony. Sometimes the wall that separates the hallway from the entire space is removed. But if you tear down the walls, the division into zones must remain. To do this, you can make a bar counter, multi-level lighting or plasterboard partitions with through holes. Such structures can be used as cabinets.
Budget renovation in a one-room apartment made of solid wood
Budget renovation white
Budget renovation and decor in a one-room apartment
Second phase
After installation, it is necessary to protect them from damage by sealing them with a durable construction protective film:
Plastering walls is one of the most difficult, but mandatory jobs during major renovations in any home.
Such work should be carried out when we have reached the third stage.
Remember that you should treat ceilings and install suspended structures on them in the form of suspended or slatted ceilings only after completing the electrical work.
Functional combination of kitchen and room
The apartment will become more spacious if you tear down the wall between the kitchen and the room. In this place you can put a bar counter with high chairs. This interior solution immediately eliminates the need to purchase a kitchen table.
If it is not possible to install a bar counter, divide the space by combining floor coverings. Let there be tiles in the kitchen, and laminate on the floor in the room. Their junction will be the border between the zones. You can put a table here and hang a thick curtain, which can be easily drawn if necessary.
Home renovation sequence: activities with windows
The next stage of work concerns the windows. If necessary, they are replaced.
If they completely satisfy the homeowner, then he simply checks the sealing of the cracks, the presence and condition of thermal insulation and window slopes. It is also checked whether the doors close and open well, whether there are distortions and other defects. After plastering and painting, it will be much more difficult to put them in order.
It is advisable to protect internal window sills with film from splashes of finishing compounds. This type of work can be carried out when installing doors, but the proposed option is more practical.
If the walls in the house need leveling and other necessary procedures, then the number of compositions and mixtures required for this must be calculated in advance.
And although the price of modern materials is quite high, you should always purchase them with at least a small reserve.
Materials tend to run out unexpectedly at the wrong time - it is advisable to protect yourself from this.
Insulation and connection of a balcony or loggia
The process of attaching a loggia or balcony to an apartment is expensive and time-consuming. But these expenses are worth it, because after completing all the work, you will be able to expand the kitchen or room.
The walls and floor on the balcony must be insulated. These works can be quickly completed by specialists. The dividing wall can be completely demolished or converted into a cabinet or bar counter, which at the same time will serve as a table and storage system. If you remove the wall completely, then the balcony and the rest of the room need to be decorated in the same style. The balcony can be turned into a dining area or a refrigerator can be moved here.
Budget renovation in a one-room apartment in brown color
Budget renovation in a one-room apartment with parquet
Budget renovation in a one-room apartment with a bed
Ceiling
Ceiling repairs are done only after roofing work. Otherwise, your efforts will be in vain. You can trim it with clapboard. If you plan to whitewash, you first need to thoroughly clean the surface of old plaster and remove mold and mildew.
It is advisable to carry out home kitchen renovations in the warm season. This way there will be no problems with cooking in the summer kitchen or on the veranda.
Rational combination of the bathroom
The bathroom and toilet can be combined into one interior if the load-bearing wall between them is demolished. If you decide to make such a change, you will have to decorate the new room in the same style. The entire floor should be tiled with the same tiles, the walls near the bathroom and toilet should also be tiled with the same type of tiles.
Combining the bathroom frees up additional space. It can be used to install furniture, a washing machine, laundry baskets and other interior items for which there was no room in the apartment before.
Budget renovation of a one-room apartment with a fireplace
Budget renovation in a one-room apartment with screens
Budget renovation in a one-room apartment zoning
Budget renovation in a one-room apartment with modular furniture
Budget renovation in the living room
Fourth stage
The fourth stage falls entirely on the electricians and plumbers, because at this stage electricity is supplied to the entire apartment.
Such work is the most responsible, because your life depends on the quality of its execution!
In addition to laying pipes, installing a toilet, bathtub, and sockets, do not forget to run the Internet, telephone and television cables to the place where you plan to place electrical appliances.
Before installing the cable, draw on the wall the place where the sockets and switches will be mounted:
- Only after this can you begin to make holes in the wall for laying the power cable.
- This type of work will sometimes require drawing an electrical diagram to ensure the correct placement of the wires.
Before you start wiring the bathroom and toilet, do all the plumbing work there.
Redevelopment of a one-room apartment into a studio
The smallest Khrushchev building can be turned into a stylish studio. To do this, you need to get rid of the walls and combine the entire apartment into a single space. The absence of walls will give extra space and additional work space.
You can divide the space into zones using thick curtains, paper screens, and light sources. Studios are traditionally decorated in a minimalist style, and multifunctional transformable furniture is ideal for them.
Budget renovation in a dark one-room apartment
Budget renovation in ethno style
Budget renovation in a one-room apartment, monochrome
Budget renovation in a one-room apartment in the kitchen
Decorating our nest
Give up paintings in favor of bright prints - this more modern solution will allow you to abandon massive, space-saving frames. Pictures of different sizes and originality can be hung throughout the home, choosing a theme that matches the zones.
Fashionable prints in the decor of a one-room apartment
Be sure to keep in mind the overall combination of walls and images. You can also place various figurines on the shelves, and hang “wind chimes” or bells above the door.
Decorative elements will add personality to the interior
Inexpensive design ideas and color preferences for decorating a one-room apartment
To decorate one-room apartments, it is recommended to use materials of light colors. To prevent the interior from seeming boring, it must have bright spots. This can be furniture and decorative items in contrasting colors. In small rooms you can combine wallpaper in bright and calm shades.
For these rooms it is better not to use wallpaper with large patterns. You can decorate such an interior with photo wallpapers, wall stickers, original textiles or interesting lamps and chandeliers. The popular Provence style is difficult to create in such an interior, but laconic Scandinavian, minimalism and modernism are possible.
Budget renovation in a one-room apartment with leather furniture
Budget renovation in a one-room apartment in the bedroom
Budget renovation in a one-room apartment in the bathroom
Budget renovation in a one-room loft apartment
Budget renovation with bright accents
Choice of colors
It is this factor that will greatly affect the appearance of the one-room apartment. Don’t forget about the psychological factor - the chosen shades will accompany you and all residents for many years.
- Brown, blue and green colors have a relaxing effect.
Apartment interior in blue colors
- All yellow colors will bring a great mood to your household and strengthen the nervous system. It is better not to use red, as it will quickly tire the property owner and will also constantly irritate.
Interior in yellow
- You should also avoid pink colors or choose the lightest possible colors - this way you can avoid negative influences.
At the moment, designers advise opting for pastel, neutral shades. Beige, sand, green or cream fantasies are perfect. After you have chosen your favorite paint tone or wallpaper, you should start choosing curtains - this element of the interior should be completely compatible with the walls of the apartment.
The interior in pastel colors is ideal for a one-room apartment
Making a budget Scandinavian style in a small apartment
This style is characterized by a light color scheme, diluted with bright colors. The walls and floor act as a background, so they should be white, beige or sand. But to get a real Scandinavian interior, you can paint one of the walls blue or red, put a yellow carpet on the floor, buy a blue sofa and put a few photos in bright frames in the closet.
To create such an interior, it is recommended to use natural materials. You can remove the old varnish from an old wooden shelving unit, cover the wood with white paint, and you will get a piece of furniture in the Scandinavian style.
Budget renovation in a one-room apartment in Scandinavian style
Budget renovation in a one-room apartment with modern furniture
Layout of a one-room apartment
Budget renovation and planning in a one-room apartment
Budget renovation and redevelopment in a one-room apartment
Modest minimalist style
To create an interior in a minimalist style, choose finishing materials in a calm color scheme:
- white;
- blue;
- brown;
- green;
- burgundy
There should not be many flowers - two or three, no more. This style is characterized by a minimal amount of furniture and only decorative items. Much attention is paid to lighting and zoning the space with color. Interiors in the minimalist style are spacious and airy.
Inexpensive decor options in Art Nouveau style
If desired, a one-room apartment can be decorated in Art Nouveau style. To do this, there must be a lot of wood in it: you can put a textured laminate on the floor and buy furniture with wooden armrests. On one of the walls you can paste wallpaper with large floral patterns. Choose an interior door with stained glass and place decorative forged objects in a prominent place. Forged lamps and a carpet with an oriental pattern will also fit into such an interior.
You can easily make a beautiful renovation in a one-room apartment for little money. All construction work will have to be done independently, and it will take a lot of time to find finishing materials at a good price. But it's worth it. If you approach this issue wisely, you will not only be able to refresh your apartment, but also decorate it in a Scandinavian or minimalist style.