One of the latest and, undoubtedly, “long-lasting” trends in the tile industry is volumetric tiles. The mass distribution of three-dimensional tiles is due to a successful combination of circumstances: consumers have fully realized the “tri-dash” delights in various fields, and tile manufacturers have finally mastered the technologies for producing volumetric ceramics.
You can be sure that fashion is not fleeting. There are a huge number of magnificent collections of flat tiles, but the additional dimension, expressed by the inimitable relief of the surface of the ceramics, in many stylistic situations can put any two-dimensionality to rest. Only an understanding of consumer diversity protects us from unconditional categoricalness and hanging victorious laurels on three-dimensional tiles.
What can you do, because even cladding made in a classic style can be richly and appropriately spiced up with structural tiles. In other, more modern design situations, real or visual relief is an indisputable plus for the interior.
Features of volumetric tiles
This building material is made from reinforced concrete or ceramics. The coating of the material is opaque. Its main task is to convey volume through its own texture. Among the rich assortment of relief-type materials, you can choose tile, gypsum and wooden three-dimensional tiles.
According to its texture, 3D tiles can be decorated with the following patterns:
- honeycomb;
- convex hemispheres;
- wave-like overflows;
- plant pattern.
The range is increasing due to the variety of structure. 3D tiles come in glossy, rough and matte.
Despite the many advantages and original design, this material has a drawback. Moisture and dust accumulate on the rough surface, making it more difficult to clean than regular tiles. In addition, it should be taken into account that visually voluminous tiles conceal space.
Colors:
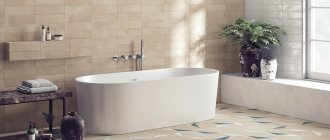
When choosing the color of tiles for the bathroom, proceed primarily from your own comfort. Also keep in mind that with the help of the right shade, you can radically change the interior of the bathroom.
- White.
A classic color loved by many, giving the bathroom a special shine and style. Also, white color visually increases the space. To prevent the bathroom from reminiscent of a hospital ward, choose pearl, milky and other tones. - Blue and cyan
. They evoke pleasant thoughts about vacation, the sea, ships... Several marine elements - fish, shells, pebbles - will give the bathroom the mood of the sea coast. - Green
. The color of calm and spiritual harmony. - Yellow or orange
. Fill the bathroom with warmth and light. - Unusual options: purple, red or black
. Suitable for extraordinary, self-confident people.
Bathroom in black from this project
Types of 3D tiles
There are a huge number of options for volumetric tiles today. The main emphasis when choosing should be on the original effect, as well as on the room for which you are looking for finishing material.
1. Single-color relief tiles. This type of volumetric tile is a real find for connoisseurs of minimalism. Despite the monochrome color scheme, “stylistic neutrality” does not look boring. This type of cladding material is suitable for the bathroom. In addition, it is appropriate in the design of the kitchen and any room in a modern style.
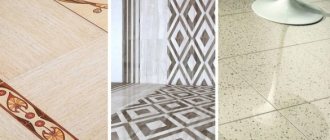
2. “Under a stone.” Current colors, repeating marble and stone structure, will fit perfectly into any design. 3D stone tiles look beautiful not only in an apartment, but also in a country house, cafe, restaurant.
3. “Under concrete.” Tiles, the texture and color of which resemble concrete, are gaining momentum in popularity. Relief tiles will be an excellent backdrop for hi-tech and loft style.
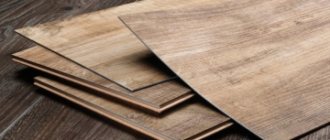
4. “Under the tree.” Such tiles in three-dimensional format look like real boards and bars. Such material attracts attention; you always want to touch it. Wood-look tiles can be used for zoning. It creates a cozy and warm atmosphere in the house. This solution is suitable for any room, the main thing is to competently develop a design project, providing for harmonious combinations of this material with others. For example, for a bathroom you can buy round tiles and highlight the accent area with a wavy pattern. Streamlined designs will help smooth out the harshness of the interior lines.
Popular layout options
The most difficult thing is to choose a pattern that can be used to decorate the walls and floor in the bathroom. If you create the ornament correctly, it is interesting to combine the seams between the tiles, you can get a unique effect. It will emphasize the sense of taste and add the finishing touches to the interior.
Correct placement of tiles in the bathroom from the corner horizontally Source m.my.mail.ru
Masonry from the corner
This method involves installing one tile in a row from the corner. From here they lay out the entire wall, using tiles without a pattern with the same surface. When you reach the next corner, there is usually empty space left. It is finished with cut fragments of tiles from the same collection. As a result, we may see a corner filled incorrectly. In appearance, it visually supports the ceiling and makes it higher. To ensure that such an element is clearly visible, a contrasting shade is used for grouting joints.
Placing tiles in the bathroom, starting from the center of the wall to the sides Source plitkahelp.com
Correct laying from the center
Installation begins from the center of the wall. When completing a row on both sides, the last tile is not fixed. Unfilled spaces on both sides are leveled and lined with material of the opposite color. The following combinations look good: light green and orange, brown and milky, peach and pink, white and black.
Installing tiles from the center using decor in height Source folksland.net
Laying squares from the center in the bathroom Source yandex.ua
See also: Catalog of companies that specialize in finishing materials.
Central masonry in different directions
For such a composition, background tiles and decorative elements are used. For the entire bathroom you will need at least 3 vertical rows of them. Laying begins from the center of the wall without architectural structures (built-in niches, bulges). Having reached the end of the row, they return to the center and carry out a similar installation of tiles in the opposite direction. At the end of each line a vertical decor is inserted. The same thing is done on the other edge of the row. This composition is repeated along the entire height of the wall. You can use not only friezes and borders, but also equally cut pieces of tiles of a different color.
Each method is guaranteed to be suitable for different conditions: with curvature of walls, lack of level.
Placement with ornament
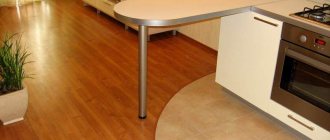
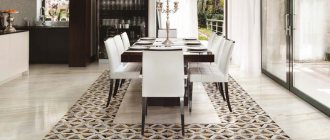
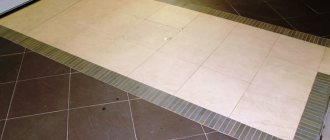
Typically, this method is acceptable for tiling the floor in the bathroom. With the correct selection of geometric patterns, a tiled carpet is created. For such compositions, be sure to use edging around the perimeter of the room. It is chosen in dark, eye-catching tones. You can continue the framing with a plinth, also made from the remains of tiles.
Floral ornament on the wall in the bathroom Source roomester.ru
Using this technology, it is necessary to accurately calculate all dimensions. An error of a few millimeters can cost a shift and visual disruption of the diagonals in the room. Designers do not recommend using ornaments on the floor in small bathrooms. This is explained by the fact that the composition should be visible at the entrance. You can't clutter it with a headset.
Using patchwork tiles for masonry in the bathroom Source plitkahelp.com
Patchwork masonry
Patchwork is used for modern and vintage styles. It looks original in the bathroom. This interior will be remembered for a long time. It is equally used for finishing floors and walls. Screens under shower boxes or bathtubs are often decorated with this design. This option should be used sparingly. Otherwise, the composition will turn out to be a kaleidoscope that hurts your vision.
Bathroom with patchwork tile decor in the functional area Source plitkahelp.com
When covering the floor in a patchwork style, the walls should be left light and monochromatic. If you want to decorate the walls in a similar pattern, then choose only one, preferably the far one. The patchwork will always be visible on it. The remaining walls are made monochromatic (as in minimalist style). A multi-colored pattern can be placed in a small fragment behind the side of the toilet, under the washbasin, between wall shelves, opposite the mirror.
Patchwork tiles for decorating adjacent walls in the bathroom Source uutvdome.ru
For narrow and elongated bathrooms where a shower is installed, you can line two adjacent walls forming a corner with a patchwork pattern. Tiles are laid on the floor in diamond shapes or small squares. They try to use a light shade of the surface, and make the seams one tone darker.
Bathroom with shower with patchwork tiles Source remontbp.com
Bathroom with tiles on the walls in the form of parquet boards Source topplitka.ru
Tile design in different rooms
An unusual solution is panel tiles. It is combined with natural stone, tiles, ceramic or glass mosaics. 3D panel tiles can be used to decorate ceilings in certain areas. The color of the tiles can be any: cream, white, beige, light gray, with a metallic tint.
1. Bathroom. To decorate this room, designers often use materials in marine colors. Blue and turquoise 3D tiles diluted with lush greenery look especially attractive.
2. Living room. For this room, 3D tiles, mostly monochromatic, are best suited. The following patterns will look impressive: branches, foliage, geometry. On a plain background, the wavy texture attracts attention. An aesthetic solution is hexagons, rhombuses, circles that form a single canvas. Black and white 3D tiles fit perfectly into an interior designed in art deco and classic styles. The warm shade of wood fits harmoniously into country style, strict classics and country.
3. Bedroom. Designers advise using embossed opaque tiles for cladding. These can be bulges and roughness, wooden patterned surfaces or a white plaster wave.
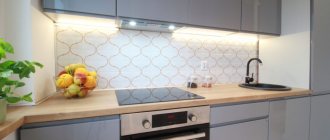
4. Kitchen/dining room. The kitchen backsplash can be made from 3D tiles in the art deco style.
Why do you need relief on tiles?
Depending on the nature of the surface, tiles can be smooth or textured. In the second version, this definition is interpreted as - a product that has an embossed protruding design or pattern.
The purpose of such tiles may be different. This:
- Aesthetic. Since volumetric ceramics bring a special chic to any interior, create a feeling of prosperity and can dilute even the most boring room design;
- Visually leveling. Ornate patterns can distract attention from installation flaws. This is especially true when the installation is carried out by a novice master, who allows deviations from the specified level in the tile field, and uneven seams and joints are observed;
- Useful. Such relief tiles with special identification patterns are widely used for installation on surfaces in various institutions, for tactile orientation of visually impaired or blind people.
Advantages of volumetric tiles
Along with the aesthetic appeal and multidimensional effect, it is worth noting other advantages of cladding with this finishing material:
- anti-slip surface - the material will be relevant for the kitchen and bathroom;
- increased wear resistance is an important criterion for flooring;
- environmental friendliness - the material does not cause an allergic reaction and does not emit harmful substances;
- durability - 3D tiles last for several decades without changing their original qualities.
A part of the wall from floor to ceiling made of tiles will look gorgeous. You can complement the wall with LED lighting or a pendant lamp.
Manufacturer country
If you want to make inexpensive repairs, then Russian, Polish, Ukrainian or Belarusian tiles are quite suitable for you. Spanish and Italian ceramics are significantly higher in price, but this is not always an indicator of quality. Expensive tiles may also have defects and manufacturing defects.
You can choose good inexpensive tiles from such Russian manufacturers as:
- Kerama Marazzi
- Cersanit
- Uralceramics
- AltaСera
- Shakhty tiles
- Fap Ceramiche
- Keramin
- Golden Tile
Photo collection of volumetric tiles
Ceramic tiles with a 3D effect can be found in the WOW, Realonda, Peronda, Equipe, Porcelanosa collections.
Now look at our photo selection. Which options do you like best?
Tools to get started
Before laying tiles on the floor, make sure you have everything you need:
- building level,
- pencil and tape measure,
- roller and brush,
- 10cm spatula and rubber spatula for rubbing joints,
- comb,
- mixer and glue bucket.
From the material we will need:
- the tile itself,
- tile adhesive,
- dividing crosses,
- primer,
- grout (fugue)
Grouting joints
The finishing touch is grouting the joints. It is needed for waterproofing, for the beauty of the coating, and for increasing service life. A day after installation, moisten the floor surface with water using a spray bottle. You can also wet it with a damp sponge to improve the adhesion of the grout. According to the instructions, prepare the mixture for grouting. After mixing, the grout has an elastic, paste-like mass.
Spread it on all seams with a rubber spatula. There is no need to press too hard into the cracks; proceed carefully, making sure that no voids or air bubbles form in the seams.
Leave for half an hour. Next, the remaining grout mixture is removed with a damp sponge.
Leave to dry for another hour. And then wash the entire tile with water and detergent. After a week, sealant is used to further go along the seams. If a “warm floor” is installed, then it is turned on two to three days after the joints are grouted.
Important! It is not recommended to walk or load the floor surface in the first two to three days. It is better to wait until it dries completely for one week.
Fugue (grout for joints between tiles at the junction of tiles)
Fugue - grout for joints between tiles at the junction of tiles
Fugue - grout for joints between tiles at the junction of tiles. When choosing a fugue, you need to pay attention to the fact that contrasting grout makes the floor bright, emphasizing the shape of the tiles, and a fugue matched to the color of the tile will give the effect of a uniform, smooth coating. The width of the joint depends on the quality of the tile and ranges from 2 to 20 mm.
