There are many plumbing fixtures installed in bathrooms, each of which is connected to water supply and sewerage systems. Siphons, taps, meters, hoses and pipes can ruin any interior, so many property owners try to hide them.
An excellent camouflage option is a tile inspection hatch. The main thing here is to choose a suitable design and install it correctly. Let's figure out what to look for when choosing an inspection hatch and what rules should be followed so that the installed structure will serve for a long time without complaints about its functionality.
What functions do inspection hatches perform?
To disguise electrical and pipelines, as well as the space under the bathroom, special boxes, screens and other similar structures are used.
All of them perfectly cover unaesthetic nodes, but the need for access to communications remains. Audit niches are used for this purpose.
In order to easily inspect and repair plumbing fixtures, pipelines, and replace meters, inspection niches are left. They are closed with special hatches
Some models of hatches for inspection niches are initially designed so that they can be covered with the same coatings that cover the walls: wallpaper, tiles or panels.
Such structures do not stand out against the background of the walls, which is why they are called invisible.
There is plenty of space left under the bathtub. It is usually covered with a screen, and the technical niche with a hatch. These structures can perform not only camouflage functions. If you attach shelves to the screen and place large bottles of cleaning products and detergents in the inspection niche, you can free up space in the wall cabinet and save useful space
Sometimes niches in the walls serve to store a supply of hygiene products, washcloths, towels and other necessary supplies. They perform the functions of cabinets, but do not take up space in the bathroom.
Such storage niches are also covered with inspection hatches under the tiles, and they do not attract unnecessary attention.
Technical niches covered with hatches not only camouflage equipment, but also protect against accidental mechanical damage, moisture, and sudden temperature changes.
Thanks to invisible hatches, you can give free rein to your design imagination and not worry that pipes or wires will hopelessly ruin the interior. They can be hidden and easily accessed if necessary. The main thing is to periodically carry out technical inspections so that pipeline leaks or meter breakdowns do not appear behind the beautiful facade.
Purpose and scope of use
The main problem of bathrooms is the concentration of all known household communications and appliances in these small rooms:
- risers and cold water/hot water circuits;
- sewerage system;
- wiring;
- cold and hot water meters;
- filtration equipment;
- distribution manifold of the heated floor system;
- shut-off valves.
In the stylistic design of bathroom interiors, urban and high-tech engineering systems can somehow be played up. In all other cases, the owner prefers to disguise communications with boxes and false panels under a layer of decorative tiles and porcelain stoneware.
However, a new problem arises - access must be provided to pipes, meters, taps, filters, water seals of siphons of sinks, showers, bathtubs, and toilet cisterns. Therefore, in gypsum plasterboard/gypsum plasterboard systems, an opening is left and a hatch is installed under a metal bathtub for subsequent finishing with tiles, mosaics in the same style as the entire wall, or screen.
Design features of the models
Hatches are installed in different parts of the room - in ceilings, walls, floors. In many ways, the design of each specific model depends on the intended location. Two main parts remain unchanged - the frame and the door; other elements can change depending on operating conditions.
Each model has its own design features, but the basic principles of their design are approximately the same: frame, hinges and door
The model of the plumbing hatch is also selected according to the size of the technical niche. They are usually 20x20-120x120 cm. The frame is firmly installed in the opening, and then the doors are mounted. Most often they are mounted on hinges, which can be made of metal or plastic (depending on the frame material).
There are two main types of frames:
- Adjustable . The owner can independently choose the size of the frame, and the excess material is simply cut off with a suitable metal tool.
- Unregulated . The size of the hatch is set during its manufacture and cannot be changed.
There are also frameless models. They are mounted using magnetic plates, and the main elements are fixed with silicone sealant or other suitable adhesives. Combined hatches are fixed using a frame and magnetic plates.
The materials from which hatch frames and doors are made are varied. Aluminum is most often used for frames, and doors can be made of metal, plastic, aluminum, plasterboard, polystyrene foam
Inspection hatches are opened using suction cup handles. Push-type models are also common, which move away after pressing on the door plane.
Depending on the location of the niche, you can find a hatch that opens to the left or to the right. There are models that move in a vertical plane.
Image gallery
Photo from
Inspection hatch for floor tiles
Hatch for masking communications on the ceiling
Design of inspection niches in the wall
Invisibility hatch with removable door
Inspection hatches are convenient designs that perfectly hide communication connection points without compromising freedom of access to them. They are easy to install and operate, and are reliable.
The structures do not require any special care: the surfaces of the doors can be washed with the same products that are used for walls.
Some designs are equipped with powerful opening mechanisms that can withstand significant weight. Such models can be safely finished even with heavy materials, for example, artificial or natural stone
When using the inspection hatch, you only need to monitor the condition of the opening mechanism, lubricate it with machine oil in a timely manner and carry out minor repairs as necessary. Then the hatch will last as long as the wall decoration as a whole.
In some cases, you can even replace the tiles on the door surface if you carefully remove the old covering.
Opening mechanisms
Manufacturers install the following door opening mechanisms:
- swing;
- push;
- folding;
- sliding
Each type of opening has its own advantages. When choosing, you should focus on ease of use.
Image gallery
Photo from
Swing door opening mechanism
Invisibility hatch with push mechanism
Sliding mechanism with three-link hinges
Hinged hatch for hard to reach areas
It is hardly possible to come up with a more convenient opening mechanism than a hinged one. However, an audit is often needed where access is difficult due to equipment or furniture. Then folding and sliding models come to the rescue.
If there is space on at least one side, then it is better to choose a sliding mechanism. And for areas with difficult access, folding structures with the ability to completely remove the door are more suitable.
Which hinge is better: steel or aluminum
Quite often, buyers argue among themselves about which hinge material is better - aluminum or steel. To obtain the most detailed answer, products from four popular manufacturers were tested. The maximum load that the hatch hinge can handle in the event of a uniform increase in the load on the open door was tested.
It turned out that the aluminum alloy cracked under a load of 600 kilograms, and the steel hinges were bent to such an extent that they could not be straightened in order to close the hatch. We can conclude that there is no difference between the type of material - it all depends on the preferences of the buyer.
The nuances of choosing the right hatch
When choosing a size, focus on the following parameters:
- Dimensions of a technical niche . The opening can be blocked or expanded a little, but in general the hatch must correspond to the niche, otherwise access to the equipment will be difficult.
- Door dimensions. The ratio of the parameters of the supporting frame and the hatch itself may be different. It is necessary to clearly determine how much space is required for a detailed inspection and repair of communications.
- Tile size. Wall finishing materials are usually purchased in advance, and this makes choosing a door easier. The tile should protrude beyond the surface of the hatch by 0.5-0.7 cm (or better, the maximum protrusion should be no more than 5 mm). It is also important that each tile is securely fastened: more than 60% of its area should be located on the hatch door.
For a spacious bathroom, you can choose a hinged hatch, but for a cramped one, a sliding or folding model is better.
If the opening of the inspection niche is located on a plasterboard partition or false wall, then you should give preference to a lightweight folding structure on an aluminum frame.
An excellent option is to install a model with gas shock absorbers. When purchasing, you should carefully check the package and make sure that it includes spring mechanisms. If not, you will have to purchase them separately
There are many manufacturers of inspection hatches whose products are worthy of attention.
The top three invariably include the following brands:
- " Phantom ". The main advantage of hatches from this brand is their powerful, reliable hinges that can withstand significant loads. Even doors with heavy finishing do not sag over many years of use.
- " Hammer ". A special feature of the Hummer models is their high-strength frames. The secret of their quality lies in the assembly features: the manufacturer uses argon-arc welding.
- " Glory ". These are hatches with wear-resistant fittings that can withstand almost any weight of the finish. The doors of the models can be lined with ceramic tiles and even natural stone. They are not deformed.
The range of invisible hatches is extensive, and there is sure to be a suitable model for every inspection niche. It is important not to save money and buy a structure with a durable frame and good fittings.
Sometimes large technical niches are made, for example, if it is necessary to disguise a boiler, distributor, filter, meter, cold and hot water collector or other equipment behind a false wall. Often a large inspection niche is required in a toilet or combined bathroom for sewerage maintenance. If you cannot find a hatch of suitable dimensions, then you can resort to other methods of masking communications.
The frames of two-door inspection hatches are made of durable materials. They must withstand high loads. If the size of the niche is large, and the door is planned to be finished with ceramic tiles, it makes sense to order a reinforced structure
If the opening width exceeds 70 cm, you can choose a single-door hatch with a durable frame and a powerful opening mechanism, but it is better to opt for a two-door model. Most often, such hatches are equipped with push or swing opening mechanisms.
In the second case, the kit additionally includes suction cup handles.
Some manufacturers have made sure that buyers see installation instructions. They placed it directly on the cardboard in which the models are packaged. If you buy a two-door design, you should definitely familiarize yourself with the technology of its installation.
The maximum size of the standard two-door model is 120 x 160 cm, but an even larger hatch can be ordered if necessary. In this case, you should decide in advance on the size of each door.
They are calculated depending on the chosen tile: it is necessary that when opening the doors they do not cling to each other, but at the same time they are beautifully decorated with finishing material.
Two-door tile models can be equipped with any opening mechanism. The most convenient and reliable doors are hinged ones. However, the location of the inspection niche can be inconvenient for opening them. Then it makes sense to consider other options
As for door materials, when choosing two-door inspection hatches it is better to give preference to models made of moisture-resistant gypsum fiber board. The option of drywall should not even be considered, because... it will not withstand heavy loads, will quickly deform and fail. Its only advantage is its low cost.
Instructions for installing a hatch under tiles
Work on installing an inspection hatch can be divided into several stages:
- Preparing the opening.
- Installation of frame with doors.
- Finishing the outer surface of the doors.
- Finishing work.
Each stage involves several types of work. To avoid any difficulties, we offer useful installation tips with illustrations:
Image gallery
Photo from
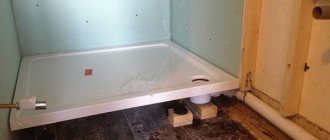
Stage 1 - preparing the hatch and opening
Stage 2 - installation of an invisible hatch in the niche opening
Stage 3 - sealing the seam between the structure and the wall
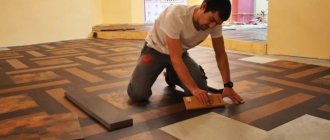
Stage 4 – finishing the inspection hatch with tiles
After installation, all that remains is to make sure that the hatch functions normally, the seam is neat, and the tiles do not cling to anything when opening the door. If everything is in order, the structure is completely ready for use.
Joints between tiles
In order to make the inspection hatch under the tile as inconspicuous as possible, you need to pay attention to this nuance. After the installation of the structure into the surface is completed, the tiles on the hatch cover are glued and processed, and the hatch is closed. Then the seams that are located between it and other tiles must be filled with silicone. This is done to ensure maximum invisibility. Before application, you first need to cover the contours of the adjacent tiles with masking tape, and then only fill the seams with silicone. After it hardens, you need to carefully draw a sharp object along the contour of the tape, and then peel it off. You will get a neat inner seam.
To ensure access, the following is done. Using a utility knife, the silicone is cut at an angle along all sides of the structure. Please note that cutting must be done as carefully as possible, as there is a high risk of ruining the seam and scratching the tile.