Bathroom countertop height and mounting
Almost every major renovation in the bathroom involves the complete or partial replacement of plumbing, as well as the installation of furniture and decorative elements.
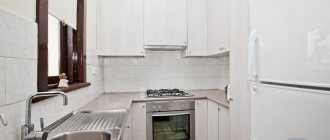
One of the stages of decorating a room is installing a countertop with a sink, and it is at this stage that many people have difficulties. Here you need to know what the height of the countertop in the bathroom should be and how to secure it correctly so that it is convenient to use and one day the countertop does not come off the wall. For your information.
The standard tabletop height ranges from 70 to 85 centimeters. But this indicator is not a mandatory requirement and you can place it at a height convenient for you. The most comfortable placement of the product will be at waist level.
Comments: 17
- Like
- Save
ryllova
I just don’t want what you sent. That's why I turned to the experts
- Like
- Save
Dmitry Evgenievich
Just attach the tabletop to the wall, in the corner. To do this, even at the stage of wall construction, it was necessary to provide fastening elements. Otherwise, you won’t be able to do what you want.
- Like
- Save
ryllova
It's not too late for us to make these fasteners in the wall. It was just laid out to us. Yes, we planned to mount it in the wall and on the corner, where it would be adjacent to the cabinet wall. I'm worried about the other corner that will hang up, near the bathtub. What fasteners do you recommend? It seems to me that the letter G is a little dangerous, the edge will be hanging
- Like
- Save
SOS REPAIR
- Like
- Save
ryllova
Thank you very much for the recommendations. Some are just a mystery to me: “do it on the floor, but make the very bottom mirrored and a little ruined.” I can’t even imagine what it is and how it is :)
Do you have an example?
And about the lighter analogue. What did you mean? What could be lighter and more like a stone?
- Like | 1
- Save
Galina
- Like
- Save
SOS REPAIR
- Like
- Save
davidenko_olga_interiors
- Like
- Save
ryllova
Thanks for the advice. But in your example, the wall in which the frame is embedded is most likely concrete. In my case, both the side wall and the back are made of tongue-and-groove slabs :(
- Like
- Save
Evgeny S
In 1 comment they wrote to you the best solution to your problem, contact the countertop manufacturer so that they issue a technical specification for the installation of embedded parts. Or so that they themselves prepare a welded structure, for example, under a tabletop.
- Like | 1
- Save
Mounting options
There are several options for how to install a countertop in a bathroom, and each of them depends on your personal preferences. Today there are three main types of installation:
- wall mounting using brackets;
- installation on furniture elements in the form of cabinets with doors or pull-out cabinets;
- mounting on legs, in this case the tabletop can have one leg at each corner or only two legs at the outer corners, and its inner part is fixed to the wall.
Important. If the bathroom is lined with plasterboard and ceramic tiles, then before installing the countertop in the bathroom on the wall, it is necessary to pre-determine its installation location at the stage of installing the plasterboard and additionally reinforce the mounting location with metal profiles or wooden beams. Drywall itself is a fragile material and will not support the weight of the countertop.
Mounting the tabletop to the wall
If you decide to mount the product on the wall, leaving the space underneath it free, then in this case, use a special bracket for the bathroom countertop. This bracket is L-shaped and has special stiffening ribs that prevent bending. It also has pre-drilled holes for wall mounting. The installation process is as simple as possible: the brackets are securely fixed to the wall using dowels, then the tabletop is laid on them and secured with screws.
Important. It is advisable to select the brackets in such a way that the side on which the tabletop will lie is no more than half the width of the tabletop itself. Also pay special attention to the material of the bracket and the presence of stiffeners.
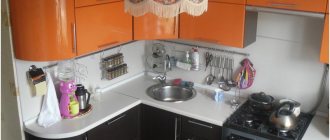
Installation on furniture elements
Installing a bathroom countertop on furniture pieces is the most common installation option, especially in small rooms. This allows you to use the space under the countertop to store bath accessories. As a base, choose one or several cabinets of the same height, depending on the size of the tabletop. Before fixing the countertop in the bathroom in this way, the cabinets are connected to each other with bolts, and the countertop itself is installed on them and fixed to the cabinets with metal corners.
For your information. The presence of cabinets allows you to hide the wiring elements and siphon if a washbasin is installed on the countertop. The gap between the tabletop and the wall is closed with a plastic decorative corner, which is glued with sealant. It is important to leave a small distance of a few centimeters between the cabinets and the wall for ventilation.
Foot mounting
Attaching a bathroom countertop to legs is usually used in spacious rooms where saving space and rational use of it is not a priority. This option will also be appropriate if the tabletop itself is too heavy and brackets alone will not be enough. Everything is as simple as possible here. One side of the product is attached to the wall on brackets, and the outer side is mounted on decorative legs.
Using the material presented in the article, you can independently choose the installation option and install the countertop in the bathroom yourself.
Design
When choosing a floating set for your kitchen, you need to ensure that the entire interior of the room is made in the same style. Hanging furniture complete with a massive kitchen corner located in the dining area will look awkward. Therefore, to embody elaborate styles (Baroque, Empire, Gothic, etc.) it is better to choose a different solution.
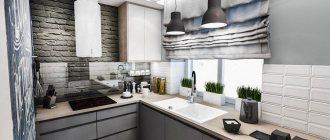
Minimalism
Hanging furniture seems to be created to embody this style: simple lines, a minimum of decor and a large amount of free space. When recreating minimalism, it is advisable to choose a monochrome palette for a floating set. In this case, the kitchen will look laconic and original.
Read more about minimalist kitchen >>>
High tech
Modern technology, plenty of chrome and unusual lines go perfectly with floating furniture. Characteristic lighting will help complement the impression of a futuristic interior. LED strips and lighting fixtures can be located not only above the work surface, but also under wall-mounted cabinets.
Read more about high-tech kitchen >>>
Modern
For those who are tired of classical styles, modernity was created. Modern kitchen - goes well with hanging cabinets. The interior in Art Nouveau style is filled with chic and gloss. Such a set will invariably attract attention with its design and functionality.
Loft
A floating kitchen in the loft style should be made of natural materials. Furniture made of solid wood or plywood fits well into such an interior.
Very often, a set in this style is only partially hung. The supporting pedestals in this case can be made of either wood or metal. Matte chrome does not disturb the overall ambience, but only emphasizes the integrity of the interior.
Read more about the loft style kitchen >>>
Classic
Classic styles are dissonant with modern trends, so floating sets in their pure form are not used in such interiors. An alternative to wall cabinets is a set on a plinth. The protective strip is pushed under the modules as deeply as possible, but so that it is still visible from the height of an adult.
Read more about a kitchen in a classic style >>>
Retro
The concept of “retro” is quite broad. The “antique” of this style is practically unlimited in time. Therefore, with the correct selection of equipment and fittings, hanging cabinets can be used in this style. These can be pseudo-floating modules on the base, as in the case of classics, or truly floating furniture.
In this case, they try to make the base darker so that it is practically invisible under the cabinets. If the cabinets are completely hanging on the wall, then the gap between the floor and the set is left quite narrow, usually its width does not exceed 10–15 cm.
Types of products
Artificial stone for countertops is an alternative to natural mineral. In terms of characteristics and appearance, it is almost no different from its natural counterpart.
Bathroom countertops are available in two types:
The former are made from various components, additives, and acrylic resin. Agglomerates are painted in any colors and shades.
Acrylic stone
Easily imitates other materials, takes the desired shape, and fits harmoniously into the interior.
- 70% mineral fillers;
- acrylic resins;
- hardeners;
- aluminum hydroxide;
- plasticizers;
- dyes.
The products have a number of advantages over other materials:
- increased strength;
- resistance to mechanical stress;
- do not deteriorate from moisture;
- do not lose their original appearance;
- suitable for any interior;
- resistant to the proliferation of microorganisms;
- defects are easily restored.
The products do not have seams - this protects against leaks and water will not seep through the surface. Easy and quick to install.
A certain technology is used to produce the material. The raw material mixture is compacted into special molds using vibration. Next, the product is subjected to heat treatment and polymerization occurs. The output is a monolithic slab. The front side is sanded, this gives the tabletop brightness and shine.
Due to their resistance to high temperatures and humidity, the products are used in bathrooms.
These models also have disadvantages:
- high price;
- heavy weight, the structure can only be installed on durable furniture.
Acrylic stone sinks cannot withstand high temperatures. To wash dishes with hot water, special stands are used - take this into account if you are going to install the structure in the kitchen.
Quartz agglomerates
Marble, granite, and quartz chips are used for agglomerate countertops. Polyester resin is used as a binder. This material is highly durable. For its production, the necessary additives and components are used. The main substance is acrylic resins.
A countertop made of quartz stone is a durable, presentable product. The artificial material is easy to care for: just wipe it with a damp cloth.
Mounting options
The stone countertop in the bathroom is firmly attached to the surface of the furniture.
Installation on a cabinet
This is the most common way.
For installation you need:
- take accurate measurements of the base;
- Lubricate the junction points with glue;
- secure light items with metal corners;
- install a tabletop on top.
This method allows you to put cosmetics, washing powders and other products on the shelves.
Mounting with bracket and foot
To implement this option you will need:
- measure the height of the future structure;
- mount the brackets on the wall using dowels or anchor bolts;
- attach a metal leg to the tabletop;
- Place the entire structure on brackets.
Use as support:
- a slab made of artificial stone;
- timber stand;
- bricks;
- ceramic blocks.
The support should be reliable, durable, and look harmonious.
Installation on corners or mortgages
If the tabletop is placed in a niche, it is secured to brackets or metal corners. Install them on two opposite walls - this is the easiest and most reliable option.
What it is?
Due to the relatively high cost, wall-hung kitchens cannot be found in every furniture showroom. Therefore, floating furniture for many still remains a mystery, causing a number of doubts. In fact, everything is quite simple.
The effect of a floating kitchen is achieved by eliminating the lower supports. The lower modules are hung on the wall in the same way as the upper kitchen cabinets or shelves. Naturally, both the fastenings and the wall on which such modules are installed must be sufficiently strong and reliable.
Hanging kitchen without handles. MDF kitchen with lighting. With electric drive SERVO-DRIVE Servo Drive Blum.
In some cases, manufacturers are cunning, passing off something else as floating furniture. They simulate the soaring effect in two ways:
- cabinets and tables are installed on transparent supports made of glass or durable plastic, which creates the effect of not being in contact with the floor;
- the legs are pushed further under the cabinets, so that from the height of an ordinary person they are invisible.
For authenticity, the lower part of the pseudo-floating kitchen is illuminated with an LED strip. The effect is quite convincing, but the operating features of a real wall-hung kitchen and its imitation are still different.
It is worth noting that the designers did not focus their idea only on kitchen units. Floating tables, beds and other parts of furniture sets quickly occupied their niche among other style solutions.
Do-it-yourself installation of the structure
Installing the product yourself will help you save money because you won’t have to call in specialists. The tabletop is also made with your own hands. Mineral fillers and polymers are cheaper than the finished product.
To complete this you will need:
- acrylic gel;
- stone chips;
- glass mat for reinforcement;
- chipboard sheets;
- electric jigsaw;
- screwdriver;
- self-tapping screws;
- wax;
- spray.
For further work you need a metal table with a flat surface.
- First a sketch is made. Create a template with natural dimensions and cut out holes for the sink and faucet.
- Two blanks are cut out according to a template on a sheet of chipboard. The parts are glued around the entire perimeter and secured with self-tapping screws.
- They are placed face down on the table, and formwork 4 cm high is attached. It is made from chipboard by cutting even strips. If the shape of the tabletop is curly, fiberboard is used to make the edges. Fixed with spacers and hot glue.
- The cutout for washing is outlined with a marker, the workpiece is carefully pulled out, and cut off by 5–7 mm on each side.
- The surface of the table and the walls of the formwork are rubbed with wax to prevent them from sticking. The template is built into the hole for the sink, connecting to the markings.
- For the working mixture, you need to take a clean container, pour acrylic gel into it, add filler and stir. The proportion of the binder will be 60-70%, the filler composition will be 40 and 30%. For 1 m2 of area you will need 3-4 kg of liquid stone. 1 kg of the mixture is poured into another container, a hardener is added - 0.5-1% of the total mass. The contents are mixed and poured into a spray bottle.
- To spray, the resulting composition is evenly applied to the sides of the formwork, in a denser layer on the horizontal surface. The joints must be completely filled so that there are no gaps left. After hardening, make a second layer, even denser. Next, the third final layer is sprayed onto the front side.
- The surface is primed with a composition of acrylic resin and a colored component. The glass mat is cut to the size of the tabletop and placed in formwork. Roll out with a roller over the entire surface so that the material is securely attached to the base.
- The binder and filler are combined in equal parts, the mixture is poured into the formwork, and leveled with a spatula. A chipboard blank is laid, and a heavy object is placed on it. After 4 hours, the load is removed and the finishing layer is made; 1.5 parts of filler are taken for one part of the binder.
- After a day, the formwork is removed, wedges are placed under the tabletop on each side, and it is carefully lifted. The surface is ground: starting with a large nozzle and ending with a fine one.
The spray bottle is washed with acetone each time. If tubercles have formed, they are cut off with a mounting knife.
Detailed instructions for installing a tulip sink
Connecting the sink to water supply and sewerage systems is carried out using standard methods.
Marking the location for attaching the sink
Despite the fact that the bowl rests on a pedestal, it must be additionally attached to the wall. Before marking, a trial installation of the product is carried out. The stand should not wobble. After leveling the pedestal, mark the locations of all parts on the wall and floor. Using a building level helps to draw lines correctly.
Marking the sink mounting location.
Installing fastenings for brackets
At this stage, holes are formed. After drilling, the holes are filled with glue, then dowels are inserted there. To secure the brackets, use anchor bolts longer than 7.5 cm, because under the influence of load, ordinary self-tapping screws pop out of the wall with dowels.
Installing brackets for the sink
The installation hole of the fastener is aligned with the dowel. Screw in the bolt, ensuring reliable fixation of the part. Check the quality of the connection and move on to the next step.
Install and connect the mixer
The washbasin is installed on the holders in two ways:
- The bowl is placed on supports, after which the wall is tiled. The gap between the washbasin and the tiles is filled with sealant. It is recommended to choose a product that contains antifungal additives.
- The composition is applied to the surfaces of the holders. Next, you can place the bowl and fill the joint with plumbing sealant. This prevents the sink from moving.
The mixer and sink are connected before installing the bowl. After mounting the product on the brackets, flexible hoses are connected to the water supply.
We connect the siphon to the sewer
To assemble a drainage system with your own hands, you need to perform the following steps:
- Connect the overflow. The hole is combined with a flexible hose, which is connected to the base of the siphon and secured with a nut.
- A grate, rubber seals, and a screw are placed on the grooves of the washbasin. Tighten the bolt, ensuring a tight connection.
- The drain pipe is bent and inserted into the sewer pipe. Raise the sink, move the pedestal, placing elements of the drainage system in it.
Rules of care
Artificial stone is a reliable, durable material that requires special care to maintain its appearance. The surface becomes dull over time, becomes covered with plaque, stains, and dirt accumulates.
To maintain the original appearance, you must:
- Wipe up spilled liquid, do not allow it to be absorbed;
- Wipe oil stains with a dry cloth and wash with a cleaning agent;
- Avoid hard sponges, they scratch the surface;
- to remove difficult stains, use a paste with chlorine;
- To improve shine, the countertop is treated with polishing paste.
If scratches, chips, or defects appear, they are repaired using special glue. The damaged area is degreased, stone powder is mixed into the glue, and all cavities are filled with the resulting mass. After drying, sand and polish the area.
Choosing a tabletop
The bathroom is a room with high humidity, which is important to consider when choosing a countertop. The product must be protected from corrosion, resistant to high humidity and mechanical stress.
- quantity of consumables;
- volumes;
- complexity of construction work.
An important detail is financial capabilities. When choosing a manufacturer, they take into account reviews and recommendations left by customers on the Internet.
A stone countertop is a multifunctional product; you can build a sink into it or use it as a table for storing hygiene items. It also plays a decorative role, with it the bathroom space acquires an individual style. Due to their practicality, the models are becoming increasingly popular. The variety of colors, textures, and shapes allows them to be used in any room.
Types and features of countertops
Depending on the type of design, they are manufactured in two varieties: solid and with a mortise sink. The choice depends on the size of the bathroom and the design idea of its interior. Some designs are more suitable for creating an attractive appearance, while others are more practical.
Solid worktops
Here the horizontal surface and the sink are a single whole. Solid cast is safe from the point of view of sanitary hygiene, since there are no places for dirt to accumulate. The main disadvantage: it requires a lot of money.
Countertop with drop-in sink
Significantly less expensive, and also more versatile in terms of installation, is a countertop into which a mortise sink is mounted. This design is most often used when arranging a bathroom. But this design has one drawback. The presence of cracks in the places where the sink is installed creates conditions for the collection of moisture, which promotes the growth of bacteria.
Tabletop options
You can do it mounted. Then the main task will be to determine how to securely attach the tabletop to the walls of the room. There are floor-standing (on legs) versions, with a built-in cabinet under the sink. This allows you to place household appliances nearby or inside.
An important criterion for good quality and practicality is what the countertops are made of. These materials must be resistant to moisture, have durable anti-corrosion properties and be protected from the harmful effects of household chemicals.
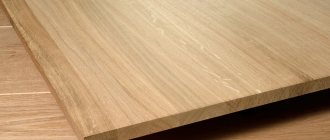
Stone (natural or artificial)
Marble, granite, onyx give the room a solid look. These products have no equal in hardness, strength and moisture resistance. Neither high temperatures nor chemically aggressive environments can affect the condition of a natural stone surface.
Products made from artificial stone (acrylic, quartz agglomerate) have the properties of natural stones, but have a significantly lower cost.
An acrylic surface is lighter in weight than a natural stone surface, so it does not create big problems during installation. The presence of the best consumer qualities makes them the most popular among similar products.
Backlight
Pendant lighting is very popular. Soft diffused light coming from under the cabinets emphasizes the floating effect. Backlighting can be organized in two ways:
- LED strip. This option is the most popular. The color of the backlight can be either matching the tone of the headset or contrasting with it. Monochrome lighting is chosen for the minimalist style; bright and contrasting shades are more common in modern and high-tech styles;
- lamps. They are usually attached to the bottom wall of the cabinet, but sometimes they are placed directly on the load-bearing wall. When distributing lighting fixtures, you need to ensure that the lighting is uniform. Separate spots of light create a feeling of incompleteness.
When choosing a place to install the lighting, you need to control one point - the lighting devices should not be visible from a height of human height.
Also, do not forget about safety precautions. In the event of a flood, wiring located too close to the floor may short out. To prevent this from happening, wires and lighting fixtures must be located at a height of at least 15–20 cm from the floor.
How to make a tabletop with your own hands?
This is far from the cheapest piece of furniture. However, you can save your budget if you do it yourself. For independent work, the most technologically advanced design is made of gypsum plasterboard (plasterboard). The material can be easily processed with home tools and is better suited for making a variety of shapes.
The options depend on the author’s imagination, where height, width and depth are chosen depending on the idea of using the internal space, for example, installing a washing machine. How to perform the work, prescribes instructions.
What will you need?
To make it yourself, the following materials and tools are required:
- moisture-resistant drywall;
- metallic profile;
- a set of fasteners - self-tapping screws of different lengths;
- electric jigsaw;
- screwdriver for tightening screws;
- sealant;
- primer;
- adhesive composition with water-repellent properties;
- ceramic tile;
- perforator;
- dowels (for attaching the tabletop to a concrete or brick wall).
This set is available to almost anyone who is going to make their own countertop. Some missing elements can be purchased without problems in specialized stores.
Instructions
A work plan will allow you to minimize errors when creating an amateur design.
- Be sure to make a project in the form of a sketch, where all the key dimensions of the structure will be indicated: height, length, depth and others. The sketch will allow you to calculate the exact amount of materials needed for the work and eliminate unproductive costs.
- The frame is made from a metal profile. It must be tough and durable. This base must be attached to the load-bearing wall.
- Drywall sheets are being cut. Using self-tapping screws, secure the sheets to the profile frame.
- All cracks and joints are sealed and the structure is primed. It is important to level the surface before laying ceramic tiles.
- For cladding, use adhesive with water-repellent properties. Grout the joints of the tiles. You can use other materials instead of tiles: wood or laminated MDF boards.
A do-it-yourself design, by definition, should not be worse than a purchased one. The guarantee is to use the most thoughtful options.
Floating kitchen with support box
In this case, the kitchen becomes only partially suspended. Attached to the floating support is a remote box reminiscent of a kitchen island. The hidden support box is made narrow and placed along the far wall of the headset. The advantage of the box is that part of the weight of the headset from the wall is transferred to it and distributed more evenly.
How to properly place a washing machine under the countertop?
Installing the washing machine under a laminated, stone or other surface is the most rational placement of household appliances in the bathroom.
There are a number of rules that should be taken into account in order to properly install the unit.
Units with vertical loading will not work when installing a countertop above a washing machine. Only cars with a front-facing window can be placed in this way.
If the recommendations are followed, the unit installed under the countertop will reliably serve its entire service life.
Photo gallery: top 5 ideas for placing a washing machine in a small space
There are various options for bathroom furniture and appliances. However, not all models can be accommodated, especially in a small room. Apartments in residential buildings built in Soviet times (Khrushchev, Brezhnevka) were distinguished by cramped bathrooms. And the design of such premises looks unique from the point of view of where their owners managed to put the necessary things. These ideas formed the basis for the appearance of a narrow washing machine, an overhead sink and original ways of placing objects in a small bathroom.
The size and configuration of the premises suggest choosing different furniture layouts. Let's highlight the most popular ones and see how you can place plumbing accessories without losing their functional focus.
Install a shower cabin instead of a bathtub
This is one of the simplest options that immediately comes to mind. Replacing the bathtub with a stall with shower will free up additional space. This metamorphosis is especially relevant in very small bathrooms. The shower cabin is quite competitive in terms of the conditions for taking water procedures in comparison with the bath. The automatic washing machine will take up free space along with other household appliances or furniture: a bathroom, a wall cabinet, open shelves.
Build in a sink cabinet
Often this option becomes a designer delight in the bathroom. In such cases, the emphasis on the obvious presence of household appliances can interfere with the creative idea. The way out is to order a cabinet with a sink and a washing machine built into it. An additional compartment with non-standard opening doors will require slightly higher expenses for such arrangement of the bathroom.
Place the machine under the sink
This option for placing the washing machine is the most compact. It is important to take into account the design features of the sink. It must be large enough to prevent moisture from entering the washing machine, which must fit completely under the countertop. The sink siphon is located at the back or side, as in the photo, so the communications will be behind the machine.
The range of such models is quite wide. It can be square, rectangular, asymmetrical in shape, but not deep - to make it easier to choose the height of a home “washer”.
Place the machine under the countertop with the sink
It is important to ensure a guaranteed clearance above the washing machine in order to eliminate vibration of the entire structure during washing. And then a sink with a countertop above the washing machine is one of the best options. This arrangement looks great when the depth of the washing unit and the countertop match. Depending on the layout of the room, the tabletop may be angular.
The furniture industry offers special designs where it was possible to combine a bedside table with a sink and a washing machine under one surface.
Such options can be divided into the following groups according to the material used:
- combined - MDF cabinet with stone countertop and sink;
- laminated MDF and chipboard;
- wooden surface;
- plastic.
What to choose is decided by the owner, based on his preferences in appearance and price of materials. With proper care, any of them will not be afraid of moisture.
Placing the machine under a countertop with an overhead sink
This option is freely located above the home washing unit. The overhead structure is simply placed on a flat surface of a tabletop or cabinet.
This type of installation allows designers to use their rich imagination in representing the forms of overhead structures. For example, a washbasin can be moved or rotated relative to the faucet to increase the usable area of the countertop. This option is most suitable for small bathrooms.
When is additional fixation necessary?
The countertop in the kitchen sometimes takes on very significant loads. When slicing food, it only requires sufficient area and a flat surface. But often we also load the table with small household appliances. Microwave, oven, portable dishwasher, coffee maker, mini-bar - all these items in the kitchen often “settle” on the table, and here you will need to secure it well.
Related article: Insulation for walls outside a country house
You should not discount the neat appearance of the kitchen - an unfixed countertop can sometimes move, forming a noticeable gap in contact with the wall. Not only does this spoil the picture a little, but also food particles will accumulate there. It is useless to attach a decorative plinth to such a moving surface. And if the design of the set is such that the tabletop has freely hanging ends, instead of a reliable working surface you become the owner of an analogue of a children's swing. So it’s better to attach the top plate even on the cabinets to the wall so that it doesn’t “play.”
Sometimes the only way to increase the functionality of a small kitchen is to make additional surfaces with your own hands where you can place equipment or process food. You cannot provide support for such tabletops from below, but fixing them on the wall is quite possible. And of course, you can’t do without this if there is built-in appliances hidden under the work surface - a refrigerator or a washing machine.
How to attach a bathroom countertop to a wall?
Share on social media networks:
A countertop in a bathroom is one of the convenient design solutions. It's not just beautiful, but convenient and practical. At the same time, installing the countertop is not so difficult. You can do this yourself. Let's try to figure this out. So, the topic of the article is how to attach a bathroom countertop to a wall. First of all, it is necessary to take into account the characteristics of the room, because the bathroom, as a rule, has modest dimensions. At the same time, free access to engineering structures in the future is necessary. Everything will be discussed in more detail below.
We use tiles
Choosing the right tiles for the bathroom
A more traditional and cheaper material for making countertops in a bathroom can be ordinary facing tiles. Some people prefer this option for finishing a new bedside table just because they have old material lying around in the closet. But do not rush to use it - carefully inspect the tile for chips, cracks or other noticeable and tangible defects in the surface of the product.
It is also important to achieve integrity and harmony between all components of the interior of the room. So, if the finishing of wall structures has one color shade, it is not recommended to resort to a contrasting tabletop, but it is allowed to play with tint solutions.
Requirements
The bathroom has high humidity and changing air temperatures. This should be especially taken into account when selecting tabletop material.
If we talk about design requirements, here they are:
- Moisture resistant.
- Corrosion resistance.
- Chemical neutrality.
- Convenience, functionality.
- Beautiful view.
Design features largely determine ease of use. All possible options can be divided into 2 groups:
- One-piece designs, when the sink and countertop are a single unit. The material used is usually natural and artificial stone.
Important! The advantages include aesthetic appearance and hygiene. There is simply nowhere for dirt to accumulate. This design looks great in a large, beautifully decorated bathroom. Disadvantages include low functionality and excessive bulkiness.
- Countertops for mortise or overhead sinks. They have a sectional structure. As a rule, they have a compartment for detergent. Some designs provide a separate sector for the washing machine. Installing and servicing such a device is quite simple.
Plumbing connection
When the sink is installed, all that remains is to install the mixer and siphon. Part of the problem is eliminated if the pipes for connecting the mixer are walled up in the wall above the sink, which is typical for water lilies and the joint use of sink and bathtub mixers. It is enough to simply screw the mixer nuts onto the pipes, not forgetting to put the O-rings.
If the mixer is installed in the back of the bowl, it must be pre-assembled. There are threaded holes at the bottom of the mixer; flexible hoses need to be screwed into them. After this, the mixer is installed in the hole in the sink and pressed from below with a wide nut. The ends of the hoses are packed using FUM tape onto the threaded outlets of the hot and cold water supply.
Another version of the mixer is possible, when a spout and two taps are installed separately into the sink - the so-called three-point installation. In this case, a rather complex layout of connecting hoses is hidden under the bowl, so the sink must be removed. The water supply is carried out to each tap separately, and the taps themselves are connected to the hidden mixer body with thin bellows pipes.
The sink mixer is installed according to the standard scheme. Having assembled the body of the device, it must be placed from below to the drain hole of the bowl, having previously placed a rubber sealing ring. A mesh is placed on top of the bowl, which is attached to the body with a long bolt. All that remains is to put one end of the corrugated hose on the drain outlet, and lower the other into the socket of the drainage system, into which a rubber sealing collar is inserted.
Did you like the article? Subscribe to the channel to stay up to date with the most interesting materials
Correct selection of materials
This is perhaps one of the most important points when you are going to attach a bathroom countertop to the wall. Both the cost and service life of the product depend on the material used to make the countertop. Each option has its own disadvantages and advantages. Let's look at the most common of them.
A natural stone
Stone products look beautiful and respectable. The most common of ornamental stones is marble. The surface can be matte or glossy. The material looks rich, is quite strong and durable.
Important! The disadvantages include high cost, significant weight and difficulty during installation.
Fake diamond
This is a composite material including natural stone chips. A polymer is used as a binder. In addition, they are currently producing artificial stone that is indistinguishable from natural stone in appearance.
Advantages of artificial stone:
- reliability;
- durability;
- strength;
- surfaces have good sound absorption and are easy to clean;
- There is a large selection of color options.
Important! Artificial stone cannot be called cheap, although its cost is lower than that of natural stone. Disadvantages include low maintainability and deformation from high temperatures.
Glass
Beautiful, elegant, chemically neutral and environmentally friendly material. The cost of a glass product is relatively low.
Important! Disadvantages of glass:
- Fragility.
- The need for regular care.
Tree
The wooden surface creates an atmosphere of coziness and comfort. Most often, solid oak is used, and coniferous wood is used as a budget option.
The advantage of wood is also its unusually beautiful texture. However, wood has a limited service life (usually no more than 8 years). And complex care with the use of expensive products makes you think about the feasibility of this idea.
MDF, chipboard
Despite skepticism about these materials, the waterproof coating makes them quite suitable for use in the bathroom.
The advantages of the materials are:
- Low price.
- Ease of processing, which means creating different designs.
- Easy to install.
Important! The main disadvantage of countertops made from these materials is their short service life. Minor damage to the coating is enough for the structure to need replacement.
Drywall
Moisture-resistant plasterboard is used in the bathroom. However, the sheets can only be used as a base. After the drywall is installed, it is necessary to cover it with mirror, glass or ceramic tiles, mosaics or artificial stone.
Important! Working with drywall is quite simple, and the cost of the sheets is quite reasonable.
How to install a countertop in a bathroom under a sink?
How to install a suspended tabletop and what kind of fastening should it be? To secure your bathroom countertop to the wall, you will need:
- Metal profile (quantity depends on the complexity of the work).
- Sheets of moisture-resistant plasterboard.
- Brackets.
- Sheets of plywood, epoxy, moisture-resistant putty.
- Electric jigsaw.
- Ceramic tiles or mosaics - for cladding.
Important! If the bathroom is small, then the best option would be a built-in countertop with functional compartments.
Countertop calculation
The beginning of work is taking the necessary measurements and installing the base frame on the adjacent wall. This takes into account:
- The convenience factor of using the sink.
- Type of cladding used.
Important! Eg:
- If you want to use ceramic tiles as a facing material, you need to calculate the height so that, if possible, you do not cut off the tiles.
- The distance of the first shelf from the tabletop is approximately 25 cm, the rest are lower.
- It is convenient to equip the structure with doors. The bathroom will look much neater.
Preparing the countertop
The preparatory work algorithm is as follows:
- Cut the hole for the sink according to the dimensions of the built-in washbasin. To do this, place an inverted shell in the center of the sheet and trace the outline with a pencil. Back off a few more centimeters to accommodate the fittings.
- Glue special strips onto the surface to protect it from water.
- Sand the product from the sides and coat it with a special primer.
- Install the structure onto the frame.
How to attach a bathroom countertop to a wall? The most preferred are screws and dowels.
Important! The doors and walls of the cabinet are made of MDF.
Decorative and finishing:
- The next step will be to cover the structure with tiles or mosaics using a special waterproof glue.
- To treat seams, it is advisable to use a special waterproof grout.
- After this, all that remains is to install the sink in the pre-made hole.