Guys, we put our hearts into Bright Side. Thank you for revealing this beauty. Thanks for the inspiration and goosebumps. Join us on Facebook and VKontakte
In order to turn a wall into an entire art object or simply add comfort and individuality to your home, you do not have to have outstanding creative abilities or purchase expensive art objects. The main thing is your desire, a little patience, courage and imagination.
Bright Side has collected for you the most interesting decor ideas of varying degrees of complexity, among which, we hope, everyone will find something to their liking.
Unusually shaped shelves
A decorative shelf performs both aesthetic and practical functions.
This is both a wonderful interior decoration and a good solution for those who do not have time for creativity and are not ready for serious changes.
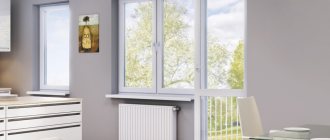
Photo wallpaper
Forget the creepy photo wallpapers from the 90s - their modern counterparts are significantly superior in quality and amaze the imagination with their realism.
Nothing decorates our home more than things dear to our hearts, created with our own hands. Interesting details and pleasant little things always fill a home with warmth and illuminate any family nest with grace. The dekorin.me portal will always have a lot of interesting things for you. Today we have prepared the best DIY decor ideas for you. Let's get inspired together!
DIY decor ideas: creative hallway
In search of successful solutions, we invite you to walk through the rooms together with the best Dekorin designers and find the best DIY decor ideas, taking into account the specifics of each room. Let's start with the hallway.
The hallway is the calling card of the house. In order for the comfort of home to envelop those entering right from the doorstep, we recommend that you equip this room in the best traditions of modern handmade. Go!
- Key holder for the hallway
A small, seemingly insignificant detail can still not only decorate your hallway, but also become an indispensable device for every day. Just look how beautifully and easily you can decorate your home with a homemade key holder!
Moreover, you don’t need any special skills to create it. Only creativity, only your own skillful hands and a bit of imagination!
- DIY rug for the hallway
Look how beautiful it is!
You can make a rug for the hallway from waste material and not worry about it getting damaged or dirty.
Plus, this homemade creativity won’t cost you a penny. Wonderful, isn't it?
- DIY hallway hanger
And this is a really great option! See how easy it is to create beauty and convenience with your own hands, without spending a penny!
All you need is a wooden frame, small logs or branches and stain or wood varnish. Take this advice for your health!
Craft house made of cardboard
This material is the most popular for creating a house. Use materials like toilet paper rolls, small cereal boxes, or large mailing boxes.
House for a gnome
Making this house model will not be difficult. With a little effort, you can create an entire village for gnomes.
For the craft you will need:
- toilet paper roll,
- colored cardboard,
- colored paper,
- White paper,
- glue stick,
- scissors,
- black felt-tip pen.
First, cut the cardboard cylinder in half. Cut 2 white strips from white paper 1.5-2 cm wider than the sleeve. Windows and doors are cut out of colored paper and glued onto white strips. Use a black felt-tip pen to draw window frames and door handles.
Then the decorated white stripes are glued onto the cardboard cylinders. The free edges of the glued strip are folded inward and glued. Roof blanks - pointed cones - are made from colored cardboard. Roofs are glued to the frame of houses.
In another version of the gnome house, you can replace the cardboard roofs with felt cones. Doors and windows are cut out so that they are wide open.
A fabric roof and open doors will give the house an original look.
Doll house
Making an exclusive two-story house for a doll is not at all difficult. This will require: a little patience and unbridled imagination. The materials and color scheme for finishing a homemade house are selected according to your own taste, which gives it individuality.
Before starting the craft, collect the necessary materials:
- 2 cardboard boxes, one of them larger,
- 2 sheets of cardboard,
- PVA glue,
- scotch,
- pencil,
- scissors and stationery knife
- colored self-adhesive paper,
- other materials for decoration: scraps of wallpaper and fabric, lace and ribbons.
The folding sides of the boxes are cut off. Place the large box with the open side facing you. Using a utility knife, cut windows and a door on the sides of the box. The first floor is ready!
In a smaller box, windows are also made. Glue it on top first in the same way - with the open side facing you. The roof is glued together from 2 sheets of cardboard of a suitable size.
The sheets are connected using tape and attached to the walls of the building. Then they move on to decorating the house.
Decorating a house is limited only by the imagination of the master. The walls are covered with colored paper, wallpaper scraps or fabric.
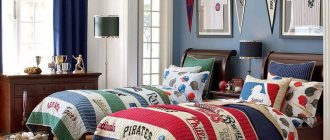
Bedroom: DIY decor elements
The bedroom is the main room in the apartment, because it is here that we relax and gain strength before the coming day. DIY decorative elements in the bedroom should be very cozy, appropriate and avoid clumsiness as much as possible.
- DIY bed headboard
Here you can show all your creativity and resourcefulness. The headboard of the bed can be decorated in the currently fashionable loft, eco and country styles.
Take a closer look, what if this is your option?
- Lamp or night light for the bedroom
A DIY bedroom lamp looks very nice, doesn't it?
It can be sculpted from empty cans, bottles, and even from ordinary driftwood coated with varnish. Nothing complicated!
- Mirror for the bedroom
A sacred place for any lady is a mirror in the bedroom. Here you can preen yourself and spend time allotted for yourself to your loved one. Let's make it cozy! Here are some ideas for you:
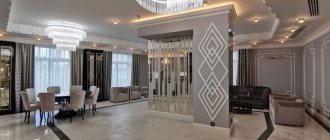
What rooms must be
Regardless of whether the house is narrow or wide, some rooms must be present in the space. If desired, each home owner can add his own ideas, adding additional rooms to the space. Any of the houses should have:
Plan of a one-story narrow cottage with a living room studio
- Living room.
- Bedroom.
- Kitchen.
- Bathroom.
- Children's room.
This is the minimum list of rooms that must be present in the building plan.
DIY living room decor
DIY living room decor ideas, one way or another, revolve around the main thing - family values. Let's figure out how to create such beauty.
- Photo frame on the wall
An interesting solution, especially since it is not at all expensive. Just hang photo frames in any order, and then just draw on the tree.
Such an exhibition will protect your home, fill it with light, comfort and warmth.
- Panel over the sofa
Here, be as creative as your heart desires. This design will look best at the head of the sofa in the living room. This technique perfectly focuses attention on the desired areas and complements the interior of your living room.
Another plus: the panels can be made from anything and adjusted to suit your chosen design style.
Textile paintings on the wall
You don't have to be an artist to hang beautiful paintings with intricate patterns on your wall.
It is enough to prepare the following set of materials:
- The base is made of chipboard panels.
- A piece of fabric with a selected design, pattern, or ornament.
- Glue.
- Threads, needle.
The textile flap should be large enough to wrap around the entire base panel. The fabric is carefully ironed, then follow the instructions:
- A piece of fabric is wrapped around the chipboard panel, right side out.
- If the fabric lays heavily on the base, you can periodically glue the panel with glue. But you shouldn’t apply a lot of glue, which will tighten the fabric and ruin the appearance.
- The fabric is pulled tight enough for the painting to look beautiful.
Hand stitches are applied along the back surface of the painting using thread and a needle.
Photos of decor ideas presented in practical design magazines will help you make a choice for the interior of each room in the house. The best ideas for decor in 2021 are presented on various web resources for creativity and design.
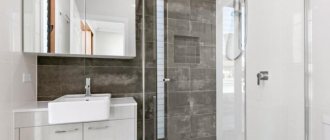
DIY bathroom decor
What can you do for your bathroom with your own hands? When decorating this room, shells and souvenirs brought from the seas will come to your aid. Let's get a look!
- Mirror frame
The emphasis in the bathroom can be made on the mirror. Decide on a style and concept and decorate, decorate, decorate!
Idea: To give an interesting effect (suitable for loft style), you can artificially age the mirror. To do this, you will need medium-hard sandpaper. Just rub the back of the mirror. Look how beautiful it turned out!
- DIY bathroom rug
A bath mat can be made from various materials. Tourniquet, old towels, yarn and even old socks!
Well, how do you like the idea, is it inspiring?
- Ergonomic decor
This life hack will help you make your bathroom not only beautiful, but also comfortable!
See how easy and beautiful it is to design towel drawers without spending a lot of money and effort.
Start from the style of the bathroom, think creatively, and sculpt beauty with your own hands!
Advantages of interior decor
Decorating various surfaces - wall panels, floors, furniture facades - has a number of advantages:
- The decor allows you to create a rich, stylish interior.
- Highlighting any area using decorative finishing.
- Changing the style of the room without renovation work.
- Maximum use of scrap materials that were intended for recycling.
In addition, creative work is the first stage in the development of abstract thinking in children. Working together on original crafts will bring both adults and children a lot of positive emotions.
Master classes on modern decor with video lessons and detailed descriptions will help you learn the basics.
DIY decor ideas for the kitchen
A kitchen in an apartment is, above all, convenience. Each of us needs comfort, especially in the kitchen. Is it possible to combine beauty and convenience? Of course you can! Let's watch!
- Clock in the kitchen
See what beautiful, stylized watches can be made from scrap materials. It turns out that leftover cereals and pasta can serve other than their intended purpose.
- Shelves for devices
Comfortable, beautiful and functional shelves can be created with your own hands very easily. Look how beautiful they look. And if you put all the bulk products in beautiful jars and decoupage bottles it will be absolutely wonderful!
- Cute vases
Do you see how easy it is to create beautiful hanging planters from scrap materials? All you need are old bottles, a tourniquet and a wooden structure.
Beauty, isn't it?
Phew! All the cards are revealed. We hope that dekorin.me’s advice will come to your aid more than once. DIY decorating ideas are a bottomless well of life hacks that you can draw inspiration from every day!
Remember that things created with your own hands have a special energy. Surround yourself with beauty, be inventive and creative! Only in this case will your home be filled with warmth, love and unique comfort!
Thoughtful wall decor not only fits into the design of the room, but also creates a cozy, homely atmosphere. Try to create your own original design that everyone will like. Everything will be discussed in more detail later in the article.
Contents of this article:
Original shelf for books
An interesting shelf for textbooks can be made from two wooden blocks. To work, you will need a minimum of construction skills from a master and a set of tools.
To create a shelf, you need to prepare two bars and then follow the instructions:
- Treat wood blanks with moisture-resistant solutions, antipyretic and antiseptic.
- Cover with stain and acrylic varnish.
- After drying, according to the drawing, cut a slot on one of the bars equal to the thickness of the second bar. The length of the horizontal cut should not reach the edge of the board.
- The book shelf folds in the shape of the letter X. The lower slats of the structure serve as support legs. Books, textbooks and other writing materials are located between the upper bars.
If desired, the original shelf can be painted with bright colors, or decorative films with ornaments can be used.
DIY work
The easiest way to decorate with your own hands is to use wallpaper. The monochromatic option looks banal and does not emphasize the originality of the design.
We emphasize originality with photo wallpapers
Therefore it is recommended to use:
- photo wallpaper;
- classics;
- euro standards;
- vinyl.
Photo wallpapers produced today differ from Soviet ones. Technologies make it possible to create images in 3D format, making them three-dimensional, attractive, and high-quality. The advantage of this method of decoration is the ability to create an individual design.
In 3D format in the bedroom
The classic is suitable not for creating an original effect, but as a basis for further decoration. To decorate a room with paintings, lamps, and other attributes, classic wallpaper will be a good basis. They are made in light colors; if there is a pattern, it is simple.
Craft house made from natural materials
Any natural materials are suitable for making crafts. Hot glue is best for joining parts together.
The base for the walls is made of thick cardboard. Cut out 4 squares and connect them with tape. Glue reed brushwood to each side. The resulting frame is attached to a sheet of cardboard with hot glue.
For the roof, cut out 2 triangles from cardboard with an allowance of 1 cm at the base of the triangles. They are used as pediments. Glued to the frame of the house.
A cardboard crossbar is glued to the top of the gables. Then slopes are attached to the roof - 2 rectangles of suitable size.
Different materials are used to decorate the roof. These can be dried reed inflorescences, moss or cones. The scales are separated from the cones. They are cut into a diamond shape and glued with hot glue to the roof slopes like tiles.
Finally, cut out the windows and door from cardboard and glue them to the appropriate place.
Decor with stickers
There are a variety of themes for interior stickers; they are most often used to decorate bedrooms, living rooms, and kitchens. They are made of vinyl material.
Simple stickers to update your kitchen
Those who have already tried to decorate a room with this option highlight its advantages:
- they are easy to apply to the surface, usually it takes no more than 15-20 minutes;
- long service life - stickers do not deteriorate due to changes in temperature and humidity;
- low price compared to other decor options;
- You can apply stickers following the manufacturer’s instructions, so you don’t have to pay extra for the work;
- vinyl can be easily removed from the surface.
Low-cost option for wall decor
Stickers look original in kitchen decor. Looks beautiful:
- fruits;
- vegetables;
- other food;
- images with water drops that look realistic.
With their help you can hide many flaws
Using stickers, you can refresh a monochromatic kitchen interior and hide minor imperfections.
House for storing sweets
An original idea would be to make a functional “house” craft from paper. First of all, select a house template on the appropriate website dedicated to the New Year. Print it out. Next, cut out the blank. You need to work extremely carefully so as not to spoil anything.
We recommend: Crafts from ribbons | 80 photos of the best crafts and decorations made from satin ribbons
Step two - bend the cut out template along the dotted lines. To make the operation easier, you can use a ruler.
Step three - connect all the sides and secure them with double-sided tape. The last step is decoration. Here you can use colored markers, pencils, paints, stickers.
It is advisable to involve the child in this stage. He will definitely like it. That's all. The product is ready. All that remains is to pour the candy inside and put it under the tree.
Wood decor
Wood in the interior has not gone out of fashion for many years. Some wood decor options are expensive, others are cheaper.
Natural wood finishing
The following options are in demand:
- Board . The main rule is that you need to choose the right type of boards. Smooth ones are suitable for minimalist designs. Rough ones that seem unsuitable at first glance can be cleaned, sanded, and laid out in an original way. They are suitable for rustic, Scandinavian styles.
- Oriented Strand Board (OSB) . It’s a cheap material that’s easy to work with; even an inexperienced builder can cut it. The decision to use OSB for decoration is fresh and appeared recently. Suitable for youth styles.
- Small boards . Many owners have saw cuts in their house left behind after previous work. They can decorate a room, it will look embossed, and the boards can be used as shelves.
- Veneered panels . An expensive option, suitable for Art Deco and American styles. They decorate halls and offices. Panels are made to order from individually selected materials.
Updating the interior of the living room
Beautiful birthday decor
A birthday is a great occasion to show your imagination and creativity to the maximum. After all, when decorating for a holiday, it is not necessary to follow the rules of matching the interior, since after the event the decorations are usually removed.
Balloons are perhaps the most popular birthday decoration option. Ordinary balls are no longer fashionable and relevant. Be original and fill them with helium.
For this you will need: floral foam in the shape of balls, a large needle, paint and a sponge for applying it. The length of the needle should be greater than the diameter of the largest foam floral ball.
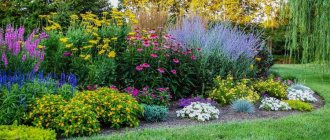
Flowers
Flowers look good on plain backgrounds, in rooms designed in different styles. Particularly suitable are Provence, minimalism, shabby chic, and other similar options. Usually only one wall is decorated in this way so that the room does not become too colorful.
Paper flowers are the perfect decor
You can make flowers yourself, which will save money. You can make many small buds or several large ones; flower arrangements of different sizes also look beautiful.
Paper fan - original and beautiful
A more complex option that looks expensive is to create a frame around or inside which flowers are placed. They are not simply hung in a chaotic manner over the entire surface area, but wrap around the edges of the frame or evenly fill it. A white panel decorated in this way looks original.
LiveInternetLiveInternet
Master class on making a house-terem for the little mouse Manyuni https://www.diary.ru/~scargeear/p183283597.htm?oam PVC was chosen as the base material. Reasons: lighter than plywood, stronger than cardboard, easy to cut and glue. I want to make a house with a blank facade and glazed windows; in this case, I’m not interested in doing the interior decoration. Therefore, there are holes in the back walls so that when transporting the house you can put stuff and dolls there, and the insides are not decorated in any way. The design consists of two separate parts, also for ease of transportation. In the future, we plan to select such materials so that the decor does not break or scratch during transportation and so that I do not have to transport the house like a “crystal vase.” I always think about convenience and I’m not ready to make some sacrifices on the altar of beauty. Front view. Back view. Before painting, tests were carried out on a piece of plastic; It turned out that even sanded PVC acrylic comes off if you scratch it. Therefore, I decided to cover the house with textured paper (toilet paper, as you understand, but you can also buy corrugated paper, the only difference is in the show-off). I tore it into small pieces and pasted it in random order so that the texture lay in different directions. Joiner's glue "Moment": ever since the guy introduced me to this glue, I look down on PVA a little. Carpentry is about the same thing, but it dries much faster. A closer look at the texture: Pasting the walls of the house took me three evenings. Painstaking and dreary work. All ends are also sealed, with a bend inward. The roof was covered with simple office paper and strips, which saved me a lot of time. There will be tiles on top, so this paper will not be visible. Now let's paint. Paints - Maimeri Acrilico in tubes, they have excellent coverage, good color mixing, a slightly pasty consistency, and most importantly - the price "src="//static.diary.ru/picture/1135.gif" /> I liked working with them, and I bought a basic set of colors. The walls of the house are painted with white acrylic, the roof is black. I already wrote that I’ve been digging hard on diorama websites, and they provide a black base for all sorts of textures, so I decided not to reinvent the wheel and do as told. The white color, even in combination with the texture, turned out to be too flat, so I decided to add shades. I did it completely at random))) The first shade was brick-pink, the acrylic was diluted to the consistency of thick sour cream, I applied a couple of strokes to the surface with a brush and quickly rubbed it with a cotton pad (without wasting a second, because acrylic dries instantly!) Diorama makers rub it with oil, It takes longer to dry, but I don’t see any point in buying more oil. As a result, we have painted protruding areas of the texture. The second shade was matched to the first, diluted the greenish-brown color and washed out the surface. I wiped off the excess with a cotton pad. The areas around the frames, under the roof and near the ground were more dirty. According to the Quenta, my house is located in the forest, near a swamp, so it is assumed that it has turned green from moisture, overgrown with moss and all that. Both colors are clearly visible here. Now we glue the wooden frames. I got the veneer through connections, but in general they buy it in stores for modellers. I bought the 5x5 linden rail there. The glue is the same carpentry “Moment”, it glues perfectly. The guy suggested cutting the slats with a laser, which would have saved me a lot of effort, but in this case, the clumsier the better. Here we will have a balcony. We are currently gluing the frame and wooden floor. PART 2
The balcony is glued.
It consists of square strips (linden) and toothpicks (bamboo). Holes were drilled in the planks for toothpick pins, and the whole thing was assembled with wood glue. The balcony floor is covered with veneer. All wooden parts are covered with cherry stain. Alcohol stain, the darkest one I had (I specifically asked for one that wasn’t the smelliest, they come in different bases). I really enjoyed working with it: it perfectly impregnates the material and flows into the cracks. Let's start with the tiles. Pieces of cardboard 1x1.5 cm, rounded on one side. I spent a lot of time cutting this stuff out by hand. I thought about how much time it would take to paint it all with acrylic, especially the ends of each tile. I was horrified. I tried painting cardboard with stain and suddenly I got an excellent imitation of pine bark. And random spots of glue resemble traces of resin. I glue the tiles in rows, and impregnate each next one with stain. Everything is glued. I also spent a lot of time - but not as much as I could have)) The pipe is made of terracotta Mungyo Sculpt Dry, the grooves are applied wet. Somewhere it’s crooked, somewhere it’s a little cracked - it’s all to our advantage. The tiles are also glued unevenly. To reveal all these nuances more clearly, the roof and chimney will still need to be additionally painted. The doors are also made of veneer, glued to a cardboard base (painted black, like the roof). I additionally applied the relief with a needle. Blanks for stones are made from wads of toilet paper. Although I have real stones, it will be lighter in weight. PART 3
Making shutters.
I cut pieces of cardboard, paint the surface under the shutter black, and paint the surface against the wall white. I cut veneer boards and apply the relief with a needle. The shutters are painted with stain and then glued. I'm building frames. Pieces of transparent acrylic are glued with a strip of paper along the end so that everything else sticks to them more reliably. Then I cut the veneer again and glue it. The slats on the small windows are made of matches; for the balcony window I had to take a thin round stick (torn out of a bamboo napkin) and cut off half to get a flat side. It took me a long time to work on shutters and windows; I only spent a day making the frames and slats. The windows are glued to the house from the inside. Balcony. I paint the tiles. The principle is this: I mixed a terracotta color and painted each tile separately in a chaotic order - about a quarter of the total quantity. I added more white to create a lighter tone - again I painted a quarter of all the tiles. I mixed a darker color and painted the rest. Due to the fact that some tiles are painted more densely, others thinner, and four colors, the result is such an artistic mess. I finished painting some of the tiles with approximately the same mixture, but less brown, and more white and black - the result was a grayer shade. I also painted the pipe with thinly diluted black - it immediately took on a shabby look. The chimney hole is painted black. I painted the ground thicker, with several shades of green. I also painted the stones. Dark tone is the base, lighter ones on top: gray, brown, green, light gray lichen spots. Toilet pellets are now unrecognizable)) So, we have beautiful new tiles. The house is located in a damp area, so I will do lichen not only on the stones, but also on the roof. I take an ordinary kitchen sponge, spread some light gray paint with a green tint, and randomly poke the sponge into the tiles. It turns out well. Please note that there is no pipe. I sat it on two toothpick pegs and two holes in the roof. Roman advised to leave it removable - for ease of transportation)) The tiles are still too new, and it wouldn’t hurt to tone down the lichen stains. I mix the gray-brown-green color and poke it with a washcloth, even thicker than before. The roof is the bomb! Compare with reference. I painted the pipe with the same colors as the tiles. Now the shutters and frames look too new compared to the roof. I'll spoil them too. Wood turns gray from the sun and water, so I spread gray paint and stain all the wooden elements on the protruding parts, leaving the recesses untouched. The same goes for the balcony and the door. Here you can see copper slats, hinges and handle. Everything was done using standard wirework techniques, the slats are heavily flattened wire. The copper needs to be aged, I will do this later, so the elements are hanging on their word of honor for now. PART 4
I think moss deserves its own post.
Diorama makers often find materials for their compositions in the most unexpected places. This is what happened to me too. This idea was prompted by one video tutorial in which trees were made with a crown of wood shavings (this happens if you scrape the floors, they are very small). Here's the kitchen scourer I used to apply texture to the roof. The green abrasive part consists of fibers that perfectly imitated moss (as it turned out). I hoped that something would work out for me, but I didn’t expect such a good result. It’s still better to take a green washcloth, because acrylic does not paint over absolutely everything. I tore off this part and cut it into small pieces with scissors. I mix the paint of the desired color in a jar - it’s still the same Maimeri acrylic. I added about a teaspoon of Moment wood glue there. Pour out all the pieces and mix well. The time required to work with such a batch until it begins to set is exactly up to half an hour. There is no retarder in acrylic, its role is played by glue. I had two such batches. And I mix it, and separate the fibers, and stick it - all with these two toothpicks, it’s very convenient for me. Result: Roof. It’s even better live, I’m still a photographer. The moss holds up very well thanks to a large amount of high-quality glue with a plasticizer. You can grab with your hands, etc. PART 5
The flower boxes are glued together from PVC, like the frame of the house, and covered with toilet paper.
The top is painted with acrylic: a solid layer of brown paint, and then black paint with a dry brush. The result is such a multi-colored texture, and thanks to the relief, the toilet paper actually looks like wood)) Copper holders are inserted into holes in the wall. They hold tightly and will not fall out during exposure, but I will remove them for transportation. I repainted the pipe to match the color of stone, not clay. Pieces of Icelandic moss, pine needles, etc. are glued to the roof. Lantern: glass - thin acrylic film (it was a badge from an exhibition), vertical bars - ordinary office paper, bottom and lid - PVC. Everything is assembled with superglue, because otherwise the acrylic will come off. Inside is a piece of toothpick instead of a candle. Everything is painted with a variety of acrylics: the base is dark brown, accents are gold and black. The flashlight is also held in the wall by a hole. At first I wanted to hang it on the right side of the house above the window, but since that facade will practically not be visible at the exhibition, I changed my mind. I’m still in no hurry to patina the copper elements: what if I want to do something else? I'm starting to get to the swamp. Roman cut me a piece of acrylic 3 mm thick (what it was) using a laser. You could cut it by hand, but this way there is less risk of ruining a good piece of acrylic. Cardboard is placed under the acrylic. I only had green, so I had to paint it black. The edges of the swamp are covered with toilet paper to keep the whole structure together. Next is painting the edges: a dark brown-green tone as the base, lighter ones are applied with a washcloth. The surface of the swamp was also tamped with a washcloth to imitate duckweed. My first experience of sculpting flowers from Claycraft Deco)) I bought it from Handmade Studio. The scale for such work is a little abnormal, the diameter of the water lilies is 1 cm, which is approximately 1/6 format. Blue flowers are 4 mm in diameter. Even my fine motor skills are not always enough for the desired result, but I try. That yellow one over there is a centerpiece for the next flowers, I haven’t figured out which ones yet. Here is a video tutorial on modeling in Russian. There are a lot of courses on Deco, because... both the material and the technology are patented, but we are not looking for hard ways)) PART 6
I stuck water lily leaves.
They turned out right the second time: I wanted to make it so that you could simply lay groups of leaves on the swamp, and not glue them tightly, this is necessary for ease of transportation. This means the bottom side should be flat. The first version of the leaves was quite thick, but it was warped (I didn’t throw away the leaves - maybe they’ll come in handy, they’re lying on the sides of the swamp). I googled the properties of Deco: they still write that it warps when drying(((I had to come up with a workaround: what if the leaves were made thinner and glued to a piece of cardboard? No sooner said than done. This is the limit of mixing paint, at which the clay does not fall apart when sculpting Here you can see the different stages of the process: on the left is a cardboard template for leaves, in the center is a glued island from the back, on the top right is another from the front side, on the bottom right is a finished island of leaves, already glued onto the cardboard. As you can see, it is quite flat. I painted the leaves a dull color, because the water lilies are very monochromatic (and why did I sculpt different colors, I don’t know?), glued the water lilies in. Along the edges of the swamp, I added moss, tinted it with different colors. And these are strawberries in boxes. She took over I have a lot of time, because flowers are sculpted in stages. I successfully adapted the eye of a needle to form the middle of the petals, and in general I learned a lot of new things)) The process looks like this: 1. I sculpt flowers. I mix green paint into clay, sculpt leaves. The parts are drying. 2. I cut the wires, with one I bend a loop at the end - this is for buds and berries, with the other - a circle bent perpendicularly, for flowers, and I leave some of the wires like this - this is for leaves. 3. I glue the flowers and leaves onto the wires, and stick the buds raw onto the wires with a loop. I mix red paint. I shape the berries, poke them with the eye of a needle to add texture, and place them on wires. The glue is drying. I'm waiting for it to dry completely. Freshly applied parts also dry. 4. I tear off the buds and berries from the wires, dip the wires in glue, and stick them back in. The glue is drying. 5. I knead the green clay again. On flowers, berries and buds I form blanks for sepals. 6. While the sepals are drying, I cut out the cloves on the already dried leaves with a template knife. I collect leaf blanks in threes and twist the wires. 7. Carefully tear off the sepals, cut out the cloves, and glue them back. 8. I paint the centers of the leaves green, trying to create a gradient towards the edges. I paint all the stems and legs with acrylic; it fits perfectly on the wire and does not crack when bent. I paint the noses of the berries light green and the centers of the flowers yellow. In short, I’ve been fiddling with all this for more than one day))) It’s time to plant our strawberries! I glued the leaves to the bottom of the boxes. Instead of soil, I stuffed the same moss with glue into the boxes and stuck flowers and berries into them. I arranged everything beautifully and am waiting for the glue to dry. Ready! PART 7
I stuck on various leaves and flowers, painted the wire stems with acrylic, and glued the leaves.
The stems for the reeds are the same wire, but with the insulation left (green), obtained from a twisted pair. The top is painted with acrylic, then a reed flower stalk is attached. Reed leaves were made like this: a sausage is rolled on a flat surface, then flattened on the handle of a brush - this is how we get a semicircular shape, it bends in the right way and is laid out to dry. The bottom of the sheet becomes more prominent, the top - flatter. You can see blanks of leaves for ivy on the left, on tubes of paint)) After drying, they will not be flat, but semicircular. The blank will produce two leaves. The ivy stem was made from very thin wire, and the leaves, after the blanks had dried, were cut with a breadboard tool. There are three piles of different colors: the lightest leaves will be at the ends of the branches, the darker ones will be at the base. Flowers of different varieties and types were planted under the house)) For the leaves, I also mixed clay of different colors, some were also painted. I made curtains for the windows and balcony door, since the interior was not done - in general, so that it would not be too noticeable)) Ivy on the house. The technology is still the same: we paint the branches with acrylic, let it dry, and glue each leaf onto PVA. It is attached to the wall with small wire staples, under which holes are pierced in the wall with a needle. I brushed a little over the leaves to give it some heterogeneity. A little more general plan. I also decided to make the reeds into separate elements for ease of transportation. The bases are cut out of PVC, covered with toilet paper, painted, then holes are filled with an awl, wire stems are glued into them. I also glued individual wire pins to the individual leaves. Inserts with minimal gaps. The bottom of the “islands” with reeds is decorated with loofah grass, just like the shores of the lake. That's almost all)) We need to finish literally some little things, add household items to the locations to give the house a residential feel. PART 8
Stools. Made of veneer and square slats (the same ones from which the balcony railing in 2 parts is made), stained on top, then sanded. I tried to paint them with acrylic, but it didn't work out. Two gray byaks are preparations for pumpkins: toilet paper, thread, glue. Made to save material, although they could have been sculpted entirely from Deco. The pumpkins are ready. I tinted the depressions a little with brown paint for a more lively look. The bench was made of the same materials as the balcony: there were still a lot of these square slats left, it was a pity)) Thin crossbars - from a loose bamboo rug. Mushrooms! I did it several evenings: I stuck a bunch together, beat around the bush - it didn’t seem like enough, I stuck it again, and so on several times))) The container for mushrooms was also made of a bamboo mat: there were two types of slats. Paper hoops, assembled with glue. The bottom is triple, slats-cardboard-slats, sitting in a barrel with glue. Deco bowl. They also have mushrooms on the balcony under the roof. I laid out a linen rug, made another jug from Deco, and bought a mug at the Montpassier bead store. Yes, I know that the exhibition is in the spring, and we have both mushrooms and pumpkins here - but I strongly associate mice with homeliness and thriftiness, so the theme of the harvest was revealed. The composition will also include a wheelbarrow and a bag of sugar from that same photo shoot - why waste it)) Well, that’s all, the work is finished. See photos of Manyuni in the surroundings
putty
As a result of using putty you can get:
- wall drawing embossed in the material;
- relief surface, geometric patterns, waves;
- grainy decor.
With the help of Venetian plaster you can achieve such relief
To begin, we prepare the composition by preparing the necessary materials in advance:
- putty;
- grout for seams;
- acrylic paints;
- white soil;
- varnish
We create any drawings and stains
The work begins with standard surface preparation - removing debris, applying a primer, starting. Then the putty is applied using the chosen technique. To obtain a relief, apply the prepared mixture to the wall so that the layer thickness is 2-4 cm, and squeeze out the pattern with a spatula.
Wall inscriptions embossed in the material
Types of wall materials according to method of application
Interior finishing is classified according to a large number of characteristics, ranging from the raw material base and method of application (cladding, laying, installation, etc.) to the specifics and mode of operation. Overall, all types of interior wall decoration can be divided into several categories according to application technology.
- The wet method is everything that involves wet processes, and this is not only painting and plastering, but also cladding using adhesives, and wallpaper, which, too, have not yet been learned to be fixed with the power of thought.
- Dry method - covering with various natural, polymer and composite panels and slabs.
- Combined interior - materials used in the wet method, wallpaper with paint, tiles with paint or decorative plaster are often combined.
The method of application must be taken into account when choosing one or another decorative wall decoration, since it directly affects both the speed of work and the result. It’s not the gods who fire the pots, but it’s better not to mess with some materials without at least minimal skills. It may turn out no worse than the pros, but it will take much more time, and when we are talking about expensive materials, even more money, taking into account the need for “training on cats.” If you plan to attract performers, the price of the issue is also important - the more expensive the finishing and the more complex the technology, the more the master will ask.
You can create the desired style using different materials and methods; today, several finishing options are most in demand.
Kitchen options
If you want to get creative with your kitchen walls, consider these options.
Dishes
Often one part of the kitchen can be decorated with beautiful saucers and plates. They can be vintage, collectible, plain white, or decorated with paint. The main thing is to securely fasten them.
Decorative plates on the kitchen wall
Boards
Ordinary cutting boards look ordinary on the table, but if you hang them, it will be original. It is better to use boards decorated with any painting, they need to be combined with each other. You can supplement them with unusual baking dishes and trays.
"Message Board"
To update the kitchen interior daily, hang a slate or chalk board on one of the walls. The housewife can use such a device for practical purposes: write a menu, a list of products to buy, and other notes. For children, the board will become a favorite place in the house; they will definitely find a use for it.
Creating a New Year's fairy tale at home
All you need for New Year's decor is a minimum of New Year's attributes in the form of a Christmas tree, pine branches, pine cones, garlands, themed toys and balls. And of course, mood, inspiration and a little creative originality to create a unique festive atmosphere.
For the living room
Sufficient time is usually devoted to decorating this room, since it is intended for receiving guests. Each living room decor option has its own advantages:
- Wallpaper . Can be matched to any interior. If your living room requires an accent surface to distract attention from any imperfections, you can decorate it with photo wallpaper. A large selection of designs, colors, materials make wallpaper a good option.
Good option with photo wallpaper
- Plaster . Its main purpose is to smooth out defects. Irregularities, uneven heights, and other shortcomings can only be eliminated by rebuilding the apartment. Therefore, we have to visually hide them.
- Tree . Can be used in different types: panels, laminate, full cladding with boards, clapboards. The main advantage of wood is that this material creates a cozy, homely atmosphere in the living room.
- Decorative brick . Suitable for country, classic, Scandinavian styles. Often the wall to which the fireplace is adjacent is made of brick.
Brickwork for TV
- Soft panels . They can be made from various materials: leather, eco-leather, fabric. Inside there is padding polyester and foam rubber. Soft panels look great above the sofa, near the TV, and are suitable for many styles.
Plasticine house
Crafts made from this material are an affordable option for young children. The walls for a plasticine house can be of two types: “solid” or “log”.
For the first option, you need to cut 4 squares from plasticine cakes with a plastic knife. For a “log” cabin, you need to roll out a lot of sausages and lay them in rows.
The roof is made from 2 larger squares, which are connected at an angle to each other and attached to the walls of the house. Then they start decorating the craft. The pipe, windows and door are made of different colors.
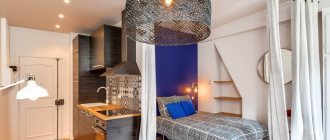
For the bedroom
In addition to paints, wallpaper, wood, and other classic materials, one wall in the bedroom can be done in a special way. The original ideas are:
- Creating a niche . The niche is usually located at the head of the bed, creating a romantic, mysterious atmosphere. If it is deep, it can include all or part of the entire bed. A small niche performs a decorative function; it is decorated with lamps, vinyl stickers, and mirrors.
Decorating a niche in the bedroom
- Soft wall . This decor would be suitable for a bed without a backrest. The surface is upholstered with fabric, leather, fillers such as padding polyester and foam rubber provide not only comfort, but also sound insulation. The color of a soft wall can stand out from the general background of the bedroom, be bright or, conversely, match the tone.
- Mirror . This method of decoration visually enlarges and brightens the bedroom. This material requires special care, daily wiping, but it looks luxurious and rich. Mirror mosaic looks stylish - small elements are connected to each other by frames and crossbars.
A soft wall is relevant when there is no headboard in the bed
Wood paneling
Lovers of “wooden” interiors prefer “warm” natural wood to all other materials; fortunately, a characteristic look can be given to any walls. In most cases, lining is used for interior decoration - planed slats made of coniferous or hardwood with a tongue-and-groove system and several types of profiles. The slats are mounted on a wooden frame, both vertically and horizontally. Depending on the type of profile, type of chamfers and width of the planks, the following types of lining are distinguished:
- eurolining;
- softline;
- calm;
- American;
- imitation timber;
- imitation logs (block house).
Ceilings and walls are sheathed with lining, either entirely or in combinations, then covered with opaque paint or emphasizing the natural color and pattern. How the lining will tolerate temperature and humidity conditions, dirt and fading depends precisely on the type of protective and decorative coating.
For the hallway
The hallway is the most frequently visited room in any apartment, welcoming the owners and their guests. It is a universal room; almost any material is suitable for it, except ceramic tiles.
This room is usually the smallest in the house, so there is no need to clutter it. When decorating, you also need to consider techniques that use minimalism. It is enough to highlight only one wall, decorating it in an unusual way.
Minimalism in the hallway
Decorating a hallway with stones is considered a sign of luxury, given that it is usually small and such decoration is inexpensive. The easiest way is to decorate it with wallpaper; it is better if it is plain or with a discreet pattern. Large images and 3D drawings look striking in a small space.
Faceted mirror increases space
Interesting and useful facts
Government structures responsible for the standards and conditions in residential buildings have established some parameters for each of the premises so that each resident feels comfortable. These standards are:
Interior and decor of a narrow studio living room with dining room and kitchen
- The living room, if two, three or more people live in the house, must be at least 16 square meters. m;
- Other living spaces, including the bedroom and kitchen, cannot be less than 8 square meters.
m in total; Decorating style for an attic bedroom in a narrow building - Corridors should not be less than 85 cm in width. If there are disabled people in the apartment, then this parameter changes to a minimum of a meter and fifteen centimeters;
- According to standards, the hallway must be at least one meter and forty centimeters wide;
Light decor of walls trimmed with artificial brick
- The toilet is at least 80 cm wide;
- According to standards, the length of rooms can be no more than twice the width. This very moment is very important for a narrow area at the stage of constructing a cottage project.
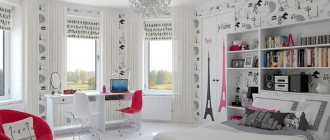
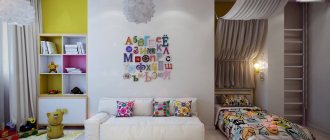
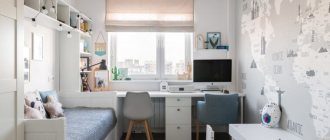
For children's
Decorating a children's room creates the child's mood, so choosing a decor option is especially important. The finishing must be environmentally friendly and safe. Wood and other atypical materials with a specific odor will be inappropriate.
Let's add realism to the wall
Add some fun to your child's room with vinyl decals. They can be not only interesting, but also necessary. Parents often buy alphabet themes, a scale for measuring height, and educational pictures.
Painting in a nursery is an original way to decorate a room, especially since you can depict any subject. However, as the child grows, his preferences change, so you need to be ready to remove the drawing at the first request. It is better to decorate one of the walls with painting.
Flight of fancy in the children's room
VIDEO: Beautiful wall design
Wall decor
Beautiful design for your interior
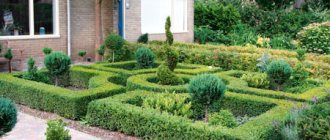
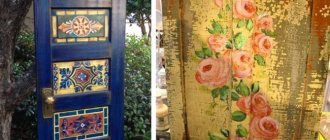
Decoration of a private home
A private home offers even more opportunities for implementing interesting decorating ideas. Indeed, on the large area of the luxury cottage there is room for the creative imagination to run wild. An additional field for realizing your fantasy is the exterior of the house: courtyard, roof, fence, front door, porch, etc.
A variety of decoration options can be created using facade and paving slabs. Concrete decorations are also very popular. Their partial gold coloring is often used by Scandinavian designers.