by Alexey | Decor Tips Workshop Interior | Monday, July 15, 2019
| Follow Make-Self.net on Facebook and be the first to read our articles. |
Follow these simple steps to ensure you have enough material for your repair.
It's worth first considering the number of tiles you'll need before rushing to the store. Whether you are installing tiles on a hallway floor, kitchen or bathroom walls, calculating the tiles is an important step.
This calculation will help you ensure adequate quantities of material, save money and avoid repeated trips to the store. Take a look at the steps to help you calculate the exact number of tiles for your project!
Calculation methods
Using a calculator will make the calculations much faster, but the results may be somewhat inaccurate. Therefore, when buying expensive luxury tiles, it is better to independently check the result obtained on the calculator.
Before starting the calculation, you need to determine:
- layout type;
- tile colors and their quantity;
- the need to use decorative elements;
- the presence of a pattern to which the material will need to be adjusted;
- tile size.
Advantages of project design
By ordering a free design project in the Art Real salon, you get 2 advantages:
- a developed design solution that takes into account the characteristics of your premises
- an exact indication of all tile articles and the required quantity.
With a free design project you save your time and money. In addition, you will be able to find out how the tiles will look in the interior even before they are laid. You can order a free design project by phone.
Tags: Fap , Peronda , Tiles , Ceramic tiles , For walls , For floors , Porcelain tiles , Universal , Decor , Panels , Peronda serenity , Fap Pop Up , Basic tiles
Layout type
There are three layout options:
- Classical.
The room is divided horizontally into two parts. They are separated by a border and differ in color. The lower part is usually made dark, and the upper part lighter.
Classic layout Source profiplitka.ru
- Plain.
Tiles of the same color are used. As a rule, the presence of decor is assumed.
Plain layout Source eto-vannaya.club
- Combined.
For the layout, tiles of several colors are selected, most often three.
Combined layout Source otdelkino.ru
Correct calculation of tiles for the bathroom
The calculation of tiles in the bathroom is based on the general principle of calculating tiles for any room. When laying tiles in the bathroom, you need to consider the following features.
It is important to know the specifics of calculating bathroom tiles.
The principle that you won’t be able to see behind a mirror or cabinet doesn’t apply here. You need to take into account all areas (that can be reached), even those occupied by the sink, shelves, mirror, etc., because no one is safe from rearrangement, and it will be very difficult to look for the same tile later and do it all over again. So, it’s better to do it once, but with high quality.
If the bathtub is not fixed, then it is better to take into account the area behind it.
In addition to tiles, you also need to purchase some auxiliary materials to renovate your bathroom.
What else to buy:
- Notched spatula (it is better to take a spatula with pointed ends, which reduces glue consumption);
- Tile adhesive (the required amount depends on the unevenness of the surface, because all the recesses are sealed with it, and how much glue to buy can be calculated in the store by looking at the consumption indicated on the pack);
- Grout (10-15% must be added to the calculated data on the pack);
- You will also need work clothes, because... glue can damage it irrevocably;
- Measuring tape, calculator, pen, notebook, patience, attentiveness, enthusiasm and confidence that everything will work out.
In the bathroom, tiles are laid (in most cases) not only on the walls, but also on the floor, which must also be taken into account when making calculations.
Method of calculation using a calculator
To calculate tiles for a room using a calculator, you must enter the following data:
- room parameters;
- the area of the door, which should be subtracted from the total area;
- dimensions of the bathtub, the need to line the ends and floor under the bathtub;
- dimensions of one element;
- the required reserve is best if it is 5-10 percent.
See also: Catalog of companies that specialize in finishing materials and related work
Calculation of the amount of tiles for walls and floors
How to calculate the number of tiles? There are no universal calculation formulas. Much depends on how leveled the surface is on which you plan to lay the tiles. Its size and how it will be laid also play a role. The calculation can be analyzed using the bathroom as an example.
There are the necessary techniques to determine exactly how many square meters or pieces of tiles will be required for installation. To determine how much it is needed for installation, you need to determine the area of your room. To do this, sum up the length of all the walls and multiply the resulting size by the height of your room. For example, if a room measures 3x4 m with a wall height of 2.5 m, then the area is obtained based on the following mathematical operations: 3+3+4+4=14 m.
We multiply the resulting perimeter by the height of the room: 14x2.5 = 35 sq.m. But these calculations are not final; you need to calculate how much doors and windows occupy in the room, and subtract this size from the total area. The final size is about 33 sq.m.
After we have calculated the surface area on which the installation will be carried out, we need to determine the area of the ceramic product. For example, the size of the element will be 0.2x0.3 m. The area in this case will be 0.06 sq.m. After calculation, it is very simple to find out how many pieces of ceramic product you will need: the surface size is divided by the area of the tile: 33:0.06=550 pieces. These are whole elements, without trimming.
Calculations for the floor are made in the same way. Determine the total floor area. Then we divide it by the area of the tile. Let's look at this process with an example. Floor size 3x3.5 m. Floor tiles used size 0.3x0.3 m. Surface area: 3x3.5=10.5 sq.m. Tiles: 0.3x0.3=0.09 sq.m. After this, you need to divide the floor size by the size of the tiles: 10.5:0.09=116.7.
We round this quantity up and get 117 pcs. The required margin is 10%, in our case it will be 117x10%, which is approximately 12 pcs. The result will be: 117+12=129 pcs. necessary for laying on the floor. The tiles on the floor are laid in such a way that the seams between the rows run parallel to the walls in order to smooth out and hide unevenness.
Calculating tiles is an important undertaking! Only by assessing the amount of materials needed in advance will you be able to avoid repeated visits to the store or overpaying for excess ceramic products. Our article will tell you how to correctly perform the calculations.
Ceramic tiles (tiles) are rectangular plates of ceramics that vary in size, thickness, type of coating and processing. They are used to cover floors, walls and even ceilings.
See articles about various and.
Calculating tiles without a calculator
The amount of ceramics must be calculated manually in the following order:
- Measure the parameters of the walls. If you are going to cover the bathroom screen, you need to find out its dimensions.
- Calculate the area of laying ceramics.
- Subtract from it the dimensions of the door, window, bathtub.
- Calculate the area of one tile.
- Divide the coverage area by the area of one element.
- Take into account the presence of borders and decor. Subtract them.
- If tiles of different colors are used for cladding, it is better to calculate the required material according to the sketch.
Add a margin of 5 - 10 percent. It will be needed if any part of the tile turns out to be defective or damaged during the installation process.
The tiles under the bathroom are not visible Source livemaster.ru
Advice! The part of the floor located under the bathroom can be ignored when calculating the required amount of material. The lack of coating will not be noticeable, but you can save money when buying ceramics.
Features of calculating the percentage of waste
On the Internet there are a lot of calculators for calculating the required amount of material. But you can only see the program shell and the final result from the entered data. How is the tile calculation done and is it correct?
The defect can manifest itself only after installation after a not so long time
The first question that arises is what percentage is taken for defects and other unforeseen cases during repairs? There is a value of 5%, which is as close as possible to reality. That's why:
- Suitable for tiles that do not have manufacturing defects, that is, all the material purchased is suitable for work. To do this, you should unpack each pack and look for defects (chips, cracks). There can also often be differences in shade that are very noticeable.
Attention! Different batches of material may have differences in size and shade, so it is worth buying products in sufficient quantities at one time.
- The dimensions should be no more than 20, 30 cm. If the module is large, then its waste area will be correspondingly larger.
- Drawing. For a simple design, it doesn't matter how you arrange the tiles. If, for example, a pattern is formed from 4 tiles, then the percentage of waste will increase several times.
But there are other points that may have been missed: often the area of the room is calculated inaccurately. This may arise due to rough calculations or due to the fact that the room itself may have an elongated, non-rectangular shape.
Therefore, can a waste percentage of 5% be considered accurate? Probably not. You need to take at least 7%, and even 10%. In this case, at least a square meter is guaranteed to remain, which can be saved for cosmetic repairs in the future.
Some people, to reduce waste, start laying tiles, but this method is not entirely reliable. Often defects begin to be observed during finishing cladding.
If a panel is laid on the floor using a contour of thinner tiles, then this will need to be taken into account. We can conclude that it is better to buy a little more once than in insufficient quantities. Finding the same tile later will be problematic.
By room area
This method seems to be the simplest because it is the most understandable. It is most suitable for tiling with single-color tiles of the same size.
Important! If the walls are uneven, tiles should not be laid along them. The floor covering is carried out along a specially laid horizontal line. Then the main part of the ceramics is laid, and only after that the remaining areas and near the walls are filled with small pieces of tiles.
How to calculate the number of tiles per floor based on the area of the room:
- You need to calculate the area of the room: multiply the length by the width. Measurements are taken with a long tape along the walls.
- Add approximately 5-10 percent to the area of the room so that there is a supply of tiles in case of defects or cracks.
- Divide the resulting value by the area of one tile.
- This will give you the number of elements needed to renovate the room.
Important! When receiving a fractional value, it must be rounded up. Otherwise, there may simply not be enough tiles.
Direct method of laying tiles on the floor Source stroimmaster.ru
We count the glue consumption
In addition to the number of tiles, before starting repair work, you should also calculate the amount of glue required. The indicator will be significantly affected by the quality of the subfloor, the installation method, as well as the quality of the tile itself. And, of course, the experience of the master. For beginners, the consumption of the adhesive component is usually higher than for experienced specialists.
The consumption of tile adhesive can also be calculated
Table. What affects glue consumption and why is it important to consider these factors?
| Factor | Explanations |
| Tile porosity | The glue will not only be on the surface of the ceramic product, but will also partially penetrate the structure. Also, such tiles usually absorb moisture from the adhesive more strongly. |
| Uneven subfloor | Cracks, chips, and unevenness can significantly increase consumption, since all identified voids will be filled with glue, and in places with unevenness, a lot of glue will have to be applied. If the difference in floor heights is no more than 3 mm, then you can still use a small amount of glue. But the more curved the base, the more glue will be spent. Otherwise, it will not be possible to make an even floor covering. |
| Uneven tile surface | The voids present on the back side of the ceramic product will also be filled with glue at the time of its application. |
| Dimensions of floor elements | The larger the tile, the more glue it needs. For example, when laying ceramics measuring 10x10, the thickness of the adhesive layer should be about 2 mm. With tile dimensions of 20x30 cm, this layer will reach 3 mm. If the ceramics are even larger, the glue is applied in a layer of up to 5 mm, but not less than 4 mm. |
Ceramic tile sizes
The amount of glue per 1 m2 is calculated as follows: the thickness of the tile is measured and divided by 2, the average value of the consumption of the adhesive composition is taken. The values are multiplied, and the final figure will be equal to the glue consumption. But it is quite approximate, and it is better to buy material with a small margin.
The glue, which is made on the basis of cement, is calculated as follows: take the weight of the bag (the best option is to purchase 1.3 kg bags) and multiply it by the recommended thickness of the glue. The result is a number approximately equal to the glue consumption. Sometimes you can determine the cost of glue using a calculator.
Tile adhesive calculation
Calculator for calculating the amount of adhesive for laying tiles
Go to calculations
On a note! Usually the average glue consumption is indicated on the packaging. This figure is correct if the thickness of the adhesive layer is 3 mm.
After the tiles have been laid, it is necessary to form the seams between the floor elements. To do this, purchase a special grout for joints. It is not difficult to calculate the required amount of this material - for this, the perimeter of one ceramic element is calculated and divided by 2. Then the resulting figure is multiplied by the area of one tile. The final value should be multiplied by the thickness of the ceramic element, and then the new figure is multiplied by the width of the seam that remains between adjacent tiles. The next resulting value is multiplied by the material shrinkage coefficient equal to 1.5. The result of all these calculations will be the required mass of grout, which can be used to process up to 1 square meter. tiled surface area
By number of rows
There is another method for calculating the required material for laying ceramics on the floor. It is based on determining the number of rows of tiles. To do this you need:
- Measure the parameters of the room.
- Find out the dimensions of one tile.
- Divide the length of the room by the length of one element. The resulting number is the number of rows.
- Divide the width of the room by the width of one tile.
- If necessary, round values up.
- Add about 10% to them for reserve.
Software option
If calculating tiles seems too complicated to you, you can simplify the task. There are quite a few services on the Internet that allow you to determine the amount of building materials online. For those who do not have constant access to the Internet, but want to entrust the numbers to professionals, we can recommend other options.
There are a number of software products that allow you not only to calculate the amount of building materials required for repairs, but also to see how well the selected elements fit together in the future interior.
This is VisiCon - a program produced by GrandSoft LLC and presented in two versions: for home and for commercial use. The demo version of the program can be downloaded from the official website. However, it should be taken into account that tile calculation is only available in the commercial version, which means it will become available only after registering the program.
The second option is the “Tile” program. This is the brainchild of Studio Compass LLC. You can download the free version of the program on SoftPortal.com»>website.
You can get all the necessary information on laying ceramic tiles.
Piece method
This method is usually used if expensive tiles are purchased for installation or a pattern is created. This is due to the fact that when counting material individually, the error is minimal.
The process of laying floor tiles Source goodwood.spb.ru
Important! For laying tiles diagonally, this method of calculating tiles is not suitable.
The process is painstaking, but at the same time simple.
How to count tiles this way:
- We need to find out the dimensions of the room.
- Measure the parameters of one installation element.
- Count the number of rows and elements in each row.
- Multiply the resulting numbers. The value will be the number of elements needed to cover.
- Then draw a diagram of the floor covering and determine how many tiles of a certain color will be needed.
- Subtract the number of elements of a non-primary color from the total number.
- You will get several meanings. According to them, you will need to buy a certain number for each type of coverage.
What color to choose tiles
If you already have an idea for a fix, choose the color of your dreams and let it become the starting point for selecting other shades.
The main thing is not to overdo it with accents. You should not choose more than three different colors. To get your bearings in all the variety of design options, it is best to look for photos of ready-made premises.
Is the room you want to decorate small and need to visually expand it? Use light colors. The classic option for the bathroom is white tiles.
housebeautiful.com
dustbustersmaidservice.com
If you think it is too banal, give preference to beige, peach or blue.
Andrey Lyamin-Borodin
General Director of the online service for ordering repairs Rewedo.ru
The floor and walls, lined with the same type of tile, mostly light and glossy, will visually expand the space and add air.
It is believed that cool colors create an effect of freshness and coolness, while warm colors soothe. One of the modern trends is decorating rooms in natural shades.
design-homes.ru
housebeautiful.com
housebeautiful.com
Dark tiles create a depressing impression. Contrary to popular belief, dirt is clearly visible on it. Use dark colors carefully. For example, for decorating the floor and the lower part of the walls.
Avoid very bright colors, such as scarlet or gold. In such rooms you will get tired very quickly.
Use bright or patterned tiles to create accents or define a room.
diy.com
housebeautiful.com
housebeautiful.com
When choosing tiles for the kitchen, coordinate its color with the set.
housebeautiful.com
housebeautiful.com
housebeautiful.com
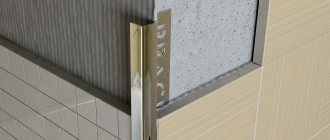
Seam width
Seams can be from 1 to 10 millimeters wide. It depends on the type, geometry and size of the tile used. As a rule, the seam width is 2 millimeters.
Grouting process Source otlichnyjremont.ru
When performing the correct layout, the width and length of the seams can be ignored.
For example, there is a wall 1.5 meters long and a tile 0.4 meters long. Algorithm of actions:
- Measure the length of the wall - 1.5 meters.
- Calculate how many meters you can cover with whole uncut tiles: 0.4 * 3 = 1.2 meters.
- Subtract one tile: 1.2 – 0.4 = 0.8.
- Subtract this size from the length of the wall: 1.5 – 0.8 = 0.7 meters.
- Divide into two parts because the tiles will be cut twice equally at the edges: 0.7 / 2 = 0.35 meters.
- Laying should begin from the center.
- Lay two 0.8 meter tiles and two cut tiles at the edge - 0.35 meters. The result will be 1.5 m. Even if the seams reach one centimeter, this will not change anything. The trimmings will probably become a little smaller.
How to choose the shape and size of tiles
Most often, stores offer square or rectangular tiles.
If you're renovating yourself, stick to these classic options. Working with them is much more convenient than with tiles of unusual shape. Want to achieve different visual effects? Use rectangular tiles. Place it on the walls vertically, and you will extend them in length, horizontally - in width. To visually expand the room, lay floor tiles diagonally.
desalledebaindesigns.org
sognandocasashop.it
Don't choose very small tiles for small spaces. Also give up the idea of decorating the room in a mosaic style. It greatly narrows the space. Do not use very large tiles. With it there will be large seams on the walls, which will also unfavorably divide the room into parts.
It is also worth avoiding extremes for reasons of economy.
From the point of view of practicality and cost of work, it is better to choose medium-sized tiles for walls. A format that is too small or, conversely, large can cause extra charges when laying. Mosaics are on average more expensive than regular tiles, and working with them will also be expensive.
Andrey Lyamin-Borodin
Briefly about the main thing
Before purchasing ceramic tiles, you need to calculate the required amount of material so that it is enough for the entire area of the room. This can be done in two ways: manually and using an online calculator.
The amount of ceramics required for renovation is influenced by the area of the room, the dimensions of the doors, windows and bathroom, the type of installation, the number of colors of the finishing material and other factors.
To calculate floor tiles, 5 methods are used: methods based on the area of the room and the number of rows, counting when laying diagonally and the piece method, combined calculation.
If you do not want to carry out the calculations yourself, when purchasing material, you can contact the store manager. It will help you calculate the required amount of materials for the room. To do this, you will need to first take measurements of the room.
Ratings 0
How to choose tiles of the desired structure and quality
If you are choosing tiles for your home, there is no point in choosing super-resistant materials that are necessary for decorating common areas. It is unlikely that the same number of people will walk around your kitchen or bathroom as attend cinemas or exhibitions.
Choose tiles with a wear resistance rating from I to III (III for floors) and don’t overpay.
If you are not going to turn your apartment into a large freezer or solarium, then the temperature resistance of the tiles should not be taken into account either.
When choosing tiles for the bathroom, pay attention to characteristics such as water resistance and texture (for the floor).
Tiles made in Italy and Spain are considered to be of the highest quality. To save money, combine expensive tiles with cheap ones.
Many Russian manufacturers, for example Kerama Marazzi, Keramin, Italon, offer tiles of quite acceptable quality. It can be taken as a base, complemented with more expensive and expressive ones or, for example, mosaics.
Andrey Lyamin-Borodin
But you need to be careful when buying tiles with huge discounts. The fact is that a low-grade product may go on sale and be passed off as a higher quality product. A coating made from such tiles will look sloppy.
Laying tiles diagonally
With any installation method, the most difficult moment is laying the first tile. The clear construction of the entire picture depends on its correct location.
Installation work using the “from the center” method, which allows you to maintain symmetry and proportions, is best carried out in sectors. There are two options for this method:
- The first tile is laid strictly in the center, through the corners of which rays pass to the middle of the walls. The next 2 tiles are placed on its sidewalls, then a row of three parts, and thus the laying is carried out along a triangular area towards the wall. Then the opposite triangle is pasted over and so on.
- In the second option, 4 tiles are mounted at the corners in the center of the surface. From each tile a diagonal is laid out along the markings. Then the space in the triangular sectors between the beams is covered.
After marking the surface according to the triangle principle, the first row of solid tiles will be installed, which is actually the second.
When placing tiles diagonally, there is a risk of displacement of each next row. To avoid this, experienced installers advise be sure to use cross-shaped clamps to maintain gaps between rows. Check the horizontal and vertical lines every 2-3 rows with a level.
The adhesive mixture corresponding to the type of surface and tile is applied with a notched trowel. To avoid deviations from the diagonal, the second row of solid tiles is installed immediately. The ends of each next row must coincide with the ends of the previous one.
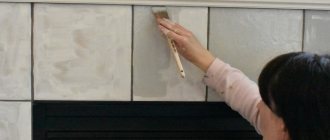
Surface preparation
A smooth, pre-prepared surface facilitates and speeds up the process of tiling.
If the floor is uneven by 1-2 cm, an experienced technician does not need preliminary leveling. If the unevenness is about 2-3 cm, it is best to level the surface with a self-leveling poured floor. The cement mixture diluted with water is evenly distributed over the entire area using a needle roller. For differences from 3 to 10 cm, it is recommended to make a cement screed with sand and with the addition of expanded clay, if the curvature of the floor is above 10 cm. After complete hardening, finishing work can continue.
The alignment of vertical surfaces requires special attention, since with a diagonal pattern, the bumps and curvature of the walls are especially noticeable. Minor wall defects are eliminated with putty; in case of complex distortions, it is recommended to cover the perimeter of the room with plasterboard.
The surface of the ceiling must be cleaned of loose plaster and whitewash, grease stains and glossy oil paint must be washed off. The seams between the slabs, cracks and irregularities should be filled with putty.
The adhesion of tiles to the surface being glued is much higher when using special primers. Additionally, after the primer has dried, you can apply a thin layer of liquid tile adhesive to the surface to be glued.