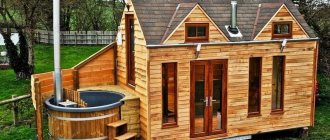
A balcony in a house made of timber is not a storage room for various unused rubbish and garbage, but performs certain useful functions. The functionality of the balcony includes the following points:
- - the role of a canopy over the porch, a roof over the veranda or terrace;
- — additional space in the house for pleasant gatherings with family and friends;
- - a decorative element for the facade of a house.
It is important to note that you can only fully use the balcony in the warm season. And in the autumn-winter period, the balcony will have to be carefully cleaned of leaves and snow to avoid excess moisture and, as a result, premature “aging” of the structure, the formation of rot, mold and fungi in the wood.
The shape, size and purpose of the balcony must be considered at the design stage of the house. In houses made of timber, wood is also used to build balconies. Firstly, this allows you to maintain a single architectural style of the house. And, secondly, as everyone knows, wood is the most valuable thermal insulation material in construction.
Pros and cons of a balcony
The absence of a balcony in a private house may cause the entire structure to be perceived as an unfinished building. It decorates the façade and is an ideal place to spend time outdoors . But this is not an easy structure, the construction of which is subject to a certain number of requirements, and the most important among them are: ensuring the integrity and unity of the entire structure.
Among the positive aspects we can highlight:
- A balcony is a great opportunity to give your home a unique, inimitable look. Beautiful, individual and unusual designs will decorate any private home and give it a complete look.
- A balcony extension is an additional area that can be used as a place for relaxation, entertainment or even a work space. If the balcony is installed above the terrace, this will help to visually divide the house into two parts, which will visually increase the volume of the entire building.
- Balcony extension is an emergency exit during a fire.
- A balcony is not a cheap pleasure, but in some cases its installation can be profitable. Installing a balcony in a country house with a terrace or bay window will help save on the roof: its role will be played by the base of this structure. The balcony also acts as a roof over the entrance to the house, which becomes reliable protection from bad weather.
But, despite a fairly large number of positive aspects, there are also negative factors :
- The presence of a balcony is the cause of heat loss. Very often this happens due to the door installed on the balcony and the thermal bridges inherent in the cantilever structure. Exceptions in this case may include structures that have autonomous supports, but their installation requires significant financial costs and significant space.
- The construction of this structure is characterized by the complexity of developing design documentation and carrying out installation work. Before erecting such a facade structure, it is necessary to carry out a fairly large number of calculations related to determining the loads that it will experience, and the installation process itself requires certain knowledge and skills in this construction field.
- Installing a balcony requires considerable financial costs, so you need to be prepared for the fact that this pleasure will cost the home owner quite a lot.
- A question about the placement of a balcony that has not been fully thought through may result in the structure not being used for its intended purpose. This often happens in cases where the balcony faces the road or faces a neighbor's yard. That is why it is necessary, already at the project approval stage, to carefully plan the visibility of the structure with the features of the environment and construction sites present nearby.
Basic methods of building a balcony
For buildings built from logs or timber, the technology for constructing a balcony is similar. The only difference is the method of support. Supports can be made:
- beam-cantilever method;
- beam-supported.
Diagram of types of balconies according to the method of construction in a private house.
In the first option, cantilever beams (logs) or simply extensions are located on the lower rims of the logs and are elements of the continuation of internal or external load-bearing walls. Among other things, such beams additionally decorate the facade of the house.
The cantilever method involves another option, in which the supports for the balcony are elongated beams of the interfloor floor, protruding to the required length beyond the facade. But many experts believe that this method does not comply with building codes and requirements, since moisture may enter the support beams, which will eventually lead to rotting of the wooden elements.
With the beam-support method of construction, the balcony is located above the veranda or terrace and serves as a roof for them. This option is much more often used in the construction of country wooden cottages.
The internal balcony is built mainly according to the French type, when it is arranged as a full-height window frame. That is, this is a small fenced area located immediately outside the door.
Let's take a closer look at each method.
Console method
When using beam-cantilever technology, it is necessary, when preparing the project, to determine the location and height of the loggia in order to release beams in this place during construction. For greater reliability, the other end of the beam should be attached to the main wall of the house. The fastening must be rigid.
Construction of a balcony in a private house on consoles.
The beams are usually released at 1.5-2 m. The beams themselves can be made of rounded logs or profiled timber
It is important that the outlet beams form a monolithic structure with the wall. If the width of the balcony is greater, then additional support pillars are erected
At the same time, a special screw mechanism is placed in the pillars to reduce the height of the supporting element by the size of the building's settlement.
To further strengthen the console, wooden or metal slopes are installed. The latter, made using forging, can serve as an additional element of facade decor. To strengthen the fastening of beams resting on the walls, battens are used.
The consoles, which are the basis of the design of a classic rectangular loggia, are connected by one beam, then a rough flooring is made and a finishing floor is laid on top of it. The outer floor beams are securely attached to the horizontal frame posts of the wall, and the rest are attached to the battens.
The canopy over the loggia is made separately, or is a continuation of the roof of the cottage.
If the balcony is purely decorative and has a width of no more than 1 m, then in this case you can use wooden trusses as a support. They are attached to the wall with special brackets. But there is a significant drawback. Over time, the fastening loses its appearance under the influence of precipitation and dirty rust stains appear in the fastening areas.
Construction of a balcony on racks
Owners of country cottages most often prefer to build balconies on racks that rest on the base of the veranda or terrace. In this case, the base of the balcony serves as a roof for them.
This method is used when the balcony is large, or it is not possible to use a ceiling under the base of the loggia. Of course, this option will require more significant costs, but the size of the balcony and, accordingly, the terrace under it can be any. You can place a parking lot under the balcony.
Attaching a balcony to a private house using the beam-support method.
Support posts with this method can be wooden, metal or brick. They are usually located along the outer edge or on both sides of the loggia. The inner part of the racks rests on a beam, which is rigidly attached to the wall.
Support posts are installed in accordance with the following technologies:
- The logs are taken slightly smaller than required. Initially, bars are placed under them, and after the house shrinks, they are removed, thus leveling the loggia. But, nevertheless, there should be an outward slope of about 2% so that the water does not stagnate, but flows freely.
- The racks are installed on jacks and then tightened as necessary.
- The beams or logs are set strictly according to size, and when the building shrinks, they are simply sawed down.
Types of balconies
Wooden balconies vary in type depending on the methods of creating support. The most well-known methods are those described below.
Attached option
The simplest and most modern way to build a sustainable balcony. The side supports securely hold the balcony base, and the front posts create rigidity for the entire structure . There must be a free area under the base to make the foundation. In some cases, such a balcony may serve as a roof for a veranda or terrace.
Console version
If building a balcony on supports is impractical, then the cantilever method of support comes to the rescue. With this method, the base of the balcony rests on the extensions of the beams that create the interfloor ceiling .
In addition, the base can be created by beams laid parallel or perpendicular to the floor beams. This base decorates the walls of the building, but there is a high risk of rotting from moisture.
Open design
Open balconies occupy a leading position compared to closed views. This façade structure is used as a decorative element , so much attention is paid to the choice of finishing materials and its decoration. Forged metal fences, which are the main components of decor, have become widespread.
When installing wrought iron fencing, the following points must be taken into account::
- the size of the fence should not exceed the size of the load-bearing slab and the balcony opening;
- when carrying out work to determine permissible loads, it is necessary to take into account the fact that it is planned to install a metal fence;
- The installation of the fence can be carried out only after the reinforced concrete slab has been completely restored and leveled: all chips and cracks must be eliminated on its surface.
Closed design
Glazing the balcony structure allows you to increase the functionality of this space and use the balcony as widely as possible: as a room for relaxation, creativity, or even as a bedroom. And those who love home flowers can breed here species that prefer large amounts of sunlight.
The glazed area is protected from bad weather, extraneous noise and annoying insects . For an unusual, aesthetic and original design of facade structures, various types of glazing can be used: panoramic, partial, stained glass.
Balconies can be made of concrete or wood.
Concrete balcony
Concrete is very often used as a base material for the construction of balconies due to its unique properties and extended service life.
This architectural structure has individual characteristics:
- The reliability of such a structure directly depends on the thickness of the house wall, since the load-bearing structures are recessed into the wall. In the case where the wall is not particularly strong, it is necessary to install additional supports.
- The length of the balcony overhang should not be less than one meter.
- The foundation slab is inserted into the wall along its entire length if the residential building was built of brick.
- The top level of the slab should be at a distance of 5 to 8 cm below the planned level of the floor covering.
- The base of the structure must be waterproofed.
- The height of the parapet cannot be less than one meter.
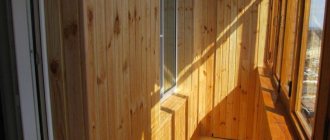
Wooden balcony
A wooden balcony is somewhat inferior in reliability, but superior in decorative characteristics to a concrete one. This is due to the fact that wood is a unique material, thanks to which you can easily and simply create an atmosphere of comfort, sophistication and splendor. The wood has a unique smell and is distinguished by excellent aesthetic properties.
The installation of a wooden façade structure has its own distinctive features that must be taken into account :
- For installation, you need to use beams with a cross section of 10x20 centimeters.
- The depth of the beams in the facade is at least 25 centimeters.
- The main fastening elements are metal angles and bolts.
- The vertical and longitudinal posts mounted on the console have the following dimensions: 4 by 10 cm and 5 by 10 cm, respectively.
- After installing the boards, handrails are installed and the flooring is laid.
Wooden elements must be treated with oil paint , and handrails and gratings are additionally coated with waterproof varnish that is resistant to low temperatures.
Step-by-step instructions for installing wooden frames
Specialized companies usually accept orders for the production of expensive frames with three-chamber double-glazed windows along with installation. It is unrealistic to make such a design at home. Therefore, it is rational to consider the installation of simple glazing of balconies with wooden frames.
In terms of installation methods, installing sash with single or double glass differs little, but will save household financial resources (up to 20 - 30 percent of the cost of the window unit).
Tools and preparatory work
For installation operations you will need a small set of tools:
- plumbing tools (hammer, screwdriver, wrenches or socket bits);
- measuring instruments (tape measure, metal ruler, construction square, level, plumb line, laser plane builder);
- rubber mallet;
- carpentry tools (for finishing, sanding, varnishing, polishing windows);
- power tools (wrench, air chisel, screwdriver, electric drill, grinder);
- mounting guns for foam, driving dowels.
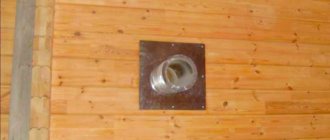
To glaze a balcony or loggia with wood (if the loggia was glazed), you will need to dismantle the old frame. To do this, unscrew the screws from the hinges of the doors and cut the box into pieces with a saw or grinder. Remove old fasteners. The railings are removed and timber is installed in their place along the perimeter of the fence. Instead of a support beam, you can use a thick board protruding inside the perimeter. It will serve as a window sill for the window block.
The process of dismantling the old structure in this video:
Strictly horizontal installation of the timber is required, which is controlled according to the building level. The fence is covered with wooden and plastic panels. Only after installing the support beam do they take the dimensions of the box to order or independently manufacture a window unit.
Fastening brackets or a corner are screwed to the finished frame, and they begin to try on the box necessary for marking the fasteners in the balcony opening. To install glazing on balconies with wooden frames, use direct through fastening of the frame with anchor bolts or fastening with bent brackets and a solid corner.
Compliance with the vertical installation of the box is controlled by a plumb line or a laser plane builder. Since the support beam is already installed horizontally, double wooden (plastic) wedges are used to adjust the vertical, which are installed in the upper part of the box. On loggias, adjustment with wedges is carried out on three sides of the box (on the sides and on top).
For three-sided glazing of a balcony with wooden frames, adjustment wedges are driven between the frame and the base plate of the upper balcony. Having installed the box vertically (with a discrepancy of no more than 2 - 3 mm), mark the holes for fastenings. With the direct fastening method, the box is drilled through (in increments of 300 - 700 mm), and the placement points of the anchor plates are marked through the holes with a pencil.
Basic installation
Before installation of through fastenings, recesses are punched in the upper base plate, side partitions of loggias, and building walls for installation of anchor plates. The operation is easier to perform with a pneumatic chisel or electric chisel; the manual method of knocking out concrete with a hammer and chisel is difficult. Anchor plates are walled into the recesses in cement mortar. Before installation, remove the window sashes by unscrewing the hinges or knocking out the rods.
During installation, perform the following operations:
- Re-expose and orient the box.
- Attach the frame to the parapet support beam. For fastening, use long construction screws or self-tapping screws.
- When fastening with anchors, tighten the bolts.
- When fastening with an angle or brackets, dowels (self-tapping screws for concrete) or dowels are used. Labor-intensive operations are made easier by using electric screwdrivers and mounting guns.
- Remove the side and top mounting wedges.
- Seal the gaps with polyurethane foam. When glazing loggias with wooden frames, the gaps between the side concrete walls and the upper support plate are sealed. Three-sided glazing of a balcony will require sealing the installation joints with the base plate and two walls of the house. On top of the mounting foam, the gap is sealed with polymer compounds or PSUL tape.
- Hinged doors are hung on hinges.
- Double-glazed windows are inserted into blind sashes and the glass is secured with glazing beads.
- Screw on decorative strips to mask the installation seams.
After installation is completed, the operations of grinding, varnishing, and polishing the wooden elements of the window block begin.
How to make a balcony in wooden houses
You can install a balcony in a wooden house with your own hands. First of all, the home owner needs to decide on the type of future structure. Often balconies are installed directly in the roof. If the owner wishes to install a pediment balcony, then this wish should be taken into account already at the construction stage of the building, since it is necessary to make one of the fronts deeper, taking into account the planned width of the future facade structure.
The base slab must be covered with insulation, on top of which a layer of waterproofing is laid, after which a screed is made. At the final stage, a fence is installed, the material for which is selected according to the customer’s wishes: wood, metal, brick.
Design features
Any balcony, regardless of appearance, decorative elements and size, has three main structural elements :
- base plate;
- parapet or fence;
- visor (roof), wind screen.
The slab is the main structural element . It can be made of either wood or reinforced concrete. The advantage of a wooden slab is its light weight, thanks to which this structure can be installed on the facade of any house.
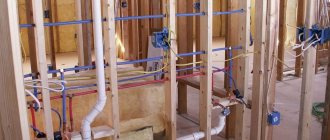
Making a subfloor
After building the foundation, it is recommended to start arranging the subfloor. We first cover the support with roofing felt in two layers.
The floor can be wooden or concrete. For example, in a frame veranda made of wooden beams, a wooden floor would be more appropriate. Concrete pouring will best fit into a brick extension.
Subfloor
We make a wooden subfloor like this:
- We fix the beam of the lower trim on the foundation. We use suitable fasteners, for example, anchors. To connect the beams directly, we first make samples at the places of their joints and additionally fasten them with galvanized nails;
- We attach wooden logs to the bottom trim. We keep the step at 50 cm - this way the floor will definitely not fall through. We use the connection option described above;
- fill the space between the joists with expanded clay;
- We make the flooring from unedged boards or plywood about 50 mm thick. We attach the flooring elements to the joists with galvanized nails or self-tapping screws.
We make a concrete screed like this:
- fill the base with a 10-centimeter layer of sand;
- pour a layer of expanded clay on top;
- lay the reinforcing mesh. For the floor of the veranda, a mesh of rods with a diameter of 6-8 mm with cells of 25x25 cm is sufficient;
- pour concrete.
The recommended thickness of the screed on the veranda is from 30-50 mm. For greater convenience and accuracy of pouring, we can pre-set beacon slats every 2-4 m.
Design placement options
Usually the balcony is located on the central part of the house and shares a roof with it. This location option is best suited for low-rise buildings. This placement allows you to best arrange a recreation area, protected from bad weather and scorching sun rays. A fairly spacious space allows you to install folding or plastic furniture here: tables, chairs.
located under the roof of the building looks unusual and attractive Such a room can be successfully used to organize a flower corner.
What to give preference: roof or visor
The roof is not included in the list of mandatory components of a balcony, but it can significantly expand its functionality. Instead of a roof, a canopy can also be installed, which will also act as protection from bad weather and direct sunlight.
Roof requirements:
- The surface area of the roof should be slightly larger than the surface area of the load-bearing slab and balcony railing.
- The roof must be installed at an angle to prevent accumulation of snow mass.
On a note! The roof can be single-pitch or gable. The first option is the simplest and most budget-friendly, the second is ideal for corner balconies.
A special Marquise canopy will help give your balcony an unusual and stylish look . This metal structure is covered with a special fabric, which allows it not only to act as a protective element, but also to emphasize the individual style of the entire structure.
Dome-type visors are less popular . This is due to certain difficulties in its manufacture, but many owners of individual buildings prefer this method of decorating the facade structure.
The arched canopy looks stylish and elegant , which is practical and highly functional.
Balcony waterproofing
Hydraulic insulation must be carried out in any case .
Water will be absorbed into the floor, as a result of which the slab may begin to collapse if the base is made of concrete or mold if the balcony structure is made of wood. A balcony built in a wooden house needs hydraulic insulation more than its stone (concrete) counterparts . This is due to the fact that wood is susceptible to the destructive effects of atmospheric phenomena.
In addition, it is susceptible to biological contamination . All of these factors lead to rapid destruction of the structure.
Open balcony
When performing hydraulic insulation of an open structure, it is important to ensure that it slopes towards the street. This will help avoid the accumulation of excess moisture on its surface. The slope of the base from the wall to the edge can be 40 mm. In addition, this solution avoids destruction of the laid insulation.
The most important role is played by waterproofing a balcony in a wooden house . There are many materials intended for its arrangement. This list includes rolled materials, mastics, membranes, etc.
Important! The quality of insulation largely depends on when it is performed. Of course, its quality will be higher if it is completed at the construction stage.
If it has already been built, then the most inexpensive way would be to lay a concrete screed on top, a liquid mixture that includes liquid rubber. It is possible to use special sheets that can be laid as a base for the floor covering.
Waterproofing made on the basis of liquid rubber shows excellent results in protecting balcony structures from water. It is applied to the surface of the wood using a sprayer. But the use of this technology requires the use of specialized technological equipment, which is operated only by specialists performing hydraulic insulation work.
Closed balcony
Methods for hydraulic insulation of a closed structure are not much different from those used to protect an open structure. The only thing you need to remember is that, in addition to the floor, on a closed structure it is necessary to insulate the walls and ceiling .
Screed, its manufacture and features
When talking about what to make a balcony floor from, you should take into account that making a screed yourself is not so difficult, and besides, it is a budget option. However, this simple method also has a downside:
- The screed significantly increases the height of the floor on the balcony (about 10-15 cm), which of course puts additional load on its base - that is, the slab. If the house is very old, the balcony may simply collapse.
- Concrete floors are considered the coldest. Of course, it can be insulated (for example, with polystyrene foam), but this will not help much; thermal insulation still leaves the floor cool.
If the above circumstances do not scare you, then you should study step-by-step instructions on how to make a floor on a balcony with your own hands.
Home comfort on the loggia directly depends on how well it is insulated
Do-it-yourself screed manufacturing technology
First, the floor is prepared for installation work. The first step is to carefully close all noticed cracks. They usually occur in those places where the wall is adjacent to the slab - the base.
Conventional polyurethane foam or acrylic sealant will help you with this preparatory stage. After all the cracks are sealed, you can begin arranging the floor.
Sealing cracks is an important step in the process of constructing and installing a floor on a balcony.
Waterproofing
Laying a waterproofing film is necessary so that when pouring the solution, excess moisture from your screed does not leak to the neighbors below.
To waterproof the floor on the balcony, you don’t have to make any special efforts. Just carefully lay a thick sheet of polyethylene in the form of a neat “trough”.
Important! The film should be laid overlapping, laying about twenty centimeters on the walls. After the work is completed, the edges of the polyethylene are carefully cut off. Waterproofing the balcony with plastic film
Waterproofing a balcony with polyethylene film
Reinforcement process
Basically, a steel mesh made of three-millimeter wire is used for this. The cells of the reinforcing mesh can be 50×50 or 100×100 millimeters.
The sequence of work is quite simple:
- All visible dirt and other debris are removed from the surface;
- The first row of mesh is carefully laid on the insulation and pressed tightly;
- The second row is placed overlapping 1-2 cells.
Reinforcement mesh increases the strength of the screed and significantly increases its service life
Lighthouses
In construction, beacons are special guides (landmarks), by moving along which you can level the applied coating to a perfectly flat and flawless surface. When making a balcony floor in the form of a screed, you can’t do without such little things.
Beacons are installed in one plane, which is determined in accordance with the height of the threshold in indoor block doors. Also, all beacons must be carefully aligned horizontally.
The top edge of the lighthouse should be at the same height as the subfloor surface
Important! To ensure that the beacons do not move during the screed leveling process, they must be firmly fixed. To secure them firmly, it is best to use building plaster or cement mortar. Installation of screed beacons using thick cement mortar
Installation of screed beacons using thick cement mortar
Filling the screed
After all this preliminary work has been done, you can prepare a solution of sand and cement (four parts cement and one part sand). The finished mixture is carefully poured between pre-installed beacons and carefully leveled using the rule.
To make the floor level, the rule must be applied slowly with little pressure, while simultaneously resting it on two beacons
After completing the concrete work, the screed is covered with a sheet of polyethylene to slow down the drying process. If you neglect this, it may crack during hardening.
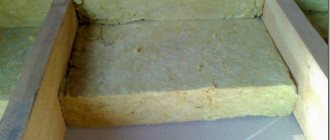
It is also necessary to ensure that the thickness of the screed laid on foam plastic or other insulation is at least fifty millimeters. Otherwise, the base of the floor on the balcony will crack under the influence of gravity - for example, from the weight of furniture.
If all work on arranging the concrete screed is carried out according to the instructions, the floor surface should be perfectly flat
Preparing for work
Preparatory work, first of all, includes the creation of a project with calculations . If you correctly calculate the loads on the supporting structures, then the balcony is not in danger of collapsing.
The success of construction largely depends on the quality of the project. When preparing it, first of all, the location of the structure is determined . The classic option is the location above the entrance to the house. In this case, the porch columns will support the balcony base.
Experts recommend that at the stage of preparation for construction, it is simplified to calculate the load, taking into account the strength coefficient and weight of the following components :
- balcony designs;
- installed furniture;
- people going out onto the balcony.
There are other requirements for choosing the right extension design :
- for safety there must be a fence at least 105 cm high;
- the base of the balcony is mounted with a slope of up to two degrees, so that during precipitation the water flows out;
- The location of the balcony must correspond to its purpose. For decoration it is placed on the facade of the building, and for relaxation in quiet places;
- Additional equipment for the canopy will well protect the balcony from precipitation and extend its service life.
Construction of a cantilever balcony
Initially, the materials specified in the project are purchased and the tool is prepared. In addition, the project must include drawings with the dimensions of the parts. This will save materials and also simplify assembly.
Important! If an extension is being made to a house under construction, then the protruding floor beams are a good basis for the construction of a wooden balcony. In a built house, the best option would be to support it on pillars.
Before starting work, you must make sure that the location of the balcony door will not affect the strength of the load-bearing wall.
In a cantilever balcony, one of the options is used for mounting the base:
- pinching in the wall. Disadvantage: the width of the base is limited to one meter;
- support on cantilever beams. The dimensions of the base increase to one and a half meters.
Construction work is being carried out in stages:
- Markings according to the project are made on the wall;
- For the balcony beams, a wooden beam measuring 200 x 100 mm is prepared. It is pre-treated with antiseptic solutions;
- Holes are cut in the wall with a depth of at least 250 mm and a pitch of up to 1 meter. The ends of the beams, wrapped with waterproofing, are embedded in them;
- the ends of the beams are connected by a transverse beam, which is then used to secure the fence;
- to increase the load-bearing capacity of the balcony, wooden brackets are installed, which rest against the wall at an angle of 45 degrees. The brackets at the bottom of the beams are attached to the cross beam;
- sheathing for flooring from boards is laid on the cantilever beams; arrangement is being made.
Important! Be sure to treat the wooden surface with protective compounds!
Construction of an attached balcony
As in the previous version, work begins with the purchase of materials and preparation of tools. Unlike console structures, such structures are more complex to install and require more financial costs.
Stages of construction of an attached base:
- according to the project, markings are applied on the wall and in the places where the pillars are installed;
- for supports, pillars with a diameter of more than 140 mm are selected. They are treated with an antiseptic. The lower part of the pillars to the depth of installation in the ground is covered with bitumen;
- holes are dug or drilled. A sand cushion is placed at their bottom;
- the pillars are filled with concrete. For a closed balcony, the height of the pillars should be higher than the height of the ceiling;
- a wall support is attached under the door strictly horizontally along the entire length of the future balcony;
- at the level of the wall support, the pillars are tied with crossbars;
- the pillars are connected to the wall support with lathing, which is necessary for installing wooden flooring; arrangement is being made.
You can build
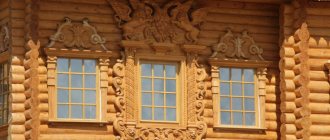
The design and appearance of a new building largely depend on the appearance and decoration of the house, as well as on the material from which it is made. An important condition is the harmonious selection of the type of balcony in such a style that it does not stand out in design from the general image of the building.
Concrete balconies
The most common option is with a concrete floor. There are several features:
- The load-bearing elements of one of the sides are fixed in the wall of the house. Using electric welding, they are connected to pre-installed and carefully secured anchors. The reliability of the entire structure will depend on how massive the wall is. If the walls of the house, which will help distribute the weight and pressure of the new building, are not strong enough, it is necessary to attach additional supports.
- Dimensions in reach and depth should not exceed one meter.
- In brick buildings, concrete slabs are inserted into the load-bearing wall of the house along its entire length. They are welded to the lintel reinforcement, which is placed above the floor below.
- Console elements are laid into the masonry in houses with stone walls.
- The top level of the main support slab should ultimately be set 100-120mm below the final floor level.
- The floor of the structure being created must have a slope of 2% from the main building.
- The concrete slab should be waterproofed. To do this, a water-repellent coating is installed on the surface of the installed slab, on which a sand-cement screed is then poured.
- Parapets must be at least one meter. For this purpose, metal gratings are used, which consist of handrails and racks. The racks are attached by electric welding to the embedded elements of the slab, and the edges of the handrails are inserted into the load-bearing wall of the building.
- The balcony door threshold must be positioned 100 mm above the floor level.
Arrangement of the balcony base
These works require special care , since the reliability, attractiveness and longevity of the balcony structure largely depend on them.
Connecting the balcony frame to the wall
As a rule, the frame of a wooden balcony is made of wooden elements .
Firstly, wood has high thermal insulation qualities, and secondly, it goes well with various architectural styles.
Typically, the balcony frame is connected to the wall using bars fixed vertically to the wall at the ends of the balcony base. The height of the bars determines the size of the fence. The wall is most often covered with clapboard.
The lining made of pine and larch looks good and is durable . If the balcony frame is large, then round profile boards are installed (block house). This wall has a distinct log look.
Floor installation
The floor is mounted on the prepared sheathing . Forty-millimeter planed boards are chosen as the material. To prevent water from accumulating, they are laid with a gap of up to 2 mm.
For flooring on the balcony, terrace boards have proven themselves . They are durable, but at the same time easy to process. The corrugated surface of the boards is suitable for open balconies.
Fencing installation
A good fence not only has an attractive appearance that matches the architectural style of the building, but is also durable and reliable. Turned or carved balusters give a wooden balcony an attractive look.
Railings are made from different materials:
- Forged railings turn the balcony into a work of art. The number of possible ornament options is practically unlimited. Such fencing combines elegance with high strength.
- Wooden railings provide high safety and reliability. They are easy to manufacture and install. However, such railings have a short service life due to rotting under the influence of moisture.
There are certain rules that fencing for wooden balconies must comply with :
- the height of the railing is not less than 1.0 m;
- the distance between balusters is no more than 0.1 m;
- permissible horizontal load on the railing is not less than 100 kg/m;
- There should be no nicks or roughness on the surface of the railing.
Note! When choosing railings, you must first of all be guided by the safety of using the balcony.
Creating a canopy
Not every wooden balcony requires a canopy . It is equipped to create comfort and protect the balcony from the destructive effects of natural conditions.
It is easy to construct a canopy as an extension of the roof slope. In this case, it is enough to have longer rafters.
The simplest design is tying the top of the pillars to support the balcony base. After this, a sheathing is made on which the roofing covering is laid.
There are polycarbonate canopies mounted on the wall. Light materials that can withstand snow and wind loads are suitable for the canopy.
Processing of wooden elements
A mandatory requirement for all wooden balconies is protection from insects and weather conditions.
Protection will be effective if it is carried out comprehensively:
- applying primers;
- impregnation with antiseptics;
- coating with fade-resistant varnish.
Special requirements for processing cladding material on open balconies without canopies . Therefore, before installation work begins, the reverse side of the floorboards is coated with VISASOL antiseptic primer. It contains substances that prevent the formation of mold.
For wooden railings, an elastic, hard and weather-resistant varnish is selected . The best option is alkyd-urethane varnish. It is not afraid of mechanical influences, temperature fluctuations, or direct sunlight.
Note! Wooden fences must be treated with primer, impregnation and varnish from the same manufacturer. Only then will full compatibility of all coatings be guaranteed.
The outside of a wooden balcony must be coated with paint that matches the color of the house facade.
The nuances and dangers of installing wooden frames
When making boxes and window frames yourself, it is necessary to impregnate the wood with antiseptics. On the outside, all surfaces are varnished with acrylic varnishes with water-repellent properties. The inside of the box and binding can be varnished with oil-based furniture varnish and polished.
Countersunk holes are drilled for through bolt anchors. This method allows you to disguise a metal bolt with a wood plug, which is not visible when the sash is open. At the same time, the metal fastening is additionally protected from rust. Do not use wedges or bars filled with mounting foam to strengthen the frame structure. They are not strong enough to withstand strong gusts of wind.
If you plan to install a balcony extension, it is better to make its frame from a metal channel, the parts are fastened by welding or bolted connections.
Installation operations at height are dangerous. When working with the upper fastenings of wooden glazing of balconies and loggias, it is recommended to use stable, wide scaffolding. The normal methods of insurance when mounting at height would be a mounting belt or a chest strap with a three-meter end of a strong rope. The rope is secured to the metal parts of the fence or tied to the door of the balcony block. It is not recommended to install the structure alone; it is better to work with two or three people.