For most do-it-yourselfers, trying to make a heater from a heating cable with your own hands is not only an interesting experience, but also an opportunity to relatively inexpensively assemble a device with which it is quite possible to heat a small room. The design is simple, and most importantly, reliable and safe enough to be left on for a long period of time.
Homemade tile with heating cable
Operating principle of the heating cable
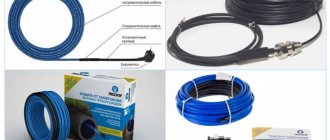
The operating principle is that electrical energy is converted into thermal energy. The peculiarity of such a heating system is that, without the use of an oxidizer or fuel, it receives energy and converts it into heat. The heating system heats up from the electricity passing through it and prevents freezing of communications. Therefore, it is necessary to purchase a heating cable ; it will help to avoid failures in the operation of water supply networks during the cold season.
To heat the external pipeline, wires are used with a seamless, sealed and damage-resistant sheath that is not afraid of temperature changes. The heating element is located inside the outer layer. When the air temperature drops, the heating cable is connected to electricity. The heating element starts working and heats the entire system. If the air temperature rises, the wire is disconnected from the power supply and the pipeline operates as usual.
Advantages and design requirements
Any home heating devices, regardless of design and complexity of production, must meet certain requirements. Among them:
- Safety and reliability in operation.
- High operating power and productivity.
- Ease of transportation.
- Easy to assemble.
- Economical in electricity consumption.
- Affordable price for design elements and materials.
- Durability and practicality.
Among all existing types of heating elements, quartz, electric, infrared and ceramic devices are considered the most powerful and efficient. Homemade devices for heating a dacha, apartment or private house have significant advantages compared to factory ones. Some of them:
- Simplicity and compactness of products that can be used in any room.
- High efficiency rate.
- The ability to make a structure from cheap and simple materials, which will help to significantly reduce the cost of the finished unit.
- Most products operate silently.
- Ease of use and transportation.
- DIY build quality.
Today it is possible to make infrared heaters yourself, which are considered the safest and most efficient in operation. If you need a more powerful device, you can make an alcohol or oil heater, a battery-powered unit, a gas appliance, or a heat gun.
There are also craftsmen who prefer kerosene devices, but such designs are less common compared to others.
Why should you use a heating cable?
The main advantages of using cable heaters:
- Safety. Excellent insulation system. Reliable protection from external chemical, mechanical and thermal influences.
- Versatility. The heating cable can be equipped with a pipeline located both underground and outside.
- Easy to use.
- Saving. After connecting the cable heater, it is possible to adjust the heating power when the air temperature changes.
Types of cable heater
There are two types of heating cable:
Resistive . It has low cost. Quite easy to install. It is usually used in everyday life for heating pipes with a diameter of up to 40 mm and for equipping a heated floor system. The operating principle of this element is to lay special sensors and wires along the entire length of the pipeline. Sensors react to any temperature changes and periodically connect and disconnect the heating system.
The wire can be laid in a spiral or strip method. It is attached to the pipes using aluminum tape. During installation, under no circumstances should you allow it to be over-tensioned. To distribute heat evenly, you can wrap wires and pipes with aluminum foil. You also need a reliable thermal insulation system. Mineral wool is suitable for thermal insulation.
Self-regulating . It is used for heating pipes with a diameter of more than 40 mm, containers, roofs, electrical panels, drains and other things. This heating wire consists of 2 insulated conductors located in a polymer, which, under the influence of temperature changes, changes the resistance. This means that as the air temperature decreases, the resistance of the polymer decreases and the current increases, which leads to an increase in the heat produced. This does not require any temperature controllers or electronic sensors.
If the air temperature rises, then this process goes in the opposite direction. The self-regulating heating cable has a long service life . The cost-effectiveness and safety of the cable is ensured by reliable insulation.
Advantages of self-regulating cables
- A self-regulating cable has a higher resistance to voltage surges. If the voltage is increased for a long time, the cable will not burn out.
- The self-regulating cable can be cut into pieces of the desired size. But resistive ones have a fixed length.
How to make a heating cable with your own hands?
A cable heater can be bought at hardware stores , but they are not cheap. If you have certain technical skills, you can try to make a heating cable with your own hands. For this you will need suitable materials. For example, a power telephone cable (field cable) can replace a branded heating cable, since they are very similar in characteristics and shape. This wire is quite strong, rigid and thin. It is suitable for use in damp environments as it has reliable insulation.
Please note that a heating system made from telephone wire will lack some functions . For example, there will be no possibility of self-regulation. There is also no special food insulation in the system. But all these qualities are not really needed, so you can safely use a cable heater made by yourself.
It is very easy to install it yourself. First you need to determine the location of the wire. If the wire is on top of the pipe, then the wire must be attached to the surface as tightly as possible. It is recommended to wrap the pipe with the “field” in foil, then wrap aluminum tape on top of it, it will press the heating element well. Such heating can be done not only for water pipes, but also for sewerage. It is important to ensure that the heating cable is well protected from moisture. For this purpose, hydro- and thermal insulation is used.
If the installation of the “field wire” is carried out inside the pipe, then in order not to expose the wires, it is better to unravel the cable into 2 wires . Next, you need to bend a single wire in half and double it again. At the 2 open ends of the wire it is necessary to build a sealed connection, which can be made from a flange from a flexible hose. In order for the input to be sufficiently sealed and not allow a drop of moisture to pass through, it should be filled with epoxy glue and the fitting should be slightly flattened. A home-made heating cable can be used in places where people do not live permanently, for example, in the country.
Idea No. 1 – Compact model for local heating
The simplest way to make an electric heater is this one. To get started, prepare the following materials:
- 2 identical rectangular pieces of glass, each with an area of about 25 cm2 (for example, dimensions 4 * 6 cm);
- a piece of aluminum foil, the width of which is no greater than the width of the glass;
- cable for connecting an electric heater (copper, two-wire, with plug);
- paraffin candle;
- epoxy adhesive;
- sharp scissors;
- pliers;
- wooden block;
- sealant;
- several ear sticks;
- clean cloth.
As you can see, the materials for assembling a homemade electric heater are not at all scarce and can be at hand for everyone. So, you can make a small electric heater with your own hands using the following step-by-step instructions:
- Wipe the glass thoroughly with a cloth to remove dirt and dust.
- Using pliers, carefully grab the glass by the edge and burn one side with a candle. The soot should evenly cover the entire surface. Similarly, you need to burn one of the sides of the second glass. It is necessary to first gradually warm up all the glass so that it does not burst due to a sharp temperature change.
- After the glass pieces have cooled, carefully use ear sticks to clean their edges no more than 5 mm around the entire perimeter.
- Cut two strips of foil, the width exactly corresponding to the width of the smoked area on the glass.
- Carefully apply glue to the glass over the entire burned surface (it is conductive), being careful not to damage the soot layer.
- Place the pieces of foil as shown in the photo below. Then apply glue to the other half and connect them.
- Then seal all joints.
- Using a tester, measure the resistance of your homemade heater yourself. We talked about how to use a multimeter in the corresponding article. After this, calculate the power of the element using the formula: P=U 2 /R. If the power does not exceed the permissible values, proceed to complete the assembly. If the power does not suit you, you need to redo the heating element - make the soot layer thinner or thinner (the resistance will become less if it becomes thicker and vice versa).
- Glue the ends of the foil to one of the sides.
- Make a stand from a block, installing contact pads connected to an electrical plug on it.
Using this technology you can make an electric mini heater with your own hands. The maximum heating temperature will be about 40 o, which will be quite enough for local heating. However, such a homemade product will, of course, not be enough to heat a room, so below we will provide more powerful options for homemade electric heaters.
Cable selection
Resistive and self-regulating cables are used to heat containers. To correctly select the linear power of the cable, it is necessary to determine the total power and cable laying pitch. The optimal distance between turns is 13-15 cm.
Resistive cables are selected within the range of 17-25 W/m. They have constant resistance indicators. To ensure the operating mode, the system is additionally equipped with a temperature sensor and thermostat.
Self-regulating cables, thanks to the built-in semiconductor matrix, are able to independently produce the required power and regulate it when the air temperature decreases or increases. The most commonly used cable is 30 W/m
System installation
The heating cable is distributed evenly from the bottom up over the tank area equal to ⅔ of the total area of the tank walls with a laying step of 13-15 cm, and if this is difficult to do, then in its lower part. When bending the cable, a radius of curvature of at least 3.5 times its outer diameter is allowed. Depending on the complexity of the tank design, fasteners for different purposes and different installation methods are used, for example: fastening with aluminum mounting tape, tying with galvanized tape, soldering fasteners to the tank wall, etc., and often you have to use ingenuity and use non-trivial heating solutions.
Economical DIY ceramic heater made from heating cable
The heating season for private homes is ahead. Ceramic wall heaters are becoming increasingly popular on sale. Especially for heating frame thermos houses.
Nowadays, heating from electricity with minimal investment in equipment (boilers, pipes, radiators) is becoming more and more optimal, because The payback period for all this is increasing more and more due to the cost of pellets, coal, and gas.
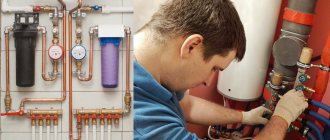
Repair and replacement
Electric flat and flexible heating elements of a water heater, thermopot or electric furnace break quite often. Their repairs should be carried out by a specialist, but some work can be done by yourself. Industrial heaters tend to burn out due to high loads, while low-voltage carbon or carbon spiral elements of washing machines and boilers burn out due to scale.
In most cases, you can simply replace the part with the same one. For example, many companies that produce boilers (Termex, Bosch) offer their customers a wide selection of products. But sometimes, say, to make a thermostat, you need to calculate the resistance of resistors and voltage. Let’s assume that to operate some abstract device (let it be a heater for plants, a generator for a mirror or a car steering wheel), you need a power of 20 Watts and a heating element voltage of 12 Volts. It turns out that the current will be within 1.2 (20/12).
Photo - heating element from a washing machine
DIY ceramic heater video
To make a heater you will need:
You can order a 66 ohm heating cable here 100 meters is enough for 10 heaters for 1,562 rubles - Check the price
Thermostat 220 volts for 234 rubles - Check the price
Built-in thermostat 16 A for 572 rubles - Check price
Smart thermostat with remote control for 1012 rubles Check price
Wi-Fi socket for controlling heating from anywhere in the world at home for 1002 rubles - Check the price
Porcelain tiles can be purchased at any hardware store.
Idea No. 5 – Automotive electric oven
Well, the last version of a homemade heater is a device that runs on 12 Volts from the car’s on-board network, which can be used to heat the interior of your own car. For assembly you will need the following materials:
- case from an old computer power supply;
- nichrome wire;
- remnants of ceramic floor tiles;
- fasteners: bolts, angles, plates.
Making an electric car heater yourself is not that difficult. It is recommended to view the assembly process in the master class in photo examples:
The disadvantage of such a heater is the increased risk of fire in the car, because nichrome wire is practically not protected. In addition, you need to correctly calculate the power of the device so as not to damage the car’s wiring. Ohm's law will help you with this.
That's all the ideas for assembling a homemade electric heater. As you can see, a simple electrical device can be easily made from various available materials, if desired. If you liked the master classes, share the recording with your friends so that they too know how to make a heater with their own hands for your home, garage or car!
It will be interesting to read:
How to make a ceramic heater with your own hands
The idea of assembling such a heater was taken from Mikhalych’s YouTube channel. But the quality of filming there leaves much to be desired.
We take a sheet of porcelain stoneware of the required area with the required color and metal Z-shaped corners. Two for fastening with dowels to the wall and one as a support for the vertical position of the heater. We glue (fix) them onto liquid nails.
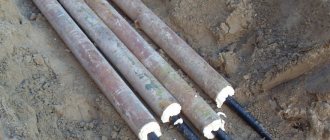
Scheme for laying a heating cable on porcelain tiles
We measure two coils of cable 5 m
.
will
give us an approximate heater power of 350 W. We fix the pre-purchased heating cable of the required resistance ( 66 Ohms
) with masking tape. It is profitable to purchase the cable on Aliexpress (link in the description of the video). We also fix the cable with liquid nails. Once it dries, remove the masking tape. We connect the ends of the cable and connect it to an external electrical cable. We make a parallel connection of these two 5 m sections to 220V. Check for heating.
Connection diagram. Only in our case there will be two such parallel connected cables
Filled with sand-cement mixture (or tile adhesive). You can also coat it with a primer so that the solution doesn’t crumble so much.
You can install a thermostat. But this will increase the cost of the heater significantly. Or you can do it like the inventor of this simple design did - connect the heaters through a simple power reduction circuit:
Idea No. 4 – Oil device
Another device model that is recommended to be assembled for heating a garage or other outbuildings in the country. All you need is an old battery, a tubular heater, oil and a plug. You will also need a welding machine, welding skills and some free time. The photo below shows one of the options for a homemade oil heater.
A tubular heater is installed at the bottom left, and a plug for draining/filling oil at the top. A simple design of an electric heater, which will be enough to heat a small room.
The video below clearly shows how to make an oil heater with your own hands: