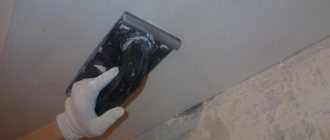
Purchasing expensive material at a hardware store is not always available. But the owner himself can make decorative plaster from ordinary putty at home. You should start working by priming the wall: the smoother the base is, the more realistic and accurate it will be to apply the top layer. After preparation, you can begin decorating the room:
- Apply a little putty to the trowel and distribute it evenly over a small area (this will allow you to complete the finishing with the smallest errors). The layer thickness should be about 3 mm.
- Next, the trowel is leaned against the damp layer at an angle of 15-20 degrees. Use light movements to leave thin stripes. The angle of incidence of individual stripes must match: the intersection of lines will disrupt the aesthetics of the design. With careful and slow movement under the trowel, the putty will fold and stretch, which will allow you to get a slight relief.
- After cleaning the smoother, you can proceed to the next area. As you gain experience, the process will happen faster.
- After the relief surface has dried, it can be painted with a brush. In the area of depressions and irregularities, it is recommended to re-paint with a darker paint or paint with glitter or pearlescent composition.
Using these tips, you can easily figure out how to make decorative plaster with your own hands from simple putty. But in order for the finished finish to be truly beautiful, you need to take into account the following rules:
- avoid making deep furrows with a trowel;
- exclude “overlaying” of patterns when adding texture;
- apply coloring compounds in a thin layer;
- use paint that is wash-resistant (so that when applying the second layer, the first layer of paint does not “drip”).
Careful and smooth application of decorative plaster can also be done in oblique, horizontal stripes. And then make patterns on them step by step using a smoothing iron. Before finishing the room yourself, it is recommended to study the attached photo and video lessons and first practice treating the walls in a small area.
What are the differences between putty and plaster?
Before finishing, walls made of brick or concrete must be leveled. Gross defects are corrected with plaster, which consists of coarse-grained components and fills all the defects. But still, the plastered surface is still far from ideal.
For the final leveling of walls or ceilings, putty is used. It contains finely ground particles a fraction of a mm in size. First, the starting treatment is carried out, then the finishing treatment. As a result, the surface becomes smooth and suitable for applying wallpaper or paint coatings.
Methods for updating plaster
So, there are two main ways to update decorative plaster:
- Local repainting. This means that if there are unwanted spots on the wall that spoil the overall appearance, then only these areas can be repainted. This is not labor-intensive work and it does not require much time and effort. Also, with this method of restoration there will be no large amounts of dust and construction debris left. But this option is not suitable for everyone.
- Complete repainting of plaster. This method is suitable if the interior of the room has been radically changed and the old color of the walls does not fit into it at all. Or you just want something new. There won't be a lot of dust, but just in case, it's better to cover the floor and furniture in the room with protective film. As a result, the apartment owners will receive updated walls that will please the eye for a long time.
Putty is a convenient material for decorating walls
The putty mixture can be used not only as a base for other finishing materials, but also for the production of decorative plaster. It is flexible, holds its shape well, and does not blur. After drying, a mechanically durable coating is formed that can be painted, varnished or glazed.
The composition of putties can be cement, gypsum or polymer:
- cement ones are intended for finishing wet rooms and facades;
- gypsum absorbs moisture, so they are used only in dry conditions;
- polymeric ones are universal, do not shrink or crack.
To create texture, decorative elements are added to the mixture - marble chips, coarse quartz sand, various fibers, polymer chips. Combinations of these components of different sizes give an interesting relief. Additionally, pigments and glitter are used - finely chopped sparkles that create a slight shimmer.
Due to the fine structure and plasticity of the material, the design is easily formed even without decorative inclusions. The texture can be created with the most common tools - a grater, spatula, roller or just your fingers.
Terrasite plaster has high strength. It is used for finishing plinths and facades. In addition to frost-resistant cement, it contains granite chips and stone flour, which perfectly resist mechanical damage.
Decorative plaster for finishing facades and fireplaces, stone finish
Artistic plaster is one of the standard options for covering a vertical area. Over the past few years, the composition and techniques have noticeably improved, and new tones and textures have been introduced.
Now it is a full-fledged decoration of the interior or facade. Decorative plaster is often used not only for walls, but also for columns, arches, fences, barbecues and fireplaces. Let's stop at the latter
Application technique:
- Calculate the volume of raw materials based on the size of your fireplace and prepare all the necessary tools.
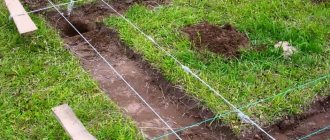
- Prepare the coating: prime, level, strengthen, if necessary, reinforcing mesh, etc.
- Apply a layer of plaster, then the disconnector;
- Take texture matrices and print the design.
- Finish the facing.
- Carry out outdoor work in good weather.
Advantages and disadvantages
Finishing mixtures have high adhesion to stone, concrete or metal, are easy to apply and harden quickly. They are made with the addition of plasticizers, which facilitate convenient application and the formation of a decorative texture.
High-quality plasters are much superior to both wallpaper and painting in a number of characteristics. They provide:
- reliable protection of walls;
- attractive appearance;
- durability and maintainability.
The disadvantages include:
- the need for preliminary leveling of the surface;
- high price of professional services;
- labor-intensive dismantling in case of changing the coating.
Of course, the installation of decorative plaster cannot be called too simple, but having mastered some techniques, it is quite possible to do it yourself.
Paint selection
In order to choose paint for re-painting decorative plaster, you need to know two things:
- what paint was originally used;
- how much money has been allocated for restoration?
If the most common water-based paint was chosen for the initial painting of the plaster, and the budget for re-painting is small, then you can use exactly the same paint only in a different color.
If enough funds have been allocated for renovation work on decorative plaster, then better, more wear-resistant paint can be used. Acrylic-based façade paints are suitable. But, it is important to take into account the fact that when applying such paint, it is necessary to treat the walls with deep penetration primer.
Stages of work
Before applying the finish, all dirty or dusty work is completed, electrical wiring and other communications are completed. The room temperature should not fall below +5°.
Decorative putty plaster is made in the following sequence:
- Surface preparation. Although due to the texture it is possible to hide some flaws, large defects will still be noticeable. Therefore, the base needs to be leveled, puttied and primed.
- Preparation of putty (when using a dry mixture). Cement and gypsum compositions are diluted with water according to the manufacturer's recommendations. Polymers are usually produced in finished form.
- Applying the mixture using tools, forming the relief. The design can be graphic or imitate various textures - marble, wood, masonry, sea waves, etc.
After complete drying, if necessary, light sanding and final finishing with paints and varnishes are carried out. To make the texture brighter, paints are applied in several layers and rubbed over the surface. Compositions with a metallic shine effect give a special shimmer.
Patterns, embossing, roller textures
Now we have moved on to the final stage of decorative finishing with plaster, which we prepared ourselves. At this stage you will apply the finishing coat and decorate it as you choose. We will tell you how and how to do this later.
Roller
We are talking about an ordinary paint roller. It has a large pile that naturally presses through the plaster, leaving an intricate pattern on it. This is the simplest and most affordable option.
You can buy a special textured roller, the rubber surface of which has neat patterns. This option will help create a beautiful and stylish relief on the wall.
After coating and drying the decorative plaster, you can paint it in the desired color. If you used several layers with different shades, then squeezing the pattern in itself will create a stylish effect on the wall surface.
Spatula
There are no less opportunities for realizing creative ideas. If you use a ribbed plastic or rubber spatula, you can easily make straight lines, waves and various geometric patterns and transitions. Ever heard of Japanese rock gardens? You can recreate a similar texture on your wall.
An important advantage of the spatula is that it covers a larger surface. If desired, you can make an arbitrary ornament by applying small vertical or horizontal strokes.
Other options
There are many other professional tools that will help you create decorative finishing. A trowel is perfect for this. It is much lighter and simpler than a spatula, and thanks to its pointed end, you can effectively squeeze out small hollows in the surface of the wall.
Another interesting option is ready-made rubber molds. They are good because they help give the surface the appearance of brick or stone masonry, and at the same time significantly speed up the work of decorating the surface.
Improvised devices for creating relief
If you are passionate about the creative process, then you can use decorative plaster to decorate the wall:
- an ordinary kitchen sponge,
- porous sponge,
- crumpled plastic bag,
- comb,
- with a nail.
Alternatively, you can put on a rubber housekeeping glove and make patterns on the wall with your hands, running your fingers over the thick putty. Craftsmen often resort to this method and create stunning designs.
Now you know in detail about all the techniques for interior design using decorative plaster prepared from a regular mixture, which is available in every hardware store. This will help you make the amazing renovation you've always dreamed of.
How to properly prepare the surface
The more even and durable the base is under the plaster, the better it will lie and the longer it will last. There is no need to level it perfectly - small defects will be filled with a decorative mixture, and the drawing will visually hide other defects. Large imperfections must be smoothed out with cement or gypsum mortar.
Before applying decorative putty, the walls are cleaned of old cladding, the bumps are cut off, and the surface is treated with a deep penetration primer. This improves the adhesion of materials and reduces the absorption of moisture from the putty.
It is recommended to make test samples of various types of plaster in advance, and also paint them in the chosen color. It is possible that the paint will look different in specific lighting and the pigment will need to be replaced or adjusted.
Expert advice
Experts in the field of decorative plaster repair advise adhering to the following tips:
- If repairs are made using a cement-sand mixture, then the rule must be followed: the thicker the layer required, the larger the sand grains contained in the mixture.
- To prevent the prepared mixture from drying out prematurely, it is kneaded in small portions. For thin layers, you can use a liquid solution. To make it more dense, you can make the composition thicker.
- Peeling occurs when plastering a very dry surface. To eliminate this defect, it is necessary to dismantle the plaster on the damaged area and reapply it.
In rooms with high humidity it is better to use cement plaster, and for wooden surfaces use limestone material.
- To repair old plaster, you need to clean the seams by 5–10 mm, sweep away dust and dirt from them. Then they are thoroughly cleaned with a metal brush and treated with warm water so that the new layer of plaster adheres tightly to the old one.
Decorative plaster is easy to repair. To complete it, you need to calculate the amount of material required and take the correct measurements. The solution must be mixed in strict proportions to obtain a quickly hardening mixture.
Recipes for making plaster from putty
The classic mixture is made with the addition of water. But for decorative purposes, greater viscosity is required, which can be achieved using various substances.
With PVA glue
Polyvinyl acetate glue is a viscous white or cream-colored liquid. It is used for gluing paper materials to various surfaces, and also as an additive to mortars.
To prepare decorative plaster, first mix the putty with water, then add glue. As a rule, dry ingredients are poured into water, and not vice versa. Depending on the volume of the solution, hand tools, drill attachments or construction mixers are used for mixing.
PVA, as an aqueous dispersion, quickly dissolves in putty. After a few minutes you can begin applying plaster to the wall. The life time of such a mixture is no more than 3-4 hours.
With primer
To increase the workability period and increase ductility, craftsmen completely replace water with a primer.
Mixing the putty is done as usual. It is recommended to add the liquid component in portions to achieve the desired consistency.
This plaster adheres well to the surface and forms a strong monolith. After hardening, it becomes more durable than on water.
From gypsum putty
A gypsum mixture is quite suitable for finishing dry rooms. It has high vapor permeability, so the walls “breathe” without accumulating condensation from the air.
To prepare plaster from gypsum putty, craftsmen advise mixing “start” and “finish”. This mixture forms well and “holds” the pattern. The starting putty alone is a bit rough, and the finishing putty is too soft. Their mix has all the characteristics necessary for plastering.
With stone chips
Marble plaster is not cheap. It contains many components that provide not only strength, but also good adhesion to various surfaces, resistance to ultraviolet radiation and moisture. Up to 1/3 of the volume is occupied by ground marble, granite, tuff or limestone. Due to this, the coating resembles natural stone and is not inferior to it in strength. For shine, mica is included (up to 2%), color is provided by pigments.
Marble plaster is sold ready-made; it only needs to be slightly diluted with water (1-1.5 liters per 25 liters of mixture). Everything is mixed at low speeds. To prevent the base from showing through, the primer for such a finish should be the same color as the decorative coating.
You need to apply the composition with stone chips to the wall in one go, from corner to corner, so that there is no difference in shade. The raw material is carefully smoothed to fill all voids. The color begins to appear as it dries.
Advantages of homemade plaster
The main advantage is low cost. Such mixtures are inexpensive and are sold everywhere. They are much cheaper than decorative plaster and are also quite simple to mix and subsequently apply. There are many ways to refine ordinary putty and give it a luxurious look.
Other advantages include:
- long service life,
- wide possibilities for choosing proportions (convenience in applying the solution directly depends on this),
- environmental friendliness, since the putty does not contain harmful and particularly caustic components,
- antibacterial properties,
- has excellent thermal insulation, which is especially important for residents of cold regions,
- characterized by noise-absorbing properties, for which many people value it,
- a properly prepared solution greatly facilitates the covering of surfaces, which increases the pace of work,
- the ability to create an original and attractive pattern on the wall.
Techniques for applying putty plaster
We offer several techniques that require not only time and labor, but also artistic taste. As a rule, walls decorated in this way go well with smooth, plain surfaces. To make a bright accent, small areas are sometimes covered with labor-intensive plaster.
Venetian
This is a rather complex technology, but the result is a spectacular imitation of polished marble with a fantasy pattern of veins, beautiful color tints and a silky shine.
If you are ready for a difficult task, we suggest performing a three-layer finish using putty in 2 colors:
- Prepare the wall as for wallpapering, that is, level and prime.
- Divide the gypsum putty into 2 parts. Add pigment to one, the other remains white.
- Using a plaster trowel, onto which small portions of a colored and white mixture are applied, perform the first layer - broaching. To do this, randomly rub the mass in different directions to create streaks and streaks.
- Allow the first layer to dry, sand the tool marks with sandpaper.
- Apply the second layer in the same way, but make smaller portions of the solution. Grind everything thoroughly.
- When the coating is completely dry, trim with a solution of both colors. With short movements of the trowel with additional rotation, the material is distributed over the surface in a random order.
- To ensure that there are no boundaries between areas, treatment should be carried out in areas of 1-1.5 m². Carefully smooth out color differences and burrs from the spatula.
- Dry the wall, sand all sharp edges and burrs with sandpaper.
- Remove dust from the surface and coat it with a deep penetration primer.
Apply a decorative coating to the finished Venetian plaster - wax, glaze, varnish. To create a transparent glazing effect and achieve a deep iridescent color, you can add ground mother-of-pearl, silver or gold. Glitter sparkles will add elegance and brightness.
Moroccan
This is an amazingly beautiful glossy smooth plaster, known as tadelakt. It is performed using the following technique:
- The substrate is coarse-grained lime plaster without compaction.
- The surface is coated with casein primer in 2 layers in a cross direction so that there are no smudges.
- The plaster is applied in 2 steps without smoothing, then a third, more liquid layer.
- After setting, the polishing stage begins. It is carried out with a smooth stone. The result should be a glossy surface with water-repellent properties. When polishing, the sound resembles the friction of stone on stone, which indicates the high hardness of the finishing coating.
- The surface is covered with a special polishing soap and finally sanded. If during operation there is direct contact with water, you need to polish again.
You can make a multi-color coating if you use mixtures from different palettes. The design is applied in stripes or multidirectional strokes and then polished with stone.
There is also a technique of applying with a sponge, when instead of a smooth surface you get a textured one. The grooves are filled with wax, everything is polished with a grinder, and then by hand. This coating is very similar to Venetian multi-layer plaster.
"Bark beetle"
This is one of the most popular types of decorative finishing for exterior and interior work. It is easy to apply and economical in material consumption. The surface is covered with small winding grooves and looks like wood eaten by bugs. The similarity gave it the name “bark beetle” in “honor” of the woodworm of the same name.
A specific pattern is formed during the plastering process with a mixture of small granules. You can set the direction of the “moves” yourself.
The base can be made of gypsum, liquid glass or polymer. Release form: dry mixture or paste. After application to the surface, the mass should not remain motionless. It is moved using a plastic trowel in the selected direction - vertical, horizontal, in a circle. At the same time, solid particles cut grooves, creating a characteristic relief texture.
Movements should be light, sliding, without pressure. The granules must not be deformed or damaged. If the composition contains pigment, coloring is not required. You can coat the surface with a strengthening acrylic varnish to make it waterproof.
"A Thousand Lines"
The decorative material is made from ordinary putty (it is better to use ready-made acrylic-based paste) and quartz sand with a grain size of up to 1 mm. The granules are added gradually, in small portions, and the mixture is thoroughly mixed each time.
The color for the primer and putty is selected as accurately as possible to avoid showing through the underlying base. The brush for forming the pattern is made from a construction float and a plastic shoe mat with a needle-shaped surface, which is sold in stores by the meter. A piece of the desired size is simply cut out and glued using epoxy glue. The edges of the nozzle must be secured with self-tapping screws.
Markings are made horizontally on the wall so that the lines are straight and do not slide. To do this, segments 2 brushes wide are marked, and masking tape is glued along their borders. The result is horizontal stripes of the same height.
Next, putty with a thickness of at least 1 mm is applied to the areas, which must be brushed over. Grooves will remain on the surface. Irregularities are carefully smoothed out with a spatula.
The masking tape is removed as the areas are processed, and each subsequent strip is formed overlapping the previous one. Due to this, there are practically no joints.
Then you need to leave the plaster to dry for at least a day. Lightly sand with fine sandpaper and apply glaze, spreading it along the stripes. It is recommended to use material with glitter. It will highlight the structure of 1000 lines and give the interior a touch of luxury.
Technology
In order for the paint to adhere well to existing painted plaster, the first step is to ensure the room temperature is +20°C. Temperatures that are too low or too high will have a negative effect on the work result.
To apply paint, you can use a long-nap roller or a spray bottle with a compressor. Experts recommend a roller. Because it distributes the paint more evenly over the wall surface. But they must work very quickly so that the drips do not have time to dry. It will be quite difficult to fix them.
And the main thing to remember is that in any case it is necessary to take into account all the nuances and be careful. Then the result will delight the eyes of the household. In addition, you should not skimp on the material, because if the paint is too cheap, it will be visible to the naked eye.
Decorative plaster is gaining popularity among all other materials for painting walls. The main advantage of this material is durability and quality for many years, a wide selection of colors and textures. But, after some time, you will still need to update, refresh the plaster, and make the walls more attractive. Many people reuse paints, believing that this way they can economically retouch the surface. Experts do not advise doing this. Below is a list of consequences of such painting:
- Loss of paint density and the structure of the walls.
- Sloppy and untidy appearance.
- Peeling of the coating.
How to make decorative putty: simple techniques
If Venetian or Moroccan plaster requires skill and time, then some reliefs can be made with your own hands very quickly. This does not require expensive materials; ordinary putty and simple devices are sufficient.
Curly roller
With the help of structured rollers you can cover even a large area in a short time. Their surface can be rough, fleecy, with a geometric or naturalistic pattern, for example, wood or leather.
Homemade devices are also used. To make them, ordinary foam rollers are converted into structural ones - they are wrapped with ropes, plastic film, a pattern is applied to the surface using a silicone glue gun, etc.
When forming a decorative coating, a layer of putty 1-3 mm thick is applied to the wall. The roller is moistened with water and rolled over the damp surface in a certain direction or randomly.
Processing continues until a characteristic uniform pattern appears on the wall. After drying, the surface is lightly sanded and painted as desired.
Masking film
This is a simple and inexpensive way to create an interesting “crinkled” pattern on the wall:
- Tint the putty for the base layer in the chosen color and apply evenly to the surface.
- Cover the putty with masking film, smooth it with your hands and form a relief. Additionally, treat with a roller.
- After 24 hours, carefully remove the film, wipe the surface with a grout mesh, remove dust and prime.
To secure it, tinted azure is applied. To emphasize the relief, excess from the protruding parts is removed with a plastic spatula.
Using a stencil
Stencil plaster requires painstaking work and considerable patience, which is why master finishers charge a lot of money for the work. But you can do something similar yourself.
You will need a thick stencil, which you can make yourself or order from a workshop. The surface of the wall must first be primed with a high-quality primer and puttied to match the finish. The base can be perfectly flat or with some deviations (for subsequent filling with Venetian). A little Marrakech on the plaster will only decorate it.
The stencil is glued to the wall using masking tape. The slots are filled with a modeling mass of a different color from the base. You can use a solid color mixture and then paint the reliefs or cover them with gold. After the putty has dried, sand off the burrs and finish the wall completely.
"Fur coat"
The mixture for this plaster is made on an acrylic base with the addition of sand and ground rocks. They give the surface its characteristic “fur” appearance.
Compositions for “fur coats” are plastic, easy to apply, and not prone to shrinkage and cracking. You can tint the entire mass at once or paint the surface after the solution has dried. The pre-treatment primer should contain quartz to ensure good adhesion of the materials.
To apply the “fur coat” you will need a trowel and a metal grater. For the first layer, the mixture is distributed evenly over the wall with a thickness of no more than 1 mm.
Next, the desired drawing is formed:
- A portion of the solution is applied to the spatula and lightly smoothed with a trowel.
- The spatula is applied to the surface, pressed and torn off. Movements are made chaotically.
- Begin processing each subsequent section before the already applied putty dries, in order to avoid the visibility of joints.
- After the plaster has dried, remove sharp ridges with sandpaper.
The coating can be washed, repainted, and damaged areas can be repaired.
Ways to create relief
You can update the rooms yourself; to do this, you should choose the appropriate finishing option. When working with embossed options, you can update the design in one of the following ways:
- If there are a lot of chips and cracks on the surface, it is recommended to carry out repairs. In this case, all defects are repaired, after which a painting composition or an additional layer of relief plaster can be applied to the wall.
- For a small number of defects, it is sufficient to perform local restoration followed by changing the color of the material.
- Another fairly simple method is to replace the relief base with a thin-layer coating.
After replacing the base and decorative layer, you can begin painting or gluing.
An easy way to create an invoice
Advantages of decorative compositions
Plastered and painted walls have a lot of advantages. All this is due to the quality characteristics of decorative compositions. This decorative finish is:
- Beautiful. Plaster takes on an attractive, aesthetic appearance. To paint walls, you can use absolutely any color, combine shades to get the desired effect.
- Reliable. The service life of decorative finishing is quite long. This cladding is suitable for both interior and exterior work, as it is resistant to different types of impact.
- Safely. The compositions are made from environmentally friendly raw materials and are therefore absolutely harmless to humans.
Decorative plaster can be easily painted, which allows you to change its appearance if necessary.
Painting walls: choosing tools
All necessary equipment should be prepared first. If everything is at hand, the painting process will be much faster. To paint plaster you may need:
- Roller. It has different widths, pile lengths and materials. The size of the handle can be adjusted.
- Brushes. An important element that allows you to paint both the entire surface and individual elements and hard-to-reach places.
- Spray gun. Allows you to save costs and paint the plaster in one color as quickly as possible.
Different painting methods require different tools. It is also important to consider the type of surface and its structure. In addition, be sure to have tools for grouting and leveling the surface on hand. If, while carrying out the work , defects are noticeable, they can be quickly eliminated.
How to calculate consumption correctly
Correct calculation of paint and varnish material is a guarantee of savings. This indicator depends on many factors. First of all, it is worth noting that each type of paint and varnish material has a specific consumption:
- 1 l. acrylic paint per 8 m²;
- 1 l. water-based composition for 8-18 m²
- 1 l. oil for 10-20 m².
This is a maximum that is rarely achieved. It is reduced mainly by the quality of the surface being painted. Consumption is indicated for perfectly smooth walls. Structural plaster will require more paint. Its consumption can be reduced by using a spray bottle rather than a roller and brushes for painting.
An important nuance when calculating consumption is also the thickness of the paint. If the composition is too thick, it is recommended to dilute it slightly with a special solution. Taking into account the above points and knowing the surface area, you can easily determine how much paint is needed to paint the plaster.