There are many ways to connect wires - from the old-fashioned twisting to the most modern self-clamping terminal blocks. But none of them is ideal; each method has its own advantages and disadvantages. In some cases, it is enough to connect the wires in the terminal block; sometimes welding or soldering will be necessary. But there are times when crimping the wires is the best option; we’ll talk about it in more detail.
Crimping methods
There are known effective methods for crimping wires, the implementation of which will require the simplest plumbing tools available in the household of most users.
Possible solutions to the problem are given below:
Using a branded center punch for pressing in (photo below).
- Tinning and subsequent sealing of the contact connection with a gas torch.
- Crimping using a screw and crimping in a vice.
Let's look at each of these approaches in more detail.
Punch punch with hammer
Pressing using a punch is the easiest and fastest way to solve the problem, which does not require excessive effort. To implement it you will need a punch, a vice and an ordinary hammer.
The crimping procedure is as follows:
- First, the part of the wire stripped of insulation is inserted into the tip.
- Then the structure is placed on a massive and rigid lining - the surface of an anvil, a vice, or the wide plane of a sledgehammer.
- After this, using a punch, successive indentations are made on one of the sides of the sleeve while simultaneously flattening it.
- Cores are made in increments of about 2-3 mm, and during impacts they try not to pierce the sleeve.
- The tip is then turned over and processed from the reverse side.
Additional Information
: The number and depth of packings made depend on the length and working diameter of the tip.
Finally, the treated area is wrapped with electrical tape.
Solder connection
This method is especially interesting for those who constantly work with solders and have a gas burner on their farm. And although it does not fit into the “compression” category, nevertheless, with its help the problem is solved quite quickly.
To implement it you need to do the following operations:
- First, the wire and the inside of the tip are carefully tinned, after which a small hole is drilled at its blade.
- Next, the stripped end of the conductor is inserted inside, and the tip itself is wrapped with glass tape.
- After this, it is heated by the flame of the burner, and tin melt is poured into the hole located on top.
When heated, the tin spreads and fills the voids. The previously wound fiberglass tape prevents it from leaking out.
Crimping in a vice with screws
There is another way to solve the crimping problem. According to it, two long screws of a suitable diameter are taken, the length of which completely covers the pressed part of the sleeve (photo below).
After compressing this entire structure in a vice, the wire is securely pressed along the contour of the screws. After this, all that remains is to wrap the joint with electrical tape and use the tip for its intended purpose.
Recommendations for crimp testing
If difficulties arise in selecting a sleeve that is ideally suited for the wires in size, it is better to opt for a tube slightly larger than required. In this case, the void can be filled by cutting bare wire with a slightly shorter length than the sleeve. Compaction in this way will improve the quality of the crimp.
Extending the wire using crimping should imply that the connection joint is located exactly in the center of the tube.
When isolating the joint, the connecting tape must extend beyond the edges of the sleeve by at least 10 mm. If multi-core wires are connected to each other or it is necessary to splice different numbers of them on both sides, then the correct solution would be insulated type connecting sleeves.
In conclusion, we note that crimping as a process is not difficult if you act consistently, use a special tool and suitable sleeves. One way or another, you need to remember that we are talking about a permanent connection, so you will need a wiring diagram. Having a plan at hand will help you avoid mistakes during the work.
CTF press pliers set
This set also includes 5 dies. True, there is no quick release mechanism here anymore. To replace the matrix you will have to use a hex wrench. Which is not entirely convenient and can take much longer than the crimping process itself.
You can, of course, do something on your own and somewhat modernize the process of removing matrices. To do this, you can solder nuts onto the factory screws, which can be easily twisted by hand without the use of hexagons and special wrenches.
The kit also includes 2 spare matrix screws in case you lose the current one or damage the threads on them.
The lack of a quick release mechanism is, of course, one of the main disadvantages of this tool. Imagine you are sitting in front of a cabinet with a couple of hundred conductors. They all come in order, have different sections and sizes, and they need to be crimped accordingly. How much extra time and nerves it will take you to unscrew and tighten the matrices is not a rhetorical question.
A reasonable question arises: why do we need a CTF set with an inconvenient process for replacing dies, if there are CTB press pliers with a mechanism for their quick removal?
The fundamental difference between CTF is the parallel closure of matrices. This form of compression is the most important advantage over any other press tongs.
When using conventional press pliers, insulated and non-insulated ferrules are crimped first from one edge, then in the center, and only at the end is the entire ferrule crimped.
But the CTF model has such a design that its jaws close parallel from top to bottom. Therefore, crimping occurs evenly and immediately over the entire surface of the tip.
True, it is possible that you have chosen the matrix and the tip seemingly correctly, but the wire after crimping is still poorly clamped inside the sleeve. How is this possible?
And the reason here lies in an unscrupulous manufacturer of cable products. They are the ones who can make the wire, relying on their technical specifications, and not on GOST. As a result, the cross-section is not 1.5 mm2, but less than 1.25-1.3 mm2. You, by clamping it all with a 1.5mm2 matrix, naturally will not be able to achieve the result that is necessary.
The CTF press tong model also has:
ratchet mechanism
adjusting the compression force of the dies
You need to understand that adjustment itself does not change the compression force. It only controls and changes the gap between the dies.
Be careful, if you adjust them incorrectly, you may end up with the ratchet not going through the full crimping cycle each time.
There is no need to adjust anything on new pliers. The factory settings provide optimal crimping conditions. However, during long-term use, the dies can become loose and backlash and slack appear.
Adjustment is carried out using an eccentric. Unscrew the stop screw and twist the sprocket. Towards the plus side if you need to increase the convergence of the matrices and towards the minus side if, on the contrary, to weaken it.
The manufacturer KVT for its crimpers talks about a guaranteed crimping of tips of 30,000 cycles without loss of crimping quality.
Also ctf pliers have:
unlocking mechanism from any position
handle lock button
Why do you need to lock the handles? Imagine that you are standing on a stepladder and using one hand to press the tip sleeve into the junction box under the ceiling. You need to put it on the wire, insert it into the desired slot of the matrix and fix it before finally pressing it.
It will be problematic to do this in one go due to the awkward position and cramped working conditions. This is where the fixation mechanism is indispensable. They inserted the cartridge case, pressed it, intercepted it and pressed it properly.
It is not recommended to crimp solid wires with CTB and CTF pliers. To do this, you need to apply more force and the ratchet mechanism must be designed for this. In this case, it is better to use other brands of tools from KVT. For example, crimper – PK-16u and PK-35u.
In general, both sets CTB and CTF can complement each other and be indispensable assistants when crimping insulated, non-insulated and other types of thin-walled sleeves and tips.
Of course, for a generalist it is quite enough to have one of them. However, remember that versatility does not always pay off. It is much more reliable to have a set of pliers, rather than a set of dies for just one press pliers.
Sets of CTF and CTB press pliers can be purchased in online stores for around 5,000 rubles. The pliers themselves with only one matrix will cost at least twice as much. You can choose the option you need here.
Additional recommendations
For proper crimping, you must use the following tips:
- Make the junction of the conductors in the center of the connecting tube.
- Select the correct sleeve section. There will be fewer voids inside the clutch, and contact will become more reliable.
- Apply the insulation so that it extends 1 cm beyond the connecting tube on both sides.
- Use ferrules if cables with different numbers of cores are spliced.
Crimping is a procedure that allows you to obtain maximum adhesion of conductors when installing electrical networks. However, to carry it out correctly, the appropriate tools and materials are required.
Why do you need crimping and crimping wires?
Is it even possible to do without sleeves and crimping? What's wrong with simply attaching wires to machines and other devices?
With a simple clamp, the bundle of wire fluffs up and is crushed to the sides. Some individual conductors may even be damaged. Such conductors, destroyed and separated from the main bundle, no longer take part in contact and the passage of current load through themselves.
All this leads to the fact that the remaining cores are not enough and the connection points heat up. In addition, the bare copper from which the wire strands are made remains accessible to moisture and oxygen. And this leads to its darkening and oxidation. By crimping the conductor once with a tip or sleeve, you will save yourself from all these problems in the future.
How to brew twist
For good contact, the twist can be welded with a graphite electrode or a gas torch. Torch welding has not become widespread due to the complexity and the need to use gas and oxygen cylinders, so this article only talks about electric welding.
Electric welding is performed using a graphite or carbon electrode. Graphite electrode is preferable. It is cheaper and provides better welding quality. Instead of a purchased electrode, you can use a rod from a battery or a brush from an electric motor. It is better not to use copper electrodes. They often get stuck.
For welding, you first need to make a twist 100 mm long, so that the finished one turns out to be about 50. The protruding wires need to be trimmed. For welding, it is best to use an inverter welding machine with adjustable current. If this is not the case, then you can take a regular transformer with a power of at least 600 W and a voltage of 12–24 V.
Near the insulation, “ground” or “minus” is connected using a thick copper clamp. If you simply wrap a wire around a twist, the twist will overheat and melt the insulation.
Before starting welding, it is necessary to select the current. The required current varies depending on the number and thickness of the wire that makes up the twist. The welding duration should be no more than 2 seconds. If necessary, welding can be repeated. If everything was done correctly, then a neat ball will appear at the end of the twist, soldered to all the wires.
So, how to properly crimp wires with lugs
In addition to selecting the necessary wires and tips, to perform this task you will need a special tool called a “crimper” or press pliers.
Externally, the tool is very similar to pliers, at the ends of which a special matrix is installed, into which the tips and the non-insulated part of the cable are inserted.
This tool is designed to provide uniform ferrule force around the wire, eliminating poor contact when crimping the cable. In addition, there are universal tools that allow you not only to crimp, but also to cut the cable, remove the insulation from it and twist the core.
Particular attention should be paid to the type of cable; in domestic conditions, the power cable can be of two types:
- with a monolithic core;
- stranded
When crimping a wire with a monolithic core, it is enough to remove the insulation layer with a small margin (up to 0.3–0.5 cm), (using a tool or using an insulation stripping knife), then straighten and degrease the area to be worked with, after which you should put it on a thermal insulating tube onto the cord.
Then, we select on the tool (by a jumper in the matrix) a certain section and type of tip. After carrying out the above manipulations, you need to insert the prepared end of the wire into the tip, after making sure that there are no cracks in it.
Install the ratchet lock lever. Failure to comply with this point may result in poor-quality crimping of the tip and, accordingly, poor quality of the connection.
The final part of crimping a wire with a monolithic core with a tool:
- make sure the connection is correct;
- insert the tip all the way into the device so that the numbers with the matrix markings are knocked out on the front or back sides of the tip;
- completely recess the exposed section of the wire into the tip;
- applying force, press the crimper handles;
- as soon as the operation is completed, the handles will automatically begin to return to their original position (to do this, it is necessary to move the ratchet locking lever to the “locked” state);
- The cord has been terminated; the final step is to put the heat-shrinkable braid on the connection point and warm it up with a special hairdryer or lighter.
If the handles do not return to their original position, then this problem may be caused due to the following problems:
- too weak compression of the tool handles;
- malfunction of the ratchet mechanism;
- “weak” spring in the ratchet;
- The ratchet locking lever is not fully installed.
If you have to terminate multi-core wires, then the above method should not be used, as it has many nuances.
Therefore, wires with a large number of cores are crimped according to the following instructions:
- remove part of the insulation from the wire (with a small margin of up to 0.3–0.5 cm); when removing the insulation, it is highly advisable to use a special tool that allows you to remove the braid and not damage the cable cores, but if such a tool is not available, you can use a sharp knife (when removing the insulation, you should make sure that the wire cores were not affected);
- put a small piece of thermal insulating braid on the cord;
- after which the bare area must be degreased with alcohol and a special electrically conductive paste applied (the most common options are compositions such as “KVT” and “EPS”).
After the above manipulations, cable processing can be considered complete.
set the required cross-section and type of tip in the device matrix; install the tip completely into the device so that the numbers with the matrix markings are on the front or back sides of the tip; we insert the straightened cable cores into the lug until it stops (Attention! Twisting the cable cores is prohibited); applying force, press the crimper handles; The crimping of the stranded wire is completed, now we return the heat shrink that was previously placed on the cord to the connection point and warm it up with a hair dryer, soldering iron or turbo lighter; After completing the operation, the handles should return to the standard (unclamped) position; if this does not happen, then the reason for this may be the problems described above.
Rules for crimping wires
Crimping of wires with sleeves is carried out taking into account the following rules:
- The materials used to make the tube and conductors must match each other.
- Crimping elements cannot be shortened by sawing. In this case, the protective layer is damaged and the contact reliability is reduced.
- To carry out the crimping procedure, a special tool is required - press pliers.
Crimping of wires is done with a special tool.
The cross-section of the wires cannot be reduced so that they fit into the sleeve. It is better to take a larger diameter crimping element
Types of crimpers and their prices
Given the huge number of existing tips, crimping tools are divided into several types.
For example, according to the location of the clamping surfaces among electrical installation crimpers, there are models:
- With horizontally located matrices (scissor type) - they resemble ordinary pliers. They are lightweight, provide high speed operation and are easy to handle.
- With vertically located matrices (retractable type) - they usually weigh more than the previous version and are not so easy to handle, but for the sake of fairness, it should be noted that for the most part they ensure uniform compression. Here the working surfaces move parallel to each other.
- Diaphragm type (sleeve type, collet type) - exert pressure on the surface of the sleeve from four or even six sides, due to which the wire is crimped tightly and efficiently.
Crimpers are also divided into several types according to the type of drive.
So, for manual mechanical models, the operating principle is similar to ordinary pliers.
Such crimpers are usually designed to work with wires of small cross-section, since they crimp a limited group of lugs.
Automatic options include the following types of crimpers:
- Mobile semi-automatic models are modified manual crimpers, the design of which includes removable “different-sized” dies, a ratchet mechanism and an unlocking device.
- Fully automatic models with hydraulic, electric or pneumatic mechanisms, through which the connectors are crimped. In this case, we can talk about desktop or stationary crimpers, which not only develop enough force to work with thick cables, but are also able to work very quickly and efficiently. Such devices are indispensable on automated assembly lines of electrical equipment.
Crimpers can be both universal and highly specialized.
For example, the latter include a tool designed exclusively for crimping coaxial cables, or for working with automotive lugs.
The former can be equipped with replaceable matrices for many types of connectors; they are also called crimpers with a replaceable module.
Such models have additional functionality, such as a blade for removing insulation.
There are crimpers designed to work with hoses, such as freon hoses.
Often this is a mobile hand tool with a hydraulic drive, made in the form of a pump with a pressure pumping lever, which provides high clamping force.
The crimping tool market is filled with both expensive branded equipment and cheap Chinese crimpers, among which both professional electricians and beginners in the business have to choose.
So manual options will cost the buyer from 250 to 3000 rubles.
The cost of hydraulic crimping machines often exceeds the mark of 6 – 15 thousand rubles.
Crimpers for crimping high-pressure hoses cost over 20 thousand rubles.
The tips below will help you choose a crimper.
Common Mistakes
For crimp connections, select a sleeve of the appropriate size. If the diameter of the core is larger, then it has to be sharpened. Its thinning leads to an increase in the resistance of the contact area. In this place the wire will heat up and may burn out over time. Mechanical strength is also lost. External influence on the connection can lead to rupture.
An increase in diameter, compared to a wire, similarly leads to a deterioration in contact. The presence of gaps between the cores reduces the reliability and strength of the connection. In order to save money, dividing the sleeve into several parts makes installation inconvenient and reduces the contact length. You should also not use improvised tools when crimping. Pliers, a hammer or a chisel will not bring the desired effect, but can cause irreparable damage.
Connecting wires using crimping will not be a problem. If the sections are consistent, the work is carried out carefully and safety precautions are followed, you can get an excellent result.
Crimping wires with lugs using a center punch
When there are no special crimping pliers at hand, it is not advisable to purchase expensive equipment to perform a one-time job. Home craftsmen use several techniques to secure the conductor in the end cap. However, deforming the metal with a hammer or pliers, squeezing it in a vice or even using a hydraulic press does not provide reliable crimping. A connection made using this method may heat up and burn out during operation.
Fixing the wire in the ferrule sleeve at home is possible with a center punch. With this fastening, tight contact is achieved between the end cap and the cable. To complete the work, you will need a minimum amount of tools: a center punch, a hammer and a vice. The shape and size of the tip does not matter. If you do not have a center punch among your home tools, you can replace it with a thick nail, dowel, or a piece of drill. Contact in such a connection is provided by holes or cores pressed into the body of the conductor.
Important!
It is necessary to accurately select the diameter of the conductor and sleeve. Often the specified characteristics do not correspond to reality. For good contact, the conductor must fit into the sleeve without gap.
Work order:
- Strip the edge of the wire from insulation.
- Insert the conductor completely into the tip.
- Place the structure on a hard, flat surface (vice, anvil, sledgehammer).
- Use a center punch to evenly make indentations on the sleeve. In this case, it flattens.
- The cores should be placed strictly along the axis of the tip. When striking, be careful not to puncture the cartridge case. If a nail is used as a center punch, it must first be dulled. The number and depth of the holes depend on the length of the sleeve and its diameter.
- Turn the ending over and make indentations on the reverse side. The cores should be positioned with an offset relative to those already applied by 2 - 3 mm.
- Wrap the crimped tip in several layers of electrical tape.
Advantages and disadvantages
There are many positive aspects to crimping:
- The tool used to make this connection is hand-held and does not require electricity to operate. In cases where you have to work in a room where there is no voltage, crimping is the only high-quality connection method.
- Using crimping tubes, you can connect conductors from different metals, which is a solution to the eternal problem of switching copper and aluminum conductors in one electrical unit.
- If welding requires a specialist capable of performing welding work, and when soldering it is necessary to be able to use a soldering iron, then anyone can do crimping; you just need to try the press pliers in action once.
- Using a special crimping tool, it is possible to make connections in any, even limited spaces. It is especially convenient when connecting wires in a socket box or box.
- Crimping with press pliers and sleeves allows you to shorten the connected sections of wires to a minimum.
- Due to mechanical force, the most durable contact connection is created.
- As a result of crimping, a permanent connection is obtained that can withstand heavy physical stress when breaking.
- Installation speed is minimal, connection quality is maximum.
- This contact does not require any maintenance.
The one-piece type of crimping is in some way a disadvantage, that is, if necessary, it is impossible to unscrew the connection and replace one of the conductors. The sleeve can only be cut out.
Application area
To solve basic problems, experts recommend using a crimper for:
- preparation of current-carrying conductors for the purpose of their fastening inside the terminals of sockets, switches, and other electrical devices;
- connections of a set of wires.
Crimping is indispensable for processing cables of large cross-sections. In this case, a high-quality connection can only be obtained using a special crimping press. The main advantage of the fastening is that after pressing, no air will enter the sleeve. The connection will be tight. The method is suitable for working with aluminum and copper.
Tool design - its appearance
Basic mistakes: how not to do crimping
During the crimping process the following mistakes can be made:
- Cutting the sleeve when the tube length is too long. This will reduce the contact strength.
- Kinked aluminum wires. This cannot be done, because the metal will break.
- Installing a liner of the wrong diameter. If it is large, then it can only be installed on copper wiring, the wires of which need to be bent.
- Reducing the cross-section of the cores. In this case, the resistance will increase and the coupling area will become very hot.
- Selecting the wrong crimping tool. It is better to use special pliers that will not damage the protective layer.
- Excessive or insufficient number of crimps.
- Use of a press matrix of a different diameter.
To avoid mistakes, you need to use standard sleeve size tables and profile tools.
Application area
Press pliers have a wide range of applications in the field of radio, - and electrical engineering. Use a crimper for crimping:
- thin-walled tips of stranded wires;
- thick-walled stranded wire connectors;
- large cross-section cable sleeves;
- sleeves for serial connection of wires;
- RJ-45 connectors for computer cables.
Crimping of thin-walled stranded wire lugs
Thin-walled connectors are divided into three types:
- NSHVI;
- Sheath;
- Ring.
NSHVI
Pin lugs are necessary for reliable fixation of wires in sockets of radio equipment. The lugs are made of thin metal to tightly grip small cross-section multi-core cables ranging from 0.5 to 3.5 mm2. The fittings are designated by the marking NSHVI.
Important! Crimpers with markings for opening sizes of 0.5-3.5 mm2 reliably and firmly crimp NShVI tips, which are often used in assembling various radio devices. NSHVI
NSHVI
Sheath
Thin-walled terminals for stranded wires include sheath connectors. They are used for serial connection of wires in devices with high temperature conditions where soldering may lose its properties. These are irons, electric kettles, microwave ovens and various heating devices.
To crimp sheath-type terminals, crimpers with special dies are used. The terminal has two pairs of brackets. One of them clamps the bare bundle of wires, the second brackets cover a section of the insulated conductor. The terminals are distinguished into “father” and “mother”. The connection occurs by inserting the plate of one tip into the tubular clamps of the second terminal.
Scabbard terminals
Ring
The terminal has a ring configuration for screw fastening. For crimping them, crimpers with dies for wire cross-sections from 0.25 to 16.8 mm2 are used. Ring shanks are used for fastening wires in various power distribution boxes and panels.
Ring thin-walled tips
Crimping thick-walled stranded wire connectors
Massive lugs are used for crimping multi-core wires and cables with a maximum cross-section of 16 mm2. Crimping pliers type PK-16U are designed for such work. The crimper develops a powerful force on the die jaws. Therefore, press pliers are used only for multi-core wires. The tool can easily bite through a single core.
Pliers PK-16U
Note! The letter “U” in the marking of a crimping tool means that the tool is equipped with a reinforced ratchet mechanism
Crimping of large cross-section cable sleeves
For crimping large-section cable sleeves, a manual hydraulic press is used. These are press pliers that develop powerful force thanks to the built-in hydraulic mechanism.
Hydraulic Press
A reinforced crimper is especially needed when laying and switching power cables in power switchboards, both at industrial facilities and in buildings for various purposes.
Consistent crimping of wire sleeves
The serial connection of wires is made by increasing the length of the electrical circuit. This is especially in demand when connecting cores of different metals. When connecting an aluminum core and a copper wire, a through crimp sleeve is used. The sleeve ensures non-close contact of unlike metals, which eliminates the destructive interaction of atomic lattices of different conductors.
Crimping is carried out in the following order:
- the wires are freed from insulation at a distance equal to half the length of the sleeve;
- the cores are inserted into the sleeve on both sides;
- Crimping is done with a crimper on both sides of the sleeve.
Crimping RJ-45 connectors of computer cables
Polymer RJ-45 connectors provide quick connection of cables to computers or connection of additional equipment to them. The cable in this case is a twisted pair, where the insulated cores are intertwined with each other.
Network cable crimping pliers
For twisted pair cables, crimpers with special matrices are used. Crimping is carried out in several stages:
- the wire is cleared from the outer sheath to a length equal to the depth of the plastic connector;
- twisted pair is divided into individual wires and grouped by color in a certain position (see below for additional information);
- the wiring is inserted into a special opening of the pliers and the ends of the wires are stripped of insulation;
- the plastic connector is covered with a crimper;
- a group of cores is inserted into the RJ-45 housing until it stops;
- squeezing the plastic with pliers and pressing the wires into the connector.
Polymer RJ-45 lug
The wires of the network cable are grouped from left to right before entering the connector:
- white-orange;
- orange;
- green-white;
- blue;
- blue-white;
- green;
- white-brown;
- brown.
Types of sleeves
It is very important to choose the right sleeves for crimping wires.
According to the material of execution
A copper cable or wire should be crimped with copper sleeves accordingly. They come in two types and have the following abbreviation:
- GM - copper sleeves. They are made purely of copper, do not have any coating or processing, and in appearance they look like ordinary pieces of copper pipes.
- GML – tinned copper sleeves. They undergo a tinning procedure, that is, their surface is treated with a special tin-bismuth layer. This is done in order to prevent oxidation and corrosion processes. It is also known from school physics lessons that copper, like any other metal, oxidizes. Tinning prevents this process; the crimped wires will not enter into a chemical reaction with the tinned sleeve.
I would like to give one useful piece of advice. Do not listen if suddenly one of the experienced electricians tries to prove to you that using GML sleeves it is possible to crimp aluminum wires, since the tin layer will not allow direct contact of aluminum with copper. This is incorrect, because during crimping the surface layer of the tube is deformed and the corrosion process is still inevitable.
To connect aluminum wires, they use products made of the same metal; they are designated GA (aluminum sleeve).
There are also combined sleeves, they are designated GAM (aluminum-copper sleeve), in everyday life many call them aluminum-copper. This option is used when you need to connect wires made of different metals end to end. The sleeve is a tube of two parts; at the junction of dissimilar metals, the connection is made by friction welding. Here everything is extremely simple and clear - you need to insert copper wires into the part of the tube made of copper, and an aluminum conductor into the aluminum part.
And the most modern version with the designation GSI (insulated connecting sleeves). They are based on ordinary tinned tubes, only they are covered with polyvinyl chloride insulation on top. They crimp copper wires. During crimping, the insulating layer is not removed, pliers are put on top of it, and compression is performed. Such sleeves greatly simplify the work of an electrician, since the crimped electrical assembly no longer requires any additional measures to insulate it.
By size
After the letter designations, a number is written on the sleeve. What does it mean? This is the cross-section of the conductor for which this product is designed. For example, tinned copper sleeves are produced for wires with a cross-section from 2.5 to 300 mm2. Accordingly, with an increase in the cross-section of the conductor, the sleeve itself has larger dimensions (diameter and length). For combined products, two numbers are written through the fraction, one indicates the cross-section of the copper conductor, the second - the aluminum.
By design
The sleeves also differ in design. They can be hollow, that is, inside they are bare through tubes. And they come with a partition in the middle, which allows you to adjust the depth of the conductors, that is, the tips of both connected wires will enter the sleeve to the same length. Combined sleeves are produced with partitions, which are used when connecting conductors at the joint.
How to crimp wire lugs without tools
From the point of view of construction technology, crimping wires without the appropriate tool is prohibited, the only exception being rough installation to check the work performed. However, for any household work with low-current consumers, work without a crimping tool is allowed.
There are several methods for ending cords without tools:
- soldering using refractory high-temperature solders;
- “non-standard” crimping using cores, hammers, and notching the tip
Soldering tip
For soldering, you, of course, do not need serious and expensive press pliers/crimpers, but the following “household” repair tools should be present in your arsenal:
- Soldering iron (from 80 W)/blowtorch/gas burner.
- Soldering kit (fluxes/rosin, various types of solders).
- Heat shrink tubing and/or electrical tape.
- Basic knowledge and skills of working with a soldering iron.
The algorithm of actions is as follows:
- if you have a soldering iron/blowtorch, heat it up to operating temperature, if you don’t have one, turn on the burner on the kitchen stove;
- While the tool is heating up, we perform operations to remove the insulation from our cord (remove with a margin of 0.3–0.5 cm), making sure not to damage the cores;
- we put the thermal insulating braid on the cord and move it to a safe distance until we need it;
- degrease the cleaned area;
- degrease the tip;
- apply flux to the inside of the tip;
- Pre-cut the solder into small pieces so that it covers the inside of the tip by about half to a third;
- apply flux with a soldering iron to the stripped part of the cord, tin it (if there is no soldering iron, then skip this step);
- carefully, holding the tip with pliers so that the solder particles do not fall out of it, place it on the kitchen tile (if you don’t have a soldering iron) or heat it with a soldering iron/lamp/burner for several minutes until the solder inside becomes plastic and liquid;
- as soon as the solder is ready, quickly and carefully take the cord by the insulation and install it into the tip, while continuing to heat the tip, holding it with pliers, if there is an empty space between the tip and the solder does not come out, then add solder to these places until it will not begin to “crawl out”;
- then turn off the soldering iron/burner and give it a few minutes for the solder to completely harden;
- After hardening, we wrap 2-3 layers of electrical tape around the connection between the cable and the tip, move the thermal braiding, securing it at the edges with electrical tape.
Crimping using a core/hammer
This method has many disadvantages, the main one being insufficient pressure, which can lead to heating of such a connection. However, it is often practiced, especially in cases where the connection will not work with high-current devices.
This method requires a minimum of tools:
- Hammer.
- Kern (optional, but recommended).
- A small file for metal.
- Vise (optional, but recommended).
- Conductive paste (highly desirable).
- Insulation tape and/or heat shrink.
To finish with these tools, we do this:
- remove the insulation from the cord (margin 0.3–0.5 cm);
- make sure that the wires are not damaged;
- straighten all the wire strands, twist them slightly (half a turn, no more!);
- take the tip and make a small cut with a file (about 1/5 of the entire length of the tip) on the wire side;
- put on the heat shrink, move it 10–20 centimeters so that it does not interfere; degrease the cord;
- evenly apply conductive paste;
- we clamp the tip in a vice or place it so that it can be comfortably held with one hand;
- after which we completely install the wire into the tip;
- we take a core and a hammer and begin to strike the central part of the tip, which should be “compressed” (if there is no core, then you can use the thin part of the hammer);
- make 4–5 fixation points;
- turn the tip over and repeat the operation;
- check the connection for strength;
- We put heat shrink on the connection, heat it;
- ready, the connection is pressed!
Dimensions and design features of sleeves - how to choose the right one
Connecting tubes are used for installation of single-core and multi-core cables. When choosing, take into account not only the material, but also the size of the product.
It is better to use standard data:
| Type | Section, mm² | Dimensions, mm | |||
| Cable flexibility class 2–3 | 5–6th class of wire flexibility | Length | External diameter | Inner diameter | |
| GM 2.5 | 2,5 | 2,5 | 20 | 5 | 2,6 |
| GM 4 | 4 | 4 | 30 | 5 | 3 |
| GM 6 | 6 | 6 | 30 | 6 | 4 |
| GM 10 | 10 | 10 | 30 | 8 | 5 |
| GM 16 | 16 | 16 | 30 | 9 | 6 |
| GM 25 | 35 | 25 | 40 | 11 | 8 |
| GM 35 | 35 | 35 | 50 | 12 | 9 |
| GM 50 | 70 | 50 | 50 | 14 | 11 |
| GM 70 | 95 | 70 | 53 | 16 | 13 |
| GM 95 | 120 | 95 | 67 | 19 | 15 |
| GM 120 | 150 | 120 | 67 | 22 | 17 |
| GM 150 | 185 | 150 | 67 | 25 | 19 |
| GM 185 | 240 | 185 | 75 | 27 | 21 |
| GM 240 | 300 | 240 | 75 | 32 | 24 |
The quality of the formed electrical contact depends on the correct choice of diameter. The conductor must fit inside the tube and sit tightly.
Products can also be classified according to their design features. They can be hollow or with a partition. The first type is used if the connected conductors are made of the same metal. Combined devices are necessary for end-to-end wiring.
What is the essence of the method?
Crimping is a method of connecting wires using special sleeves. Outwardly, they look like ordinary tubes and serve as a connecting mechanism.
The wire strands that are to be connected are inserted into the tube from two opposite ends, crimped with press pliers, and as a result, a strong and reliable electrical unit is obtained. The tube is compressed in two or three places, depending on its length and the cross-section of the switched conductors. The connected cores and the sleeve are jointly subjected to deformation. At this moment, the tube compresses and squeezes the conductive surfaces of the conductors. Due to this, the wires interlock with each other, which provides reliable electrical contact.
The junction is then isolated.
Most often, this method is used in situations where it is not possible to use another type of connection. For example, welding requires the presence of electricity so that the welding machine can be connected. When working in a small junction box, it is inconvenient to position the bolt connection, nut clamp or terminal block. And reaching up to the distribution box from the ceiling with a soldering iron is also not very convenient. It is in such cases that crimping wires using sleeves helps out.
The crimping method is most in demand:
- if it is necessary to connect wires in power lines with a high current load;
- for switching multi-core conductors;
- if it is necessary to connect large cross-section wires.
This is interesting: How to choose a cable channel for electrical wiring: let's look carefully
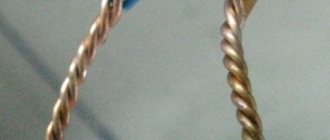
Twist connection
The easiest way to connect wires is twisting. Previously, this was the most common method, especially when wiring in a residential building. Now, according to the PUE, connecting wires in this way is prohibited. The twist must be soldered, welded or crimped. However, these methods of connecting wires begin with twisting.
In order to perform high-quality twisting, the connected wires must be cleared of insulation to the required length. It ranges from 5 mm when connecting wires for headphones to 50 mm if it is necessary to connect wires with a cross-section of 2.5 mm². Thicker wires are usually not twisted together due to their high rigidity.
The wires are stripped with a sharp knife, insulation stripping pliers (ISR) or, after heating with a soldering iron or lighter, the insulation is easily removed with pliers or side cutters. For better contact, bare areas are cleaned with sandpaper. If the twist is supposed to be soldered, then it is better to tin the wires. Wires are tinned only with rosin and similar fluxes. This cannot be done with acid - it corrodes the wire and it begins to break at the soldering site. Even washing the soldering area in a soda solution doesn’t help. Acid vapors penetrate under the insulation and destroy the metal.
The stripped ends are folded parallel into one bundle. The ends are aligned together, the isolated part is held firmly with your hand, and the entire bundle is twisted with pliers. After this, the twist is soldered or welded.
If there is a need to connect the wires to increase the total length, then they are folded opposite each other. The cleaned areas are placed crosswise on top of each other, twisted together by hand and tightened tightly with two pliers.
You can only twist wire made of the same metal (copper with copper, and aluminum with aluminum) and of the same cross-section. Twisting wires of different sections will turn out uneven and will not provide good contact and mechanical strength. Even if it is soldered or crimped, these types of wire connections will not ensure good contact.
Differences in wire crimping tubes by material
Connecting sleeves are divided into several types depending on the material of manufacture. The use of different types is due to the fact that, due to the electrochemical properties of metals, some react actively with each other, which leads to oxidation of the wires and their overheating under load.
Copper sleeves
The abbreviation GM indicates that the sleeve is made of high-quality copper. Used exclusively for connecting copper wiring. The surface of the GM is not covered with a protective shell, so it can only be used in non-aggressive environmental conditions.
Tinned sleeves
Tinned sleeves are used to connect copper wires intended for use in aggressive environments. These are the same copper sleeves, only their surface is coated with a special compound that forms a white protective shell. The abbreviation is as follows - GML.
The advantage of tinning is to protect the material from electrochemical corrosion, however, it is prohibited to use GML for aluminum wiring. This is due to the fact that during the compression process the protective layer is partially destroyed, which will result in direct contact between aluminum and copper.
Connecting tubes for cores made of different materials
The installation of electrical lines, as a rule, is not complete without the use and connection of cores made of different materials. For such purposes, special sleeves are used, which are considered combined and are called GAM. The design is simple, but its peculiarity lies in the use of different materials. Two parts of the tube are welded into one, one is made of aluminum and the other of copper. The middle, the junction is equipped with a special limiter. Thanks to it, equal input of the cores is ensured on both sides.
This variety differs in shape. This can be explained by the fact that the aluminum part of the tube has a larger diameter due to the need for a larger cross-section of the conductor.
The algorithm for crimping GAM is similar to the previous methods.
Connection Features
The technology involves two options for crimping. This is a method of local indentation and continuous compression. Copper or aluminum wires are used for work. The sleeve must also be made of these materials. There are also elements made of copper-aluminum alloy.
Since aluminum cables are prone to the appearance of oxidative films on them, the sleeve must first be cleaned and treated with special lubricants. Copper wires are also pre-treated. The use of lubricants in the process reduces the risk of possible damage to the cores. The friction force is also noticeably reduced. Pressure testing is carried out using manual or hydraulic tools. In the latter case - with a figure press. It is usually used in large industries.
How it works? The two ends of the cable are crimped until they take a round shape. Next, the core is inserted into the sleeve until it stops. It is possible to connect not exactly end-to-end. But in this case, the cross-section of all cores does not exceed the bushing. In the case of local compression, contact directly depends on the depth of the pits. The latter can be measured with a caliper. If continuous compression is used, then check the cross-sectional area. Then, when the crimping of the wires is completed successfully, it is necessary to treat the outer layer with electrical tape or elbow cloth. Next, the wire and cable are carefully laid in the junction box.
Terminal block connection
A development of the bolted connection is the terminal connection. Terminal blocks come in two types - with a rectangular pressure washer and with a round one. When using a terminal block with a pressure washer, the insulation is removed to a length equal to half the width of the terminal block. The bolt is released, the wire is slipped under the washer and the bolt is clamped again. On one side, you can connect only two wires, preferably of the same cross-section and only flexible or only single-core.
Connecting to a terminal block with a round washer is no different from using a bolted connection.
The connection of the wires is reliable, but cumbersome. When connecting wires with a cross-section of more than 16 mm², the connection is unreliable or the use of lugs is necessary.