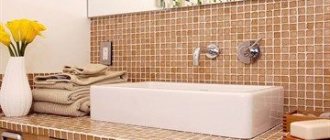
Using plumbing in a bathroom or toilet should not cause discomfort to all family members. It is for this reason that before carrying out installation work, the optimal height of water outlets is determined - equipment designed for connecting plumbing fixtures to water supply and sewerage pipes. How to determine the height of device placement yourself? What parameters need to be taken into account additionally? Are there standards for the location of water outlets? The answers follow.
Equipment for connecting the mixer to the water pipe
Why are water sockets needed?
The water socket allows you to connect the water supply to the necessary equipment in the bathtub. On average, no more than four such outlets can be installed in one room. This device transfers water pressure from a common pipe to the shower, faucet, or any other plumbing fixture that is connected to it. Water outlets must be used for the following reasons:
- installation of appliances and plumbing becomes much easier with their presence;
- quick replacement in case of an emergency or breakdown;
- water can be supplied to several devices at once, which facilitates the operation process.
But this equipment must be installed in accordance with SNiP standards, otherwise it may lead to a malfunction of the plumbing or the outlet itself.
This is interesting: Repairing a pumping station with your own hands, causes of malfunctions and their elimination
Standards and regulations for the installation of water outlets
Each device and equipment installed in the bath has its own standards. You need to study everything in order to install water sockets correctly.
For bathroom
If you follow building codes, sockets near the bathroom should be installed as follows:
- the bathtub must be installed so that the tap is located at least 20 cm from it;
- the socket must be placed at a distance of 80 cm from the floor, 25 cm from the bathtub;
- The device should be located more than 30 cm from the sink or washbasin.
This ensures a safe distance from all equipment to the outlet to avoid moisture getting into it. It is necessary to comply with these standards and even slightly inflate the actual results with the required ones.
For the sink
The standard height of the sink from the floor according to standards is 85 cm. Other standards are provided for this equipment:
- if the sink is installed with a cabinet, then it is necessary to maintain a distance of 65 cm from the floor and 8 cm between the cold and hot water supply taps;
- if the cabinet is large, then you will need to keep 62 cm from the floor, and 10 cm between the outlets for cold and hot water.
It is very important to consider the separation between cold and hot water pipes. If these details are mixed up, the water supply may stop flowing as usual.
For shower
Showers and baths differ in operating conditions. That is why the installation of water sockets is not subject to the same standards. Installation of such devices in a shower stall requires compliance with the following rules:
- maintaining free space to the shower at a distance of 70 cm;
- faucets must be installed within 1.2 meters;
- the shower net is located at least 2 meters from the floor;
- sockets are installed at a distance of at least 60 cm from the floor.
For washing machine
In order for the water outlet to function as usual, all requirements must be met, including the distance from the walls and floor to the equipment. SNiP provides the following conditions:
- the hose from the washing machine should easily reach the socket being installed so that it is not stretched and at the same time does not hang;
- There should always be access to the water supply tap to the washing machine, so that in case of an unforeseen situation or malfunction of the outlet, immediately turn off the water;
- the socket should be well reinforced, the kit includes parts for fastening, but if the structure is not so strong, you can strengthen it;
- the equipment should be located no less than 78 cm from the floor; each model of washing machine has its own standards, but the minimum value begins with this figure.
Other equipment
Water outlets are also required for other installed equipment. The standards for them are as follows:
| Plumbing | Distance from floor (minimum) |
| Floor standing toilet | 17 cm |
| Wall-hung toilet | 22 cm |
| Kitchen sink | 60 cm |
| Heated towel rail | 100 cm |
| Hygienic shower | 70 cm |
These standards must be observed during installation so that the plumbing fixtures remain suitable for use.
Thus, to install water sockets in the bathroom, compliance with SNiP standards is required. Following these rules will help you correctly install appliances and sockets that supply cold and hot water. Each plumbing equipment has its own standards, which must be carefully studied before installing a water supply device.
Kitchen
The main condition for an electrical element installed in the kitchen is that it should not be closer than 0.6 m to the water pipes and sink. The same applies to gas pipes and stoves; it is necessary to maintain a distance between them and sockets (switches) of at least 0.5 m.
About the design of sockets in the kitchen in the video:
In general, the situation with electrical kitchen wiring is the most difficult. Firstly, there are many communications located here - heating, water supply, sewerage, gas. Secondly, there are much more household appliances that require a separate power supply in the kitchen than in any other rooms (washing machine, water heater, hob, electric oven). In this case, you need to install sockets in such a way that they are always accessible.
In kitchens, it is better to install these switching devices at three levels from the floor:
- The first level (or lower) is 0.15-0.20 m. At this level, sockets are installed for electrical appliances that require constant or long-term connection to the network (washing machine, dishwasher, refrigerator, electric stove, waste shredder).
- The second level (or middle) is 1.0-1.2 m. At this height, switches for lighting elements and sockets for household kitchen appliances (microwave oven, tester, blender, food processor, electric kettle, bread maker, coffee machine, multicooker, etc.) are made. P.). Choose a more precise distance yourself depending on the configuration of the furniture in the kitchen.
It is permissible to place sockets under countertops or inside kitchen cabinets. To do this, special holes must be made in the walls of the furniture. This will help you save some space without ruining the overall look.
The minimum distance from the floor to the outlet must be at least 0.1 m, otherwise water may enter it during wet cleaning (washing floors).
Where should I place this element?
One of the key points when installing a water outlet is its location. The ideal solution would be a major renovation of the bathroom with a special space allocated for the fitting. Then you can place a new branch in accordance with the existing rules.
- Sufficient distance to the insert. The inlet hose from the washing machine should freely reach the water socket, without complicating connection and operation. If possible, the wiring should be redone in order to move the machine as close as possible to the pipeline.
- The optimal height for the water outlet. Two nuances are taken into account here. Firstly, the height recommended by plumbers is 77 cm from the finished floor. Secondly, the dimensions of the existing washing machine, especially if you plan to install a branch directly behind its body.
- Free access to the valve. This is a safety requirement - in case of problems with water supply, leakage or accident, the owner must quickly and easily reach the tap and turn off the water supply to the machine . You can use shutoff of the general water supply, but it is better to act locally.
- Reliable fastening. To avoid leaks, it is necessary to carefully approach the method of installing the water outlet. Especially if you plan to place it on the wall. In this case, a special type of fitting is selected, and if there are no possibilities, alternative options are sought.
The main thing when choosing a modern insert is to think about convenience. The outlet should not be difficult to install and use and should not be obstructive or inaccessible in an emergency. The aesthetic side of the issue will also be an important point, so do not forget about a beautiful design that matches the interior of the bathroom.
Distance between pipes when connecting a mixer
Before installing the mixer, pipes with cold and hot water are installed, and the outlets are supplied to the place where the mixer is attached. At this stage, you should know the distance between the pipes when connecting the mixer; this parameter should be selected based on SNIP standards and usually it is 15 cm, with a deviation of 1.5 cm in both directions.
Pipes under the sink
The size of the pipe connected to the mixer is half an inch, and based on this parameter, if necessary, you should take care of additional adapters. Installing a faucet in a bathroom, shower or kitchen has its own characteristics and nuances that should be paid attention to even at the initial stages of pipe installation.
Installing a faucet in the kitchen
When installing a faucet in the kitchen, as a rule, the pipes are laid open and are not walled up in the wall, so it is not so important what the distance between the pipes is on the faucet; it can be easily adjusted if necessary. If the pipes are mounted into the wall, in order to avoid the use of additional elements and adapters, it is worth taking care of the distance between the pipes in advance so that the installation of the mixer goes without unnecessary problems. It is worth buying the mixer in advance and installing the pipeline based on the given dimensions.
Installing a faucet in the kitchen
Installing a faucet in the shower
The most suitable for these purposes are faucets designed specifically for showers. Until recently, in this role they used one mixer for both the sink (pictured) and the shower, which did not require large expenses.
Installing a faucet in the shower
A distinctive feature of this type of faucet is the absence of a bath-shower switch, which gives a more modest size of the product. Recently, there has been a tendency to use special mixers that allow you to reveal the functions of the shower at 100%. Installation of such a mixer can be done openly or some parts can be hidden during the installation process for a more aesthetic appearance; it is worth noting that with hidden installation, when repairing the mixer, problems arise with access to failed parts. Shower faucets designed to connect special shower heads or hydromassage elements are becoming increasingly popular.
Pipe distance
The distance between the pipes of the mixer in the shower during hidden installation is selected especially carefully, since the complexity of installing the mixer itself will depend on this. When installing the mixer, you should take into account the height to which the mixer should be raised. Also, you should not ignore the height at which the shower head is located, which affects the quality of the mixer. Before purchasing a mixer, check all the necessary indicators with a sales consultant.
Installing a faucet in the bathroom
Often, when installing a water supply system to connect a faucet in a bathroom, the pipes are walled into the wall, this saves space in the bathroom. With this type of installation, the distance between the pipes for the faucet in the bathroom plays a big role.
A small error when installing the mixer can be eliminated with the help of eccentrics that come with most mixer models. After setting the required distance between the pipes for the mixer using eccentrics, all the necessary elements are connected.
When choosing a faucet, pay attention to the weight of the product; as a rule, faucets made of silumin are cheaper and lighter in weight than brass ones, but they are usually inferior in quality. When installing the mixer, it is necessary to wrap tow or full tape on the threads of the products, this will prevent leaks during operation of the product.
Advice when installing the mixer: tools for work, if possible, should be wrapped with electrical tape or other materials to prevent damage to the surface of the mixer. When dismantling an old mixer, you should be careful not to damage the threads on the fitting connected to the water supply, which can lead to unnecessary costs.
Choosing a water socket
The modern market offers an expanded range of fittings at any price and of any type. It is not recommended to act at random, since the parameters of a particular water socket will greatly affect the installation and operation of the washing machine . Therefore, first we study the proposed options and choose from threaded, crimp, self-locking and press water sockets.
Threaded elements are the most popular, and the name speaks for itself - a threaded connection is provided here. In addition to screw threading, special requirements are also placed on the material of manufacture, which must be resistant to temperature changes. All this gives this type the following advantages:
- long service life;
- high tightness;
- impact resistance;
- no need for additional fasteners;
- easy installation and dismantling.
Crimping devices are considered relatively “young” and require connection using a collet - a special sleeve with a provided cylindrical chuck. Due to the intermediate layer, complete tightness is guaranteed, and, consequently, durability and reliable fixation on the pipeline. The list of advantages continues:
- low cost;
- easy and quick installation;
- a wide range of;
- collapsible design with the possibility of partial replacement.
Press water inlets are fixed to the water supply using the soldering method. The main advantage is the absence of many parts that make assembly easier. But to perform high-quality fixation, you will need special equipment.
The self-fixing water socket appeared not so long ago, but stands out from other types. The whole secret is in equipping it with special rings, one of which has teeth. As soon as this link is clamped with the key, the clutch is activated and all the rings “snap into place.” The device can be disassembled by again pressing the “toothed” element. Its main advantages are impressive.
- Reusable due to disassembly.
- Connection strength and high tightness.
- Universal application.
- Ease of installation.
- Resistance to loads and temperature changes.
- Durability.
- Low price.
Important! In addition to the type of product, we pay attention to the manufacturer - Valtrex and Viega have proven themselves well.
Fittings also differ in the material they are made of. They come in brass, bronze, stainless steel, cast iron, polypropylene and PVC. Each has its own characteristics and advantages, but it is recommended to navigate the pipeline system and choose a similar one. Devices also differ in the number of connected pipes, but for the existing hose of a washing machine, one outlet is sufficient.
After studying all the available options, you can correlate the advantages and disadvantages with the available conditions and opportunities .
It wouldn't hurt to consult a plumbing service employee. It is also worth considering the method of planned fastening, which will be discussed further.
What not to do
It is strictly forbidden to use extension cords in bathrooms, especially those of dubious manufacture. Not only are they in no way protected from moisture, most of them do not have a grounding contact, and the cords are made of wire with a small cross-section.
The bathroom, as mentioned above, is a room with high humidity, where the effect of high voltage electric current is especially strong.
The cost of any mistake in connecting electrical equipment can be quite high, so you need to strictly follow the recommendations and not hope that nothing bad will ever happen.
You may also be interested in reading:
- Indesit wiun 102 - operating instructions for the washing machine in Russian
- First launch of a new washing machine: instructions
- How to choose a washing machine based on tank material
- Bosch washing machine - error F23
Do not connect the grounding of the outlet to water supply and sewerage pipelines, heating radiators and building fittings.
How to secure a water socket?
Before purchasing and direct installation, you need to decide on the method of attaching the water outlet to the wall. There are several options that depend on the strength, thickness and material of the existing wall. So, a new branch is attached.
- In the pocket. If the partition is made of concrete or brick, then the optimal solution would be to make a recess in the wall to form a pocket of suitable size. A hole of 4-5 cm will be required, but it is not necessary to completely recess the fitting. Often it is left protruding and masked with improvised means.
- In a recess with a gasket. For thin gypsum walls with a thickness of up to 4-6 cm, another option is suitable. Make the largest possible hole and install a half-centimeter sawn wood lining into it. The water socket is attached to a piece of wood, which should be carefully treated with anti-corrosion impregnation to avoid rapid rotting.
- Lined. If the walls in the bathroom are plasterboard, then you will need to act completely differently. First, the drywall is placed on a frame made of metal or wood, then a 3-4 cm spacer is fixed on top, and then the socket itself.
The entire structure is hidden behind another sheet of drywall so that the fitting is flush with it.
Here it is important to soberly assess the strength and thickness of the existing partitions, since unreliable fixation will quickly lead to failure and leaks. It is important to accurately measure the dimensions of the outlet in order to eliminate unsightly voids and subsequent repairs . Afterwards we proceed to the actual installation.
This is interesting: How to attach a stainless steel sink to a countertop, how to install an overhead sink to a cabinet, how to attach it in the kitchen - installation and installation
Rules for the location of electrical points in different rooms
Bathroom power points
Location of sockets in the bathroom
The bathroom is a room with high humidity
Therefore, it is extremely important to know at what height to install sockets and switches so that they do not pose a danger
The main prohibitions are installing power points under the sink, bidet, and bathtub. The sockets must be separated from them by at least 60 cm to prevent accidental ingress of water. It is advisable to make the switch outside the room or also away from the washing items. It is advisable to power the lamps and sconces near the mirror through a cord or a key switch on the side opposite the sink/bathtub.
Living room
For a TV and music center, it is better to make the socket at a height of 90-140 cm. The distance from the floor to the switch should be at least 0.9 m. If an air conditioner is installed, the power point under it is installed at a level of 20-40 cm from the ceiling.
Kitchen
There are several standards for placing food outlets in this room. They vary depending on the technique used:
- First level. It involves installing sockets at a height of 10-15 cm from the floor. A powerful oven, electric stove, freezer, refrigerator, and waste shredder are connected here. The convenience of this arrangement is that after installing a built-in kitchen, it will be impossible to get to the sockets in any other way than through cabinets or a table from below.
- Second level. Here a whole block of sockets is installed at a level of 110-130 cm from the floor in the kitchen apron area. Thanks to this arrangement, it is possible to successfully connect an electric kettle, blender, microwave oven, mixer and other small household appliances that are convenient to use on the work surface.
- Third level. Install power points for connecting an electric hood, TV, and lighting. The height of the location is 2-2.5 meters from the floor.
The switch is located right next to the door at a height convenient for the user. As a rule, it is close to European standards and equals 90-110 cm.
Bedroom
An example of the location of electrical points near the bed
The rest room is recommended to adhere to the following standards:
- On both sides of the double bed (regardless of its size) there is a double socket and a two-key switch. They are placed 70 cm from the baseboard. This allows a resting person, without getting out of bed, to control the lighting, charge a mobile phone, or read a book under a night light.
- The main switch is placed in the room immediately at the entrance.
- If there is a dressing table in the bedroom, on both sides of it at a height of 70-90 cm there is an outlet for connecting a sconce or hair dryer.
Children's
Even 10 years ago, experts recommended placing all food points as high as possible in children's rooms. This ensures the safety of the child and eliminates the possibility of his contact with the electrical network. Today, all plug sockets are equipped with special locking covers. It takes effort for the baby to lift them. Therefore, such sockets can be installed in accordance with the European standard.
The switch in the child's room is made according to his height. It is advisable to install an adjustable power point, with which you can increase or decrease the intensity of artificial lighting. It is better to install a separate standard socket with a cover under the night light.
Cabinet
For expensive equipment it is necessary to provide a system of protection against voltage surges
This space requires more power points. At least one block must be placed in close proximity to the table. A personal computer, monitor, router, printer and copier, and audio speakers will be connected through it. The block is placed 30 cm from the floor level. The master decides how many power points it will include, depending on the amount of future equipment.
If the office has a library, it is necessary to install an outlet under the floor lamp. It is installed in the reading area. The power point under the floor lamp is also made at the Euro level of 0.3 m.
There will be 1-2 more sockets on the free wall. They are used to connect temporary equipment.
We install a water socket
Installing a water socket and connecting a washing machine to it is not an easy task, but anyone can do it. If you don’t have confidence in your abilities, then be sure to contact the appropriate service. Otherwise, prepare the tools and follow the following instructions.
- We turn off the water.
- We clear the wall and repair it, ensuring a perfectly flat surface.
- We carry out the markings. Using a pencil and a building level, we draw out the height of the fittings and their relationship. We remember that water sockets are placed only horizontally and parallel.
- We make a drilling to mark the place for fasteners. There must be at least three self-tapping screws, and it is not recommended to use only the provided pair of “tendrils” for fastening.
- We hammer the walls if you plan to install sockets in a hidden way. We make a pocket, grooves and inlets for laying pipes.
- If necessary, adjust the diameter of the hole on the surface by attaching pipes and fittings. Everything is adjusted to the details so that the reflector completely covers the holes.
- We cut off the rubber gaskets and glue them to the back of the water socket.
- We install a water socket.
Attention! When installing press water sockets using the soldering method, we monitor the operating time of the soldering iron to prevent overheating.
- Carefully tighten all fasteners.
- We evaluate whether the structure is level and, if necessary, tighten the screws on each side.
- We close the voids around the “tee” using thick polyester putty.
When filling, pay attention to the self-tapping screws: tighten the nuts onto the threads for protection or immediately remove any grease that gets on the threads.
- When crimping a connection, it is necessary to align and fix the device with one hand, and with the other begin to screw it to the wall, controlling the immobility of the collet.
- We cover the remaining voids without touching the inside of the pipes and grooves. It is only allowed to fill the holes made with polyurethane foam.
After fixing, the easiest thing to do is connect the washing machine to the water supply. To do this, connect the machine’s inlet hose to the water socket and turn the water supply tap to its previous position. Turn on the fastest mode on the washing machine and open the detergent tray. If water comes out and there are no drops at the joint, everything has been done correctly.
- Share your opinion - leave a comment
Selection of water sockets
Before you begin to consider the rules for installing water sockets for connecting various plumbing equipment, you need to find out what devices are produced and what they are intended for.
Water sockets for kitchens and bathrooms can be classified according to three criteria:
- type or number of bends;
- material of manufacture;
- method of attachment to pipes.
Types of water sockets
Depending on the number of outlets, water sockets can be:
- single (picture above). Such devices are used to connect one pipeline, for example, for a washing machine, dishwasher, hose, and so on;
- double solid. Used for simultaneous connection of two different highways;
Double solid water socket
- double, mounted on a relief strip. The devices are also used to connect equipment, such as a faucet, to two lines for a bathroom sink.
Double water socket on a relief strip
The main advantage of a double water socket on a raised strip compared to a double solid water socket is the ability to adjust the interaxial distance, which allows you to connect, for example, different types of faucets without replacing transition elements.
What materials are they made from?
To make water sockets for a bath or kitchen, the following are used:
- stainless steel. The fittings are distinguished by a high safety margin (withstand pressure up to 20 atmospheres) and high cost (on average 800 rubles). Can be used to connect pipes made of various materials;
- galvanized cast iron. Fittings are cheaper (approximately 200 rubles), but no less durable. A significant drawback is the susceptibility to rust formation when the protective coating is damaged;
- brass, bronze and other alloys. The average cost of fittings is 100 rubles. The devices are no less durable than previous versions, can be installed on pipes made of various materials, are not subject to rust, and are durable. Brass and bronze are the most popular materials;
- PVC and/or polypropylene. Plastic water sockets are characterized by minimal cost (about 40 rubles), durability, and inertness to corrosion. Recommended for use only on pipes made from similar materials.
Double water socket made of polypropylene
Methods for attaching water sockets
Another parameter taken into account when choosing is the method of installation of plumbing equipment. Attaching water sockets to pipes can be done:
- on the thread. The advantages of a threaded connection are a detachable connection, which allows repair work without replacing the device, durability, ease of installation without the use of special equipment;
Threaded fitting
To achieve tightness of the threaded connection, special sealing materials are used, for example, sanitary flax or FUM tape.
- using a crimping collet. The device is easy to install and can be removed for repairs. The connection is sealed without the use of additional materials;
Fitting fixed with a collet
- by soldering method. Press water inlets are distinguished by the maximum level of tightness, reliability and versatility. Special equipment is required for installation.
Soldered fitting
Preparation for installation
Installation begins with determining the location, then marking the surfaces and preparing the pipeline. After this, they begin to connect the equipment. At the end, be sure to check the correctness of the work.
Determining the location
When choosing a location, take into account the building codes that must be observed when installing a particular device. In addition, the fitting must remain freely accessible. This facilitates further maintenance, and in the event of an accident, repair of the device.
When choosing the installation location, building codes are taken into account.
Markings for water sockets
Polypropylene lines in grooves are laid with some reserve. Subsequently, they are cut taking into account the horizontal markings. After connection, the pipes are discharged into niches. At this stage, the surfaces are marked according to the drawing drawn up in advance. When installing the mixer, a distance of 15 cm is left between the axes running through the centers of the water outlets. When installing a faucet for a sink with hidden communications, this value may increase.
After completing the vertical marking, the pipes are placed along it. At the next stage, horizontal lines are drawn at the level specified in the project. The water lines are also marked, leaving an allowance of 1.5 cm for installing a water outlet. At the last stage, the polypropylene elements are cut with special scissors.
Pipeline preparation
After marking and cutting the polypropylene lines, fitting is carried out. You need to make sure that all threaded components are in place. Deviation of no more than 5 mm is allowed. If one section is shorter than the other, the pipe can be extended. To do this, use an element of the appropriate diameter, a plastic coupling of the required cross-section.
When welded correctly, the strength of the joint is comparable to that of a solid section.
Placement of water outlet
The device is fixed to the wall in the following ways:
- Using self-tapping screws. This method is considered the most reliable. Before placing the fitting, holes are made for fasteners. Dowels are inserted into each hole, after which a water socket is installed and screws are screwed in.
- Using cement-sand mortar. The method is suitable only for hidden installation of communications. The solution provides strong fixation.
- Using polyurethane foam. The method is also intended for hidden installation of pipelines.
Water outlets are secured using self-tapping screws.
To connect a faucet or other plumbing fixture, sockets and outlets must be at equal heights. To check the correct installation, use a building level.
Fastening fittings
The method of connecting the device to the water supply line is selected taking into account the material of the pipes. When working with polypropylene products, soldering is used with a special device. The work is carried out as follows:
- The unit is equipped with a Teflon nozzle. Heat it to +250°C. A coupling is inserted into the second nozzle. The elements are held for 3-5 seconds. This time cannot be increased, since polypropylene loses its properties when liquefied.
- The heated parts are removed from the apparatus and combined with each other. In the first seconds, changes in the position of the elements are allowed. During this time, the water socket is leveled.
- Leave the structure for a few minutes. The cooled material forms a strong, hermetically sealed joint. The system cannot be used until the plastic has completely hardened. Failure to comply with this rule leads to the occurrence of cracks, and accordingly, the service life is reduced.
Mixer bar
This element is used to firmly fix a plumbing fixture. The bar is made of stainless steel. Compared to a plastic product, it is more durable. The part itself is equipped with a coupling connector. The mixer hose is connected to it. The other side of the plank is attached to the water supply.
Checking connections
After fixing the fitting on the wall, the threaded connections are provided with plugs, then the water supply begins. After 10-15 minutes, check the connections for leaks. Particular attention is paid to soldered areas.
Final finishing
If there are no leaks, then proceed to calibrate the water outlets. The following features are taken into account:
- The position of the devices is selected taking into account the facing material. The plane of the water outlet must coincide with that of the final finish.
- If it is necessary to recess the fitting, the depth of the part should not exceed 5 mm.
- The coupling with the pipe is fixed in the plane of the wall if painting or plastering of the surface is planned in the future. If the room will be tiled, take into account the thickness of the tile and adhesive. The total figure is 11-14 mm. If there are defects on the wall that need to be hidden by increasing the thickness of the adhesive layer, water sockets are placed along the plane of the lined wall.
After calibration, they begin sealing the grooves with pipes with cement-sand mortar or a special mixture. Wait until the composition hardens, level the surface with plaster, cover the walls with tiles, plastic panels or other material.
Standard rules for installing water sockets
What are the rules for installing water sockets for a shower, for a sink or bath faucet, for a toilet, for a washing machine or dishwasher? What is the optimal installation height for equipment? Let's take a closer look.
Bath
In accordance with SNiP 3.05.01-85 the following standard applies:
- the tap should be located above the bathtub at a distance of at least 20 cm;
- mixer installation height from the floor – from 80 cm;
- if the mixer is used exclusively for drawing water into the bathtub, then it is recommended to install water sockets at a height of 20 cm - 25 cm from the side of the plumbing;
- if you plan to install one mixer for a bathtub and a sink, then the installation location is chosen so that the device is located 25 cm above the side of the bath and 30 cm above the washbasin;
- The installation depth depends on the size of the mixer.
For installation of equipment in medical institutions, other standards are used. The faucet for the sink or bathtub is installed at a height of 110 cm from the floor level. The tap in the shower stall is mounted at a height of 120 cm - 150 cm from the tray.
Sink
Water outlets for a standard sink (85 cm from the floor and 20 cm height) are installed:
- under a sink with a cabinet, unless other requirements are established by the equipment manufacturer, at a height of 62 cm from the floor. The distance between water outlets in this situation is 8 cm;
- for a large cabinet: height – 62 cm, center distance – 10 cm.
Standard parameters for placing water sockets
Other equipment
Water outlets intended for other equipment are located at the following heights:
- 55 cm - 60 cm from the floor for a kitchen sink. The standard center-to-center size of the water socket is 7.5 cm;
- 70 cm – 75 cm for a hygienic shower;
- 18 cm for a floor-standing toilet;
- 23 cm for a wall-hung toilet;
- 110 cm for heated towel rail;
- 50 cm – 85 cm for washing machine.
How to determine the depth of placement of water sockets yourself, watch the video.
It should be noted that the recommended parameters are average values and can be changed by the plumbing installer depending on the user's preferences.
← How to determine the height at which to install the mixer
How to change the battery in a gas meter yourself →
Sconce functions
It is necessary to select a lamp depending on the following functions:
- Local lighting. To provide local lighting, sconces are used as an addition to the main source. Typically, lamps are mounted for reading books and lighting interior items. You can also choose two identical devices, which are placed above the bed at the same distance.
- Creating a certain atmosphere. Lamps can give a solemn look and create an intimate atmosphere. In this case, the sconce must be chosen to match the style of the chandelier. Usually they buy lamps from the same collection.
- Main source of lighting. In small rooms, a chandelier can look bulky, so it is advisable to choose a wall sconce. It will be the main and only light source.
- Decorative element. Sometimes the main function of a sconce is considered to be decoration of a room. Then it should be matched to the style of the room or used as a bright accessory.
- Zoning. The use of such lamps allows you to divide the space into areas for relaxation, work or reading books.
When choosing a sconce, you must also take into account the number of lamps. If a wall lamp will be the only source of lighting, then it is better to choose a multi-arm chandelier. Lamps with one shade are used for small rooms or used with other devices - sconces, lamps, floor lamps, spots.
What is a water socket and what are its advantages?
Previously, washing machines were connected mainly using tee taps. This is convenient, but only in the case of open pipelines. If the pipes are hidden under panels, placed in a box, or simply run inside the walls, this solution is not suitable. A water socket is needed here.
In essence, this is one of the types of fittings used in plumbing. There are different options, but the simplest design looks like this: an elbow with threaded parts for connecting to the main line and connecting the consumer, which has lugs for fixing on the wall. At the location chosen for installation, this angle is secured with dowels, and a water supply pipe is connected to it. After sealing, only the threaded part peeks out from the wall, intended for connecting a washing machine and other household appliances.
Installing water supply outlets to your washing machine is a smart approach that offers a number of significant benefits, including:
- ease of installation;
- household appliances are connected after the repair is completed, which guarantees their safety;
- The process of replacing or transferring equipment is as simple as possible.
This is really convenient, because you only need to make repairs once, install several sockets, and you can change washing machines as often as your family budget allows.
Classification of sockets by design features
The answer to the question of how to choose a water socket for a washing machine has long been found. It is necessary to take into account all their technical characteristics: shape, type, material, but first of all, the method of connection to the highway. Here you need to focus on the configuration of your water supply system, the material of the pipes and the availability of special tools.
Threaded models
As the name suggests, a thread is used to connect these products. This is a time-tested method. Made from high-quality material, this socket is guaranteed to last for many years. A threaded water socket is:
- long service life;
- excellent tightness performance;
- strength and reliability;
- ease of installation.
Installing a threaded water socket does not require any special tools; even a novice craftsman can handle it. An additional plus is that the connection is removable. The socket is easy to disconnect from the pipeline, dismantle, and replace if necessary.
Crimp water sockets
The water supply connection is carried out using the crimping method. The basic part of the product is a collet, a special bushing that ensures the reliability and tightness of the joint. Such models have been used relatively recently, however, they have a number of significant advantages:
- low cost;
- long service life;
- ease of installation;
- wide range of models;
- Possibility of dismantling and reinstallation.
Installing such a water socket is somewhat more complicated than working with its threaded counterpart, but it also does not require special tools.
Self-locking
This type of sockets is characterized by ease of connection. For fixation, various locks are used, which are easy to close, securely hold the pipe, and can be easily separated if necessary. Advantages of such products:
- completely collapsible design;
- possibility of reconnection;
- ease of installation;
- versatility.
After connecting these parts, you must check the reliability of the joint. Carefully inspect for leaks, use a napkin if necessary.
Solder sockets
These water sockets are attached to a plastic pipe using a special soldering iron. The joint is even, smooth and reliable. Advantages of this method:
- minimum of used parts;
- compactness;
- long service life;
- tightness;
- low cost;
- versatility.
This is one of the simplest methods of fastening, but it also has disadvantages. First of all, the connection is permanent; if replacement is necessary, the pipe will have to be cut. In addition, installation will require special equipment.
Methods for attaching a water socket
There are several common ways to secure a socket. The choice of one or the other is determined by the material of the walls, the features of the water supply in a particular apartment and the installation height of the outlet. In any case, before starting work, it is necessary to carefully inspect the surface of the wall at the site of intended installation. There should be no voids or cracks that could lead to failure of the fitting with subsequent leakage.
Pocket installation
This method is applicable when installing a water socket on a solid brick or concrete wall. A recess is made according to the size of the socket. It is not necessary to completely hide the fitting; it can peek out, which will later be “played out” during the finishing work.
The socket is fixed using the supplied parts, after which they move on to finishing the walls.
On a wooden spacer
In the case of thin walls (4-6 cm), when it is not possible to make a full-fledged “pocket” and securely secure the socket, another method is used. A small recess is made, the fitting itself is attached to a board about 0.5 cm thick. The wood must be pre-treated with an antiseptic. The gasket is fixed in the recess.
Installation on a pad
This method is used in the case of a plasterboard wall. It is definitely not possible to attach the socket directly to the sheet; you must first make a support for it. As such, a frame made of wood or a metal profile is used. Its shape and configuration is determined individually.
A wooden gasket is installed on the finished frame, which, in turn, will be the basis for the water outlet.
Work options
You should start installing an outlet in the bathroom after the walls in the room have been finished with tiles or decorative plastic panels. To have an idea of the installation process, you can consider three possible options:
- Installation of overhead socket;
- Built-in installation;
- Use of a protective enclosure (standard electrical panel).
The socket body usually indicates the maximum current load that it can withstand. The passport of the washing machine and its nameplate reflect similar data. If a contact block designed for a lower current is used, then there is a very high probability of its overheating and partial melting. The socket for the washing machine must withstand a load of 16 A.
The socket packaging contains technical specifications
Before installation begins, preparatory work must be done in the room. An electrical power cable must be laid in advance at the installation site and an installation section must be routed out. The free end is stripped of insulation to the required length, and each core is covered with solder. Subsequently, the tinned areas will be fixed in the contact block of the socket.
Sufficient length of wire must be used. By not installing junction boxes or using connecting terminals for splicing, the labor intensity of the work will be significantly reduced. For all three installation options, the rules for performing electrical wiring, connecting an RCD and choosing an installation location are the same. Differences will only appear when mounting the installation products.
