As practice shows, it is the insulation of the bathroom from the inside that is the very process that should be given special attention. This is due to the fact that coolness, draft, dampness and other factors will have an extremely negative impact on comfort. What could be the reason?
In fact, there are many factors that influence the atmosphere in the bathroom. This could be not only a problem with the heating system, but also incorrect insulation of walls and floors, as well as a complete absence of any insulation. You can solve the problem either independently or by seeking help from qualified specialists. Let's consider the question of how to insulate a bathroom in more detail.
For what reasons can the bathroom be cold?
One of the walls in the bathroom is external - or opens into an unheated room. Usually there is external insulation of the house, but sometimes it is not always effective, and if in other rooms there may be no elementary cold bridges, or due to the radiators this deficiency is not felt there, then in an unheated bathroom everything is different.
Often the cause of low temperatures is poor performance of the heated towel rail, the presence of powerful natural draft that simply removes air from the room, or the presence of cracks in wall structures. If the latter are present, it is necessary to seal, and perhaps this will be enough to prevent unnecessary heat loss.
Important! In apartment buildings, usually the walls of bathrooms and toilets are not combined with the outside, but open into the entrances. The latter are usually not heated, and in winter they are often quite cold. And if the fate is that the internal walls of the house are usually made thinner, then large heat losses are not surprising.
Determination and calculation of heating equipment power
Equipment power is one of the most important characteristics. It is this indicator that must be taken into account when purchasing a heater for a specific type of room. To determine the power, first of all you should find out the area of the entire room that needs to be heated.
To determine the correct parameters, you will need to study the list of room areas and the power required to warm them up:
- 5-6 square meters – 500 W.
- 7-9 square meters – 750 W.
- 10-12 square meters – 1000 W.
- 12-14 square meters – 1250 W.
- 15-17 square meters – 1500 W.
- 18-19 square meters – 1755 W.
- 22-23 square meters - 2000 W.
- 24-27 square meters – 2500 W.
What are the dangers of low temperature in the bathroom?
It doesn’t matter whether we are talking about the walls in a wooden house or concrete structures - the combination of the high humidity characteristic of a bathtub with low temperatures, as well as insufficient ventilation, leads to the formation of fungus. And the active growth of mold on the walls not only spoils their appearance, but can also have a detrimental effect on human health. We wrote about this, as well as about methods of combating mold, in one of our previous articles.
Costings
The estimate for installing the system includes the following costs:
- materials - basic and heat-insulating: damper tapes, films, adhesive tape and others;
- components: sensors, thermostats, fasteners, hardware and others;
- screed solutions, glue, etc.;
- surface preparation;
- installation work, installation of wiring, sensor, thermostat;
- screed and cladding.
This is a very approximate list, rather a rough diagram, since the list is individual for different types of sex. This will be discussed in more detail below. It is difficult to name exact costs, since the price of different types of materials fluctuates significantly. And the cost of installation depends on many factors. We can say that the entire set can cost 2–5 thousand rubles per “square”. Laying can cost about one and a half thousand rubles per square. Consultants on our website polaremont.ru will help you choose the appropriate option and outline its cost.
The harm from electromagnetic radiation from heating mats is greatly exaggerated
Features of internal wall insulation in the bathroom
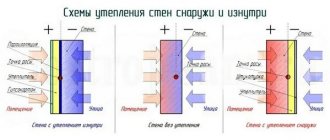
In addition to the fact that internal insulation is always less preferable than external insulation, in the case of a bathroom there is another difficulty - a high level of moisture. Consequently, the material used for this must not be afraid of moisture and not become saturated with it, reducing its performance characteristics.
Important! It is often necessary to insulate not only the walls, but also the ceiling, since large heat losses also occur through it.
In addition to this, you must also keep in mind the following:
- When insulating walls in a bathroom, the vapor permeability indicator is often violated, so you should install a good ventilation system in the room;
- Before finishing with insulation, walls should be treated with antifungal impregnations. It doesn’t matter whether we are talking about a wooden wall structure, or brick or concrete, the risk of mold formation is equally high;
- The formation of cold bridges must not be allowed, so pay close attention to the absence of gaps between the insulating boards;
- To prevent moisture from affecting the insulation, it is necessary to use a water barrier.
Water heated towel rails
These are the most common special heating devices for bathrooms. Their work is simple: hot water flows through tubes, where it gives its body to the room. The most popular used to be the so-called. coils. This design remains relevant today, but only modern coils are much more beautiful and efficient.
There are several ways to supply heating circuit water to heated towel rails. The classic connection diagram implies the presence of a hot water supply and a heating circuit connected to the bathroom. In apartments, the central heating circuit is already present in the bathroom.
In private houses where autonomous water heating is used, it is easier to choose a heated towel rail for the bathroom. This is due to the fact that the coolant in the system is usually clean and does not destroy the walls of the radiators. In apartments, when choosing a heated towel rail, there are some restrictions regarding its material. For example, non-ferrous metal models are of little use there, since hot water, saturated with antagonistic metals, represents an aggressive environment for them.
The disadvantage of connecting a heated towel rail to heating circuits is their seasonal use, i.e. In warm weather, it will not be possible to dry a towel or robe. However, this problem can be solved by combined models that can operate on both hot water and electricity.
We insulate the walls in the bathroom with various materials
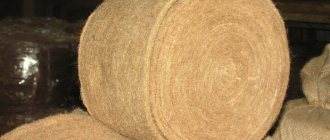
First of all, you should abandon mineral wool, as it absorbs moisture and increases its heat transfer capacity. If you use rolled material, it is better to use basalt wool, which is mounted in a similar way, but almost does not absorb moisture. However, such material still needs an effective vapor barrier. And therefore, after reading the construction forum, you will find advice to take a closer look at other methods. Now let's look at other insulation materials:
- Styrofoam. An excellent option for the bathroom. The high fire hazard in the case of this room does not play a role, since fires almost never occur in the bathroom. But low cost, environmental friendliness and ease of installation are the undoubted advantages of this choice. Its thermal insulation qualities are excellent, and the foam is not afraid of moisture. However, the material almost does not “breathe” - it has low vapor permeability. Placed on pre-cleaned and leveled walls using an adhesive composition;
- Polyurethane foam. This polymer layer is sprayed using a special apparatus, and it is better to trust the process to professionals. Like polystyrene foam, polyurethane foam is not afraid of moisture, and its adhesion is great with almost all materials. On the material side there is high vapor permeability, fire resistance, insulating qualities and environmental friendliness. Usually sprayed on walls with a pre-arranged frame. The latter helps in further finishing;
- Warm plaster. It differs from the usual one by the presence of filler in the form of polystyrene foam, vermiculite or sawdust. The goal is to reduce thermal conductivity by using less dense materials or air cavities. The advantages are that we not only insulate, but also at the same time level the walls for further finishing. Manufacturers talk about the high thermal insulation quality of their products, but in reality the effectiveness of such plaster is not so high, and it should be applied in a thicker layer, which is more difficult and expensive;
- Cork insulation. Before use, the material is waxed to make it more moisture resistant. Mounted on pre-prepared walls using a special adhesive composition. The disadvantage of such insulation is its high price;
- Extruded polystyrene foam. The most attractive insulation for indoor and outdoor use, and not just for the bathroom. Low thermal conductivity, minimal moisture absorption, low specific gravity. It is superior to regular foam in almost every way.
Instructions on how to properly foam a steel hot tub?
Typically, this method is used to insulate and soundproof steel bowls, but it can also be used for acrylic bathtubs.
Be sure to read articles about other methods of insulating and soundproofing bathtubs.
STEP 1: Place the bathtub upside down on the floor. Don’t forget to first place pieces of cardboard underneath it so as not to scratch the enamel surface.
STEP 2. Be sure to thoroughly wipe off dust from the surface on which you are going to apply foam. Then you need to degrease it; for this you can use a universal degreaser, alcohol or dishwashing detergent.
STEP 3. Before use, it is better to prepare the balloon. It needs to be shaken well and heated a little by placing it under running warm water for 5 minutes. It would be enough.
Under no circumstances should you heat the cylinder in a kettle or boiler, as many resources advise. Due to a significant increase in pressure, it can explode.
STEP 4. Spray the bath generously with water using a spray bottle. This way the foam will stick to the surface much better. If the bowl dries out during application, repeat the procedure.
STEP 5. Place the can on the gun and get to work. It is better to apply the foam in dense layers using a snake. Start with flat surfaces and gradually work your way up. There are no special recommendations for the sequence of surface coating
It is important not to leave any spaces
Sometimes the drain needs to be replaced, so it's best to leave a little space around the hole.
STEP 6. Now you need to leave the font until completely dry for 5-6 hours. After the foam has completely dried, cut off any excess foam at the leg attachment points using a knife.
Insulation of the ceiling in the bathroom
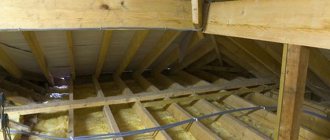
Important! If we are talking about a private house, then the ideal solution would be to insulate the floor on the floor above. In this case, when finishing the ceiling directly in the bathroom, you can limit yourself to a vapor barrier followed by hanging drywall, taking into account the ventilation gap.
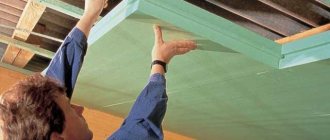
For interior ceiling decoration, the best material would be polystyrene foam or polystyrene foam. The process looks like this:
- The ceiling is pre-leveled, cleaned of dirt and old finishes;
- Special glue is applied to the insulation sheets. It is better to coat the elements around the perimeter with a slight deviation from the edges, as well as in the middle with a zigzag;
- The sheets are pressed against the ceiling and fixed for a minute until the glue sets. It is better to carry out further work, including processing of cracks, no less than an hour later;
- A fiberglass mesh is installed on the material and putty is applied with a waterproof compound;
- The final finish can be water-based paint. It dries quickly and withstands high humidity well.
We use liquid thermal insulation ↑
The optimal way to save space is to use liquid ultra-thin thermal insulation Corundum, which is applied to the surface like regular paint. The thickness of this insulation is 1 mm (two layers of 0.5 mm each). It is a white suspension and has excellent adhesion to any surface. Thermal insulation is environmentally friendly, high moisture resistance makes it possible to use it for insulating bathroom walls. A completely dry coating is suitable for painting or tiling.
Application of liquid waterproofing
Insulating the floor in the bathroom
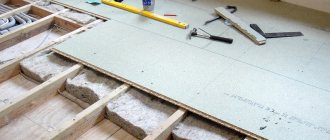
This part of the bathroom can be insulated using heated floors, but we will consider the option with foam plastic. For this purpose, you should choose foam with a density of 25 kilograms per cubic meter or higher. We will mount the sheets on the floor with tile adhesive, after gluing damper tape on the sides. In this case, reinforcement in the form of a mesh is laid on top of the foam plastic and the screed is poured with a layer of at least 3 centimeters. The latter will be the basis for the final finishing - most often with tiles.
Before pouring the screed, it is important to make sure that the foam sheets do not spring, otherwise the finish here may crack in the future.
https://www.youtube.com/watch?v=xc7T99cXd6E
How to insulate a metal font with your own hands
Below are detailed step-by-step instructions for insulating an iron bathtub using foil polyurethane foam (penofol).
For detailed instructions on thermal and sound insulation of a bathtub using polyurethane foam, see our special article.
Step 1. Place the bathtub against the wall or lay it upside down on the floor, after covering it with cardboard or cloth. This is necessary to avoid damage to the enamel.
Step 2. The next step is to degrease the surface. A universal degreaser is perfect for this. But if you don’t have it, it doesn’t matter, you can use alcohol or regular dishwashing detergent. Wipe the entire surface thoroughly and let it dry for 10-15 minutes.
Step 3. If you have insulation in rolls, cut a piece of the required length so that the bowl is covered crosswise from side to side, as shown in the photo. Don't forget to peel off the film from the adhesive layer.
After you have glued the sheet to the bathtub, you need to trim off the excess and once again iron the insulation tightly with your hand so that there are no bubbles.
Step 4. Measure the width of the most even areas and cut strips of 15-25 cm. Then glue them to the bowl in the same way, cutting off the excess.
Step 5. Next, glue the remaining empty spaces with the same small strips.
Don't forget to cut a hole for the drain.
Step 6. Tape the insulation joints with reinforced tape.
Step 7. Remove the insulation from the mounting points of the legs.
Insulation materials
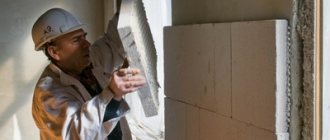
Penoplex is in wide demand in the building materials market. Among its advantages are good thermal insulation characteristics, long service life and ease of installation. We’ll look further at how to insulate bathroom walls with penoplex.
Table of contents:
- Wall insulation with penoplex: advantages and features of the material
- Insulation of walls with penoplex - technology and types of material
- Insulation of walls from the inside with penoplex in the bathroom
- Insulation of walls with penoplex under siding: insulation installation technology
Wall insulation with penoplex: advantages and features of the material
Penoplex is classified as a material that performs the function of protecting a room from heat loss. Its installation can significantly reduce the thermal conductivity of the area of the building on which it is installed.
Penoplex is produced as slabs, which are extruded polystyrene foam. In appearance and structure, this material is often confused with polystyrene foam. However, penoplex has a higher level of rigidity and strength.
In addition, this material has the following advantages:
- low level of thermal conductivity, thanks to which the material is able to retain heat in the room;
- high level of strength both before bending and compression;
- resistance to moisture is ensured by the low moisture absorption of the material, this advantage reduces the level of development of mold and mildew on the insulation and increases its service life;
- low level of vapor permeability;
- duration of operation, which is more than 50 years;
- resistance to fire and high level of fire safety;
- environmental safety, absence of substances harmful to human health;
- Possibility of operation at temperatures from -40 to +70.
In addition, installing penoplex does not require special skills or special equipment. One day is enough to complete the work. The cost of the material, compared to other types of insulation, is average, therefore, by comparing the quality and price of penoplex, it is possible to obtain high-quality insulation for a moderate amount of money.
However, the use of penoplex for external insulation of a building, and in particular for facade systems, leads to its gradual delamination. This is due to the fact that the material has a high density, which does not allow it to absorb glue, therefore, some time after installing the penoplex, under the influence of moisture and other external factors, it peels off from the surface and the appearance of the facade deteriorates.
Therefore, to prevent this unpleasant factor, you should use special fasteners - fungi. It is also possible to replace penoplex with polystyrene foam, which is more practical for external insulation.
Insulation of walls with penoplex - technology and types of material
There are several types of penoplex, which differ in relation to density and scope of application. The slabs have a standard size, but if necessary they can be easily cut and installed on the surface. Depending on the thickness of the penoplex for wall insulation, penoplex from 2 to 10 cm is distinguished.
In addition, there are the following types of penoplex:
1. Used for wall insulation - allows you to insulate the walls of a building both inside and outside. In addition, it helps insulate the basement and interior partitions. The material is suitable for constructing walls using the well masonry method.
If the walls are insulated from the outside with penoplex, then siding is laid on top of the heat-insulating material, the tiles or the wall are plastered.
2. Penoplex for foundation insulation. Used in the process of building basements. This material has zero moisture absorption and increased density.
3. Roof insulation is also possible using penoplex. It is used to insulate roofs of both flat and pitched types. The material has excellent thermal insulation characteristics and, due to its lightness, does not load the structure.
4. Insulation of roads and runways - even in such cases, the use of penoplex is mandatory.
5. Another version of penoplex is intended for internal insulation of a house or apartment. With its help, it is possible to insulate the walls, floor and ceiling of any room.
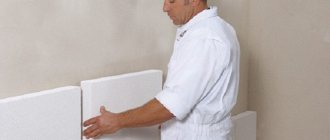
To insulate walls using penoplex, follow these steps:
1. Preparing the base.
This stage involves preparing the surface for attaching insulation to it. The surface, regardless of its type, must be clean, dry, free of finishes and paint. Use plaster to level the walls. Next comes the process of treating the surface with a primer with an antiseptic effect.
2. Installation of slabs using glue.
In order to glue the slab, we recommend using a special glue that comes with the insulation or is recommended by its manufacturer. The glue is applied directly to the surface of the slab.
3. Mechanical installation method.
After gluing the slab to the surface, the process of its mechanical fixation follows. This is necessary so that the plate, when peeled off, will still stick to the surface. For one square meter of slab, the installation of four dowels will be required. If the slab is installed near a window, door or in a corner, then the number of fasteners must be increased.
4. Fixing the insulation with plaster mortar.
In order for the insulation to adhere better to the plaster, we recommend using a carriage brush, which will help make its texture more rough. On the first layer of reinforcement, a polymer mesh is embedded with a reinforcing effect. Then the plaster solution is applied a second time and further finishing of the walls is carried out.
5. Installation of insulation indoors.
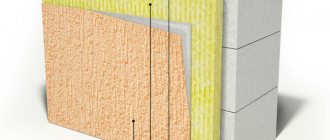
It is possible to use penoplex to insulate external walls; it is also used indoors. We recommend, if possible, installing penoplex outside. However, when installing internal insulation, after installing the insulation, install a foil-coated polyethylene film on it. It will provide proper vapor barrier. Next, the drywall is installed and finishing work is carried out. To install the frame for installing drywall, use dowels, which, after passing through the foam, will reach the wall and fix the profile on it.
Insulation of walls from the inside with penoplex in the bathroom
The bathroom is a place with a high level of humidity, and proper insulation will prevent the formation of condensation, which has a detrimental effect on the finishing of the room. There are several options for insulation that are used in the bathroom, among them the following are noted:
- cork is a material in roll form, which is easy to use and can be easily installed on the surface of walls and in a heated floor system; among its advantages, it is noted that it is not susceptible to rotting, is resistant to moisture and has a long service life;
- mineral wool is more popular than the previous option, however, it is hygroscopic and unstable to moisture, therefore, during its use, proper waterproofing must be ensured;
- although polystyrene foam is cheap, it also absorbs moisture due to its porosity; after its installation, it is necessary to install plywood or drywall with moisture-repellent properties;
- penoplex has low thermal conductivity, but at the same time has a high density; it is used to insulate both screeds and bathroom walls.
