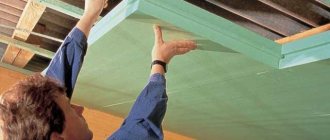
Internal insulation of the attic has an undeniable advantage - the ability to carry out thermal insulation work regardless of the season. However, this approach has several important nuances, ignoring which can negate all efforts and financial investments. It’s easier to prevent unwanted consequences than to eliminate them, don’t you agree?
We will tell you how to act correctly to avoid mistakes. In the article, we described the features of using different thermal insulation materials, gave tips on choosing the best insulation, and also told how to avoid the appearance of condensation in the roofing pie.
The detailed technology for insulating an attic roof will help you do all the work yourself, without the help of specialists.
General points
Let's start with the fact that the attic is a bit of a special room. Its overall structure requires a careful, meticulous approach. And the insulation of the attic roof is even more so:
- Mostly vertical or inclined surfaces . Therefore, it is better to immediately exclude all soft “pliable” materials, namely mineral wool rolls.
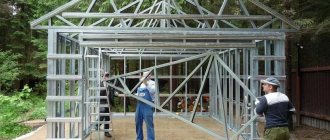
- It is advisable to focus on materials with low dead weight . Since the rafter system is already experiencing significant loads from wind and snow. In addition, the load on load-bearing walls will not increase much.
- Often insulation is required for gables . They are not always made by analogy with a main wall. May be made of facing material. Or the frame is simply built for insulation.
- It happens that the area of the attic significantly exceeds the size of the house itself , while part of it rests on columns. In this case, you will also have to insulate the ceiling in contact with the street.
If the attic floor protrudes beyond the house, additional insulation of the floor is required. Source metasold.com
It should be understood that the thickness of the insulation must correspond to the weather conditions of a particular climate zone, while having a small margin. To gain the required thickness, the insulation is installed in several layers, and the relatively small dimensions require joining.
Important: splicing any insulation requires a careful approach. The joints of different layers should not be concentrated in one place. To prevent freezing, they should be spaced as far apart as possible. It is important to constantly remember this so as not to spoil the material, especially when insulating a sloping roof.
How to insulate an attic floor
To improve the microclimate in the attic, as well as reduce heat loss in the lower rooms, you often have to insulate the floor of the under-roof space yourself. A technology for insulating the attic floor of a wooden building (timber) is proposed.
Step 1 . The necessary materials and tools are prepared. During the work you will need:
- mineral wool slabs (density 35 kg/m3 and thickness 100 mm), impregnation with an antiseptic for processing logs and rough filing, composition with fire retardants to increase fire resistance, hydro- and vapor barrier membrane, boards for the subfloor (25 mm thick and 100 mm wide ) and OSB boards (18 mm thick);
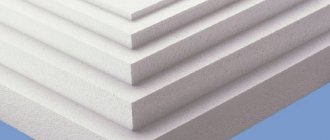
OSB board
- screwdriver, construction knife, tape measure, chain saw (it is needed to create cuts in beams that rise above the rest of the joists), circular saw for cutting sheet material and boards, brush, tape, level, self-tapping screws.
A circular saw
Before starting work, it is necessary to check the condition of the ceilings (especially integrity). They also should not show signs of biological damage.
Step 2 . The floor is cleared of debris and dirt, which usually happens in abundance in the under-roof space.
Step 3 . The wood (joists and rough boards) is impregnated with an antiseptic. After this, the wood should dry out. Fire retardant treatment of wood is carried out. The composition must also dry.
Step 4 . Using a chain saw (for working in the attic it is more convenient to use a cordless tool), cuts are cut in the highest beam so that the boards lie flat.
Cutting cuts in the beam
Step 5 . An insulating coating is laid on the base (with a slight overlap on the walls). It is necessary to do this with an overlap (about 15 cm), and it is also advisable to secure the edges of the film with tape.
Step 6 . The insulation is laid in two layers in a checkerboard pattern so that the thermal insulation seams do not overlap each other (an offset of at least 15 cm is required). There should be no gaps between the plates.
Laying insulation
Step 7 . A vapor barrier membrane is again laid on this cake. It is placed with the smooth side facing the insulation.
Laying a vapor barrier membrane
Step 8 . The floor is covered with boards on top. The installation pitch is 100 mm. The evenness of the base is controlled by a bubble level.
The floor is covered with boards
Step 9 . OSB boards are cut to the required size.
Cutting OSB boards
Using a screwdriver and self-tapping screws, the sheets are easily fixed to the boards.
The material is screwed to the boards
The resulting rough attic base is covered with floor covering (if desired, you can install a heated floor system).
Finished attic subfloor
The efforts spent on installing thermal insulation will fully pay for themselves during the operation of the attic room.
Preparation
All wooden surfaces must be treated with antiseptic and fireproof impregnations.
All wooden components must be treated with protective materials Source remontik.org
It is necessary to immediately identify “unreliable places” on structural elements. For example, the connection of the outer rafter to a pediment made of facing bricks. Or an overlapping connection between a rafter and a screed, made without insulation. It is necessary to eliminate the shortcomings - if possible, foam them or line them with a sealant. Otherwise, they will not be able to withstand through blowing and freezing.
It is necessary to minimize the use of metal fasteners. This is especially true for metal linings secured with bolts. Of course, the bolted connections will remain, but the plates should be made from thick, durable plywood and replaced. The remaining metal parts are painted with primer-enamel and covered with a layer of polyurethane foam. Metal directly in the insulation is a source of condensation and dampness.
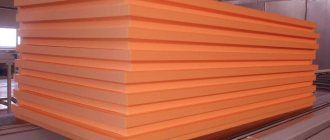
Features of expanded polystyrene
Extruded polystyrene foam is very similar in structure to polystyrene foam. Their operational and technical characteristics are almost the same. The only difference is in the installation technology. Sheets of foam plastic must be laid between the rafters, and polystyrene foam is placed on top of them, which eliminates the risk of gaps and cracks.
Most manufacturers make slabs that have stepped joints. Thanks to this, the connection is much more reliable and durable. This fixation is an excellent option for insulating the roof above the attic.
This material has high strength characteristics and is also resistant to various external influences. Despite this, it is very light in weight. The service life of building materials is quite long if you follow the installation technology.
Expanded polystyrene does not decompose or rot , which is especially important for roofing work. On top of it, you can immediately apply absolutely any coating that can create a pleasant appearance for the room, and also additionally protect against the penetration of cold into the room.
Working with this material is quite simple, so installation can be done alone. Various adhesive mixtures are usually used for fastening. And sometimes a regular construction stapler is used. This allows you to reduce the final cost of insulation due to savings on expensive elements.
Expanded polystyrene has one, but very serious, drawback. It has a high degree of flammability. This means that special care must be taken when laying communications. Electrical wires must be of high quality, and their cross-section must be correctly calculated.
Manufacturers, of course, are trying to combat this, but at present the issue of flammability is still open. People who use polystyrene foam for insulation must take good care of safety, as lives may depend on it.
This material is often used to insulate balconies. It has a very low degree of thermal conductivity, and in this room, polystyrene foam has almost no contact with electricity.
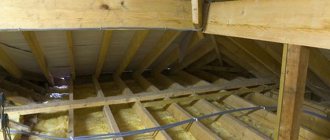
Insulation of the rafter system
It’s great when the insulation of the attic from the inside was planned in advance, or “just in case” the constructive points for this were observed by the builders:
- A roofing membrane is mounted on the rafters.
- A counter-lattice is provided.
- The pitch of the rafters is maintained corresponding to the common length or width of the insulation.
It is convenient to carry out insulation if it was planned at the construction stage Source bamban.ru
It is worth noting that these are ideal initial data that allow you not to look for a “way out of the situation” and to insulate the maximum volume of the attic efficiently without extra costs. Such conditions make it possible to use vapor-permeable insulation. And these are comfortable living conditions.
See also: Catalog of projects of houses with an attic presented at the exhibition “Low-Rise Country”.
Common mistakes
Insulating an attic is a costly and difficult task. To ensure that the result does not disappoint and that money is not wasted, scrupulous adherence to the technology of work is required if they are carried out independently and control over them in the case of work by third-party specialists.
The most common errors include the following:
- Absence or incorrectly installed layers of hydro- and vapor barrier. This leads to moisture getting inside the insulation, thereby reducing its thermal insulation properties and creating favorable conditions for the development of fungus.
- Failure to comply with ventilation clearance standards. Condensed moisture cannot be evaporated and the system becomes a breeding ground for fungus.
- Loose fit of insulation slabs to the rafters and non-compliance with the rules for laying slabs with overlapping seams, as well as poor-quality sealing of all kinds of technological holes. These shortcomings lead to the formation of cold bridges and reduce the effectiveness of the insulation system.
- Compaction of soft insulation when laid in cells between rafters. Such actions reduce the heat-shielding properties of the material, which affects the final result. If the height of the rafters is less than the layer of insulation being laid, then the best solution would be to install slats on the rafters to increase the depth of the cells.
- Mistakes include using roll insulation instead of slabs. This material is intended for horizontal surfaces, but on inclined surfaces it can sag and slide, creating gaps that are not protected from the cold.
- Even at the construction stage, all wooden roof elements must be treated with antiseptic agents. If the elements are metal, then use anti-corrosion agents. This will protect the roofs from destruction even if moisture gets into the insulation system.
Insulation of an unprepared roof
When the decision to insulate is forced, the roof is usually not prepared. There is nothing terrible about this, it is even possible to choose the following options:
- Insulate with materials that do not require waterproofing.
- Build a special frame for living space.
In case of insulation of a roof that is not prepared for this, special compounds can help Source paspraypros.com
Foamed polyurethane foam can play a special role here. Although equipment is required to apply it, insulation occurs in a continuous layer and does not depend on the design features of the roof.
Foamed polyurethane foam is one of them Source da.decorexpro.com
This also includes ecowool. Although its installation requires a roofing membrane, it is quite possible to make a continuous layer of insulation.
The attic and its subtleties as a construction project
A little interesting history to make it easier for you to understand why attics are so problematic in terms of heat.
The concept of an attic was first brought into this world by the French architect Francois Mansart in the 17th century, who proposed using the attic space for household and residential purposes. And already from the beginning of the next century, the poorest people began to live under a usually uninsulated roof. And only much later - bohemia, i.e. rich youth, free artists and poets.
The joy of the Parisians can be understood: at that time, the tax for a house was taken based on the number of floors, but the attic was not considered a floor. Those. It made sense to equip this nice room because of the savings, and therefore the fashion for a residential attic came to Russia much later. It was only in the 1990s that they began to take up the attic in earnest: the market suddenly became flooded with a variety of insulation materials and new building materials.
And today, the attic as a living space is recognized by modern building codes and regulations (SNiP), which state that this term can be used for that attic where the line of intersection of the facade and the roof plane is no lower than 1.5 m from the floor level. But we can tell you with all confidence that the technology for insulating and waterproofing an attic is the most complex and demanding of all existing ones.
Effective insulation
Next, we will consider the most effective materials that do not require serious equipment in order to efficiently insulate the attic.
Stone wool
Due to their elasticity, the mats adhere well between the rafters and allow installation without additional fastening. And the relatively dense structure of stone wool prevents its shrinkage over time. Therefore, it has proven itself well on vertical surfaces.
Stone wool mats come in different thicknesses, and you can choose the one you need based on climatic conditions and other materials used Source pallazzo.su
To further reduce the risks, every 3 meters of height it is necessary to arrange supports for the insulation - add a horizontal frame element.
Teplofom panels for waterproofing
From the above it can be understood that protection from moisture is a very difficult and labor-intensive process. At the same time, there is a way to reduce the cost of time, materials and labor to a minimum. This is possible when using Teplofom panels. Why does this happen:
- All work on hydro- and vapor barrier will be reduced only to the installation of panels.
- This material is not afraid of moisture (moisture absorption is 0.1%), which means that no additional membranes are required to protect it. Accordingly, you will not have to lay insulation and film several times.
- The resulting surface is not subject to the risk of mechanical damage and is ready for finishing.
Proper completion of work
The insulation has been installed, but the process must also be completed correctly. It must be protected from damp vapors from the room. For this, a vapor barrier film is installed. Moreover, the overall result greatly depends on the thoroughness of execution. Although each package is supplied with instructions, let us briefly repeat:
- The subsequent canvas overlaps the previous one by at least 15 cm.
- The joints are taped with special tape.
However, attic vapor barrier has a dual purpose. Oddly enough, it also protects the residents themselves. The fact is that vapor-permeable insulation is not strong enough and can be slightly weathered. From the outside this is not so important, plus it is protected by the roofing membrane. And inside it is necessary to exclude even the minimal possibility of the insulation components being released into the air - to reliably cover it.
The final stage is covering the insulation with canvases, on which the finishing is subsequently applied. Source obustroeno.com
Of course, this does not apply to Penoplex. But it is also recommended to protect against it; an effective material is penofol.
As for insulation of any type. In addition to the vapor barrier device, a technique that at first glance is unnecessary, but effective, is often used. Before finishing, intermediate, seemingly unnecessary material is installed. It can be OSB, GVL or GKL - it depends on the design. Moreover, the technology is fully observed - all joints are carefully sealed. This is an additional barrier against the unwanted effects of materials.
We calculate the heat: what will be in the attic?
And now - about the important points. As you know, heat always moves upward. Therefore, if you don’t want the attic to become too hot and stuffy, and the rooms on the floors below to become colder, block off this heat access. How? To begin with, be sure to install doors between the first and second floors, if there are any. Next, think carefully: will you somehow heat the attic? If not, then the heat that will come from the floor below will be enough for her (provided that there is no door above the stairs). If so, then the attic floor will need to be insulated in the same way as the pitched walls, thereby creating a barrier for heat from below. The room below will become warmer, and the attic will now have its own personal microclimate, which can be regulated.
But why, for example, make the attic colder than the living rooms? This is a completely rational solution if you are going to organize a library or a personal mini-gym in it, which do not need either excess heat or excess water vapor from below.
Answers to popular questions
What is the best insulation for an attic under metal tiles?
Metal tiles do not place any special requirements on insulation. All types of mineral wool and foam plastics are suitable. The main condition is a sufficient layer of insulation, reliable waterproofing and vapor barrier.
Soundproofing insulation should be installed under a metal roof. Basalt wool and polystyrene foam have these qualities. In addition, roll and block insulation materials with a soundproofing substrate are produced.
How to insulate an attic if the roof is without waterproofing
If there is no waterproofing, it should be installed. With a cold roof, the absence of a water barrier is not critical - if there is no difference in the external and internal temperatures, there will be no condensation, as well as ice dams.
If you install a roofing pie for a warm attic without waterproofing, the insulation will get wet and lose all its performance properties.
The waterproofing film can be laid from the inside, securely connecting the joints. In this case, the need for ventilation under the roofing should be taken into account. Therefore, there must be an additional sheathing above the waterproofing film to create a ventilation gap. If there is no gap, the roofing material is laid on the rafters, then it must be removed.
Waterproofing is laid on top, connected without gaps, sheathing is made and the roofing is installed.
Advice from professionals
PPU insulation is considered a complex technology. It is better to entrust the work to hired specialists. If you decide to master this “art” on your own, you should listen to the advice of professionals:
- When mixing polyurethane foam with water, the ratio is 1:1.
- If the working mixture has darkened, the proportions are not maintained correctly. The properties of the insulation will deteriorate.
- When insulating in the middle zone of the attic, the thickness of the polyurethane foam is applied at least 15 cm.
- Insulation is best done in warm weather, when the air temperature is above + 10 ° C.
- During spraying, moderate humidity is created in the attic. Excess moisture is not allowed. The insulation can peel off from the surface or harden with large air bubbles.
- During operation of spraying equipment, ventilation is provided in the attic.
- Spray foam from a gun, moving from bottom to top. The nozzle is removed from the insulated surface at a distance of 50 cm.
- In one pass, a layer of the required thickness is immediately sprayed. You cannot use a gun to return to areas of foam that have not hardened.
Upon completion of work, the equipment is washed. If polyurethane foam accidentally sticks to the body, carefully remove it with a solvent.
What is construction polyurethane foam?
In comparison with elastic compounds of polyols foamed with air and/or carbon dioxide (foam rubber), construction polyurethane foam is a rigid material with a density of 30 - 150 kg/m³. However, it is not rigidity that is the main difference between insulating polyurethane foam and foam rubber, but the structure of its pores. In construction foam, up to 98% of the pores are closed, so the material does not absorb water and conducts heat poorly (due to the gas filling of the chambers - the pores).
Polyurethane foam - a new generation of insulation
Polyurethane foam, sold in spray cans, also belongs to insulating polyurethane foams, but its percentage of closed pores is lower (about 80%). In general, the higher this indicator, the higher the energy efficiency of the insulation. Polyurethane foam has the lowest thermal conductivity coefficient among all insulators currently used in construction. For the best two-component systems, the parameter value does not exceed 0.019 - 0.021 W/m*K. This is 30% less than samples of high-quality extruded polystyrene foam (EPS), which have a coefficient of 0.028 W/m*K.
Polyurethane foam is a material with stable properties. Its characteristics have not changed for many decades. However, it is destroyed when exposed to ultraviolet radiation, so it requires protection from it. The minimum required protection can be achieved with conventional painting.