| № | Name | Rating | Nomination |
| 1 | WELTWASSER WW TS 4244 | 4.87 | The best ratio of price and quality |
| 2 | Grohe Tempesta Cosmopolitan 210 27922001 | 4.83 | Most Recommended Model |
| 3 | Milardo Helic HELSB1FM06 | 4.79 | |
| 4 | KAISER Trio 57188 | 4.75 | |
| 5 | Wisent W3506 A | 4.60 | Best price |
| 6 | Grohe Euphoria 260 27296002 | 4.56 | The most functional overhead shower |
| 7 | Hansgrohe Crometta E 240 1jet Showerpipe EcoSmart | 4.50 | Economical water consumption |
| 8 | GROSS AQUA Space GA9014SMD | 4.37 | The most stylish design |
| 9 | IDDIS Shelfy SHESB3Fi06 | 4.33 | Best guarantee |
| 10 | Lemark LM6462WG | 4.03 | The largest overhead shower head |
A watering can with a rain shower function is a wider surface, from 20 to 30 centimeters, with many nozzles for distributing the flow of water. When passing through such a structure, the liquid mixes with air, the jets become softer and no longer hit the body, but gently envelop it. This gives special pleasure, allows you to relieve fatigue from your muscles and relax. What could be better after a hard day at work?
Rules for installing plumbing
Installation of internal sanitary systems should be carried out in accordance with the requirements of SNiP 3.05.01-85, SN 478-80, as well as SNiP 3.01.01-85, SNiP III-4-80 and SNiP III-3-81.
Before installation of internal sanitary fixtures begins, the following work must be completed:
- laying pipelines and air ducts
- installation in accordance with the working documentation of embedded parts in building structures for fastening equipment
- ensuring the possibility of turning on power tools, as well as electric welding machines, at a distance of no more than 50 m from one another
- glazing of window openings in external fences, insulation of entrances and openings
General construction, sanitary and other special work in sanitary facilities should be carried out in the following order:
- Preparation for floors.
- Plastering walls.
- Arrangement of beacons for installation of ladders.
- Installation of fastening means for pipelines.
- Laying of pipelines.
- Carrying out their hydrostatic and manometric tests.
- Waterproofing of ceilings (floors).
- Wall priming.
- Installation of clean floors.
- installation .
- Installation of brackets for washbasins.
- Installation of mounting parts for flush cisterns.
- First painting of walls and ceilings.
- Wall tiling.
- Installation of washbasins.
- Installation of flush cisterns.
- Second painting of walls and ceilings.
- Installation of water fittings.
When installing sanitary systems and carrying out related civil works, there should be no damage to previously completed work. Earthenware fixtures are installed after the installation of pipelines before the final painting of the premises.
When installing sinks and sinks, inspection siphons should be used; when installing washbasins and bathtubs, bottle and floor siphons should be used, respectively. Devices are placed horizontally or plumb. To equalize electrical potentials, the bathtub body and steel water pipes must be connected with a special metal conductor.
Valve-type shut-off valves must be installed in water supply systems. Valves and check valves must be placed in such a way that water or steam flows under the valves.
Check valves on hot water supply (heating) pipes are placed strictly horizontally or strictly vertically, depending on their design. Water meters are placed at a height of 300 to 1000 mm from the finished floor level. The axis of the water meter unit must be in a horizontal position.
Water taps and mixers are installed above the sides of sinks by 250 mm, sinks and washbasins by 200 mm, counting from the sides to the horizontal axes of the taps or mixers. Mixers common to bathtubs and washbasins should be installed at a height of 1100 mm, mixers for shower trays - 800 mm from the floor level to the horizontal axis of the mixer.
In accordance with the recommendations of SNiP 3.05.01 clause 3.11 and clause 3.15, sanitary fixtures are installed at a height according to the table
Step-by-step disassembly instructions
Watering can repairs must be done carefully. It is advisable to put small spare parts in a previously prepared container so as not to lose the required element. When dismantling the gaskets, avoid damage.
The algorithm for disassembling plumbing fixtures with a mode switch is as follows:
- Remove the watering can. To do this, unscrew the union nut of the divider, which is located at the junction with the hose. If it is not possible to remove it manually, use an adjustable wrench.
- Disconnect the supply hose and begin disassembling the watering can.
- Insert the knife into the recesses located in the center of the diffuser, turn the blade counterclockwise until it is completely untwisted.
- Remove the panel and carefully remove the swirl box secured with a special screw. To do this you will need a Phillips slot.
- Having gained access to all parts, begin cleaning the elements from limescale.
Some shower models, such as those from Grohe, have a complex switch design, and universal tools will not work here. The manufacturer takes this factor into account and supplies plumbing fixtures with a special key.
Installation height of plumbing fixtures: SNiP requirements
The installation of sanitary ceramic products should be carried out in accordance with the requirements of SNiP 2.04.01-85, technical conditions and instructions of equipment manufacturers. The height at which sanitary fixtures are installed should be taken in accordance with SNiP 3.05.01-85.
At what height should a shower head or rain shower be installed? Finishing works Tyumen.
When purchasing plumbing fixtures, the presence of invisible cracks is determined by ear by tapping the product, located on a wooden stand, with a wooden hammer weighing about 250 g. A product that has cracks makes a rattling sound when tapped.
The presence of nicks and scratches is determined visually by wiping the surface of the product with a cloth soaked in a 0.1% solution of methylene blue solution. If there are nicks or scratches, they are filled with a blue solution and are detected visually without the use of magnifying devices.
Table: the best Russian and foreign brands
The table below compares major manufacturers of rain showers with mixer taps for modern bathrooms.
| Company name | A country | Quality | Price |
| Jacob Delafon | France | High | High |
| Lemark | Czech | Average | Low |
| Aquatechnics | Russia | Average | Low |
| Rossinka S | Russia | High | Average |
| Raiber | Germany | High | Average |
The cost in the table is a relative parameter, since the positions of all brands differ. Some do not have ceiling showers in their catalog, while others specialize only in such products.
Installation height of shower mixer in bathroom
In addition to the usual bathtub made of cast iron or acrylic, a shower is often installed in the bathroom, which is a structure consisting of a tray and a mixer or a special factory-made cabin. Its popularity is due to personal preferences, the ability to reduce water consumption and smaller overall dimensions. The location and height of the mixer in the shower from the floor depend on the design features of the equipment.
To ensure comfort while bathing, it is also necessary to take into account the individual characteristics of the users.
Types of equipment
There are several types of structures:
Rack
Functional, universal device. The design consists of a rod mounted to the wall. A watering can, which is larger in size, is attached to it. Water supply is carried out using a flexible hose or a stationary stand pipe.
Panel
Such designs are suitable for cabins and baths. The body combines a watering can and a mixer. The water supply system is hidden. Additionally, hydromassage nozzles are installed in it, as nice bonuses - a thermostat and lighting.
Mixer with rain shower and tap
It is universal, convenient, and relatively inexpensive. It has a large watering can (up to 300 mm) and is mounted on the wall. But it does not provide a full-fledged storm effect - the flow is not enough to cover the entire body.
Standards and Recommendations
Features of the installation of plumbing fixtures are regulated by SNiP 3.05–85. According to its provisions, height of a shower mixer in a separate cabin is 1.2 m from the tray platform. Foreign standards establish principles for placing equipment depending on its design features. The following shower options are available:
- Manual. This type of shower has a short spout and is usually located above the bathtub at a distance of 0.5–0.7 m from its top edge.
- Upper. In this case, there is 2–2.1 m between the shower head and the tray. A special rod, instead of a rigid stationary fastening, allows you to adjust the height of the shower.
- Side. The placement of nozzles is determined by their number. Two are installed at a distance of 0.7 m and 1.3 m from the shower tray. If there are three nozzles, then they are located at levels of 0.6 m, 1 m and 1.4 m.
READ How to plaster slopes on plastic windows
However, the recommended height for placing plumbing equipment is not always convenient for users. If for standard factory-made shower cabins this parameter is limited by the manufacturer and technical characteristics, then when you independently assemble a shower from a tray and mixer, it can be changed.
Replacing the watering can
The simplest and most cost-effective option for transforming your bathtub or shower into a source of equatorial shower is to replace the shower head with a special wide model. Of course, it will be difficult to achieve the full effect, but you can refuse the services of specialists. Additional materials may require plumber's sealing tape to seal threaded connections, but usually the rubber gaskets included with the purchased nozzle can cope with any leaks without additional effort.
Individual parameters
To decide at what height the shower mixer will be most comfortable to use, you need to consider:
- anthropometric data of users;
- individual preferences.
In addition, the location of the tray and the architectural features of the bathroom are important. If the wall finish remains the same, then when installing plumbing equipment, installation work should be carried out carefully and significant damage to it should be avoided. The optimal distance from the mixer to the tray is selected so that its use is convenient for most family members.
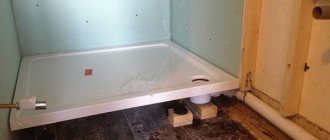
Construction of a shower room
The thorough construction of a “tropical shower” type shower requires hidden wiring of water-bearing pipes, especially since installing a nozzle at ceiling level will also bring additional labor and material costs. Such bathroom equipment is very dependent on construction experience and the availability of plumbing skills; experts recommend entrusting the design and execution to professionals. If you feel able to handle all the steps of installing a rain shower yourself, the following are step-by-step instructions.
What determines the installation height of the mixer?
It is important to note that all the figures indicated above are only recommendations. After all, the premises and requirements of different consumers differ from one to another and are unique. For this reason, height of the crane will always be different. This parameter, and the installation method itself, depends on various factors. One of them is the type of mixer.
Each of them needs to be mounted at a different height (as indicated in the previous paragraph). If two taps are installed for the bathtub and sink (that is, for each of the bowls), then the mixer that you will use only for the bathtub can be mounted at a distance of 20–25 cm from its upper edge.
If you plan to use only one faucet (with a long spout) for both devices, then the installation height above the upper side of the bath should be at least 30 centimeters. It is recommended to install the faucet above the sink at a distance of at least 25 cm from its top edge. This height is optimal so that the consumer can easily wash their hands, wash themselves and perform the entire set of hygiene procedures.
Benefit
Since this type of shower has a positive effect on the psychological state (relaxes, reduces stress reactions, removes anxiety), it is also called a shower of positive emotions.
This is interesting: Faucet on board the bathroom, selection rules, types and installation
Thanks to additional aeration of the water inside the mixer, such a shower has a hydromassage effect. As a result, such a shower improves peripheral blood circulation, relieves muscle tension, invigorates and improves mood. Due to the soft hydromassage, the skin after such a shower acquires elasticity and a toned appearance. A separate positive effect is noted from the influence of lighting in a tropical shower.
Standards for installing a mixer in a shower
Almost all commercially available faucets come with installation instructions. It lists all the standard installation parameters and lists the procedure. This simplifies the installation process and allows you to do it yourself without the help of specialists.
Before you begin installing a new mixer, you need to dismantle the old one, if any. But before installing a new one, you should remember that there is a certain set of installation recommendations. All of them are documented and can be found in SNiP 3.05.01–85.
The document clearly states that the distance is selected in accordance with individual preferences, but the recommended installation height of water intake fittings above a bathtub or tray is 180 centimeters.
Reference. It is worth noting that this figure is more suitable for public baths or showers (for example, in the locker room of a sports complex or gym) than for a private shower.
For home use, it is better to choose the height from the mixer to the base in the range of 200–210 centimeters. If we consider the interval from the floor, then it should be 215 (plus/minus 10) centimeters.
If the crane is mounted not at one stationary point, but on a rod, then you get the opportunity to adjust this parameter for each user personally. The upper edge of the rod is installed at the same distance - 215 cm from the base of the bathtub.
It is better to install a hand shower with a short spout at a height of 30–70 cm from the top edge of the bowl. It is important to remember that in this case the distance will depend on the length of the hose.
If you are installing a side shower, then the height of the entire system will depend on the number of mixers in the set. If there are two of them, then the optimal distance will be 70–130 centimeters from the base of the shower stall. If the set includes three taps, then it is better to choose the following height from the pallet:
- 60;
- 100;
- 140 centimeters.
All these parameters are advisory in nature and are not strict.
Reference. According to SNiP standards, it is best to install the sink at a distance of 85 cm from the floor. However, this value is only a guideline, and is calculated based on the average height of a person.
What is the height of installation of plumbing fixtures in the bathroom and toilet? Height of bathroom furniture. Where is the best place to place a bidet?
Top best manufacturers
Many users of rain shower systems are faced with incorrect operation or too rapid failure of the equipment. Most often this happens if you purchase a cheap model from an unknown manufacturer. To ensure that the system works for a long time and does not fail, you should choose equipment from trusted companies.
The most popular manufacturers:
Grohe (Germany)
The company offers designs made of chrome-plated material with rods 90 cm long, which have an adjustable distance between wall mounts. The set includes a cylindrical hand shower with a hose up to 175 cm and a convenient watering can, plus a single-lever mixer. On top there is a swivel bracket on a hinge. The diameter of the watering can is 18 cm, its jets evenly distribute flows over the entire area of the diffuser. Adjustable water flow. The shape of the top watering cans is round, rectangular or square. Some models are equipped with bath thermostats.
Otler (UK)
Implements built-in designs of premium quality. Models differ in the shape of the watering cans, the number of nozzles, lighting, and materials of manufacture. The system is made of glass, chrome-plated steel, and is additionally equipped with a touch screen for convenient control and an adjustable irrigation mode.
Hansgrohe - a company from Germany
It produces a wide range of shower stands equipped with shower heads of various shapes and sizes, and LED lighting. Manufacturing materials: chrome steel, brass. The products are distinguished by their simplicity, modern design and durability.
Novellini (Italy)
Produces shower panels. Many models are complemented by seats, footrests, shelves, mirrors, lighting, and a thermostat.
You should not believe the excessively low prices of models from unknown manufacturers. An unscrupulous seller is able to offer an ordinary, but large-sized watering can, from which it is impossible to obtain the effect of tropical rain.
What height should the shower faucet be?
Bathroom renovation includes several stages. However, it does not consist only of interior design. An important point in carrying out repair work is the installation of all elements in such a way that they are comfortable and convenient for each member of the household to use.
Such elements, first of all, include the mixer in the shower stall, and the main point is the height of its installation from the tray. This parameter depends on various nuances, but the main one is the individual preferences of users and the type of faucet itself. But are there certain rules for how to choose this distance and at what height the mixer should and can be installed? More on this later.
Peculiarities
This type of shower, such as a tropical shower, is classified as an overhead shower, since water jets often fall on the body from above, and thanks to the drip system, they are not represented by a stream of water, but by soft drops.
A distinctive characteristic of rain shower fixtures is a large watering can, equipped with a special system that supplies water and distributes it. Drops fall from a height of about 2 meters and create the effect of being under a warm downpour.
The geometric shape of the watering can varies. Almost all modern rain showers have special lighting. Many shower models also come with a control panel that allows you to change the shower from light rain to heavy downpour.
Recommendations for choosing the height for installing the mixer
When installing a sink, it is important to choose a height that suits each individual resident. However, when calculating, remember several rules that play an important role in the future. These rules include:
- Before starting installation in the selected location, you need to attach the mixer to the wall. This way you can see if the spout is in the way, evaluate the location of the device, and conclude whether this particular height is comfortable for you.
- Do not take the floor as a reference point for installation, since the length of the legs of the bathtub is not a constant value and may vary depending on the model. In addition, some users place various objects under the legs to provide stability. This leads to the fact that the adjusted height may “fall” and you will not feel comfortable taking a shower after installing the faucet.
- Before installation, take absolutely all measurements. Distance from the floor, as well as from the bottom and top edges of the bowl. This way you eliminate any shortcomings.
- The height depends on the set of various accessories.
- When installing the faucet, make sure that it is not attached to the tile border. In this case, the mixer will not be securely fixed.
By following these simple rules for choosing a height, you can ensure that the faucet in the bathroom will last for many years, and its operation will not cause discomfort.
Installation of a hidden mixer
The so-called “ibox” has a cross connection diagram. The internal mechanism can be turned in any way to change the purpose of the pipes. As a rule, the water supply is carried out from below and from one of the sides, the outlet of an additional spout is connected on the reverse side, and the tropical watering can itself is connected on top.
The mixer body is a cylindrical glass, which is attached to the wall with four adjusting pins. To make it easier to reach the final surface of the wall finishing, high-quality plumbing fixtures have a flip ring on the outside of the body, which serves as a back stop for covering the false wall. Ultimately, a layer of sheathing and trim is sandwiched tightly between this ring and the faceplate. If the mixer is embedded in a solid wall, the ring is removed.
The mixer is connected to threaded fittings, which are sealed with anaerobic sealant. The diameter of the connections is usually 1/2″; accordingly, there is no obvious need to use a pipeline with a wider nominal bore. After connection, the mixer is finally adjusted with studs to bring the front side into the finishing plane, then the wall is walled up or covered. In the latter case, the remaining gap between the body and the casing is thickly filled with sanitary silicone, then a waterproofing collar is placed on the sealant around the protruding sides.
The installation is completed after tiling the shower. The parts of the internal mechanism are covered by an overhead panel, which for many manufacturers has up to a dozen variations in the appearance and ergonomics of the controls. Protection of the insides of the mixer from water ingress is provided by one or more contours of gland seals or gaskets along the contour of the panel. The panel itself is secured by tightening the decorative sleeves of the handles or using hidden clips.
Selection of water sockets
Before you begin to consider the rules for installing water sockets for connecting various plumbing equipment, you need to find out what devices are produced and what they are intended for.
Water sockets for kitchens and bathrooms can be classified according to three criteria:
- type or number of bends;
- material of manufacture;
- method of attachment to pipes.
What materials are they made from?
To make water sockets for a bath or kitchen, the following are used:
- stainless steel. The fittings are distinguished by a high margin of safety (withstand pressure up to 20 atmospheres) and high ). Can be used to connect pipes made of various materials;
- galvanized cast iron. Fittings are cheaper (approximately 200 rubles), but no less durable. A significant drawback is the susceptibility to rust formation when the protective coating is damaged;
- brass, bronze and other alloys. Medium The devices are no less durable than previous versions, can be installed on pipes made of various materials, are not subject to rust, and are durable. Brass and bronze are the most popular materials;
- PVC and/or polypropylene. Plastic water sockets are characterized by minimal strength and inertness to corrosion. Recommended for use only on pipes made from similar materials.
Which brand of shower stand should I buy?
A lot of manufacturers have occupied their niches in the plumbing equipment market. However, only five of them have gained an impeccable reputation:
- Grohe. The popular German manufacturer is famous for its high quality products. Only the best materials are used in the manufacture of equipment, ensuring a long service life. In addition, the brand is actively developing innovative technologies.
- IDDIS. The popular brand is one of the best among domestic brands. The company not only reacts sensitively to changing trends, but also pays a lot of attention to ergonomics.
- Lemark. The manufacturer makes high-quality equipment for bathrooms in the middle and economy segments. In addition to reliability, the products are always distinguished by an elegant design that is not inferior to the most expensive competitors.
- KAISER. The German manufacturing company uses advanced technologies and maintains strict quality control. Buyers unanimously rate the product as one of the most reliable. At the same time, the cost of faucets and shower stands does not exceed the border of the middle segment.
- BOCHMANN. One of the best budget-class manufacturers successfully combines a good range, quality and ease of use. It is for these characteristics that BOCHMANN products are in consistently high demand.
Standard rules for installing water sockets
What are the rules for installing water sockets for a shower, for a sink or bath faucet, for a toilet, for a washing machine or dishwasher? What is the optimal installation height for equipment? Let's take a closer look.
Types of water sockets
Depending on the number of outlets, water sockets can be:
- single (picture above). Such devices are used to connect one pipeline, for example, for a washing machine, dishwasher, hose, and so on;
- double solid. Used for simultaneous connection of two different highways;
- double, mounted on a relief strip. The devices are also used to connect equipment, such as a faucet, to two lines for a bathroom sink.
READ What a drill bit for ceramic tiles looks like
Double water socket on a relief strip
Sink
Water outlets for a standard sink (85 cm from the floor and 20 cm height) are installed:
- under a sink with a cabinet, unless other requirements are established by the equipment manufacturer, at a height of 62 cm from the floor. The distance between water outlets in this situation is 8 cm;
- for a large cabinet: height – 62 cm, center distance – 10 cm.
Standard parameters for placing water sockets
What depends on the height of the mixer
When a person is in the bath or shower, they often stand directly on a metal or ceramic surface, without a mat. And this is not the most durable coating.
Therefore, it is dangerous to bend too much to reach the faucet with your hand. This largely determines the height above the bathtub when installing the product.
Selection of dimensions
Also, if the bathroom faucet is installed incorrectly, the risk of flooding your neighbors increases. After all, when people wash, they are often distracted. And if the faucet is too high or too close to the edge of the bathtub, a person may accidentally turn it so that water flows somewhere past.
Of course, if you cover it with a curtain, the risk is less. But if the pressure is strong, then at the point where the jet falls, the curtain may eventually fall over the side of the bath. And if a person thinks about something, he won’t notice it for a long time. By then there will be a large puddle on the floor.
And it’s good if there is a water alarm system on the floor - like Hydrolock. By the way, some of them in this case immediately turn off the main valves at the inlet. Otherwise, tiles made in accordance with GOST 6787-2001 will not save neighbors from flooding.
In the apartment
In addition, the ease of repair and replacement depends on the height of the mixer. If it is difficult to reach the water consumer (in this case, the mixer), this leads to problems during dismantling and subsequent installation of a new product. As a result, the water supply may be damaged.
Why is it more convenient to follow the faucet height standard?
If communications have already been installed and the water socket is placed in a standard place under the mixer above the bathtub, then it will be inconvenient to position the product any other way.
In a private house
For example, this happens if a person buys an apartment on the secondary market. And in the new housing market, if communications have already been laid, then in accordance with the standard distances and heights from the floor.
That is why, if there is no need or great desire, it is rational to leave the standard height of the mixer.
At least when it comes to your apartment. Otherwise, a lot of problems may arise. In general, replacing communications is not an easy task. Although, if they are bad, they need to be changed, and first of all.
Standard crane installation height
Compliance with the height standard is convenient as follows:
How to properly install a rain shower / bathroom with rain shower / shower height
- The faucet above the bath will remain clean for as long as possible.
- Such a device does not interfere with the use of the washbasin and does not touch any pipes or other objects in the bathroom.
- Considering how much repair work costs, it cannot be overstated that this is the safest mounting height option.
- Plus it looks aesthetically pleasing. It may not be a hidden option in the wall (without a nose), but it doesn’t catch the eye either.
- With this mounting height above the bathtub, it is convenient to use the shower. And it doesn’t matter so much whether the tap is short or long.
In the country
This standard is not much different from the European one. But when traveling to the UK, Ireland, US and some other countries outside the Eurozone this will be unusual. Especially in terms of shower.
If we are talking about a private house, then it’s a different matter. Here the crane can be placed in height as the homeowner wishes. If you want to organize something like a tropical waterfall over the bathroom, why not.
Installing a bathtub faucet
It is not a fact that in the end it will be convenient. At first it will look unusual and interesting. But over time, the power of the first impression will fade, and what will remain is not the most comfortable everyday use.
Advantages and disadvantages of the system
Consumer interest in the rain shower system is due to its advantages:
- High-quality water treatments . A large watering can can cover your entire body with water at once. This stream can wash off cosmetics in a few seconds. You don’t need to hold the watering can in your hands and move it over different parts of the body.
- Low water consumption . The rain shower head covers a large area, the flow is represented by small drops, the density of which is reduced due to air bubbles. It turns out that the whole body is in contact with a dispersed suspension of water in the air. At the same time, the flow is less than that of a standard watering can with a similar dispersion area and flow density.
- Therapeutic effect . Drops of water gently massage the body, positively affecting blood circulation and skin. A shower relaxes muscles and helps saturate the blood with oxygen.
- Emotional relaxation . A cloud of water that gently envelops the body effectively relieves stress and anxiety. The built-in lighting in some models helps enhance the relaxing effect.
- Extraordinary appearance . Shower heads look chic and add a truly luxurious feel to your bathroom. A shower can transform your bathroom into a beautiful tropical retreat.
- Economical . The rain shower has a large head and seems to pour out as much water in one second as a regular shower pours out in a few seconds. In fact, aerators are built into the system, breaking the stream of water into small drops. This significantly reduces the amount of water required per procedure. True, I somehow don’t want to get out of such a shower quickly.
Despite the abundance of advantages, the system is not without a number of disadvantages:
- high price;
- the need for increased installation space;
- complex installation.
Installation height of the mixer above the bath
Standard option
Of course, you can install the product at different heights. After all, this is just a faucet, and the apartment is the resident’s personal space. Despite the fact that it is located in an apartment building (although this should be taken into account). For this purpose, a distance standard is established according to SNiP (SP) standards. The distance at which the device should ideally be installed is shown in the table below.
| Mixer height from floor | At least 80 centimeters |
| Distance to bath | At least 20 centimeters |
| In the shower, to the bottom of the tank | From 120 to 150 centimeters |
This height of the faucet above the bathtub from the floor is more common, and this is not surprising, because this is the standard. But you don't have to follow these rules.
For example, if everyone who uses it is short, then you can make the distance from the floor 750 millimeters.
If there is no understanding of the issue, it is better not to deviate from these standard figures for the installation height of the mixer. Then in the future there will be no problems either in operating the device or in servicing it.
Minimum height from the floor according to GOST and SNiP (SP) standards
Let us note what was taken into account when drawing up the standard:
- ease of use for a person of average height;
- the degree of repulsion of the water flow and individual drops from the bottom of the container;
- average water pressure in urban apartment buildings.
Rules are established mainly on the basis of practical experience and the conclusions of many generations. If something changes in the future, it will only happen in two cases: if the design of the average product changes, or if the average height of the person himself changes.
Installation diagram of a faucet over a bathtub and sink
If we talk about how convenient such a standard according to SNiP (SP) is for a family, then in general most people will be comfortable if the product is fastened in this way. Of course, it will be difficult for children to reach it.
However, there is no serious problem here. After all, usually, when a child cannot even reach a faucet located according to the standard, he does not need it. And sometimes it's dangerous.
For older people, the standard height placement of the mixer will be optimal. So it’s better to do this and arrange the device according to the rules.
Typical faucet dimensions and spout length
After all, most people have always had something like this in their past. And then we developed body memory, which allows you to do things automatically without wasting energy, which is not a lot.
For a middle-aged person of standard height, the installation will be a little more comfortable than others, but still comfortable. After all, if we are talking about a typical Russian apartment, then the bathroom is used not only for washing. Many people perform housekeeping-related activities in it.
Drawing of the location of plumbing fixtures
What is a rain shower
A rain shower is a design with wide vertical watering, similar to a tropical shower . The effect is achieved due to the large diameter of the sprayer and vertical (diagonal) installation.
An important feature is the impossibility of removing the main sprayer - the shower is installed as a static one, with slight adjustment.
Such shower systems do not need adjustment - the water coverage area starts from 300 mm in diameter, which allows you to completely cover a person. With wide systems, such a distance to the watering can hinders, rather than helps, washing - a large flow of water goes beyond the cabin and floods the entire bathroom.
An interesting option for the location of the mixer
If you really want to place the faucet in an unusual way, you might want to consider mounting the fixture in one of the corners on the edge of the bathtub. That is, in a metal case on a horizontal surface parallel to the floor, holes for the mixer are drilled almost from the edge. This way the mixer is secured and no gating is needed.
In bathroom
It turns out to be an interesting option for placing the faucet above the bathtub, as eloquently evidenced by photos and videos on the Internet. Some people who are knowledgeable about plumbing consider this arrangement to be optimal.
In the event of an accident, it is easy to immediately gain access to the communications of both the faucet and the bathtub. In addition, in someone’s opinion, this position of the faucet in the bathroom is aesthetically pleasing.
If you attach a brass faucet to a white bathtub, and even with faucet axles, and not a cartridge, you will get a kind of retro style.
Something close to art-DEKO, architectural and not only the style of the 30s of the twentieth century. It was also partially encountered in other decades. If you like this, you should pay attention to this option for attaching a faucet above the bathtub.
READ What to do if polymer clay crumbles
Sink installation parameters according to GOST, SNiP (SP) and SanPiN standards
It is worth noting that it is better to install a faucet in the bathroom at a level that corresponds to the standard. Then operation will be convenient and safe. If a person's height differs significantly from the average, it is worth considering other installation height options.
Successful design solutions (photo)
Built-in shower systems look original in every interior style. Some people decorate them with dark tiles and complement them with glass doors, while others decorate them with mirrored doors. To simplify the task, you need to consider ready-made design solutions with photos.
The built-in shower allows you to quickly refresh and recuperate.
A built-in shower is an excellent solution for a bathroom.
A built-in shower is a convenient system that has a number of advantages.
The built-in tropical system will visually increase the space.
The built-in shower is very convenient.
Selecting a different faucet installation height
It won’t be difficult to decide at what height to place the faucet above the bathtub. It is not so important if the mark differs slightly from the standard according to SNiP (SP).
Installation of a sink, faucet and other appliances in accordance with SPiN (SP) standards
The distance from the mixer to the bath can be changed. The main thing is to follow certain principles when placing the faucet in the bathroom. And then the result will be both convenient and safe.
Here's what you should consider when choosing the height and location to install the faucet with your own hands:
- First, before connecting, it is worth approximate the location of the attachment to the wall above the bathtub. Then you should take the faucet that will be installed, place it there and make sure that it will be aesthetically pleasing, convenient and safe.
- It is also important to take into account not only the height of the bathtub from the floor, but also the height of the floor legs on which it is installed or will be installed. If the bowl has not yet been installed, an error often occurs. When working, they do not take into account that the bathtub will be higher after installation.
- Finally, you need to take into account the shape of the product that will be hung. If it is somehow atypical, then it is better, first of all, to be guided not by the standard, but by common sense. Sometimes faucets are equipped with additional devices, which is worth considering before installing them in the bathroom. For example, so that devices do not touch the sink. After all, some are large.
Height of fastening objects
After all this, you can determine the minimum installation height from the floor and the distance to the side of the bath. Once you've managed to hang the faucet, it's important to make sure everything is done correctly. To do this, turn on the water at different pressures and see if there is any splashing outside the bathtub.
Here are some important nuances. Firstly, such splashes are possible even with a standard height and standard bathtub material. And all this over time may be the result of an unusual mixer that does not comply with GOST. For example, there are products that do not have an aerator. That is, they do not have a part in the spout that is responsible for creating a uniform flow.
With such faucets, unlike standard ones, water flows randomly. Often curls. Often such products have a flat shape.
Standard height from floor
When water falls from such a mixer, it is not a solid stream, but a mass of small, uneven streams. And of course, splashes fly from them in different directions. It is better to avoid such options; after all, the flow should be uniform.
In addition, non-standard options are sold at a higher price. And they disappear from the shelves quickly. And if you have to change it, it will be difficult to find one.
This is not the case with classic versions, because they will be delivered regularly. Of course, it’s better to take a metal option, even a single-lever one. Others, including polypropylene, are not the most reliable technology.
Shower usage diagram
Today there are many ordinary faucets that look original, but have a classic design. The devices function as such a water consumer should ideally operate. And there will be no extra splashes from this design.
If after checking the water flows normally at different pressures and there are no problems, then everything is installed correctly. But you should consider not only your convenience, but also the comfort of everyone who will use the device. If for someone else such height parameters are inconvenient, it is better to choose some kind of compromise option.
Rules for selecting and purchasing a watering can “Tropical Rain”
The first thing you need to pay attention to when choosing a “Tropical Rain” watering can is its size (for round models - diameter).
Choosing a shower stand
If the package includes a glass or plastic shade, it must be inspected for chips and cracks. All models of lampshades have a recess in the central part into which a watering can must be installed. Therefore, the diameters of the recess in the lampshade and the watering can must match.
Watering can in disassembled condition
It is necessary to check the availability of components. All “Tropical Rain” watering cans come complete with a special sleeve, which is screwed to the inlet hole located on the back of the watering can. This sleeve is a transition link between the shower roof and the shower head. The sleeve is attached to the shower system (its counterpart with the hose) using a nut. It is also included in all models.
This is interesting: Spare parts for faucets
Top rain shower, watering can
If the model has backlighting, in addition to connecting to the water supply system, connect to the electrical network through a transformer unit.
Rain shower with lighting
Comparative table of sanitary installation heights. devices - SNiP and European standards
| Name | Europe, mm | Russia, mm |
| Sink | 850 via VK | 850 via VK |
| Mirror over the sink | 1200 according to NK | – |
| Soap stand (sink) | 950–1000 according to Tax Code | – |
| Towel holder (sink) | 800 C | – |
| Toilet paper holder | 750–950 on VK | – |
| Spare toilet paper roll holder | 300 according to NK | – |
| Brush holder | 200 according to VK flasks | – |
| Wall-hung toilet | 400 via VK | – |
| Bidet | 400 via VK | – |
| Towel ring (bidet) | 800 C | – |
| Soap stand (bidet) | 700 C | – |
| Bath | 600 on VK | 600 on VK |
| Hand shower head (bathtub) / hose must not be in the bathtub / hose length 1.25 m / 200 mm from the vertical axis of the mixer | 500 for NK bracket from VK bath | – |
| Inlet for hose (bathtub) / with hose length 1.25 m / 200 mm from the vertical axis of the mixer | 700 C from VK baths | – |
| Soap stand (bath) | 100 according to NK from VK baths | – |
| Bath mixer | 300 C from VK bath | 800 N from the floor surface |
| Overhead shower head (shower cabin) | 2095 via VK from the pallet area | 2100–2250 according to NK from the surface of the floor covering |
| Hand shower head on a bar (shower cabin) | 2095 via VK from the pallet area | – |
| Side shower nozzles (3 pcs.) | 600 / 1000 / 1400 N from the pallet platform | – |
| Side shower nozzles (2 pcs.) | 700 / 1300 N from the pallet platform | – |
| Shower faucet | 1200 N from the pallet platform | 1200 |
| Hose outlet (shower cabin) | 1400 N from the pallet platform | – |
| Pen | 1000 according to Tax Code from the pallet platform | – |
| Shower tray | – | 400 via VK |
- Unless otherwise stated, all values are based on the finished floor level. For example, the value “Sink: 850 mm on VK” contains an instruction to install it so that the upper edge of the sink (VK; top of the side) is at a height of 850 mm from the surface of the finished floor (covering).
- NK - the value is indicated along the lower edge.
- VK - the value is indicated at the top edge (at the top of the side).
- C - the value is given according to the mark of the corresponding axial mowing line (horizontal or vertical).
When did toilet paper appear in Russia?
We think that you will be interested in learning the history of toilet paper production in our country. Here's what information was published as part of TheQuestion project:
“The production of toilet paper in the USSR began only in 1968, when two English paper-making machines were installed at the Syassky pulp and paper mill (Leningrad region). The launch took place on November 3, 1969, but the first batch of hygiene products encountered zero interest from consumers: Soviet citizens simply did not know what it was intended for. Only after a large-scale advertising campaign (videos about toilet paper from the Syassky plant were shown before screenings in cinemas) did a real boom begin. The personal hygiene product, so familiar all over the world, immediately became in short supply in the USSR and until the 80s it could only be obtained by standing in a huge line.”
So, the need for a toilet paper holder arose relatively recently.
The materials on this site are not a public offer. Any calculations using online calculators are indicative only. Their results cannot be used in the preparation of any project documentation (see also - rules for using the site).
Sources:
https://sam-brigadir.ru/vysota-smesitelya-v-dushe-ot-pola.html https://setafi.com/vanna/kakoj-dolzhna-byt-vysota-smesitelya-v-dushe/ https:/ /vse-o-trubah.ru/na-kakoj-vysote-nuzhno-stavit-vodorozetki.html https://kak-sdelano.ru/sanuzel/vyisota-smesitelya-nad-vannoj-ot-pola https://www .attractif.ru/remont-sanuzla-normy.php
Shower switch repair
If cleaning the plumbing did not help and the water pressure is still weak, you should look for the cause of the breakdown elsewhere. If your showerhead is multi-mode, you will need to check the switch. It may need repairs.
Using a hex wrench, remove the center panel on the watering can. Inside there is a round mechanism equipped with concentric swirlers. They are installed according to the matryoshka principle. Take them out. Next, pull out the sealing gasket, the mesh and the switch itself. After this, carefully use tweezers to hook the spring inside the mechanism and replace it with a new one. During disassembly, be careful not to remove the diffuser inside the watering can.