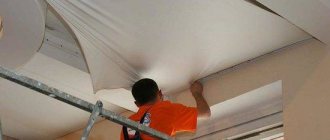
To work with plasterboard sheets, you often need to make a frame. It is mainly made from metal profiles, but sometimes an environmentally friendly material – wood – can be used. Drywall is mounted on a wooden frame if there is 100% confidence that the wood will not be deformed by moisture and the wooden blocks will be treated against pests.
For installation of drywall, a frame made of wood and metal profiles is used.
Where to use a wooden frame?
Wood tends to change its size with sudden changes in temperature and high air humidity. When covering the frame with plasterboard, during its finishing, the wooden frame will breathe air that penetrates into the section between the wall and the plasterboard. Therefore, first of all, a wooden frame under plasterboard is mounted in a room where the walls are dry and there is no moisture. The use of wood saves space, this has always been an important point. Every person wants to leave room space.
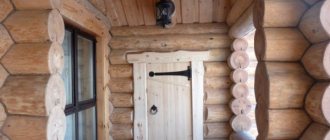
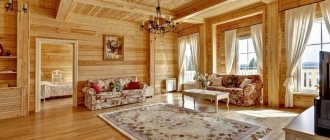
Very often, a wooden frame is installed in private wooden houses and in houses made of logs. If wood is treated correctly, it will last a long time.
There is a method of attaching drywall to a wooden ceiling (wall) without a frame. In this case, a number of facts should be taken into account:
- Wood quality.
- Room humidity.
- Wood processing.
Wood “breathes”, so there is a high probability that drywall will deform or burst. Therefore, before attaching unframed drywall to a wooden ceiling base, you should think carefully about this step.
For greater confidence in guaranteeing the wooden frame, the timber is treated with drying oil. In this case, it does not swell when exposed to moisture and does not shrink when exposed to dry and hot air.
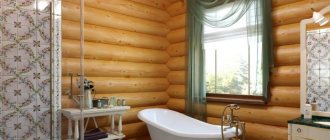
In dry rooms it is possible to create a partition based on a wooden frame covered with plasterboard.
Isolation
Sometimes it is impossible to do without additionally insulating the structure, especially if it is not just a decorative part of the interior. There is nothing complicated about this, just lay and secure the material.
Structural insulation
Mineral wool, polystyrene foam or polystyrene foam are suitable for this. The rigid material is already attached to the inside of the lined partition.
Each material has both disadvantages and advantages, it all depends on what the room in which they are used is intended for.
Necessary tools and materials for work
To work with wooden beams, you need tools and materials, without which it is impossible to make a wooden frame with your own hands:
- An ordinary hammer.
- A set of screwdrivers or a screwdriver.
- Construction knife and set of blades.
- Drill if the walls are made of concrete or brick.
- Saw.
- Meter or tape measure.
- Ruler and pencil.
- Laser level or regular.
- Dowels, wood screws and regular screws.
- Drying oil or other antiseptic solution for treating wood.
- Primer, preferably with additives.
- Insulation material – polystyrene foam, mineral wool.
- Putty, reinforced tape.
- Roller, brush.
- Set of spatulas.
Briefly about the main thing
Using a cold attic space and creating a warm, cozy living room in it is possible today. We offer a choice of 6 options for covering the interior space of the attic.
Classic lining will help create a cozy “rustic” interior. Drywall will make it possible to create modern forms. A block house or imitation timber will immerse you in the atmosphere of a rich village mansion. Plywood will allow you to create a warm room with maximum savings. OSB boards will solve the finishing issue in the shortest possible time.
Knowing the characteristics of materials and their capabilities in installation and operation, you can make the final choice. After all, one of the attic cladding options will fit perfectly into your interior.
Surface preparation
When starting to install a frame made of wooden blocks, you should prepare the surface. For this you will need:
- Clear the wall of unnecessary objects so that nothing interferes with your work.
- Remove wallpaper, if any, remove hanging pieces of paint, remove cobwebs, dust and other dirt.
- If different types of stains appear, you should get rid of them. If these are stains caused by dampness (fungus, mold), they should be dried initially. It is best to do this with liquid bleach with the addition of aspirin. For 10 liters of diluted bleach, two aspirin tablets. After the procedure, the wall should be completely dry. Using a rag, remove traces of the solution (white spots) and cover with a primer.
- All irregularities should be plastered and the surface brought to a flat plane. This should be done so that the wooden blocks do not move when fastened.
- After the plaster has dried, the surface is covered with a primer solution containing an antiseptic. It will be better if the surface is primed twice.
Cleaning the wall of old finishing
A very important point is preparing the surface and identifying wet spots.
The wall must be dry and level.
Installation of hangers
Soundproofing. Before installation, the suspensions need to be noise-free. To improve sound insulation qualities, a sealing tape is glued to the suspension at the junction with the wall in accordance with its width.
Sound insulation of direct suspension
- Direct suspension
- Sealing tape
Please note that the sealing tape covers all mounting holes. In this case, contact of the suspension with the wall is excluded. This significantly reduces the conductivity of noise from the gypsum board through the frame from the profile to the wall. This is especially true for apartments and residential buildings. If you are a customer and good noise insulation is important to you, be sure to require the master to follow the technology.
Installation. The marks for the holes are ready, now you can begin installing the hangers. What to fasten with? There are several options:
- Self-tapping screw for wood 3.8x32mm
- Dowel-nail 6x40mm
- Dowel-nail 6x60mm
- Concrete nails 3.05x19mm
What to choose depends on your walls. If the wall is wooden or plaster, then for fastening take 3.8x32mm wood screws and a screwdriver. If the wall is brick or concrete, then you will need dowel-nails measuring 6x40mm if the wall is solid, or 6x60mm if the wall is loose. Well, a hammer drill, respectively.
Concrete nails are an exceptionally professional option for concrete monolithic walls or panels. To work with such nails you need a construction gas pneumatic gun. A nail 15-20mm long is driven into the concrete so firmly that it is impossible to pull it back out. A suspension secured with such nails will not dangle.
Let's consider the most difficult option. Let's assume that our wall is brick and finished with plaster. The plaster holds up well, there is no need to dismantle it, but when drilling with a hammer drill, the beginning of the hole always crumbles a little and becomes slightly larger than the diameter of the drill. In this case, we take longer dowel-nails, 6x60mm in size, and attach the hangers with their help. We take a concrete drill and drill all the holes according to the markings.
Holes for mounting hangers are drilled
Now we take a thick awl, a nail or a construction knife and pierce the sealing tape through the mounting hole of the suspension. We first fasten the suspension with dowels, and then drive in the nails with a hammer.
The suspension is fixed
You should not immediately bend the suspension after fixing it; do this when installing the ceiling profile racks. Attach the remaining hangers to the wall.
All hangers are installed
Please note that the hangers on the far left and right profiles only have one blade. The profiles on the right and left, according to Knauf and Gyproc technology, are attached only on one side, since there is simply no room for a screwdriver or a screwdriver on the side wall. Therefore, the second blade can be cut to the nearest mounting hole using metal scissors. As a result, when bending the blade, we get not a U-shaped, but an L-shaped suspension. In the slang of builders and finishers, it is also called a “crutch”.
Test of strength. After installing all the hangers, be sure to check the strength of each of them. If the suspension dangles, the entire frame will dangle. To do this, grab the edges of the suspension blades and swing them up and down. If there is play, it must be eliminated.
There are three options for strengthening the suspension. Looking ahead, I will say that the third method is the most reliable and economical, it is purely personal experience and I like it the most.
- Dowel nail. The hangers have two additional holes through which you can screw in more screws or hammer in dowel nails. Reliable. But you will have to drill and waste dowel-nails.
- Self-tapping screws. They can be screwed into the same hole with a dowel-nail, but only under a plastic dowel. This fills the space inside the hole and the dowel stops dangling. It looks extremely unaesthetic. You shouldn't do that.
- Toothpicks. Yes, yes, have a pack of toothpicks in your suitcase; they will come in handy more than once when the wall is loose or the hole is too large and the dowel simply does not stay inside, even with a screw or nail screwed in. Unscrew the self-tapping screw or threaded nail, insert a couple of toothpicks into the dowel and break them off so that they do not stick out, or better yet, recess them a little inside. After this, screw in the screw or nail. Important! The threaded nail is also screwed in, not driven in. If a couple of toothpicks is not enough, add another one.
From my personal experience, the third method is the most economical, simple and, at the same time, reliable. Wooden toothpicks perfectly wedge the dowel and fill the excess space. Try it and you will be surprised at the result.
Strengthening suspensions. If standard hangers seem too flimsy to you, you can replace them with homemade ones made from a 27x28mm guide profile. A homemade suspension is called a “boot” or “shoe.” The walls of the profile are cut to the base, then the profile is bent and an L-shaped part is obtained. A dowel-nail is attached to the wall, to the ceiling profile with a self-tapping screw, and the excess is cut off.
Marking
Markings are applied to the prepared dry wall and a drawing is made for the future structure:
- you should measure the length and height of the wall on which the structure will be made;
- using these numbers, the perimeter of the room is calculated (the length must be multiplied by the height);
- all received numbers are transferred to a sheet of paper. First, horizontal and vertical lines are drawn on paper and on the wall along which the bars for the frame under the drywall will be laid;
- The attachment points should be noted.
With the help of the drawing and markings applied, the frame will be smooth and rigid (without movements or vibrations).
When to start
On a “fresh” log house, you can begin finishing work no earlier than the main shrinkage has passed.
If the log house is made of laminated timber, it should take 3-4 weeks. For all other types of wooden houses, the period is calculated in months, and sometimes years. The exact shrinkage time depends on the initial moisture content of the raw materials, climate zone and construction time. That's how difficult it is. In any case, it’s not worth starting finishing sooner than a year later, or at least 10 months later. During this period of time, active shrinkage of the wood occurs, logs and beams decrease in size, and the insulation laid between the crowns is crushed. If you attach the trim before the main processes have completed, it will fall off or become warped. Everything will have to be removed and redone. So there's no need to rush. Moreover, there will be enough work: you need to achieve tightness of the joints, and this is not easy. Careful competent caulking is needed. Before starting finishing work, it is tedious to caulk a log or timber frame
Typically, the main caulking of a log house takes place in two stages. Primary - a few weeks after installing the log house, and secondary - after about six to eight months. Each time the cracks are clogged with insulation - jute, tow, sometimes moss. It is done immediately both outside and inside, otherwise the house will warp. Therefore, they walk around the perimeter of the building, caulking alternately, each crown, now from the outside, now from the inside. Work begins from below, from the lowest row of logs or beams.
With each caulking, the frame rises by 5-7 cm. Then, under the force of gravity, it gradually settles. The compacted inter-crown insulation reliably covers the cracks
The quality of this work is very important: it not least determines how warm the house will be
Finishing work begins inside the wooden house after the frame has settled after the second caulking. To determine whether the process is completed or not, the height of the walls is periodically measured. If there are no significant changes within two to three months, we can assume that the main processes have passed. It's time to start decorating the inside and outside of the house.
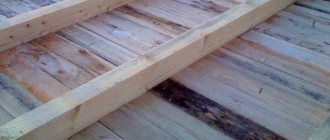
Assembling a wooden frame
Before you start attaching wooden beams with your own hands, for the future frame you need to use plumb lines to tap out points on the ceiling and floor that will form a clearly horizontal surface. Now:
- Using anchors, the timber should be horizontally attached to the floor.
- On the same plane, a beam is attached vertically to the ceiling.
- After this, according to the markings applied in advance, vertical bars are attached from the upper horizontal to the lower horizontal bar.
- Vertical slats should be located every 60 cm.
- At the site of the proposed plasterboard joints, the beam should be 8 cm wide.
- For structural rigidity, horizontal jumpers are made between the vertical posts. They should not be on the same horizontal line. The jumpers are staggered.
- After installing all the wooden slats, the space should be filled with insulating material (mineral wool, polystyrene foam). This will not only provide sound insulation, but also insulation.
- All beams are secured with anchor bolts, depending on the load expected on the plasterboard wall. In case of heavy load on the plasterboard wall, the wooden frame should be reinforced with additional slats and jumpers.
How to sheathe correctly
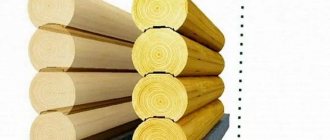
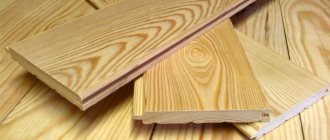
Before sheathing the inside of a wooden house with plasterboard, you should install the frame. It can be made of metal profiles or bars. The support posts will be bars with a cross section of 75 x 25 mm. The lumber is treated with an antiseptic and fire retardant, dried well and only then used for work.
If a craftsman is wondering how to properly cover the walls of a wooden house with plasterboard, he should know that planks with a cross section of 50 x 25 mm are suitable for the crossbars. The distance between the posts should be 1.2 meters. This is exactly the width of the drywall sheet. Guides are installed between these elements. To increase the strength of the structure, there should be more guides. The position of the slats is checked with a building level. The bars should be fastened with screws and a washer. The distance between them should be 25 cm.
Attaching drywall to the finished frame
The next step is to install the drywall on the wooden frame. Sheathing begins with whole sheets. The drywall is attached to the frame with self-tapping screws. The fastening pitch is 30 cm.
The horizontal joints of the sheets should be staggered, that is, one sheet is flat, the second is cut by 20 cm and when attached it will be lower, the cut gypsum board should be attached at the very top. The open area should be sealed with plasterboard cut to size. The edge of the plasterboard sheet should be exactly along the wooden beam.
Video description
How to make an interior partition from a metal profile with an arch can be seen in the video
How to install a ceiling frame
Before you start connecting all the frame elements, you need to take into account that all sheets of sheathing material must be joined on the rack. The process itself is carried out as follows:
- The guide profile is fixed according to the established markings.
- On each side of the square of the ceiling frame mesh, straight hangers are installed exactly in the middle, securing them with dowels. They will capture the main elements.
- Ceiling elements are inserted into the guides and secured with self-tapping screws.
- Measure out 60 centimeters of the profile, cut it off and attach it with screws across the main profiles. At their intersections, “crabs” are used.
- The frame for the ceiling is leveled and fixed with hangers. The antennae are bent and secured with self-tapping screws.
Finishing
After the step of covering the gypsum board of a wooden structure, the next step is finishing the gypsum board. First you need to process and seal the seams. If a chamfer was not made when sheathing with plasterboard, then grooves about 0.5–0.8 mm deep should be cut with a construction knife at the joints of the sheets. These grooves should be cleared of excess cardboard and treated with primer. A brush is suitable for this type of work. The primer must be completely dry before sealing with reinforced tape and putty can begin.
The putty should be applied in a thin layer, covering not only the seam with the tape, but also the fastening points. After the putty has dried, all excess pebbles and stripes are removed using sandpaper. The sealed seams should be in the same plane with the entire surface (do not protrude).
After the putty has dried, the entire drywall surface should be treated with a primer mixture. This will improve the adhesion of the putty and prevent moisture from penetrating into the plasterboard.
After the surface has been puttyed and completely dry, the entire surface should be sanded using sandpaper.
Now the plasterboard wall based on a wooden frame is completely ready for further decoration.
Advantages of using gypsum plasterboard
This material has a number of advantages compared to other raw materials:
- low cost and assembly costs;
- little weight;
- quick installation;
- better sound and heat insulation;
- Can be used even in freezing rooms;
- leveling walls;
- installation of drywall does not require additional preparation of the base;
- After installation, little debris and dust remains.
If everything is done correctly, the final touch will be to decorate the wall. And plasterboard structures will last a long time and save a lot of time and money.