Are you developing an interior design yourself, but don’t know if it’s possible to hang cabinets on a ventilation duct? On the one hand, you will be able to use the space of your home more rationally, but on the other hand, you absolutely don’t want to become a criminal because of a few square centimeters, right? So is this procedure legal and what should be done to avoid penalties?
We will help you find answers to your questions - in the article below we will tell you in detail whether it is possible to drill a box and hang cabinets and shelves on it, as well as change its design in any other way. We will also figure out what actions may be considered unlawful and what risks the violator bears.
An exclusive approach to decoration
The most acceptable design for a high-height ceiling is the use of decorative beams.
Especially if it is combined with styles such as country, Provence, retro, Scandinavian and any other that brings rustic or ancient European motifs into the room. It is in the case of excessive height of the walls in the kitchen that this option is considered the most acceptable. The beams can be domed, can be strictly horizontal and parallel, or can be horizontal, but laid crosswise.
Any of these or other options for installing wooden beams will significantly lower the ceiling, giving it greater originality and exclusivity.
If the house is just being built, then you can use fairly large windows that will visually lower the ceiling due to proportionality. Because high walls with low windows will create a castle style rather than an apartment style. Accordingly, there will be less daylight and more darkness in the room. To physically lower the ceiling, you should not break it or add additional reinforced concrete slabs, which would be a crazy idea that is contrary to building codes.
It is best to stretch or install a suspended or suspended ceiling. Today, the finishing materials market offers a wide selection and design of this kind of ceilings. Their advantage lies not only in lowering the ceiling, but also in the ability to connect soffits and other decorative lamps, brightening their wires above the decorative surface. Very original are multi-level ceilings, which create in the kitchen an extraordinary effect of something fantastic, non-standard and individual.
Pendant chandeliers or lamps with long cords are perfect. In a kitchen with high walls, chandeliers on the ceiling itself do not create any effect, where they are difficult to see. In addition, general lighting with lamps near the ceiling in this case will be disadvantageous, because due to the high height of the walls, the light will be scattered and the kitchen will have to be illuminated with additional wall sconces or light bulbs on the kitchen unit itself. It is for these reasons that low-hanging lamps are used.
An excellent design for high ceilings in the kitchen can also be paintings, mosaics or any other works of art that will add more energy, liveliness and elegance to the entire interior.
Of course, everything here depends on the style, so you should build on it. The walls can be finished with horizontal lines or decorative solutions that visually expand the room, which will create a balance between the walls and the high ceiling.
A high ceiling gives a lot of room for imagination, but sometimes creates certain difficulties when creating a design in a room with it. For example, if the kitchen itself is small, then a “well effect” may occur in it; if the length and width of the kitchen are small, with a high ceiling it will be perceived as disproportionate.
You can avoid everything and create a comfortable and stylish kitchen interior with high ceilings by knowing some of the features of its design.
How to make a kitchen with a high ceiling proportional
A very good trick that can “expand” the kitchen is to make the ceiling several shades darker than the walls. A ceiling that is too dark can feel oppressive, but being just a little darker will make it appear a little lower and balance out the proportions of the room.
At the same time, the feeling of spaciousness will not be lost, and the beauty of the high ceiling will be able to fully manifest itself.
Walls with horizontal stripes or a horizontal pattern, with large ornaments, as well as furniture with a large number of horizontal lines will make the kitchen visually wider. Bright furniture is also a good choice for a large kitchen, as it distracts attention from imbalances.
As with any other room, the rule for the kitchen is that cold and light colors create a feeling of spaciousness, while dark and warm colors, on the contrary, narrow the room a little. Therefore, it is better to decorate a small kitchen with a high ceiling in light, cool colors.
Ceiling design options
You can safely use suspended, suspended and multi-level ceilings and beams. Moreover, many modern materials are not afraid of moisture, so they are great for the kitchen. A suspended or suspended ceiling in the kitchen is also good from a practical point of view - ventilation or pipes can be installed under it, and lamps can be built into it.
Decorative beams also allow you to disguise wiring and integrate lighting into them. Beams are also good because they add coziness to a room with high ceilings without depriving it of volume.
Moreover, you can choose decorative beams to match the interior of almost any style. They look especially good if the ceiling is vaulted.
It looks impressive when a massive chandelier or several lamps hang from a high ceiling.
Several ways to make a kitchen with a high ceiling more comfortable and stylish
If the kitchen not only has a high ceiling, but is also large, then an “island” with a large hood located above it will look very interesting. You can attach a frame to the hood or directly to the ceiling and hang pots, ladles and other utensils on it. It looks interesting and is very comfortable.
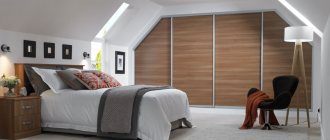
Thanks to the high ceiling, you can choose large, ceiling-mounted wall cabinets - on their upper shelves you can put items that are rarely used, or, if the cabinets are glazed, you can place decorative dishes or souvenirs there.
It is important to remember that at least the first shelf of the wall cabinet should be easy to reach by hand. If wall cabinets are relatively low, it is better to leave more space between the top and the ceiling rather than hanging them too high. Moreover, you can place decorative items in the interior of a kitchen with high ceilings on top of the cabinets.
If the high ceiling is located at an angle to the floor, then the space above the cabinets can be used in an interesting way, making it both functional and decorative.
When starting a renovation, you need to thoroughly think through all the details of the interior design. It is important that all repairs are not only financially practical, but also durable. Some details, such as the ceiling, are not made for one year. Let's look at the main options for ceiling coverings in the kitchen.
In today's variety of ceiling covering options, a person who is unaware of this matter can easily get confused. Therefore, it is first recommended to study each type of ceiling in detail, and only then begin to install it.
Let's consider the main options that the construction market offers:
- suspended ceiling;
- plasterboard;
- plastic;
- suspension;
- two-level;
- river;
- wood;
- wallpaper on the ceiling.
After identifying the significant advantages and disadvantages of each ceiling option, it will be easier for the buyer to make a choice. Let's look at them below.
The main material used in the manufacture of stretch ceilings is vinyl. To make such a ceiling, thin sheets are used, connected to each other using high-frequency current.
As a result, the canvases are up to five meters in length, which makes it possible to create a seamless ceiling in small areas.
Advantages of a stretch ceiling:
- Fast installation.
- Capable of holding about one hundred liters of water per meter. This ability will come in handy if your neighbors suddenly flood you. The tension fabric will simply bend, and after the water is pumped out, it will return to its original position.
- Since the material used for the manufacture of such a ceiling has an average degree of flammability, it can rightfully be considered fireproof.
- Variety of designs and colors.
- Resistant to liquid precipitation and moisture, which prevails in excess in the kitchen due to constant temperature changes.
Minuses:
- Subject to mechanical stress, so you should be careful with sharp objects.
- Reduces ceiling height by four to five centimeters.
- For large areas, a visible joint of the canvases is possible.
- During the first time after installing such a sheet, there may be an unpleasant odor.
Stretch ceilings can be of different designs:
- glossy;
- matte;
- satin;
- With artistic design. The most commonly used images are flowers, maps, birds, clouds, portraits, and starry skies.
There is a myth that suspended ceilings can cause mold and mildew. But this is far from true. Their appearance is associated with excess moisture.
Since it is impossible to treat a moldy area with a special antiseptic without dismantling the entire tension fabric, it is recommended to treat the entire ceiling with a solution before installing it.
The price of a stretch ceiling has a significant difference in minimum and maximum values. As a rule, the lowest square meter costs about five dollars.
The maximum cost is unlimited. If we consider the average price, we can give a value of ten to fifteen dollars per 1 square meter.
The cost of a stretch ceiling depends on the following indicators:
- ceiling size;
- what kind of corners are in the kitchen (round or square);
- number of built-in lamps;
- the need to bend around uneven surfaces in the form of pipes;
- type of ceiling: glossy will cost more than all other options.
Fastening techniques
Let's start with the fact that fastening methods entirely depend on the parameters of the object being hung (dimensions, weight), and based on the data obtained, you can get an answer to the question - is it possible to hang kitchen cabinets on drywall.
Professional techniques
- The most popular and accessible method even for beginners is to attach kitchen cabinets to plasterboard using butterfly dowels and special plasterboard dowels.
When attaching cabinets to the so-called “butterflies”, you need to make holes in the wall and then install the fasteners. When screwing a self-tapping screw into a “butterfly”, the tendrils of this type of dowel spread in different directions and tightly press the installed fastener to the surface of the gypsum board.
Operating principle of the butterfly dowel
If the cabinet is mounted on special dowels, use a screwdriver to screw the dowel into the cavity of the material and only then screw in the fastening bolt (screw). This method allows you to fasten only lightweight structures whose weight with all contents does not exceed 5 kg.
dowel nail; 2. snail dowel; 3. butterfly dowel;
- The second method is to attach kitchen cabinets to drywall using mounting strips. The main feature of this fastening technology is that the mounting strips are attached to a sheet of drywall, and not to the suspended structure. The strips are fixed in several places (both to the gypsum board and to the metal profile located under the drywall). Fixation is done with self-tapping screws.
Mounting rails for wall cabinets
After completing the installation work, you can hang a cabinet on such slats, the weight of which when fully equipped will not exceed 15 kg. But this method has one significant drawback - the use of unaesthetic fasteners that are unlikely to decorate your kitchen.
If you need to hang bulkier and heavier cabinets on the wall, there are other secure mounting options that will help you do the job yourself:
Extended anchor bolts can be used as fasteners - such fasteners will allow you to attach bulky kitchen cabinets and even household appliances to the wall.
In order to secure them, you should drill deep holes with a hammer drill through the drywall at the very base. We insert anchor bolts into the resulting holes and clamp them there using ordinary wrenches.
This method of fastening is relevant only if there are base walls (this fastening option is not applicable for a plasterboard partition);
Anchor Bolt Installation
The price of mortgages is zero - they can easily be made from leftover building materials.
Unconventional fastening methods
- Thus, a heavy kitchen cabinet suspended on a plasterboard wall can be additionally secured to the ceiling using decorative cables;
Hole in the shelf for the cable
- As additional elements for fastening kitchen cabinets, experts often use decorative chrome-plated tubes - they are screwed to the floor and installed in the form of a frame, which bears the weight of the suspended structure;
In order for the hanging cabinets to be mounted as efficiently and productively as possible, several recommendations must be followed:
- Use only those fasteners that have a quality certificate and meet aesthetic standards;
- When marking fastening points, you must use a building level, and not do the work by eye - correct marking will allow you to evenly distribute the load on all fastening points.
If you follow all the instructions and recommendations described above, then you will probably end up with a reliable fastening system that will quietly serve until the next repair.
In addition to cabinets, the presented techniques allow you to attach any other hanging accessories and attributes to the walls (hoods, air conditioners, cornices, curtains and paintings). All of the above work can be carried out without problems by beginners, without the involvement of expensive specialists.
Shelf on plasterboard for various accessories
Plasterboard ceiling in the kitchen
Most often used with defective ceilings: uneven slabs, targets or other irregularities that need to be masked.
Pros:
- Flexible and moisture resistant material used.
- Possibility to hide wiring and other wires.
- Allows you to zone the room.
- Additional sound insulation.
- When the building itself settles, it does not crack.
- Various design variations and colors.
Minuses:
- Significantly reduce the ceiling height (from seven centimeters). Difficult to install.
According to its installation, a plasterboard ceiling can be:
- single-level;
- two-level;
- multi-level.
With a plasterboard ceiling it is also possible to use additional decor in the form of mirrors, glass, wood.
As for the cost of such a ceiling, prices start at ten dollars per square meter. The rest all depends on the chosen design and decor used.
Who can detect the demolition of a ventilation duct?
Of course, sooner or later, specialists discover the absence of a ventilation duct. Among them may be a BTI technician, an inspector from the Moscow Housing Inspectorate, or a building inspection engineer. You can also discover the absence of a ventilation duct yourself.
In order to understand and determine whether the ventilation duct has been demolished, you will need a BTI floor plan. The box is always reflected on it, its dimensions are drawn to scale. Thus, you can measure the ventilation duct with a ruler and, through simple calculations, determine the size of your duct and its presence in the apartment.
The consequences for the owner when the box is demolished can be different. It all depends on how the place where the ventilation duct was is used.
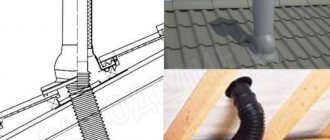
READ MORE: Ondulin tiles, pros and cons of an ondulin roof, technical characteristics of the roof and components photo
Plastic ceiling in the kitchen
The main advantage of this type of ceiling covering will be the combination of aesthetic appearance and ease of care. Their design differs in size and number of sections in one panel.
Pros:
• Easy to care for. • Can easily withstand water flooding from upper floors. • Hides wires and other communications. • Resistant to temperature changes. • They are odorless. • Reasonable cost. • Varied designs.
Minuses:
The most important disadvantage is the reduction in ceiling height by several centimeters.
Due to its varied design, plastic ceilings are loved by many people. Panels can imitate wood, marble, metal, bamboo and so on. As for color, light shades are most often used for the ceiling.
The cost of such a ceiling is considered one of the most affordable. The price starts from three dollars per square meter.
What types of ventilation ducts are there?
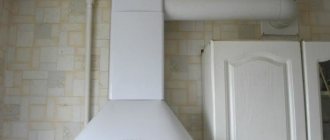
The box may have modest dimensions and take up little space. Or have a large size, which causes a lot of inconvenience. It is important that the structure cannot be dismantled for safety reasons. The box can be located in a corner or at the entrance. Most of them are rectangular in shape.
The presence of such a detail confuses many people, because it does not allow the use of headsets created for a standard layout and the implementation of many ideas.
The design of a kitchen with a ventilation duct requires a special approach and a non-standard solution to the problem of an unsuccessful layout.
Two-level ceiling in the kitchen
With this type of ceiling covering you can easily hide uneven ceilings or various pipes and wires.
The most common materials used for installing a two-level ceiling:
- drywall;
- tension fabric;
- slatted ceilings;
- ceiling panels;
- noble stone.
Pros:
- They zone the room well.
- Visually make the kitchen larger.
- They mask communications and wires well.
Minuses:
- The height of the ceilings is reduced by several centimeters. The price depends on the chosen design and material used.
Slatted ceiling in the kitchen
The slatted ceiling allows you to recreate a unique design due to the good flexibility of the slats themselves. And the variety in colors allows you to choose the appropriate shade for your individual kitchen interior.
Pros:
• Tolerates moisture well. • Easy to maintain. • The gap between the slats allows you to change the lighting over time without dismantling the entire ceiling. • Durable and withstands mechanical stress well. • Does not accumulate dust. • Low price.
Minuses:
- Due to the suspended structure, it reduces the ceiling height by several centimeters. If it is necessary to change the ceiling covering in a specific area of the ceiling, the entire ceiling is dismantled.
The cost depends on the material of the slats. The average price of such a ceiling reaches ten to fifteen dollars per square meter.
Characteristics of the painted coating
When choosing paint, choose products from well-known manufacturers that allow you to carry out wet care of the coating.
The painting algorithm involves several basic actions:
- leveling the ceiling surface;
- puttying uneven areas and crevices;
- sanding protrusions;
- applying an evenly distributed layer of paint.
High-quality painting of the ceiling surface is a difficult job, the degree of difficulty is determined by the area of the ceiling and the amount of experience. In the worst case, painting can take 18-20 hours.
Paint lasts a long time
The presence of stains from soot and smoke is unacceptable; they must be removed before painting begins. If the stains were not removed before applying a coat of paint, they will appear, leaving the kitchen covered in unsightly yellow stains. To remove stains, use matte alkyd paint. The cost of painting (provided you do the work yourself) is an inexpensive pleasure.
Wooden ceiling
Wood gives coziness and sophistication to the entire room. In addition, this material “breathes”, which proves its high environmental friendliness.
Pros:
- Keeps you warm.
- Additional layer of sound insulation.
- Hides communications and wires.
- Aesthetic appearance.
Minuses:
The main disadvantage of such a ceiling covering is that wood does not tolerate moisture well. And there is plenty of it in the kitchen. But various ceiling impregnations will help solve this problem. They will protect the tree from rapid rotting.
Most often, a wooden ceiling is used in country style, where wood creates a cozy home environment. An excellent option for those who love nature and a quiet lifestyle.
The cost of such a ceiling depends on the type of wood used, as well as the design. If you take a coffered oak ceiling, the price starts from one hundred and fifty dollars per square meter. Not everyone can afford such financial costs for ceiling coverings.
Useful drilling tools
A jack of all trades always needs certain tools to work in a private house, on a summer cottage, in an apartment, or when building his own house. Many of them are not even worth purchasing if they do not require constant use. For example, for drilling, there are many different attachments that will greatly increase the functions of your drill and significantly expand them.
Let's look at some devices for auxiliary potential.
To obtain precise holes of significant diameter in different workpieces, a device such as a drilling and milling attachment will help to carry out individual milling work.
Make a milling machine out of a drill.
The next device worth mentioning is very expensive, but has the highest versatility. You will sharpen all the tools that you have on the farm, be it knives, shovels, axes, hoes, various drills, effortlessly with the universal sharpening device.
When purchasing drill attachments, be sure to check their compatibility.
Holder with clamp. With its help, you can fix the drill anywhere, use it with various kinds of devices, use it as a mini-lathe, sharpening, milling or grinding and polishing machine.
The drill holder allows you to quickly secure the drill.
All kinds of attachments are also designed for drills. These can be stops that limit the depth of drilling, platforms with which you can drill at a certain angle or perpendicularly. There are nozzles that are adapters and extensions of different designs: offset, angled, flexible.
The angle drill adapter is designed for hand and electric drills.
Metal cutting attachments turn your drill into a one-of-a-kind tool. Some resemble sheet metal shears, while others have a different feature, such as roller shears. The nozzle, called the “Cricket,” seems to cut through the metal.
The main advantage is that they do not damage the polymer coating of the metal.
There are also other attachments designed for monotype work.
- For installing aluminum rivets. There are types for both the same size and those with interchangeable bushings for different calibers.
- Tape-shaped attachment for self-tapping screws. With its help, you will significantly save time when working with plasterboard partitions or when you need to secure other materials with self-tapping screws.
- A belt sanding attachment will completely replace a sanding machine, and it will be much cheaper in cost.
- An attachment with which you can turn your drill into a hammer drill will not be superfluous.
- Using the corner pruner attachment, you can cut various cables, as well as tree branches.
- Using a variety of attachments, the drill will replace your jigsaw, circular saw, pump, and you can polish surfaces and sharpen drills.
- There are unusual attachments.
Whatever attachments we use, the main thing is that the work is enjoyable.
Wallpaper on the ceiling
It is probably the oldest and time-tested type of ceiling covering. In addition, it is a very budget option. The main thing to do before buying wallpaper is to decide on the quality.
As a rule, lightweight wallpaper with high permeability and moisture resistant is chosen for the ceiling. Please note that it is better to choose neutral colors, as they hide accumulated fat.
Pros:
- Affordable price.
- A wide range of.
- When using moisture-resistant wallpaper, it will be easy to care for the ceiling.
- Possibility of repainting.
- Easy to stick.
Minuses:
- They do not tolerate steam exposure well.
- Short service life.
- Perfectly flat ceiling.
- It is impossible to hide wires and other communications.
Reasons for the inflexibility of the law
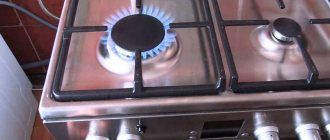
Ventilation ducts are an important component of ventilation systems, on which not only comfort but also safety of living largely depends. Thus, natural ventilation, despite all its shortcomings, is the only system that can prevent:
Thus, natural ventilation, despite all its shortcomings, is the only system that can prevent:
- destruction of a building due to a gas explosion;
- fire due to gas leak;
- tragedy due to the accumulation of carbon monoxide in the room, which can be detected using special sensors.
In addition, the general house air exchange system ensures the removal of moisture, unpleasant odors and harmful substances, such as carbon dioxide, from the premises.
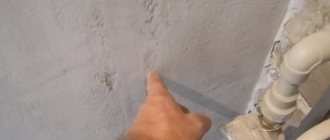
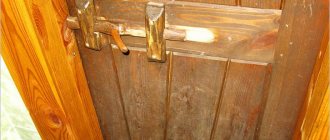
The photo clearly shows the design of the ventilation duct. And even non-specialists understand that they are thin-walled and therefore unsuitable for placing any heavy objects on their surfaces. The presence of which over time can lead to cracks and other consequences with a subsequent decrease in the efficiency of the ventilation system
Effective air exchange allows you to create a microclimate in the building, the parameters of which will meet the requirements of relevant documents, the main one of which is GOST 30494-2011.
At the same time, it is easy to reduce the efficiency of the ventilation system or make it completely inoperable - just make changes to the design of the duct.
Even if they are insignificant, another user may do the same, and another neighbor will decide to install a fan that the system is not designed to use. Such actions will complicate the situation, as a result of which you can expect backdraft and other troubles.
We discussed other reasons for the decrease in the efficiency of the ventilation system and ways to restore it in the next article.
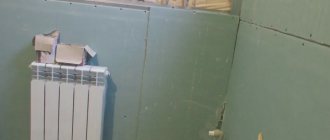
Ventilation ducts are often self-supporting structures. For example, this is exactly how things are in the houses of the P-44 project. This means that each element of the ventilation duct rests on the one below. However, they cannot withstand significant lateral loads. As a result, even with normal drilling, cracks may appear. The consequence is weakening of the structure and sediment, which often leads to disruption of air circulation
It should be understood that ventilation ducts are not load-bearing structures, therefore, when drilling and placing heavy cabinets on their surfaces, shrinkage and cracks often occur. Which in itself reduces the efficiency of ventilation systems.
To prevent such consequences from occurring, it is prohibited by law to change the design of the boxes.
Choosing the color of the ceiling for the kitchen
Whatever material is used to decorate the ceiling, the color scheme is of great importance. Most often, white and other light shades are selected for the ceiling. But there are also very eccentric design options, where there is a place for dark tones.
White ceiling
Traditional ceiling color. Its main advantage is that it visually enlarges the space and makes the room brighter. The glossy white ceiling looks impressive.
Black ceiling
You should be careful with this color. It is best to consult with experienced designers who will suggest the best option for a dark shade on the ceiling.
If done correctly, it can create the illusion of no ceiling. A black ceiling is only suitable for kitchens with high ceilings.
Red ceiling
As a rule, red color is preferred by purposeful people with a strong life position and obvious qualities of an unrivaled leader. For the ceiling, red is used quite rarely. But if you apply it, you get a very beautiful interior.
One of the conditions for the presence of this color on the ceiling is its proper combination with other shades of the kitchen. The result is an incredible luxury effect.
It is worth remembering that the red ceiling will be the center of attention in such a kitchen, so the rest of the interior should be done in more subdued colors. Red color awakens the appetite, so it would be very appropriate for the kitchen.
Drawing on the ceiling
Modern technologies make it possible to transfer images onto the ceiling covering with high accuracy. Plus, proper lighting and then you get an incredibly beautiful ceiling.
Most often, the pattern is used on stretch ceilings. For the kitchen, images of flowers, sky, animals, and kitchen utensils would be ideal. A great idea would be to place photos of your household on the ceiling.
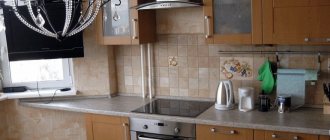
Features of choosing the color of kitchen furniture with cabinets
To ensure that the kitchen photo in the interior does not look too cumbersome, it is necessary to select the color scheme as carefully as possible. Gloss and light colors, such as:
- lactic;
- white;
- cream;
- pink;
- light blue.
Such headsets look quite graceful and elegant. Even if there is a small gap between the ceiling and the cabinets, it is hidden behind the cornice.
You can make cabinets more “weightless” using built-in lighting. Additional lighting can be provided for the following purposes:
- zoning of the territory;
- illumination of paintings or mirrors;
- lighting in the work area;
- lighting for the dining area.
Their prices are slightly higher than regular kitchens. And this can be explained simply: more materials are needed to make such furniture.
Which is better: glossy or matte ceiling?
It is difficult to say exactly which type of ceiling is best for the kitchen. It all depends on the personal taste of the apartment owner, as well as on the size of the room and lighting. If, then designers advise giving preference to the matte option.
For connoisseurs of gloss, it is better to choose a two-level ceiling for the kitchen.
A glossy ceiling in beautiful lighting can seduce with its beautiful reflection. In addition, this type of ceiling can visually enlarge the kitchen, which is an excellent solution for a small room.
The matte ceiling still applies more to. One of its advantages will be the absence of visually visible joints of the ceiling covering. Also, dust will not be visible on the matte finish. It’s not for nothing that most people choose a matte surface for the kitchen.
But a combined ceiling is also suitable for this. The use of glossy inserts on a matte finish will visually make the room more voluminous and expressive.
Conclusion: After analyzing all the information above, everyone will be able to find the ideal ceiling covering for themselves. You should not blindly chase fashion or succumb to the visual effect obtained from what you saw in a neighboring apartment or a beautiful picture on the Internet.
If you still haven’t decided on the choice of material for the ceiling, then seek help from experienced designers who will select an interesting and suitable design specifically for your kitchen.
You can also look at photos of real ceilings in the kitchen, perhaps after that your inspiration will come to you.
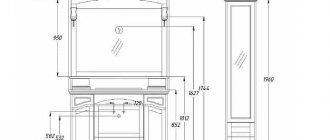
Hanging height
Before hanging kitchen cabinets correctly, the optimal height for fixing the cabinet is selected. It is recommended to make preliminary calculations taking into account the growth of users.
The distance from the floor to the countertop is selected, since the convenience of cooking and performing other actions depends on this. Sometimes the standard figure of 45 cm is used, but this is incorrect because the height of the regular user is not taken into account.
For people of average height, it is advisable to place the tabletop at a level of 55 to 65 cm. During work, it is desirable that a person can easily reach the highest shelf without a stand or chair.
The upper part of the headset should be suspended at a distance that is convenient for the user. For example, if your height does not exceed 165 cm, the mount is located within 175 cm from the floor. If the height exceeds 175 cm, it is advisable to fix the fasteners at a distance of 200 cm from the floor covering. The height of the person who will spend a lot of time in the kitchen, cooking or cleaning, is taken into account.
Fixation methods
Installation of the top drawers is carried out in two ways:
- Fixation in one line. All fasteners are at the same distance from the ceiling. This option is the most common, as you can easily hang the cabinets with your own hands.
- Fixation at different heights. This method is much less common, since its implementation is quite difficult. This option is suitable for non-standard sets in which cabinets differ in size and methods of fixation. You have to adjust the location of each element using a level.
Any option is suitable for a compact or large kitchen.
Ceiling in the kitchen (real photos)
Decorating a kitchen is a difficult task. It needs to be practical, convenient, beautiful and desirable - not very expensive. And one of the tasks that we have to solve is to choose what kind of ceiling to make in the kitchen so that it is easy to use, lasts a long time and is also attractive.
Reasons for the inflexibility of the law
Ventilation ducts are an important component of ventilation systems, on which not only comfort but also safety of living largely depends.
So, natural ventilation, despite all its shortcomings, is the only system that can prevent: So, natural ventilation, despite all its shortcomings, is the only system that can prevent:
- destruction of a building due to a gas explosion;
- fire due to gas leak;
- tragedy due to the accumulation of carbon monoxide in the room, which can be detected using special sensors.
In addition, the general house air exchange system ensures the removal of moisture, unpleasant odors and harmful substances, such as carbon dioxide, from the premises.
Effective air exchange allows you to create a microclimate in the building, the parameters of which will meet the requirements of relevant documents, the main one of which is GOST 30494-2011.
At the same time, it is easy to reduce the efficiency of the ventilation system or make it completely inoperable - just make changes to the design of the duct.
Even if they are insignificant, another user may do the same, and another neighbor will decide to install a fan that the system is not designed to use. Such actions will complicate the situation, as a result of which you can expect backdraft and other troubles.
We discussed other reasons for the decrease in the efficiency of the ventilation system and ways to restore it in the next article.
It should be understood that ventilation ducts are not load-bearing structures, therefore, when drilling and placing heavy cabinets on their surfaces, shrinkage and cracks often occur. Which in itself reduces the efficiency of ventilation systems.
To prevent such consequences from occurring, it is prohibited by law to change the design of the boxes.
Requirements for kitchen ceilings
The kitchen is a room with difficult operating conditions. High humidity, an abundance of pollutants, and in apartments there is a high probability of flooding. All this imposes certain requirements on finishing materials. In particular, the ceiling in the kitchen should have the following characteristics:
In addition to all that has been said, there is one more wish - it would be nice if the ceiling in the kitchen makes it possible to hide utility networks (ventilation, wiring) and defects in the ceiling.
Unfortunately, even with the current abundance of finishing materials, the entire range of requirements is not combined in any of them, but there are very good options.
Upper cabinets in two rows
Two-tier - a classic option with two rows. To achieve harmony, order furniture of the same width.
Whitewashing, painting
Some time ago, all our ceilings were whitewashed. Because this type of finishing costs mere pennies, the material is widespread, the whitewashing process itself did not present any difficulties, and almost everyone whitewashed the ceilings on their own.
Another advantage of this method of finishing a kitchen stream is the ability of lime to regulate humidity. When there is an excess of moisture in the air, it absorbs it, and when there is a lack, it releases it. Excellent quality for the kitchen. This is where the advantages end.
Whitewashing the ceiling is an old method that is becoming less common
The disadvantages of whitewashing the ceiling are also significant. The first disadvantage is that it is not the most attractive appearance. Secondly, the surface turns out to be porous; in addition to moisture, it absorbs odors. Drops of fat or coloring liquids that fall on the surface are absorbed into the material, after which they cannot be removed in any way. Just paint over with a new layer or two of lime. It is for these reasons that whitewashing in the kitchen is now becoming less and less common.
Painting the ceiling in the kitchen is a modern replacement for whitewash. For these purposes, water-based paints with increased washability are most often used. With normal preparation of the ceiling, the appearance is at least normal. The performance properties are also improved - the painted ceiling in the kitchen can be washed several times using liquid detergents.
The main disadvantage of this option is the need to thoroughly prepare the surface for painting. For a painted shelf to look good, it must be smooth and free of flaws. It is leveled first with plaster, then, in several layers, with putty. The process is difficult, lengthy and costly.
Paintable wallpaper helps make preparing the ceiling for painting a little easier. The ceiling also needs to be leveled, but not to the same extent as before applying paint. For these purposes there are special glass wallpapers, non-woven and paper ones. The most durable ones are made of fiberglass. They can be repainted up to 20 res. Paper ones last the least. They can withstand 2-3 repaints. Non-woven ones are a good option both in terms of quality and price. They will also delight you with a rich selection of ornaments (if you want, of course).
Another drawback of painted ceilings is that leaks leave stains that can only be painted over. It is rarely possible to paint only the damaged part - different shades are obtained. I have to paint the entire ceiling.
Types of hinged mechanisms
Kitchen cabinets have always been fastened to the wall using metal fasteners in the form of lugs. The device was attached to the cabinet through one hole, and to the wall through the other. This type of fastener is still used today because such fasteners have proven themselves to be reliable products. In addition, such fasteners are also distinguished by their decent cost. But they also have one drawback - the complexity of the fastening process.
In order to secure wall cabinets using lugs (furniture hinges), you need to perform the following steps:
- Attach hinges to wall cabinets. The main requirement for this stage is installation of fasteners at the same level. In other words, the mounting hole through which the cabinet will be attached to the wall must be located at the same height from the top surface of the cabinet. In addition, the height of the kitchen cabinet should be such that it is convenient to screw a screw into the wall.
- Draw a horizontal line on the wall. Its location is determined by the installation height of the hanging elements of the kitchen unit. This mainly depends on the height of the kitchen owner. After all, the main requirement for cabinets is ease of use. But there are standard sizes that are taken into account by GOST; they are determined by the distance from the tabletop to the bottom plane of the cabinet. It is equal to 45 centimeters, although this figure can be maintained up to 60 centimeters. The height of the upper kitchen cabinets and the distance from their top plane to the center of the mounting hole are added to it.
- Place one cabinet against the wall exactly at the installation location and make two notches through the holes in the hinges using a marker or pencil. Holes are drilled in the serifs, and plastic dowels are inserted inside. Then the cabinet is installed, which is secured with self-tapping screws.
- Hang adjacent cabinets in the same way. In this case, each subsequent element of kitchen furniture must be pressed tightly against the previous one.
- Connect all the wall elements of the set with furniture bolts and install a cornice (canopy), which will visually unite all the cabinets together into a single structure.
- Hang facades, install shelves.
- Check cabinet doors for proper operation. Correct any inaccuracies using the adjusting screws.
A significant disadvantage of this method of fastening is that two people will be required to install and fasten the elements of the kitchen set.
Ceiling tiles
If you don’t know how to make a ceiling in the kitchen inexpensively and quickly, consider tiles made of foam plastic or polystyrene. This method is now far from being as popular as it was 10 years ago, but is still used when there is a lack of funds and/or time for other types of finishing.
Ceiling tiles in the kitchen are a good option. It is washable, and you can use a brush and liquid non-abrasive detergents. with special glue. The base is preferably level, without sharp changes, but an ideal surface is not required. Installation takes several hours, and you immediately receive a ceiling ready for use.
This is what PVC tiles look like on the ceiling - one of the options
There are few disadvantages. The first is that not everyone likes the appearance. Here you can agree or not - it’s a matter of taste. The material is not luxurious, but the result is quite decent. Especially if you need an inexpensive finishing method.
The second disadvantage is the unnatural material. You can’t argue with this, but the material used - polystyrene - is chemically neutral and in its normal state does not emit any substances. Neither harmful nor beneficial. And that's not bad either.
Everything new is long forgotten old
At first glance, such a solution may seem like know-how. But back in Soviet times, our grandmothers and mothers made mezzanines in their kitchens, where they stored necessary things: rarely used dishes, empty containers, seams and pickles.
Typically, such wooden cabinets were placed above the entrance door to the kitchen. But there were options under the window, instead of the battery or in front of it. This solution made it possible to provide the kitchen with functionality and remove unnecessary things from prying eyes.
Mezzanines in the kitchen Source www.mobyco.ru
From plasterboard
If you can make a ceiling in the kitchen by lowering it a few centimeters, consider the option of a suspended ceiling made of plasterboard. This method of finishing the ceiling is good because you can make multi-level structures that completely cover the ceiling. In the gap between the main and false ceilings, you can lay communications - vertical boxes, wiring.
The design of the ceiling allows you to install them, choosing the location of their placement according to your taste, which makes it more functional. The result can be very beautiful. Another positive point is that drywall is made from natural materials - it consists of two sheets of cardboard and a layer of gypsum between them.
- the task is difficult. First, the frame is assembled from guides, then it is covered with plasterboard, then puttied and painted. The positive point is that it is several times easier to level the base ceiling: the surface is initially flat, you only need to seal the joints, and then cover the entire surface with a thin layer of putty.
The disadvantage of a plasterboard ceiling in the kitchen is that it is difficult to maintain. Even if you use moisture-resistant water-based paint, the surface will remain rough. Soot gets clogged into the pores, dust mixes with grease. Removing this plaque is not at all easy. Another disadvantage is that drywall does not react well to water. If you use moisture-resistant material, it will not be afraid of high humidity, but if there is flooding from above, most likely everything will have to be redone.
Method 5. Anchoring into a solid wall
This solution is used for main walls covered with plasterboard; it is not suitable for partitions made of gypsum plasterboard. Anchoring into the wall allows you to hang large structures, household appliances and cabinets on a plasterboard sheet.
To do this, hatch holes are cut into the gypsum board so that you can drill into the main wall with a hammer drill and install anchors. The anchor consists of a metal or plastic dowel and a long threaded screw or hook. I don’t take into account chemical dowels, because... they are used quite rarely and have some difficulties in installation.
You can hang heavy furniture on anchors if the distance from the main wall to the gypsum board does not exceed 5 cm. At a greater distance, even a thick screw that can withstand significant loads will bend over time. In this case, you can use a combined method, for example, by securing the tire to anchors and adding several attachment points to the gypsum board.
After installing the anchors, the cut sections of drywall are mounted in place. The joints and the hole around the anchor head are sealed with putty.
Anchoring is effective if the main wall is made of concrete or brick without voids. In cinder block or foam concrete, the anchor holds much worse.
You can increase reliability by passing the anchor through the rack profile of the plasterboard lining. Unfortunately, the places where furniture is attached do not always coincide with the location of the metal frame parts.
The disadvantage of mounting on anchors is the need for very precise markings. Possible distortions and deviations will become noticeable only when the furniture is already secured to the anchors, and it will not be possible to hang the cabinet “a little higher” or move it to the side.
Stretch ceiling
In the kitchen - a good choice. In any case, it is beautiful and modern. Although when installing them, you will again need to “take away” a certain volume: they are mounted at a certain distance from the ceiling. As in the case of plasterboard flows, tension ones also allow you to hide the base ceiling and utilities. Spotlights can also be used for lighting, but of a different design.
Stretch ceilings can be film (their films are PVC) and fabric. For the kitchen you should choose film ones. They are smooth, which is easier to clean, and can be glossy, which makes the room lighter and adds volume. If you decide to make a suspended ceiling in the kitchen from PVC film, an additional bonus will be protection against flooding, since the film is absolutely waterproof. If your upstairs neighbors flood you, the water will collect in a bag. It will need to be carefully poured, after which the material will return to its normal size.
Shape and color - any This is after the flood - the water gathered in one place
The disadvantage of film ceilings is their chemical origin and the ability to change sizes due to sudden changes in temperature. The film may wrinkle, sag, etc. Not the highest quality canvases suffer from this, but this phenomenon is present. Another significant drawback is that if you touch the film ceiling with a sharp object, the hole will be very large. The material is very stretched, which is why the slightest puncture turns into a huge hole. Fabric tension threads do not have this drawback, but they are looser in structure, they are more difficult to care for, and they are water permeable. But a hole made by accident does not grow larger.
Disadvantages also include the high price and complexity of installation, although you can do it yourself if you wish. If installing a film ceiling requires a heat gun or its substitute (to heat the canvas), then for a fabric ceiling none of this is needed.
Stages of work
Preparing the wall
Before you start hanging cabinets or shelves, you need to do some preparation.
- The first step is to level the wall, since any unevenness will negatively affect the installation work.
- It is necessary to complete all electrical work - installation of sockets and lighting.
- All finishing work must be completed.
Kitchen finishing is necessary when purchasing an apartment in a new building or a major renovation.
It’s easier to install a frame for future shelves on prepared walls
Hanging on a mounting plate (rail)
Before you begin installing the cabinets, you need to take into account that there will be a gap between the wall and the furniture.
It is necessary that this distance be the same both above and below. An additional rail needs to be installed at the bottom of the cabinet.
The mounting plate is level and attaches well to the wall.
This canopy option has several advantages over loops and hooks. Marking for the mounting rail is much simpler, and installing the cabinets is also easier. The hangers can also be adjusted. There will be no gaps between the cabinets, which will result in an even row. In addition, such a canopy can withstand any load, due to the fact that it is distributed evenly.
The main problem with using a mounting rail is the gaps between the wall and the cabinet.
However, there are also a number of disadvantages. Firstly, the cost is not cheap. Secondly, the gaps that form between the wall and the furniture.
Hanging corner
The first step is to dismantle the front doors, trim the back wall and secure the hooks. After this, you need to lean the set against the wall and mark the boundaries.
Take your time to hang the cabinet, follow the instructions.
The next step is to measure the distance from the top of the furniture to the top of the tire using a mounting rail. The difference between these two indicators should be noted on the wall and then the upper border of the batten and the parallel first line should be drawn.
The shelves need to be fastened well so that they last longer.
Using the mounting rail you need to make holes. You need to screw in dowels and screws, secure the rail and install the corners. The last step is to install a shelf or cabinet.
If the installation is done correctly, the shelves will hang evenly and delight the owners.
Hanging with loops
In order to hang cabinets using this method, you need to prepare hinges and other types of fasteners.
- After determining the upper limit, you need to draw a horizontal line along the entire length of the shelf or cabinet.
- Using a water level, you can check whether it was applied accurately.
- On this line you need to mark the location for the hole that will be used to install the fastener.
- We install the fasteners themselves.
- You need to prepare regular hinges on furniture. They may have a slight horizontal shift.
- Next, hang a cabinet or shelf, after which you can mark the second point for the hole. The cabinet is removed again.
- The actions are performed again.
- After all the work is completed, furniture and various decorative elements and accessories are installed.
Attaching cabinets in the kitchen is not a complicated process, but you should follow the rules.
Interesting interior design
Modern designers offer a large number of diverse and unusual solutions for how you can originally fit a non-standard shelf into your kitchen interior design. On the market you can find products of different sizes, shapes, with different functionality and other parameters.
Custom shelves in the kitchen attract the attention of guests.
If you want something truly exclusive, you can always make the product to order, and then the kitchen interior design will turn out to be truly interesting and unique.
In a small kitchen it is better to make small hanging shelves.
Plastic panels
If you are looking for a ceiling to make in the kitchen that is inexpensive and easy to clean, your choice is plastic panels. This material costs very little; you can wash it with a cloth and liquid detergent. The surface is usually smooth, everything is easy to wash.
Installation in the kitchen is quick and easy. A starting plinth is attached around the perimeter, and panels cut to size are inserted into it. It also takes away a few centimeters of height and makes it possible to hide communications; you can use spotlights. An additional advantage is high maintainability. If something happens to one or more planks, you can remove them and install whole ones in their place.
The simplest option is to fit the planks one to the other
Also, this type of ceiling finishing allows you to quickly get to the base ceiling or the systems that it hides. This is a useful feature.
Disadvantages - not the best appearance and fragility of the panels. But the load on the ceiling is usually small, so plastic ceiling panels serve until the owners want something else. Another disadvantage is the unnatural material, which releases harmful substances when burned.
Installation of decorative shelves and paintings
Heavier objects should be hung using special fastening devices.
Up to 10 kilograms
With such a load on the plasterboard surface, the ideal solution would be to use a “butterfly”. This option is a dowel consisting of a plastic sleeve with two spread legs on a rod and a threaded screw.
The product is attached according to the following diagram:
Based on the size of the sleeve, a suitable drill bit for a screwdriver or drill is selected. Mounting points are outlined. The tool attachment is directed strictly perpendicularly. The resulting hole should be smooth, without deformation of the edges
To prevent such damage, you need to correctly set the power of the drill. The legs of the plastic element are straightened, and the sleeve is carefully inserted. It is not recommended to press hard, as the gypsum board may be damaged. To completely sink the product, a hammer is used, since there are two protrusions at the neck that fix the position of the part. The screw is screwed in
Due to this, on the reverse side the paws rest against the sheet.
After installing all the mounting points, you can hang a picture or mirror.
To use a standard butterfly mount in a plasterboard wall, you need to drill a hole with a diameter of 8 mm
Up to 30 kilograms
It is recommended to fasten massive objects that create a load of up to 25–30 kg per fixation point using a special dowel - Driva. Its structure is similar to the previous version, but the plastic element has a “snail” shape. The part is equipped with a sharp tip and thread located on the surface of the body. A special screw is used for fixation.
Fastening a shelf or other item is carried out according to the following algorithm:
- Installation points are marked and holes with a diameter of 6 mm are drilled. It is taken into account that the seat must be exactly perpendicular to the surface.
- After preparation, you need to screw on the plastic elements. This will require some effort, because the snail thread cuts into the structure. A screwdriver will make the process much easier. The neck of the dowel should be almost in the same plane with the wall.
- Depending on the fastening device of the item being hung, installation occurs by installing and tightening the screw.
Driva fastener installation diagram
It is taken into account that Driva is divided into categories: for plasterboard bases, plastic options are recommended, since metal ones do not provide reliable installation into such a surface.
Armstrong suspended ceiling
If they are figuring out what kind of ceiling to make in the kitchen, they rarely remember about this type. Armstrong is more often used in offices, trading floors, and industrial premises, but it also performs well in houses and apartments. It is inexpensive, easy to install, made from natural materials, and has high maintainability.
It is a system of profiles arranged in the form of squares. Plates are inserted into the squares, which form the plane of the ceiling. The slabs are simply laid on the profiles and are not secured with anything. This is convenient: damaged slabs can be easily replaced, and there is always access to the ceiling space.
What kind of ceiling to make in the kitchen so that it is inexpensive, but beautiful - Armstrong Photo printing on glass. And this too - Armstrong suspended ceilings
The disadvantage of the system is that it takes away the height of the room; the slabs are afraid of water (they are pressed and painted paper). And the traditional drawback for inexpensive methods of finishing the ceiling in the kitchen is that it doesn’t look very cozy, although not everyone will agree with this.
Only profiles can be washed, slabs cannot. But they can be repainted or replaced with new ones - the cost is low, the replacement process will take an hour or two (including trimming). In general, a good budget option for ceiling repair.
Classification of fastening structures
Although the cabinets are fixed directly to the hangers themselves, there are still special designs that are attached directly to the wall. With their help you can carry out this operation. Among them are some of the most popular products:
- Self-tapping screws. A relatively simple option, which is used to fix structures that are not susceptible to significant loads.
- A crutch is the same self-tapping screw, but it has an L-shaped end, which limits the sliding of the cabinet of such a loop.
- The mounting strip (mounting rail) is a special metal profile with several holes. The upper edge of this product lags slightly behind the wall and forms a kind of hook on which the cabinet is hung.