15731 0 7
MesterulManole October 25, 2018Specialization: many years of experience in finishing works of residential and office premises, summer houses, country cottages, etc. Hobby: cycling in all its forms
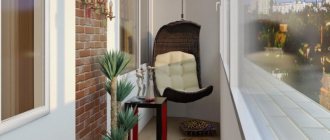
After varnishing, such a chair will decorate any interior.
A comfortable and beautiful wooden rocking chair in the store is not cheap. However, you don’t have to buy such furniture, because everything can be done with your own hands. Read this article about how to make reliable and inexpensive furniture from plywood yourself for a comfortable stay.
Selection of design and material
To make a chair, they use ready-made drawings, changing them if necessary: this is easier than coming up with a sketch from scratch. It is advisable to choose designs that have a minimum of connections in order to reduce the risk of product failure.
Drawing of an original rocking chair made of thick plywood
Diagram of a rocking chair made from planks, which can be used to make furniture from plywood
Drawing of a rocking chair with a canopy
Diagram of a durable rocking chair made of plywood with solid sides
The choice of material depends on the operating conditions of the future chair.
| Plywood type | Chair installation location |
| FC, FBA, BV | Rooms with moderate humidity |
| FSF, FOF | Outdoors, indoors |
| Pine plywood | Outdoors, indoors |
| Berezovaya | Only inside the house |
The thickness of the sheets for the side and supporting elements is 15 mm, for the manufacture of the strip and back - 10 mm.
Plywood is divided into 4 grades, 3 and 4 are not suitable for creating furniture. The second grade can be used for internal parts that are not visible to the eye. The best choice is the first grade.
How does it swing?
Most home craftsmen make rocking chairs according to ready-made drawings, but prototypes often turn out to be developed and tailored to a specific person, and an exact replica is not so convenient. Therefore, before making a rocking chair, it is necessary to obtain at least initial information about its kinematics.
The CG of an upright person of normal build is located on the border of the lumbar and sacrum on the inside of the spinal column. In a sitting individual, it will blend somewhat forward and even less downwards. In the chair-seat system, the overall CG shifts back almost to its original position and a little further down. The downward shift of the general CG for the design of a rocking chair is not particularly significant and we can assume that the projection of the general CG onto the supporting surface (floor) is approximately the same as that of a standing person. In the future, the resulting error can be easily compensated by final balancing of the chair, see below.
The vertical location of the central center relative to the central center has a much stronger effect on the stability and comfort of the rocking chair; the latter is also a determining factor when designing rocking chairs on runners with variable curvature. If the CG and CO coincide, this is an indifferent equilibrium: for any physically possible tilt of the chair, the projection of the CG on the floor falls on the point of contact of the runners O, pos. 1 and 1a in Fig. The chair does not rock, and if you lean back too much, you will instantly somersault with the risk of breaking your neck. Fortunately, an exact match between the CG and the CO is only theoretically possible.
Kinematics and construction of the rocking chair runner profile
If the CG is higher than the CO, then its projection, at any inclination, “runs” outward, backward or forward, from the point of contact. At the slightest tilt, a tilting moment Mo occurs (positions 2 and 2a), and the rocking chair turns out to be unstable. To avoid such a situation for a family rocking chair, it is designed and balanced for the tallest, heaviest and pot-bellied rider possible so that its CO is 450 mm or more higher than the CO. Then, when the chair is tilted, the point O will “run away” from the CG projection, the restoring moment Mv will constantly act (positions 3 and 3a) and the chair will not tip over when rocking within acceptable limits. For those who are smaller, the excess of the CO over the CG will be too large, and the swaying will be harsh, but this can be easily compensated for by pillows under the back and seat. In general, the lower the elevation of the CO above the CG, the softer and smoother the swaying, but the likelihood of capsizing, suddenly straightening up and standing up in a chair, is higher. Therefore, it is better for novice carpenters to set the CO exceeding within 600-700 mm.
Note: if it is impossible to determine the position of the CG of the largest of the riders (say, in his absence), the radius of the generating circle R is taken equal to the average height of the users minus 5 cm. Suddenly the rocking turns out to be harsh, this can be corrected by placing a permanent pillow on the seat.
There is no need to drag your own pillows with you into a chair on runners of variable curvature: it will itself rise to the position of greatest comfort. At the same time, the big guy will lean back more, and the slender one will sit straighter. When swinging backwards, the point O will run away from the CG projection the further, the greater the angle of inclination, and it will simply not be possible to swing until it capsizes. And if you “pump” forward, which is actually difficult, the chair will smoothly drop the hyperactive person onto the floor: where should you rest? Go do something.
To construct a profile of runners of variable curvature, the radius of the generatrix of the circle (it is determined as in the previous case) will have to, firstly, be rotated several times by a fixed angle α; usually take α = 10 degrees. Secondly, to build the rear branch of the runner, R is increased at each turn according to the law of geometric progression with the index k = 1.02-1.03. That is, it will be (see position 4 in Fig.) R1 = kR; R2 = kR1; R3 = kR2; R4 = kR3, etc., if required. Actually, R changes according to some trigonometric function, but for furniture accuracy and the size of the rocking chair, it is more convenient to replace it with a progression, so it’s easier to calculate.
The construction of the anterior branch is carried out at a constant R, but with each rotation of the generatrix of the circle, the CO is raised vertically (ibid., in position 4 of the figure). The initial elevation Δh1 is taken equal to 2-3% R, i.e. (0.02-0.03)R, and the subsequent ones also follow a geometric progression with the same indicator as for the posterior branch. Δh1 in this case is a fairly critical value; its smaller value should be taken for thin people, and its larger value for fat ones.
Finally, the resulting points are connected using a pattern with a smooth curve. Do not be embarrassed if the tangents to it turn out to be not perpendicular to the radii: in order for the chair to be stable, at each moment of rocking it should be on the opposite slope. When constructing, it is advisable to take the scale no smaller than 1:5.
Note: if a nirvana chair is designed, but the front ascending branch of its runners will be an elliptical arc (green dotted line in position 4), tangent to the constructed profile of the runner in Part I there.
Final balancing
It is unlikely that a novice craftsman will immediately find a rocking chair comfortable enough. Most likely, the product will need to be balanced. If the chair doesn't rock well, and when you get out of it it pushes, you need to make the rear overhang heavier. The easiest way to do this is to connect the ends of the rear branches of the runners with a low U-shaped beam of boards, with the notch facing down. Weights are placed in the recess. The lever arm in this case is long, so there is no need to hang weights. Another option, depending on the design, is a transverse pipe beam with a weight inside. But during the balancing process it will have to be removed and put back several times. If the rocker tends to fall back, you need to make the front overhang heavier. The easiest way to do this is by placing a step and attaching weights to its underside.
Features of manufacturing and connecting parts
Some rocking chair designs include bent elements; it’s worth learning how to do this correctly. The parts are placed in a container of water until they are completely wet and become plastic. After that, they are taken out, given the desired shape and fixed in this position. Leave to dry for at least 12 hours.
You can use nails or screws to connect the parts of the chair. You cannot drive or screw in fasteners immediately; you must first make holes at the designated points using a drill whose diameter is equal to the diameter of the screw (nail).
Afterword
This article discusses only two types of plywood chairs, which are the easiest to make for beginners. To make it yourself for the first time, you need to put in maximum effort, endurance and patience. With a little practice, you can move on to heavier models.
A DIY plywood chair is a stylish, original solution that is not inferior in quality to expensive store-bought counterparts!
Materials and tools
To make a rocking chair from plywood, you will need:
- blueprints;
- graph paper and pencil;
- several sheets of plywood 1520*800 mm (the exact quantity depends on the design of the chair);
- jigsaw;
- primer, paint, paint brushes;
- fine- and medium-grained sandpaper;
- wood glue;
- milling cutter;
- drill with a set of drills;
- fasteners (wood screws, nails);
- screwdriver or hammer;
- rags;
- plugs for screws;
- scissors;
- mechanic's knife.
Choosing a size
The dimensions of the rocking chair may vary depending on where you would like to use it. It is recommended to make garden ones a little wider than standard sizes; more compact ones will fit perfectly into your home interior. A standard chair based on an ordinary chair has the following dimensions:
- height – 1020 cm;
- width – 720 cm;
- The length of the product in cross section is 1500 cm.
It is necessary to make a drawing of a square seat, about 60 cm in size. The thickness of the seat can be approximately one and a half centimeters. For the legs you will need bars with a height of about 110 cm; the height of the front legs is usually taken up to 60 cm.
These parameters may vary according to your preferences.
Uncover
Before starting work, it is recommended to watch a video where you can see the details of making the chair
After studying the drawings, transfer them to graph paper. After cutting out the patterns, mark the plywood. It is necessary to place the elements on the surface of the sheets so that the material is used sparingly.
The material should only be cut with a suitable tool:
- for sheets less than 15 mm thick, use a jigsaw;
- more than 15 mm – circular saw.
The sheets are cut taking into account the direction of the fibers - always along. Otherwise, the edges of the parts will delaminate. If it is necessary to make a cross-section, first apply notches to the surface of the plywood using a bench knife.
The cutting tool should not be applied directly to the marking line, but beyond half a millimeter. Then, after sanding the ends of the plywood, the parts will retain the desired size.
Cutting plywood. Chair detail
The edges of each part are treated with medium-grain sandpaper. You should not skip this stage, even if the cut areas look even. There may be small, unnoticeable particles of wood at the edges, which may become embedded in the leather during use of the chair. The surface of the plywood is sanded with fine-grained sandpaper.
If, according to the selected sketch, the parts should have rounded edges, they are processed with a file or special tools: a drill with a milling attachment, a grinder.
Based on the drawings, places for fasteners are marked on the prepared elements. Drill holes with a drill of suitable diameter. It must enter the material strictly vertically. If this condition cannot be met, it is better to drill another hole, retreating some distance from the originally intended point.
After the rocking parts are ready, they are coated with a primer. You should choose antiseptic compounds that increase the resistance of wood to moisture. They wait until it is completely dry, after which they begin to assemble the chair.
Making a rocking chair-bed
This version of the rocking chair can be placed in the garden and used for comfortable relaxation in the fresh air on a warm summer day.
Step 1. First of all, you need to purchase everything you need - a sheet of plywood 30 mm thick, a hand router, a grinder, a screwdriver, a jigsaw, and various measuring tools.
What you need for work
Step 2. Next you need to mark the parts on a sheet of plywood. The first step is to cut out a rectangle measuring 1820x1500 mm, and find the center on it.
Marking of structural parts
Step 3. Now you need to draw the shape of the side parts of the chair, focusing on the drawing. Curved lines can be drawn using a tape measure with the ability to insert a pencil into it, or a rope of the required length with a pencil tied at the end. It turns out to be a kind of compass.
Pencil inserted into tape measure
The shape of the side parts is drawn
Another photo of the process
Step 4. Next you need to make holes in the plywood so that you can make cuts for the internal radii of the parts.
A hole is being drilled
Step 5. Then you need to cut out the side elements of the rocking chair using a jigsaw.
Side elements are cut out
Jigsaws are used
Step 6. Using the first part as a template, you can make the second without unnecessary movements.
The part is used as a template
Step 7. The finished parts of the rocking chair need to be sanded well using a sanding machine.
Sanding parts
Step 8. Now you can start making the seat slats. They need to be cut from plywood.
For slats you will need plywood
Cutting slats
Step 9. You also need to chamfer the side parts.
Chamfering
Step 10. Using a Forstner drill, you need to make recesses for the jumpers between the side parts of the chair. On both parts they should be located clearly opposite each other.
Creating recesses for jumpers
Step 11. The elements of the chair can be painted with a water-based stain and dried well before further work.
Applying stain
Step 12. On the slats for installing the seat, you need to attach metal corners along the edges, on which they will be held between the side elements.
Fastening metal corners
Step 13. The two side elements of the chair need to be connected using jumpers, round in cross-section. They must be securely fixed.
Connection of side parts
Step 14. Next, it’s time to screw the seat slats. They need to be fixed using the corners previously screwed to the slats on the side elements.
Slats for seating are attached
Step 15. This chair has a small roof that will protect the resting person from the scorching sun. You can secure the material (and this is fabric) using a construction stapler.
The fabric is secured with a stapler
Step 16. To make lying on the rocking chair comfortable, you can lay a thin mattress or foam rubber on the slats. The rocking chair is ready.
Rocking chair
It turned out quite beautiful
Assembly of the structure
To connect the elements of the rocking chair into a single structure, glue and fasteners are used. Due to the high load on furniture, glue alone will not be enough. Nails or wood screws can be used as fasteners.
The parts of the rocking chair are coated with wood glue in places of contact with each other, then additionally fixed with fasteners. The screws are screwed in all the way, slightly recessing the heads into the plywood. The nails are also driven in so that the head is immersed 1 mm into the material.
Finished plywood rocking chair
Excess glue that appears at the joints of parts should be immediately removed with a clean rag - when the composition hardens, it will be difficult to remove it.
After this, the plywood rocking chair must stand for at least a day so that the adhesive composition completely hardens.
Sun lounger with awning
Both those and other requests will be satisfied by a garden rocking chair on elliptical runners and with an awning. The dimensions of its sidewalls are given in Fig. their material is 24 mm plywood. The width of the bed is up to 900 mm, its covering is made of 50x50 slats. The sidewall areas, indicated by gray circles, are connected by round wooden crossbars with a diameter of 60 mm or more.
Dimensions of the sidewall of a rocking chair with an awning
Finishing
Having completed the assembly, they move on to finishing.
A plywood rocking chair is decorated using:
- clear varnish;
- alcohol- or water-based stains;
- paints;
- oil or water based varnishes.
Another option is to cover the seat and back with fabric. After the finishing of the plywood rocking chair is completed, the caps of the fastening elements are closed with special furniture plugs. It is permissible to use instead a sealant that matches the color of the surface of the chair.
Rocking chair made of plywood with metal crossbars
What will you need?
The most convenient material, which can be purchased in a store without unnecessary effort, is wood. Wood products have a beautiful classic look, they are environmentally friendly and go well with any interior.
Conifers occupy a special place due to their low weight and density, which will be convenient in the manufacturing process.
You can give the product individual characteristics and any shape. For example, products made from larch are resistant to deformation, temperature fluctuations and moisture, are not afraid of loads and damage, and, of course, they have an aesthetic appearance. But products made from elite wood species such as ash or oak still look most attractive.
Having chosen the material, you need to prepare the tools. In order to build a rocking chair with your own hands, you will need:
- jigsaw;
- plane;
- Sander;
- milling cutter;
- level (preferably laser);
- several screwdrivers;
- construction pencil;
- tape measure for measuring the length of the material;
- clamp.
Installation location
A rocking chair made of plywood is installed not only at home, but also on the street. It is important that the site has a canopy that will protect the furniture from precipitation. Possible options:
- porch or veranda of a private house;
- terrace;
- alcove;
- covered seating area.
If a rocking chair made of plywood will stand in the open air - in the garden, near a pond or in another place - then the structure must be carefully treated with protective agents.
Making a rocking chair is not a very simple process, but it requires precision. Even small deviations from the drawing can disrupt the stability of the structure, so you should be especially careful when cutting plywood and processing parts.
Some general information
Whatever one may say, it is a rocking chair, especially one standing in the garden or near a lit fireplace, that many associate with comfort, a pleasant evening in a narrow family circle, peace and quiet.
In such an environment you can have a great rest and relaxation by reading your favorite book or watching a good movie. The rhythmic rocking movements of the rocking chair will help you get ready for sleep and simply feel peace, which is so rare in modern life, filled with bustle and heavy thought processes.
Rocking movements increase concentration
On a note! Scientists have proven that rocking movements with a certain rhythm calm a person and increase the concentration of his thoughts. Sometimes it is sitting on a rocking chair that can solve serious life problems and problems.
It is still unknown exactly how and where the very first rocking chair came from . Usually many people associate it with old England, fireplaces and rugs. At the moment, there are two main versions of the history of the origin of this chair.
According to one of them, the first rocking chair was invented by the Viennese furniture maker, experimenter and innovator, as well as a fan of bent wood, Michael Thoneta in the mid-19th century. However, there is one more fact that casts doubt on this version. Thus, at the end of the 18th century, the word “rocking chair” was added to the English dictionary, and since the 1800s, such chairs began to be produced by many English furniture manufacturers.
But the fame and peak of popularity of rocking chairs came precisely in the 19th century. They were used mainly by rich and aristocratic people, as well as those involved in literary and artistic arts.
According to the second version, the rocking chair was invented by Benjamin Franklin. In terms of time, this was also the 19th century. But there are those who refute this version, believing that Franklin was just the one who became the first owner of the rocking chair.
In a word, we can say that the beginning of the history of the chair is the 18th-19th centuries. The sources are silent about the rest. And, nevertheless, rocking chairs still remain popular and in demand, and are primarily intended to create a special ambiance and comfortable environment in a certain place.
The rocking chair has its own history
On a note! The rocking chair is still the only non-static piece of furniture.
Where can it be used?
A rocking chair in general can be installed anywhere, be it a room or a veranda in the garden. But most often it can be seen in a spacious living room in a private house or in the garden. In the latter case, rocking chairs are often made of either metal or rattan.
The products are characterized by increased strength; when properly processed, they are not afraid of water, are durable and can really not only decorate the garden, but also create a real relaxation area in it. Moreover, the rocking chair will feel great both on the veranda and on the lawn or garden path, where it will not disturb anyone.
On a note! In the garden you can put not just a rocking chair for one person, but also a real rocking sofa or a bench that can accommodate several people at once.
Also, rocking chairs fit perfectly into the interior of large and spacious rooms, especially those made in a certain style. Of course, with modern design solutions, you should abandon the traditional rocking chair, but a stylized chair will fit even into a high-tech room.
Types of rocking chairs
A rocking chair is a comfortable, useful item that can be easily placed in almost any room or even a country garden. Such furniture is used mainly for relaxation of people of different ages.
Main types of swinging chairs:
- massage – used for healing, as it is equipped with massage rollers and vibration elements;
- on radius runners - the most commonly used option, as simple as possible to assemble, but if it swings too much, such furniture will fall;
- on elliptical skids - the product is equipped with bumpers that prevent it from tipping over;
- with variable curvature - almost any landing height is allowed here, the likelihood of an object overturning is low;
- multifunctional - this is a “three in one” design, with an adjustable backrest, which can be converted into a bed if necessary, therefore it is used only in large rooms;
- glider is an item of increased comfort that has a special footrest, soft armrests, and other elements.
A wicker rattan chair will become an indispensable attribute of a country veranda, a soft one, upholstered in leather, will be located in the office relaxation area.
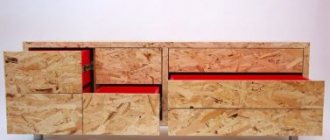
Creative plywood furniture – 50 photo ideas:
PreviousFurnitureChair with footrest - a convenient solution for home and office
Next
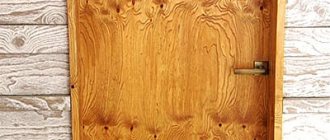
FurnitureArtificially aged furniture: a stylish solution accessible to absolutely everyone