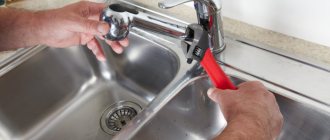
Installation of a faucet in the bathroom is somewhat different from installing a faucet for a kitchen sink, because the pipes in the bathroom can be walled into the wall and only a small part with threads for connecting the faucet protrudes outside. If the pipes are not embedded in the wall, then they run along the walls, and the mixer will be at a distance from the wall.
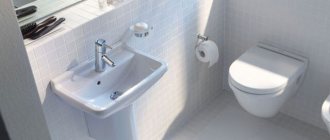
Let's define the problem more specifically - because two faucets are often installed in the bathroom: one above the bathtub, the second above the sink. So, here we will only talk about the one above the bathtub and above the sink. We will install it together with the sink.
Distance between pipes when connecting a mixer
Before installing the mixer, pipes with cold and hot water are installed, and the outlets are supplied to the place where the mixer is attached.
At this stage, you should know the distance between the pipes when connecting the mixer; this parameter should be selected based on SNIP standards and usually it is 15 cm, with a deviation of 1.5 cm in both directions. The size of the pipe connected to the mixer is half an inch, and based on this parameter, if necessary, you should take care of additional adapters
Installing a faucet in a bathroom, shower or kitchen has its own characteristics and nuances that should be paid attention to even at the initial stages of pipe installation
Installing a faucet in the kitchen
When installing a faucet in the kitchen, as a rule, the pipes are laid open and are not walled up in the wall, so it is not so important what the distance between the pipes is on the faucet; it can be easily adjusted if necessary. If the pipes are mounted into the wall, in order to avoid the use of additional elements and adapters, it is worth taking care of the distance between the pipes in advance so that the installation of the mixer goes without any problems.
It is worth buying the mixer in advance and installing the pipeline based on the given dimensions.
Installing a faucet in the shower
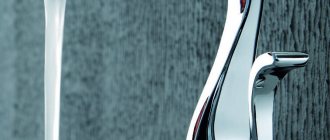
The most suitable for these purposes are faucets designed specifically for showers. Until recently, in this role they used one mixer for both the sink (pictured) and the shower, which did not require large expenses.
A distinctive feature of this type of faucet is the absence of a bath-shower switch, which gives a more modest size of the product. Recently, there has been a tendency to use special mixers that allow you to reveal the functions of the shower at 100%. Installation of such a mixer can be done openly or some parts can be hidden during the installation process for a more aesthetic appearance; it is worth noting that with hidden installation, when repairing the mixer, problems arise with access to failed parts. Shower faucets designed to connect special shower heads or hydromassage elements are becoming increasingly popular.
The distance between the pipes of the mixer in the shower during hidden installation is selected especially carefully, since the complexity of installing the mixer itself will depend on this
When installing the mixer, you should take into account the height to which the mixer should be raised. Also, you should not ignore the height at which the shower head is located, which affects the quality of the mixer’s operation.
Before purchasing a mixer, check all the necessary indicators with a sales consultant.
Installing a faucet in the bathroom
Often, when installing a water supply system to connect a faucet in a bathroom, the pipes are walled into the wall, this saves space in the bathroom. With this type of installation, the distance between the pipes for the faucet in the bathroom plays a big role.
A small error when installing the mixer can be eliminated with the help of eccentrics that come with most mixer models. After setting the required distance between the pipes for the mixer using eccentrics, all the necessary elements are connected.
When choosing a faucet, pay attention to the weight of the product; as a rule, faucets made of silumin are cheaper and lighter in weight than brass ones, but they are usually inferior in quality. When installing the mixer on the threads of the products, it is necessary to wrap tow or full tape, this will prevent leaks during operation of the product
If you carefully choose a faucet and strictly follow the installation tips, then every owner can do this type of repair.
What are plumbing eccentrics for faucets?
The distance between the inlet pipes of the mixer and the previous water supply outlets from the wall is theoretically 15 cm, in practice the value differs by 2 and even 5 cm. It will not be possible to install the mixer.
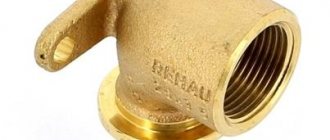
For this purpose, additional parts are purchased - eccentrics. This part is similar to an adapter, which is shifted to the side in the center (with a distance between the axes) and has threads at both ends of the input. Adjustment of the dimensions of the input and output is realized through two small sections of metal pipe, differing in diameter. This distance makes it possible to level out the difference in the position of the mixer inlet (smaller side) and the pipeline (larger side).
Many manufacturers are familiar with this problem, and therefore often additional parts such as an eccentric are included in the package.
Calculation of mixer installation height
Consider the distance from the edge of the container to the tap
Despite the established standard distance between the faucet and the bathtub, equal to 200 mm, the faucet is installed at a distance that is convenient for users.
When calculating the installation height, the following requirements must be observed:
- Before installation, you need to try on the mixer at the intended installation location to determine the position in which it will be convenient to use this plumbing equipment.
It is imperative to take into account the distance from the edge of the container to the faucet when there is a need to turn the faucet from the bathtub to the sink
When calculating this parameter, it must be taken into account that the size of the sink is usually 850 mm. In addition, when calculating in this case, you need to take into account the length of the tap itself and the distance between it and the sink
When turning the faucet, it should be in the middle of the sink. The installation location of the mixer should be in places convenient for its fastening, without destroying existing structures and finishing elements. For example, you cannot install fasteners on the edges of the tiles, because they may crack in these places.
The location of the mixer may be affected by additional elements included in the system or installed at the request of the owners.
For example, if there is a water softener or the apartment owner wants to install the faucet higher, so that he can wash his hair.
Approximate parameters for installing mixing equipment can be taken according to the values indicated in the table:
| № | Name of equipment | Installation options |
1 Sink tap 250 mm from the edge of the sink 2 Sink tap 200 mm from the edge of the sink 3 Washbasin tap 200 mm from the edge of the washbasin 4 Bathroom mixer 800 mm from the floor 5 Common bath and washbasin fittings 1000 mm from the floor 6 Shower fittings 1200 mm from the floor
Non-specialized concepts
This part has a round shape, in which the geometric axis and the axis of rotation coincide.
Application of eccentrics other than plumbing:
- for fastening furniture structures;
- in astronomical studies.
The device allows you to adjust the distance between two bushings. In some cases, it is not possible to complete the process without a device.
How can he help?
During the independent installation of the mixer, you may encounter a problem such as misalignment between the tap pipes and the pipeline. As a result, it is impossible to directly connect one to the other.
Often such devices are included in the kit together with the mixer. It is enough just to study in detail the instructions offered by the manufacturer and carry out the installation normally. If there was no eccentric in the kit, the part of the required diameter can be purchased separately, its price is completely affordable.
How to install an eccentric
Installation of the faucet fixture is divided into two operations, performed sequentially:
- fastening the structure;
- tap connection.
- We recommend that you first assemble the entire structure without seals and make sure that all mounted connections are not distorted among themselves. For example, if you have too small eccentrics in your kit, you can replace them with suitable ones before starting the main work.
The device consists of two parts – narrow and wide. If you were able to carefully remove the old eccentric from the mixer during installation, replace the seal on its thread. Use hemp or fum tape, making sure that they do not roll around the base during the connection.
- Screw the long eccentrics to the liner, making sure that they correspond correctly with the thread. Tighten them well using an adjustable wrench or wrench. Make sure that the threaded seal does not turn around, otherwise it will impair the functionality of the structure.
- The instructions recommend installing the eccentrics so that the nuts of the mixer body can be comfortably and easily screwed to them. Make sure that the installation occurs smoothly, without distortions.
- At the last stage, attach decorative screens that will hide the connection point.
Material
There are different types of eccentrics for the mixer, but the main thing along with this is what they are made of:
What they are made of and the disadvantages of inexpensive models Products can be made of bronze or chrome-plated metal. In most cases, inexpensive options from China and Turkey are chrome plated. We recommend not using metal products from the set, but replacing them with brass ones. Despite the fact that they look beautiful, they often “stick” to the threads with rust. Another drawback of inexpensive eccentrics is that when they are unscrewed from the water supply after some time, the head has a pipe thread. Getting it out of the pipe after this will be quite difficult and associated with unforeseen costs
Please note: Choose only solid brass eccentrics. On sale now you can also find yellow products, but made from pressed brass powder. Their price is significantly lower than cast ones, but we do not recommend buying them due to their fragility
There is a high probability that at the moment of tightening the product. Do not forget that when installing an eccentric made of pressed bronze, there is always a danger that if there is accidental pressure on the faucet during operation, it may fall off the wall together with the mixer. The right choice This expert advice is suitable for selecting both an eccentric and a crane. “Weigh” the product in your hands – one of the most basic indicators of quality. Know that brass is a fairly heavy metal. Based on this, take the expensive option in one hand, and the one you want to buy in the other. You should not take the seller’s words on faith at a time when doubts have crept into your mind. The yellow color of the surface may turn out to be a simple coating, under which sintered aluminum chips or cast iron can hide.
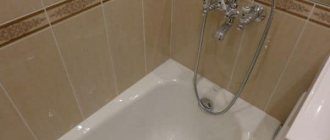
Faucet height above bath
The shower mixer is installed at a height of 120cm from the bottom of the shower tray.
If the pipes are laid before installing the bathtub (and this happens in most cases), THEN the height of the bathtub should not be considered as simply the height of the assembled bathtub.
Almost always, during installation, you have to place stands under the legs of the bathtub, often 8-10 centimeters high.
This is necessary to ensure a sufficient slope of the sewer, otherwise there will be serious problems later. If you measure the height of the faucet 20 cm from the side of the assembled bathtub, and then install it 10 cm higher, the faucet will be at a height of 10 cm from the bathtub. This is not very convenient to use, plus some faucet models simply cannot fit into this gap.
So, it’s better to go to the store and decide on the model of the mixer and its dimensions, or better yet, buy it right away.
If the faucet must also be turned onto the sink, then its spout must pass freely over the sink, so you also need to decide on the sink in advance. For reference, the height of the sink ranges from 820...850 (mm).
We add the height of the mixer X to it. Do not forget about the gap between the “gander” and the sink. In this case, it is better to err on the larger side than on the smaller one.
In this case, the vertical axis of the sink faucet is not made along the axis of the bathtub, but is shifted towards the sink.
Height of standard bathtub assembly: 540…580 (mm)
The height of the faucet also varies: from the minimum to 20 cm. Quite a lot of customers have asked to install the faucet higher, so that they can wash their hair without getting into the bathtub.
It is also advisable that the mixer does not touch the tile border.
It looks more beautiful this way. In addition, most curbs have a textured surface, and the mixer reflectors will not be able to adhere tightly to them.
The border, in turn, should extend above the sink. So we have at least 1 meter of height from the floor.
If the mixer is installed along the side wall of the bathtub, then it is better to place it not in the middle of the bathtub, but with a 1/3 offset towards the feet. This will make it more convenient to sit in the bathroom and use it.
I will add that the standard distance between the hot and cold water outlets is 150 mm along the axes.
Hot water is always on the left - this is a European standard, and all faucets are marked accordingly.
The exception is some faucets with a built-in thermostat.
The installation depth of the fittings is flush with the tiles. Although, to be sure, it is better to immediately buy a mixer, assemble it and measure it. It happens that the fittings need to be recessed a little into the wall.
;
It’s a good idea to use a plumbing template—a level—to install fittings. It allows you to set the water sockets strictly along the axes and level.
Kinds
Since the difference between the water supply inlet in the wall and the faucet outlet can vary from several millimeters to a couple of centimeters, there are several types of eccentrics. As a rule, they differ in size.
Short
Suitable if the distance or insufficiency between the fasteners and bends does not exceed 7.5-8 cm.
Extended
The elongated one has a greater length than the short one, but it will not be enough if the distance is large and the vibration error between two points is more than 8, but not more than 10 cm.
Long
This eccentric is suitable for very curved walls (eliminates a gap of up to 12 cm) in old panel houses. However, if the length of such a part is too long and does not fit tightly into the wall, then the entire mixer will wobble. If the extended one does not fit, and the long one is very large, you can file one side with a file.
Recommendations for installing the mixer
Hot and cold water taps must be located at a distance of at least 15 cm from each other.
For convenient and high-quality use of the mixer in the bathroom, sink, sink or above the washbasin, it is necessary to take into account the experience of specialists, their practical experience and the requirements, wishes and comments of consumers. Their brief description consists of the following points:
- If you plan to install the mixer along the side surface of the container, then you do not need to try to do it strictly in the middle. In this case, it is better to install it closer to the feet - this will make it more convenient to use while taking a bath.
- The cold and hot water supply points must be at a distance of at least 150 mm from each other, and the final installation of all equipment must be done after testing the system and finding the optimal installation option.
- The correct installation of mixing equipment is influenced by the design of the mixer, which can be installed on the bathtub itself, a wall, or a specially made elevation.
- The designs of many bathtubs already include places for installing faucets, the installation of which is quite easy if you comply with the requirements attached to the instructions for the equipment.
- When installing mixing equipment on a wall or a special podium and supplying water to it, you will most likely need the help of qualified specialists.
Regardless of the type of mixer and the adopted method of its installation, it is necessary to comply with the requirements of the installation instructions in compliance with the technological sequence of work operations specified in them. See all the nuances of installing a faucet in the bathroom in this video:
The installation height of the faucet depends on the shape and size of the equipment itself, the bathtub, sink, sink, as well as on the parameters of the room in which these plumbing installations and fixtures are installed.
Which faucets can be placed on board in the middle
You can install a mixer on board that has a traditional, familiar look. There are models that allow you to hide all unaesthetic knots.
In this case, only the valves and spout remain on the side. This installation method is suitable for a minimalist interior. Cascading models create a beautiful stream, similar to a waterfall.
Mortise type
It is a familiar design, but it is mounted not on the wall, but on the side of the bathtub. During installation, there is no need to disturb the finish if the plumbing is connected after repairs. This installation method helps to hide all communications and pipes. This is appropriate if the plumbing fixtures are moved from the corner to the center of the room.
The mortise type is attached to the side of the bathroom.
Installing an inset faucet changes the design and adds neatness and style. Valves are more affordable. The tap is easy to reach when taking a bath. To do this, you do not need to leave the warm water.
By installing the spout on the side, you can avoid unnecessary splashes. The water flows exactly into the bathtub, because the spout is located low.
Cascade type
The cascade mixer has design differences. Connecting nodes and eccentrics are located on the lower part of the side. Only the control valves, spout, and watering can are attached to the top. At the same time, the shower hose is also hidden.
The cascade type creates a powerful and directed water flow.
The cascade looks impressive and original. The main advantage is the non-standard shape of the spout, which distributes the flow of water, forming a beautiful wide stream. There are no nodes or communications outside.
Like the mortise mixer, the cascade mixer is accessible, does not splash drops, and creates less noise.
Spout without shower
If the room has a shower stall, and a bath is rarely needed, you can refuse to install a watering can and choose a spout without a shower. It looks neat, because only one element with lever control is attached to the side. The valve opening method is rarely chosen - it looks more cumbersome.
A spout without a shower is installed if a bath is needed occasionally.
Touch models have built-in heat or motion sensors or an electronic control panel with buttons for setting settings. They are compact, look minimalist, beautiful. To create a waterfall effect, choose a cascading spout shape.
Determining installation height
The height of the faucet above the bathtub is mainly determined by the user independently. However, experts have also developed certain standards based on many years of research.
Standard parameters
The standard for installing a faucet over plumbing equipment is determined by SNiP 3.05.01-85. According to this document:
- the recommended height of the mixer above the bath is 200 mm;
- the height of the crane from the floor must be at least 800 mm;
- if the equipment is installed in a shower stall, then the recommended height is 120 mm from the bottom tray.
Recommended installation height of the mixer
An exception to the rule is the installation of a mixer in medical institutions. If the equipment is installed above the bathtub, the recommended height is 110 cm from the floor. If the installation of taps is carried out in a shower stall, then the mixer is located at a height of 120 cm - 150 cm from the floor.
Self-calculation
The standard faucet installation height is purely advisory and is used only in public institutions. Each user can determine for himself the most optimal installation height. When calculating the parameter, you must be guided by the following rules:
- immediately before installing the faucet in the shower, try on the equipment and check the comfort of use and aesthetic appearance;
- Installation of a shower over a bathtub should be made in accordance with the height of the majority of users. The minimum distance - 120 cm is determined from the bottom of the font or from the tray installed in the shower stall. The height above the floor is determined in accordance with the installation height of the bath;
Determining the installation height of the shower
- if the mixer is used for both a bathtub and a washbasin located nearby at the same time, then the minimum installation height of the plumbing equipment must be increased by 5 centimeters or more;
If the bathtub and washbasin are located at different heights relative to each other, then it is recommended to install the faucet at a height of 25 cm from the sink.
Location of bathtub and washbasin taps
- Determining the location and, accordingly, installation is required after the bathroom has been fully secured, since during the work it may be necessary to level the font to the horizon, which will lead to raising the plumbing equipment and, as a result, reducing the distance between the bathtub and the mixer;
- The installation height of the mixer is also affected by the need to install additional equipment, for example, an aerator or a sprayer with several operating modes. Any device installed on a crane will increase the length of the equipment and reduce the working space;
Bath faucet with aerator
- The mounting height of the mixer tap is also determined depending on the location of the finishing material on the wall. It is not recommended to attach it to tiles, as the fixation will not be durable. Installation, as a rule, is carried out at the junction of the finishing material or the laying of the curb;
It is additionally recommended to calculate the distance between the mixer and the edge of the font
It is especially important to determine this parameter when using a bath mixer and washbasin at the same time. To make the calculation, you will need to determine the overall dimensions of the washbasin, since the water should fall almost into the center of the bowl, the length of the jig of the mixing equipment and the distance between the bathtub and the sink.
For more information about the installation process, watch the video.
The most common mistakes when choosing a faucet location are too high a height and placing the equipment close to the edge of the bathroom.
In the first case, additional noise will occur when water is supplied. In the second situation, it will not be possible to wash large items.
If you take into account all the rules and recommendations of specialists, then independent installation of equipment will be correct and as effective as possible.
Installation of eccentrics
The spacing of the bathroom faucet is determined by positioning the inlet water fittings. If an error occurs in the center distance, the situation can be corrected using the adapter eccentrics contained in the equipment set. Tow or special FUM tape is used as a sealant for the threaded connection.
Preparing the place for the mixer
Preparation for the event consists of the following steps:
• shutting off the water supply to the bathroom • draining the water from the tap, after which you can dismantle the old device, clean the threads of the fittings from rust and sealing material • assemble a new device from the component parts.
The water supply package must contain:
• working block • gooseneck • shower hoses, watering cans • eccentrics • rubber gaskets • decorative linings.
Location of the tap in the bathroom according to SNiP
Despite the fact that each consumer independently decides at what height to install the faucet above the bathtub, regulatory construction acts specify very specific requirements for the installation height of faucets. According to documents SNiP 3.05.01-85, the following standard is specified - the distance from the bathtub to the tap must be at least 200 mm, and the height of the mixer in the bathroom from the floor must be at least 800 mm.
However, according to regulations, the recommended parameters can be changed. So, for hospitals and medical institutions, in order to install a faucet, you need to measure the distance from the floor and install the tap at a standard height of 1100 mm. And in the shower version, the distance between the mixer and the bottom of the container should not be less than 1200 mm and no more than 1500 mm.
Modern builders and plumbers, especially in private households, do not comply with SNiPs, and the installation height of the bathtub mixer depends on the personal preferences of the consumer. In this case, specialists adhere to the installation rules specified in the instructions for the device.
Attaching the mixer to the eccentric
The final stage - installation of the mixer is performed as follows:
- installation of decorative reflectors;
- installing the gasket. The gasket protects the junction of the adapter and the mixer from leakage;
Insulating the connection between the eccentric and the mixer
- connecting the mixer and shower hose;
- checking the functionality and sealing of the formed connections.
The entire cycle of work on replacing eccentrics yourself is presented in detail in the video.
Thus, replacing eccentrics on your own does not cause problems even for novice craftsmen. The main thing is to choose the right device.
Installation Standards
When deciding at what height to place the mixer above the bathtub, keep in mind that this device is included in a single water supply system, becoming its integral element. The comfort of using the bathtub and the service life of plumbing fixtures depend on the correct installation of equipment and compliance with installation standards. Requirements for installing faucets in bathrooms or toilets are regulated by SNiP 3.05.01-85. The regulatory documentation specifies the following installation parameters:
- The height of the faucet above the bath. This parameter indicates the distance from the top edge of the bath to the mixer; it affects the noise level during the collection of water into the washing container and the amount of splashes that occur during this process. If the distance from the bathtub to the tap is small, then it will be inconvenient to wash large objects in the bathtub, as well as to collect water in buckets or other containers.
- The height of the bathroom faucet from the floor. Also, the standard for installing plumbing equipment also regulates the distance between the faucet and the floor of the bathroom. The pressure in the plumbing system and the water pressure in the tap depend on this parameter.
Installation methods
The height of the bathroom faucet is not the only installation parameter that needs to be taken into account during installation. A large range of plumbing equipment makes installation methods more diverse
The most common options are:
Installation errors
Experienced craftsmen note that an incorrectly chosen installation height can have a significant impact on the comfort of using the bathroom
Therefore, it is so important during installation to take into account the recommendations of SNiP according to the type of device and the manufacturer’s instructions. Often inexperienced craftsmen make the following mistakes:
- If you install the device too high from the bathtub, then when water is drawn into the washing container, a loud noise is created, which can be very annoying for household members. This effect is especially pronounced if the bathtub is thin-walled.
- Too large a distance from the bottom of the bowl to the taps leads to the fact that the stream during the fall is divided into streams, forming splashes. Because of this, the finishing of the walls in the bathroom and the surface of the furniture often suffer, and humidity increases.
- Due to the too small distance between the edge of the bowl and the tap, it may be difficult to wash large items.
- Due to the installation at a high height, the mixer may be inconvenient to use. Often, people reach for a faucet and slip on a wet, smooth surface, which leads to serious household injuries.
Tips and tricks
If your pipeline is made using plastic pipes, then the material of the eccentric in most cases will not matter. But in the case of using metal pipes, it is important to ensure that the fitting is made of exactly the same metal, otherwise, due to different values of the coefficient of thermal expansion, the reliability of the connection will decrease over time, which can lead to leakage.
When installing chrome-plated eccentrics, it is worth wrapping them in several layers of fabric while tightening them to prevent damage to the chrome layer, because even a small crack in the protective layer can lead to rapid corrosion of the metal underneath and the need to replace the product.
It is best to purchase a product made of cast brass - this allows you to simultaneously maintain the high strength and elasticity of the material, which reduces the chances of it being damaged during installation.
How to correctly calculate the installation height
Practical experience does not contradict the standards and instructions for assembling faucets - the mechanism is installed at a distance of 20 cm from the tank. But the practice is not strict regarding the location of the tap - you can install it at a suitable point, at a convenient distance from the bath or shower, you just need to follow the main points when installing:
- before installing the device, measure it according to its elevation and evaluate the convenience of the position of the tap;
- if we are talking about a shower, then the device is installed at a height of 120 cm from the shower. The presented figure must be measured from the bottom of the container;
- A frequent mistake in calculating at what distance the device should be installed above the container from the floor appears because the height of the bowl is taken as the reference point even before installation. This is wrong - because sometimes you need to provide a bathtub with great durability by installing special stands. It may turn out that the calculated installation height of the structure above the bathtub of 20 cm at the end of the work will turn out to be 10 cm, the faucet will hang above the capacity, and will not only look ugly, but will be very inconvenient to use. Moreover, not all types of cranes can be placed at such a small distance;
- installing the structure from the end of the container is a parameter that must be measured and calculated first. This is especially necessary when the tap is supposed to be turned from the bathroom to the sink and vice versa. Remember about the size of the sink - it is usually more than 850 cm. And to this parameter you need to add the size of the mechanism itself, as well as the distance between the gander and the sink - here it is better to make an error on the positive side than on the negative side;
- The installation indications are also influenced by additional parts that are often supplied with current faucets - for example, water softeners, as well as the desires of those who will use the bathroom, many who want the faucet to be installed above the container at a high elevation - so they can wash their hair, without the need to take a shower or draw large amounts of water;
When installing the mechanism on the wall, you must try to avoid attaching the structure to the tile, to its edges - a rigid application of material will not allow the faucet reflectors to be firmly fixed. Therefore, the height of the installation of the crane can be firmly connected with the height of the curb (it is usually laid at a height of a meter from the floor).
Non-specialized concepts
This part has a round shape, in which the geometric axis and the axis of rotation coincide.
Application of eccentrics other than plumbing:
- for fastening furniture structures,
- in astronomical studies.
The device allows you to adjust the distance between two bushings. In some cases, it is not possible to complete the process without a device.
How can he help?
During the independent installation of the mixer, you may encounter a problem such as misalignment between the tap pipes and the pipeline. As a result, it is impossible to directly connect one to the other.
Often such devices are included in the kit together with the mixer. It is enough just to study in detail the instructions offered by the manufacturer and carry out the installation normally. If there was no eccentric in the kit, the part of the required diameter can be purchased separately, its price is completely affordable.
Tip: if the device in the kit is not the right length, you have the opportunity to buy an additional adapter that will allow you to adjust its dimensions.
How to install an eccentric
Installation of the faucet fixture is divided into two operations, performed sequentially:
- structure fastening,
- tap connection.
Advice: before starting installation work in an apartment building, make sure that you have shut off the water riser.
We recommend that you first assemble the entire structure without seals and make sure that all mounted connections are not distorted among themselves. For example, if you have too small eccentrics in your kit, you can replace them with suitable ones before starting the main work.
The device consists of two parts – narrow and wide. If you were able to carefully remove the old eccentric from the mixer during installation, replace the seal on its thread. Use hemp or fum tape, making sure that they do not roll around the base during the connection.
Tip: for hemp, use a special paste designed for threaded connections or silicone pipe sealant. As a last resort, use oil paint.
- Screw the long eccentrics to the liner, making sure that they correspond correctly with the thread. Tighten them well using an adjustable wrench or wrench. Make sure that the threaded seal does not turn around, otherwise it will impair the functionality of the structure.
- The instructions recommend installing the eccentrics so that the nuts of the mixer body can be comfortably and easily screwed to them. Make sure that the installation occurs smoothly, without distortions.
- At the last stage, attach decorative screens that will hide the connection point.
Tip: if the kit contains or you decide to install sealing gaskets, you have the option of not using the thread seal.
Material
There are different types of eccentrics for the mixer, but the main thing along with this is what they are made of:
What they are made of and the disadvantages of inexpensive models
Products can be made of bronze or chrome-plated metal. In most cases, inexpensive options from China and Turkey are chrome plated. We recommend not using metal products from the set, but replacing them with brass ones. Despite the fact that they look beautiful, they often “stick” to the threads with rust. Another disadvantage of inexpensive eccentrics is that when they are unscrewed from the water supply after some time, the head has a pipe thread
After this, getting it out of the pipe will be quite difficult and associated with unforeseen costs.
Please note: Choose only solid brass eccentrics. On sale now you can also find yellow products, but made from pressed brass powder. Their price is significantly lower than cast ones, but we do not recommend buying them due to their fragility
There is a high probability that at the moment of tightening the product. Do not forget that when installing an eccentric made of pressed bronze, there is always a danger that if there is accidental pressure on the faucet during operation, it may fall off the wall together with the mixer. The right choice This expert advice is suitable for selecting both an eccentric and a crane. “Weigh” the product in your hands – one of the most basic indicators of quality. Know that brass is a fairly heavy metal. Based on this, take the expensive option in one hand, and the one you want to buy in the other. You should not take the seller’s words on faith at a time when doubts have crept into your mind. The yellow color of the surface may turn out to be a simple coating, under which sintered aluminum chips or cast iron can hide.
How to calculate the installation height of a bathroom faucet
When calculating at what height to install the faucet above the bathtub, a distance of 200 mm is taken as the standard, but practical experience shows that the installed faucet can be located at any distance convenient for the consumer. However, during the installation calculation process, several basic rules should be followed:
1. Before installing the faucet in the chosen location, place it against the wall, try it on in height, see if the spout will interfere, and evaluate the convenience of this arrangement of the device.
2. Remember that if you want to install a shower stand with a mixer, then the distance from the bottom of the bowl in this case must be at least 1200 mm.
3. Many people, when calculating the final height of the faucet above the bathtub, make a serious mistake, taking the height of the bowl itself before its installation as a starting point. This is wrong, because in order to ensure greater stability of the bathroom, sometimes you have to resort to placing special supports. As a result, it may turn out that the mixer height of 20 cm, verified by previous calculations, will “fall” to 10 cm, as a result the faucet will hang over the bowl, which will not only spoil the appearance, but will also create some inconvenience during use. In addition, not all models of plumbing faucets can be installed at such a short distance.
4. It would also be a good idea to take measurements and calculate the distance of the mixer from the edge of the bathtub in advance. This will be useful for those who in the future plan to turn the faucet from the sink to the bathtub and back. Consider the height of the sink itself; models with a height of less than 850mm are extremely rare. To these parameters you need to add the dimensions of the mixing mechanism and the centimeters between the sink and the spout - here it would be better to make a plus error than a minus one.
5. The volume of installation is also influenced by additional accessories that are often included with modern faucets - for example, water softeners, as well as the wishes of those who will use the bathtub; some prefer that the faucet above the bathtub be located a little higher - this allows you to wash your hair without filling bath with water or take a shower.
6. When installing the faucet on the surface of the bathroom wall, you must avoid attaching the structure to the tiles, namely to its borders - in this case, the rough texture of the material coating will not allow the faucet reflectors to be tightly fixed. Because of this, the installation height of the crane is often related to the height of the curb (most often this is 1 meter from the floor level).
Follow these simple rules, and your mixing device will serve you for a long time.
Fitting
To assess the general situation, you must first try it on. Eccentrics are screwed into water sockets, reflectors are screwed onto eccentrics, and a faucet without gaskets is screwed onto eccentrics.
What are we assessing? The first point is the alignment of the water sockets, or in other words, the screwed-in eccentrics should not stick out in different directions, their ends should be in the same plane. If the deviation is too large, the union nuts of the mixer will be screwed on with force - this is bad!
There are two ways to solve the problem of poor alignment of water sockets: correct the position of the water sockets themselves (which is very problematic when the tiles are in place) or tricky by “sawing” one eccentric to another (more on this below).
However, unevenly aligned water sockets are a rare occurrence, considering that the deviation can be leveled out with a threaded connection and gasket. The problem will be obvious only if the eyeliner is installed very carelessly.
During fitting, you should pay more attention to the position of the reflectors. If the water sockets are flush with the wall or stick out, the reflectors may not press tightly against the wall. The size of the eccentrics and the depth of the reflectors greatly influence here. If the reflectors are not adjacent to the wall, there are two ways - shorten the eccentrics or look for deeper reflectors in stores. If there are leads sticking out of the wall, you will have to do both.
Digressing a little on the topic of installing water sockets, I’ll note: the optimal position is when the internal thread of the outlet is slightly recessed into the wall (into the tile), about 5-7 mm. There is no answer with exact dimensions; different faucets have different sizes.
The ideal position would be when, during fitting, the reflectors are pressed tightly against the wall, and the mixer union nuts (without spacers) are screwed to the base of the reflectors with virtually no gaps. Keep in mind that when sealing the threaded connections, the eccentrics will screw in a little less, and the rubber gaskets will fit into the mixer.
How to Actually Calculate Faucet Installation Height
The height of installation of the mixer in the bathroom used in practice corresponds to the recommended standards for the placement of water fittings in a given room. Typically, the distance to the location where the faucet is attached is determined based on the standard 20 cm. However, strict adherence to the rules in the location of these devices is not practiced in practice. You can install the faucet in the place where you like, but before you finally fix it, you should definitely try it on in height and evaluate how convenient it will be to use.
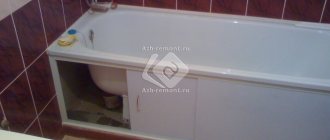
Installing a floor-standing faucet in the bathroom
If we are talking about a mixer for a bathtub with a shower, then the height of its installation should be determined from 120 cm, and the measurement should be taken from the bottom of the container. Some home craftsmen, when calculating what the final installation height of the faucet above the bathtub should be, often make mistakes because they take into account the height of the bowl that has not yet been installed. This is incorrect, because during the installation process it is often necessary to place stands under it (their thickness can be 8-10 cm). After all, if you do not provide a slope, then draining the water will be difficult. And it may happen that the value you calculated, equal to 20 cm, upon completion of all work will decrease to 10 cm. Such an “overhang” of the faucet over the bowl will not look aesthetically pleasing, and it will be inconvenient to use. In addition, some of the models simply cannot be secured so low.
You also need to measure and calculate in advance the value of such an indicator as the distance from the corner of the bowl to the place where the water socket is attached. This must be done if you plan to supply water to both sanitary containers, turning the spout in the desired direction. And keep in mind that the sink is always located higher, at a distance of 85 cm from the floor. To the value of this indicator we must add the size of the device itself and a few centimeters for the free passage of the gander over the sink. Agree, a “plus” error will not be as dramatic as a “minus” one.
Floor standing bathtub mixer
The location of the water collection point will also depend on the availability of additional accessories, which are often equipped with modern plumbing fixtures, for example, a water softener. In addition, when thinking about how to install a faucet in the bathroom, you need to take into account all the preferences of future users. Some people want the faucet to be located higher, then it will be possible to wash their hair without getting into the shower and without filling the bathtub. Others, on the contrary, like it when the water outlet is located as low as possible, because the longer the path of falling water, the more noise and splashes it makes. And this, of course, makes them uncomfortable. And it will not complicate taking a shower, because the length of its hose is enough for the tallest person.
When installing the device on a tiled bathroom wall, try not to attach it to tiles, much less to curbs. It is very difficult to achieve a tight fit of the faucet reflectors to the rough coating of the cladding. Therefore, you should choose the location of the plumbing fixtures taking into account the curb laid on the wall (usually it is laid a meter from the floor). In order for the decorative cup to completely cover the connection point, the inlet fittings must be recessed into the wall, and their ends must be flush with the front surface of the tile.
https://youtube.com/watch?v=-wfy1e6wm0A
Materials
Plastic
Plastic products are lightweight, easy to install, and come in a variety of colors. They are not afraid of corrosion and fit tightly to the mixer. The most in demand are plastic products that look like metal. However, the coating quickly deteriorates and becomes unsightly. In addition, when exposed to hot temperatures, bowls quickly lose their shape, and the plastic begins to release odors and toxic substances. Consequently, plastic reflectors cannot be called practical and reliable.
Chrome or nickel plated steel
With proper care, such products do not lose their appearance and do not peel off. Their weak point is their low resistance to corrosion and after some time the product will begin to become covered with brown spots of rust. Conscientious manufacturers apply thick layers of topcoat to protect products from the harmful effects of moisture. However, such bowls will cost an order of magnitude more.
Stainless steel
Durable and practical products with an optimal price-quality ratio. They can last for many years without deformation or rust. They tolerate high humidity well and do not lose their shine.
Alloys of bronze, brass and copper
Non-ferrous metals are rarely used for the production of reflectors and, as a rule, such products are more often found among limited editions of famous brands.
How to choose the right bath faucet
You need to choose faucets from models of popular manufacturers and, if possible, do not skimp on them. The more expensive the water intake fittings are, the longer they will last. Due to poor quality, the device quickly becomes unusable, and the most common problem with cheap faucets is corrosion. You need to select it according to the following criteria:
- Weight. A high-quality mixer has dense walls. It shouldn't be easy.
- Material. Reliable devices are made of brass, cheap ones are made of silumin (silicon + aluminum). Brass ones are heavier and bulkier.
- Size and technical characteristics. Selected based on personal preferences and the location in which the model will be installed. When choosing, the fixation to the side of the bathtub or wall, the length of the hose and faucet spout, and additional fasteners in the kit are of great importance.
Advantages of Wall Mounted Basin Faucet
The extra work associated with installation that would normally need to be done by a plumber is a disadvantage of these models. But wall-mounted taps have many advantages:
- Space saving. This model moves the sink significantly back towards the wall. This may seem like a small advantage, but it is the best choice for a small bathroom. In the kitchen, being able to move the sink away frees up cooking space at the front of the countertop.
- Design feature. Wall-mounted models can be just as stylish as sink-mounted ones. Available in materials such as solid brass or stainless steel, with a polished or matte black finish and a rectangular or shaped spout. You can install a faucet with handles that connect to the spout behind the wall so that they appear disconnected. Or choose a baroque style washbasin to complement the antique design of the room.
- Utility. The larger spout radius allows the faucet to be wall-mounted in busy home kitchens. Because it can be placed high above the sink, you'll have extra space to stack dishes and wash large pots.
Useful tips for the correct placement of taps in the bathroom
Recommendations for the location of faucets in the bathroom
If you plan to install a tap on the side of the water tank, do not try to position it clearly in the center. It is better to move the structure closer to your feet - in this case, it will be more convenient for you to use the mixing device when taking a bath.
The distance between the hot and cold water outlets must be at least 150 mm in the axial directions, and the installation depth of the fittings is best determined after a complete trial assembly of the structure.
The easiest way is to correctly install a mortise mixing device - the modern design of bathroom bowls provides special technological holes for installation. If the holes were cut out on the container yourself, then the process still remains quite simple - the mixer is connected to the water pipes by connecting flexible water supply pipes to it. The tap itself is secured in the hole with a fastening nut, sealed with washers and special gasket material. The water supply tubes are secured in a similar way. If their size is a little longer than necessary, simply cut off the excess and sand the cut areas.
Installing a faucet on a stand or podium without professional help will be quite difficult - you will need a specialist not only in plumbing, but also in construction work, since when installing such a structure, you need to connect water pipes directly to the stand.
Subtleties of choosing plumbing fixtures for a non-standard location
Criteria for selecting a faucet for on-board installation:
- Material. Brass and bronze products are considered more reliable. There are stainless steel models available at a lower price. Plumbing fixtures can be coated with an alloy of chromium and nickel to facilitate cleaning of plaque and deposits. There are original modifications, stylized as antique. They are made of polished brass or bronze and decorated with patterns. They can fade over time, adding extra sophistication. The cascade spout is also made of ceramic or glass.
- Control method. You can turn the water on and off using lever or valve taps. The latter are reversible or semi-reversible. If you choose the lever method, there will be fewer insets on the side (no axle boxes required). Models with touch controls look stylish and neat, but are more expensive and difficult to repair.
- Spout shape. For on-board installation, a monolithic structure without rotating elements is made. They are more reliable. Spouts can be tubular, rectangular, cascading. The latter look like a wide plate with a thin slit along its entire length. May have backlighting. When choosing a shape, you need to focus not only on beauty, but also on the characteristics on which the pressure depends: diameter, hole capacity.
- Shower switch type. To redirect water into the watering can, a push-button, pull-out, or rotary (cartridge) switch can be used. The lever or button for the first 2 types is located on the spout. They switch in a standard or automatic way. The second, after closing the tap, returns the button to its original position. That is, when you turn the valve, the water is always directed into the spout, and not into the watering can. The cartridge module looks like a faucet with a half-turn handle. It must be mounted separately on the side.
- Number of mounting holes. For a mortise module, 1-2 is sufficient, taking into account its shape and design. For a cascade one, you will need as many slots as the number of elements included in the kit. The dimensions of the modules must correspond to the width of the side.
You can install the plumbing yourself. If you lack the skills and tools, you should call a specialist. To connect to water supply pipes, you need to buy reliable hoses. Corrugated stainless steel tubes will last longer. It is necessary to provide the possibility of access to hidden components for maintenance and repair. For example, make an openable screen.
Advantages and disadvantages
In addition to the stylish appearance, suitable for any interior and compact size, the advantages of installing built-in faucets include the following:
- Ease of use: you don’t need to get up to add hot water - just stretch out your arm.
- When filling the bathtub, water splashes less, which is achieved due to the lower location of the spout.
- Long service life, which is achieved through the use of high-quality materials for production, the static position of the crane and the absence of additional connecting units.
Judging by user reviews, the disadvantages of this type of faucet are the following factors:
- Higher cost compared to wall-mounted models.
- If the mixer fails or for other reasons, it can only be replaced with exactly the same or very similar one, since the diameter and number of holes required for mounting on-board taps differs for each model.
- Rapid wear and failure of the flexible shower hose, which is mounted in a hidden way.
Note! The ability to hide underwater hoses behind the bath body is considered both an advantage and a disadvantage. The advantage of a hidden eyeliner is a more neat appearance of communications, and the disadvantage is that if it is necessary to revise the eyeliner or replace it, this is difficult to do, and in some cases it will be necessary to move the bathtub.