An unpleasant surprise for homeowners is the appearance of unpleasant odors in the kitchen, bathroom, toilet, and then throughout the apartment. Almost immediately, cause-and-effect relationships are established: due to the occurrence of reverse draft, air flows from the ventilation vent connected to the ventilation duct - an element of natural ventilation of the apartment or house.
Many residents solve the problem simply: they seal the ventilation windows or install mechanical plugs that open as needed: cooking starts in the kitchen - the device opens, ends - it closes. The method works by removing emerging odors. But in this case, apartment dwellers are in for an even bigger surprise: stale, waterlogged air appears in all rooms. As a result, family members develop problems with the respiratory system, and mold and mildew begin to grow rapidly on the walls in different places.
The solution to the problem is completely different: you need to block the path of air flow from the hood, maintaining a free exit of air from all rooms of the living space. The problem is solved by installing a check valve for ventilation. The method does not require changes to the existing air exchange scheme or significant financial expenditure.
To get a positive result, you need to know how a ventilation check valve works, its design features, pros and cons, and installation features.
The editors of the StroyGuru portal have prepared material with photos and videos explaining the principles of operation of the back draft valve for ventilation and how to install it with step-by-step instructions. In addition, it is discussed in detail how to make a check valve for ventilation yourself.
Before we take a closer look at the simple device, let’s find out the principle of organizing air exchange in apartments, which will allow us to understand the reasons for the occurrence of reverse draft and ways to combat it.
Efficient detail
To avoid a situation where unpleasant odors suddenly return to the kitchen, a simple device will help - a check valve in the ventilation system.
It is necessary to understand the possible causes of this phenomenon in order to effectively prevent such a fact.
Advice from the experts
Wall-mounted models are recommended for installation during the construction of walls, but they can also be installed in finished premises. It is not recommended to install window valves yourself - it is easy to break the tightness of the window frames and lose the manufacturer's warranty service. However, the most important thing is to choose the right type of additional ventilation you need. Poorly selected models can clog the natural ventilation system of rooms, overturn it, or create uncomfortable conditions due to the additional noise of the operating fan.
Ventilation device
The appearance of reverse draft largely depends on what type of hoods are installed in high-rise buildings. Builders use the following schemes for organizing the purification of premises from exhaust air:
- each vent has its own channel leading onto the roof of the building;
- the vent removes polluted air into the attic, and only then, through a common pipe into the environment;
- the so-called “herringbone”, i.e. flows from the lower floor go to the upper and so on until the very end;
- using a system for connecting several channels to a horizontal collector with subsequent air exhaust through the roof of the building.
Causes
Experts name several factors that cause backdraft:
- the temperature difference that exists at the point of air intake and at the point where the waste material exits into the atmosphere;
- contamination of ventilation ducts;
- windy weather;
- a sharp drop in temperature that can lead to the formation of an “air lock”.
An old house was designed only for natural ventilation conditions, and the connection of additional devices (kitchen hoods) causes reverse draft, and the exhaust air flows through the vents to the neighbors.
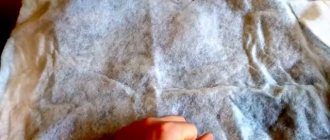
Flexible membrane
Such an element works in accordance with the principle of changing the position of the plate under the influence of air currents. Once the membrane is installed, the vent opening opens when air flows in one direction.
In the opposite direction it closes. The element lies close to the surface. A notable feature is that it does not require much air force to open or close. It turns out that this is a good solution for natural ventilation.
We recommend that you read: Adsorption air dehumidifier
If there is a possibility that the membrane is significantly deformed under the influence of reverse thrust, additional stiffeners are required. She can rely on them when closing the ventilation holes. This feature should be taken into account when purchasing membrane models, otherwise the damper will be bent or will not fit tightly. The result will be the passage of reverse air flow in certain quantities.
Golden Rule
When installing a ventilation system in dachas, the main point should be taken into account - the influx of fresh air must correspond to the volume of waste material removed.
The craze for sealed metal-plastic structures practically eliminates the penetration of air into the apartment. The problem can only be solved by installing a reverse ventilation valve in the system for natural ventilation, which will ensure the flow of the required volume of air.
Adjustment and Settings
The process of regulating the parameters of the ventilation system comes down to ensuring the level of air inflow and outflow specified in the project in all sections of the network. This is quite difficult to accomplish without specialized equipment and experience.
However, you can try to make adjustments based on the following guidelines:
- It makes sense to remove excess air to sections of the network with a capacity below the design values.
- The permissible tolerance for air flow in supply and exhaust units is 10%.
- The dampers located closest to the fan are adjusted first. The required level of air flow resistance is set by smoothly turning the damper.
- The fan power is adjusted by changing the rotation speed of the blades.
Note! If it is not possible to adjust the valves in any part of the ventilation system, a steel membrane can be installed, which creates a constant resistance to the flow in the duct.
Dampers and ventilation valves allow you to quickly and effectively regulate the parameters of the ventilation system. Control can be carried out manually or automatically, which allows you to build a climate system of any complexity: from the simplest solutions for private houses and apartments to complex and extensive ventilation networks of large buildings or industrial facilities.
In-house produced muffler:
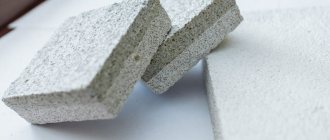
Material
Valves are made of metal, plastic, or a combination of these materials. The metal used is stainless steel (very rarely); it is mainly galvanized material.
A number of manufacturers make the valve body from plastic and the dampers from metal.
How to make the right choice from these three types? It’s very simple - you should purchase sediment from the same material from which the ventilation system is made.
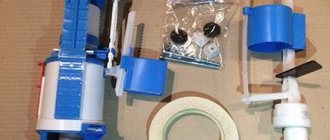
How to do it yourself?
The modern market for exhaust and ventilation equipment offers a huge selection of inexpensive valves, so making the device yourself is justified only if the ventilation grille or duct duct has a non-standard shape and size. In such cases, it is faster and more economical to make the device yourself than to spend time and money creating adapters. The simplest DIY device is a single-blade paddle valve, which uses a plate of hard plastic or thin metal, a sheet of thick cardboard, or a Mylar membrane as the flapper.
- Next, from the center of the upper side of the drawn figure, draw a perpendicular to its lower side, step back from it in both directions by 7 mm and through these points draw two more lines parallel to the first. As a result, the rectangle will be divided into two halves by a vertical bridge, on which the free sides of both flaps will subsequently rest.
- So, in order to make a channel check valve with natural draft, you need to take a ventilation grille, attach it to thick cardboard, trace it with a pencil and cut it out. Then you need to measure the height and width of the ventilation hole and draw the resulting rectangle in the center of the cardboard blank.
- Then two rectangular pieces are cut out of the Mylar film, each of which is half the size of a large piece of cardboard. They are then glued to the outer sides of the frame so that when closed they rest on the central crossbar. The design resembles a window with two wings, where the cardboard element acts as a frame and two rectangular films act as wings. The wings can be attached to the frame using tape or a stapler.
- Then cut out both parts of the rectangle without touching the jumper. You should end up with a shape that resembles the frame of a plastic window.
- Then open the window sash and check the operation of the valve. If everything is done correctly, the air flow will open both doors of the “cardboard window” and freely exit into the ventilation duct. After checking, the plastic grille is screwed with self-tapping screws to the cardboard damper.
- When the structure is ready, it should be attached to the wall with self-tapping screws at the end of the ventilation duct. The valve must be positioned in such a way that the glued valves can open towards the ventilation duct.
There is also a simpler method. To do this, foil flaps are glued directly to the back of the ventilation grille. However, in this version, the film is attached to the sides of the plastic grill using adhesive tape, which over time can lose its properties and come off. Therefore, the preferred solution is to stick the film onto the surface of the cardboard.
Installation Rules
The most important thing is to place the exhaust ventilation, equipped with a check valve, in an easily accessible place. A free approach to the device is necessary to periodically clean it of dirt.
Installation of the installation near the entrance to the shaft of apartment buildings requires special attention. This is a possible habitat for rodent pests, a breeding ground for harmful microorganisms.
Types
When looking at a photograph of check valves for ventilation, it is clear that there are several ways to bring them into working condition:
- manually and mechanically;
- using an electric drive.
When operated manually, using a special lever, the pump valves open and close. This type is not reliable, which means it does not block all unwanted odors.
The mechanical type is the most common. The dampers are brought into operation by air movement.
The valves, which open electrically, simultaneously turn on the fan or hood. Such devices are installed in rooms where there is no natural ventilation.
Choosing a fan for your home
Exhaust fans for bathrooms and toilets, kitchens and cellars are sold in different sizes and modifications, with blades of different shapes. Some have an inertial grille that, like a blind, closes as soon as the motor finishes running. Economical models with a built-in timer are also sold. It allows you to set the operating time of the device.
When choosing, it is recommended to pay attention to the ability to regulate the hood power and manually turn off the power. Steam room, small shower room, bathroom with jacuzzi - for such rooms, experts advise choosing models with a humidity controller. The fan turns on automatically if the steam level in the room reaches the level set in the device.
If you have decided on the ventilation configuration, it is important to consider three factors directly when purchasing:
- area of the ventilated room;
- type of room (performance depends on this);
- number of people living in the house.
The device must have sufficient power to meet all the requirements of the ventilated room.
Progress
The easiest mechanism to manufacture is a membrane (petal) valve. The manufacturing sequence is as follows:
- A metal plate or piece of plastic is suitable for decorating a curtain.
- Thick paper is used instead of a membrane. The main thing is that it should be larger in size than the ventilation hole.
- The curtain is attached as tightly as possible to the edges of the body.
- A grill is installed on the device. This is necessary to prevent membrane deformation.
A self-made part can be used for its intended purpose.
Lattices
A grille with a check valve for ventilation plays a significant role in the process of removing unwanted odors from the room.
They are round or square in shape, but are manufactured with standardized dimensions suitable for joining with the air duct.
Installation can be carried out both from the facade of the building and inside the living space.
Service details
To equip finished ventilation, air ducts with standard rectangular or round dimensions are used. For them, ready-made models are provided, which have a check valve. You can fix it on any area. Installation in this case will be similar to the installation process of any other component of the ventilation system. In this case, the valve is placed in a shaped element, the role of which is played by a straight channel connector.
If natural and forced ventilation operate alternately, you can install a check valve in accordance with two standard solutions. Options that make this possible :
- The tee is installed near the ventilation grille, while the valve is fixed to the outlet for natural ventilation.
- You buy a grille with a special design containing two holes at once. They are suitable for any ventilation options.
- To mount such a grille, liquid nails or ordinary self-tapping screws are used. The second option is better because it will make it easier to repair, clean up, and change the configuration if necessary. To do this, it will be enough to remove the grille. If this element is installed indoors, a thorough sealing of the areas between the walls and the grille is required.
Potential problems associated with outdoor-mounted louvers include pooling. This is facilitated by the moisture contained in the air coming out of the bathroom or kitchen. At subzero temperatures it freezes and immediately turns into ice. What problems does this create :
- The flaps do not fit tightly enough to the ventilation holes. As a result, less air flows back into the room, even when compared with the absolute absence of any protection.
- The hole diameter is reduced to a large extent. Accordingly, the throughput of the structure also suffers. Air exchange decreases. Kitchen hoods and fans experience increased loads.
To avoid this situation, you should periodically check the condition of the grille outside during the cold season. If ice is found, it should be removed.
The mechanical method is best for this, but there is a risk of damaging the side of the case, especially if they are made of fragile plastic. It is better if the specified element is rigid. Metal elements will cope well with this requirement.
Difference from conventional products
Traditional grilles allow air to flow in both directions, but with a check valve, air flows only in one direction. In addition, they have the following advantages:
- are reliable protection of the hood from dust, small debris and small insects;
- block the penetration of unpleasant odors;
- do not allow condensation to occur, because do not let in either too warm or too cold air;
- installation does not cause any difficulties;
- Available in a wide variety of designs;
- reliable in operation;
- refer to budget product options.
All of the above allows us to conclude that you can choose the necessary grille for any interior.
Disadvantages include the need for periodic cleaning of accumulated dirt and a slight decrease in hood power.