Home/Interior/
March 22, 2020
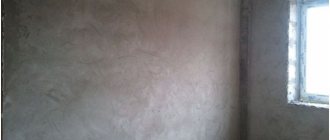
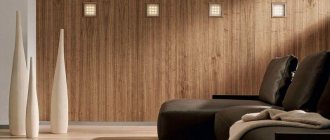
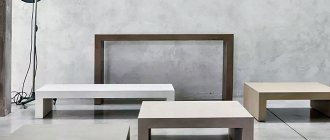
Everyone knows that plastering and finishing walls is very expensive. Many simply do not have the means to tidy up the walls of their apartment. One designer stated that there is no need to hide the concrete under the final finish. You can completely do without it. There is absolutely no need to spend money on plaster and then on wallpaper or tiles. See what the walls look like without any decoration.
Properties of plaster
First, let's figure it out: what properties should plaster have?
- The solution can remain in a liquid (working) state for two hours.
- The quality is checked by a two-meter rule, which is applied in all directions to mark unevenness. With average quality, up to five recesses are allowed, up to 3-5 mm deep. The higher the quality, the fewer errors there are.
- The strength after 28 days should be above 20 MPa.
- High adhesion.
- High moisture resistance.
Beacons for plaster
What is a lighthouse? As you know, a lighthouse is a landmark for something. Such guidelines during plastering of the wall can be any hard marks that are set according to the level.
The beacons can be based on boards, nails, or dried mortar tubercles applied to the wall. But the best are perforated metal profiles, which in construction stores are called beacons. They can have different thicknesses. It all depends on what layer needs to be plastered. In addition, it should be taken into account that the thicker the beacon, the tougher it is.
Installation methods
First way. Dots are applied to the surface of the wall using a mortar of cement, tile adhesive or putty. A perforated metal beacon is glued to each point and then leveled using a building level. It should be noted that a short level is inconvenient for proper plastering (deflections occur in places of pressure). But don’t despair if you only have a short level available. First, a rule is applied to the beacons (without it it is impossible to plaster, so it must be at hand). Then the building level is applied to the rule.
Second way. Using a hammer drill, holes with a diameter of 10 mm or more are drilled strictly along a vertical line. The holes are filled with wooden choppers; it is better to make them cone-shaped so that the lighthouse profile can be attached to them more easily. Using a cord or fishing line, each row of choppers is leveled. You can trim the row along the marking thread using a hammer or a hacksaw. The beacons are attached to the already leveled chopiks using screws 2.5 cm long. The gaps between the chopiks are filled with a solution based on cement and sand. This is done to ensure that the rule does not bend under pressure. This method of placing beacons is used for very uneven walls with large differences. The first method is not suitable, since the layer of plaster will not stick.
The length of the rule used for work must be at least 10 cm greater than the distance between the beacon profiles.
When choosing the first method of installing beacons, you must first let them dry and only then start plastering.
Using primer
Some self-taught craftsmen believe that priming is completely optional. Or they simply don’t know about its existence.
As a result, a new layer of plaster is placed on the surface that has not been treated with a primer. Particles of old material, dust, paint, sand, dirt remain free underneath, reducing adhesion.
At the slightest load, say, a blow from the front door or children running around the apartment, the absence of a binding layer makes itself felt and the plaster begins to crumble and crack. That is why it is better to use a primer.
Proportions for plastering walls: binder
Today you can see many different options for plaster mortar on the market. To choose the optimal composition, you need to know everything about the types of plaster mixtures.
All builders who try to keep up with the times, develop and improve the level of their work know that the mixture must consist of an aggregate and a binder component. When it comes to plastering, the classic filler in the proportion of cement for plastering walls is sand. This is an essential component that prevents cracks from occurring and makes the material durable.
Clay, lime, cement or gypsum powder is mixed into the composition as a binding component of the plaster solution.
Cement mixtures are most often used for external finishing work, since the external part is exposed to atmospheric influences and various weather phenomena. Indoors, cement is used to plaster the bathroom or kitchen - places with high humidity levels.
Lime mixtures are designed for rooms with the most stable humidity. This is a universal tool that can cope with many tasks.
Clay mixtures can be used exclusively in dry climates and for finishing walls inside a building. The main thing is maintaining the optimal humidity level.
Gypsum material is used when plastering surfaces in those rooms where a stable microclimate is maintained 365 days a year.
You can order from us:
The purposes of using any plaster mixture are to level the surface, seal seams and cracks, improve the heat and sound insulation characteristics of walls and ceilings. In modern construction, the most popular are cement-sand, cement-lime and gypsum compositions. Each of these plastering materials has advantages and disadvantages and specific applications.
Alabaster compositions are usually used for interior work in rooms with moderate and low humidity. They are suitable for almost all types of surfaces, including ceramic, wood and polymer, on which cement plaster does not adhere.
Cement-sand compositions are able to maintain performance characteristics under high mechanical loads and in wet conditions. They are used for finishing facades, basements and basements, and rooms with high humidity. They are also suitable for dry rooms.
Adding lime to plaster compositions increases their plasticity and ease of use, and gives the coating bactericidal properties. The plaster layer, which contains lime, is not attacked by fungus and mold.
How to prepare plaster mortar
Plaster solutions are divided into:
- simple (lime, cement, clay);
- complex (lime-gypsum, cement-lime, lime-clay, etc.).
In order for the solution to be optimal for work, the proportions of fillers and binders must be observed when preparing it. In this case, a normal solution will be obtained.
If there is an excess of binder material, the plaster mortar will become greasy. This type of plaster will crack and shrink as it dries and hardens. If there is an excess of fillers, the solution will become thin, that is, not strong enough. The fat content of the solution is determined by stirring it.
If the mixture does not stick to the shovel, then such a solution is considered lean. A normal solution sticks slightly, but a greasy solution sticks a lot.
To prepare the lime mixture, add some quartz sand and water to the dough, then mix the dough thoroughly. Sand is added in portions until the mixture reaches normal fat content.
Lime is not only a binding material, but also a plasticizer. This property helps it quickly and reliably grip both stone or brick surfaces and wood. However, such a solution hardens for quite a long time.
Due to its poor moisture resistance, lime is extremely rarely used for plastering external walls. In addition, such plaster is fragile and is easily destroyed by mechanical stress. But thanks to these properties, lime plaster can be easily and quickly removed by hand if repairs are necessary.
Gypsum is added to lime mortar to speed up hardening. For this purpose, gypsum is poured into a container with water and mixed thoroughly. Add the dough to the resulting solution and mix again until smooth.
Plastering other surfaces
When plastering wooden surfaces, the walls are first covered with shingles, which increases the adhesion of the materials.
Often the mixture is made “skinny”, which leads to the fact that the paint or wallpaper does not adhere well to it. The reason is a lack of the binding ingredient lime. However, if the composition is too “greasy”, it subsequently begins to crack. Moisture gets into the cracks and destroys the layer.
Concrete surfaces cannot be treated with gypsum solutions, as they react and the surface begins to swell and collapse.
Lime mixtures should not be applied to gypsum, since during adhesion these compounds peel off from each other, which leads to destruction.
The applied plaster hardens within 28 days, sometimes you want to speed up the process. However, this can lead to its destruction, as cracks form. High and low temperatures have a bad effect on surface quality.
These are the most common problems with plaster not sticking to the wall. It is important to always follow the instructions for use of various compositions and application technology.
How was your renovation? Have similar situations arisen, and what solution did you find?
How much will it cost to use a pneumatic bucket?
A pneumatic bucket made independently allows you to save money: the costs will only be on components and materials. The purchased tool costs differently, depending on the manufacturer:
- “Plaster’s Dream 1” : the cost of a ladle is from 6,000 rubles, the price of a compressor with a receiver is from 5,000 rubles.
- “Plaster’s Dream 2” : a pneumatic bucket costs from 11,000 rubles, a compressor of the required performance – from 15,000.
- “PK-1.1” : the price of the bucket is from 5,000 rubles, the cost of the compressor is similar to the previous point.
- Pistols Matrix, WESTER KP-10, “Hopper” RK-1 : can be purchased from 2000 rubles.
The consumption of plaster depends on its type. To order the required quantity, be guided by the norms:
- gypsum mixture applied in a layer of 10 mm will disperse in an amount of 9 kg/sq. m;
- cement plaster is heavier, its consumption will be 16-17 kg/m2.
To the estimated costs you need to add the cost of a hired plasterer (if you are not going to do this work yourself). Masters, depending on experience, the market situation in your region and their own “appetites,” charge from 200 to 800 rubles. per square meter. It’s possible to find a plasterer who charges 400-500 per sq. m. m. But if you have at least minimal construction skills, you can handle plastering yourself.
Specifications:
| color | grey |
| Layer thickness allowed when sealing shells and potholes on the surface: up to 60 mm | |
| Recommended layer thickness for walls | 10-30 mm |
| Maximum particle size | 1.25 mm |
| Viability of the finished solution in the container | at least 2 hours |
| Water consumption per 1 kg of dry mixture, approximately | 0.16-0.2 l |
| Consumption of dry mixture for a layer thickness of 10 mm | 16-18 kg/sq.m |
| Compressive Strength | not less than 5.0 MPa |
| Strength of adhesion to the base (concrete) at the age of 28 days | not less than 0.4 MPa |
| Frost resistance | F35 |
| Water absorption when saturated with water for 48 hours and samples are completely immersed in water (for outdoor use): no more than 8% | |
| Vapor permeability resistance coefficient | 0.1-0.15 mg/m h Pa |
| Full cycle time | 8 ocloc'k |
| Operating temperature (for outdoor use) | from -40ºС to +60ºС |
Plastering clay walls with your own hands
Published by: Arthur Kanapatsky 0
You can find clay walls not only in old houses. The desire to become an eco-friendly homeowner has revived the trend of using age-old technologies. The use of new construction techniques makes it possible to build strong and durable buildings with clay walls. Their advantage is keeping them cool in hot weather and retaining heat for a long time at low temperatures. We will study in detail how to qualitatively finish clay surfaces with plaster with our own hands.
Selection and preparation of materials for work
The characteristics of clay walls include not only positive properties; such surfaces have a number of finishing features. When choosing a material for plaster, you should take into account that a composition that is lighter in weight is suitable for a clay surface. Therefore, work on plastering external walls is carried out with solutions containing lime; interior decoration is recommended to be done with a gypsum or clay mixture. It is strictly not recommended to plaster clay surfaces with cement mortar. This will lead to the destruction of the finishing layer due to its severity.
The finishing technology involves applying three layers: rough, finishing and decorative. For the initial stage of plastering walls you will need:
- Clay. According to plasticity parameters, it is divided into light, whose indicators vary between 0.17-0.27, and heavy, for which the plasticity number lies beyond 0.27. Its color also matters. The most common is red, although material in white, grey, yellow and black is found.
Comment! Despite the natural origin of clay, sometimes it contains minerals (quartz, magnetite, etc.) that have an increased level of radioactivity.
- Wood sawdust. For rough plastering of clay walls, only thoroughly dried sawdust is used. It is important to be sure that they do not have fungal diseases. Fresh material cannot be used for finishing clay walls; at least a year must pass from the moment they are received.
- Sand. Material of the middle fraction will help ensure high-quality plastering of walls; it is better to sift out large inclusions.
- You can roll a small ball that does not stick to the skin and crush it on a flat surface. With an ideal ratio of components, cracks should not appear on the sides.
- The second option is to form a flagellum 20 cm long with a diameter of 2 cm, and roll it into a ring. The correct plasticity of the mortar for plastering walls is again determined by the absence of cracks.
To prepare a solution for rough plaster, first sawdust is mixed with sand, then clay and water are gradually added.
For the second layer of plaster you will need cement, clay and sand. Due to the different properties of clay, the optimal proportions for the solution will have to be selected independently, depending on its fat content and plasticity. The approximate ratio of components is 1:1:3. The readiness of plaster for finishing clay walls with your own hands is determined in various ways:
Selecting ready-made formulations
Choosing the type of plaster - gypsum or cement - is just the beginning. Next, you will have to choose the manufacturer and the composition itself - there may be several products with slight differences.
There are many different brands of plaster in construction stores.
Good gypsum plasters
The most popular gypsum plaster is Rotband from Knauf. This is a really high quality product that is easy to use even for beginners. The same company has other products - Goldband and HP Start. They are cheaper, and the quality is quite decent.
The most popular type of plaster is Rotband.
NR Start is a gypsum-lime composition, Goldband is a gypsum composition. The difference between Rotband and Goldyuand is the thickness of the minimum layer. Rotband’s is 5 mm, the second’s is 8 mm. Otherwise, the technical characteristics are very similar - both consumption (8.5 kg/m 3 with a layer thickness of 1 cm), and maximum layer (50 mm), and compressive and bending strength. The density in the hardened state differs slightly:
980 kg/m 3 for Goldband and 950 kg/m 3 for Rotbabd. Scope of application: any residential and non-residential heated premises, including kitchens with bathrooms.
| Name | Purpose | Color | Layer thickness | Binder type |
| Knauf Rotband plaster mixture | For plastering smooth surfaces of walls and ceilings | White gray | 5-50 mm | Gypsum with polymer additives |
| Plaster-Adhesive Mixture Knauf Sevener | For restoration of old plaster surfaces, including facades | Grey | Portland cement with polymer additives and reinforcing fibers | |
| Plaster Bergauf Bau Interier | For plastering in rooms with normal humidity | Grey/White | 5-40 mm | Cement with polymer additives and perlite filler |
| Plaster Volma-Canvas | For indoor spaces with normal humidity | 5-50 mm | Based on gypsum with chemical and mineral additives |
Volma Layer, Osnovit Gipswell, Eunice Teplon, and Prospectors also speak well of gypsum plaster. They cost less, give good results, but it’s still easier to work with Rothband and the “company”. Based on the results of working with these brands, there are both positive and negative reviews, but in general, the quality is not bad.
Ready-made cement plasters
Cement plasters are available for manual and machine application. We will talk about compositions for manual application. For interior work, Forward, Weber Vetonit, Osnovit Startwell, Weber Stuk Cement are good. They fit well on a clean, pre-moistened surface. For better adhesion, it is better to pre-prime the walls and, after drying, begin the plastering process itself.
Cement plaster is also noticeably different
If you choose cement-based plaster for exterior work (including for plastering an open loggia or balcony), you need façade compounds. They differ from ordinary ones in the increased number of freezing/unfreezing cycles. Facade cement plasters - Yunis Silin facade, Osnovit Profi Startwell, Knauf Unterputz, Bergauf Bau Putz Zement. Ceresit CT 24 Light plaster is suitable for both facade and interior work.
Aerated concrete walls require special plaster. It has increased vapor permeability to prevent moisture from being trapped inside the wall. This is Ceresit CT 24, Knauf Grundband (contains the smallest particles of polystyrene foam, which increases its thermal insulation properties and reduces consumption).
Formation of the rough layer
Sawdust provides reliability to the plaster mortar. If they are not available, in order to apply the rough composition to the gypsum surface, you will need to attach a reinforcing nylon mesh. It is better to fix it directly with a solution; when used to secure nails, the integrity of the wall is compromised and the strength deteriorates. It is practical to treat clay walls with plaster with an assistant who will point out places that need improvement. The process includes the following steps:
- To work, you will need a grater board or spatula.
- Two or three mounds of plaster are applied to the working tool.
- The tool with the solution is pressed tightly and distributed over the surface.
- The direction of movement is from bottom to top. You should try to distribute the plaster as evenly as possible.
- The flat surface of the wall is checked using a building level. Identified irregularities are eliminated immediately after detection.
If the wall is relatively flat, a starting layer of 1 cm is sufficient. If there are significant unevenness on the clay surface, the plaster layer can increase to 3-5 cm.
Advice! When processing large areas of clay walls with your own hands, it is much more convenient to apply plaster using beacons. This will speed up the entire work process and increase the quality of the finish.
After applying the rough layer of plaster solution, time is required for it to dry completely. The entire process takes on average 4-6 weeks. The approximate drying period for a 1 cm thick layer at room temperature is 5 days, and it is not recommended to speed up the process using a technical hair dryer or heaters. Therefore, it is better to plan the work for the warm period. It is optimal when the initial finishing begins in late spring - early summer, although it all depends on the region where the house with clay walls is located. Professional steps for applying plaster to walls can be seen in the following video:
Finishing
The final leveling of clay walls occurs at the stage of finishing with plaster. After bringing the surface to a smooth state, you will need to grout. It requires a solution of sand, clay and cement. It is better to avoid sawdust due to its swelling and disruption of the smoothness of the wall. The approximate ratio of these components is 3:1:1, it all depends on the quality of the clay, sometimes the amount of sand needs to be increased to 4 units. The finishing plaster solution should be liquid; this composition is easier to apply to clay walls. The absence of a coarse fraction in the sand composition will provide a smoother surface during finishing. It is recommended to use only dry material. The procedure for preparing the plaster solution is as follows:
- the clay is soaked a day before preparing the composition;
- after softening, excess liquid is removed, and the clay is kneaded so that there are no large lumps;
- dry sand is combined with cement;
- All components are thoroughly mixed with the gradual addition of clean water.
The drying period for finishing plaster applied to clay walls ranges from 1 to 3 weeks, it all depends on the surrounding microclimate. The naturalness of the process is a prerequisite; any artificial acceleration will provoke cracking of the clay walls.
Final decoration
At the final stage, after the finishing layer has dried, the walls are treated with lime. Traditionally, the procedure involves applying several layers. Alternatively, the surface of clay walls can be treated with fine-grained sandpaper. After sanding with sandpaper, it is necessary to apply a primer. It is better to do this twice at intervals for complete drying. Next, the clay walls are covered with a gypsum mixture. The prepared surface can be painted or covered with wallpaper.
Rules for combining gypsum and cement
To obtain a good result, solutions are often combined. The best option is to paint the walls with cement and then finish them with plaster. It is important to let the first layer dry thoroughly, then coat it with a suitable primer and dry it again. This is the only way to achieve high-quality adhesion between the two layers.
Trying to do the opposite, that is, applying cement on top of the plaster, is not worth it. This will not give the desired result, since heavy cladding will simply destroy the fragile gypsum layer. It will crumble quite quickly. It is possible to combine the properties of both materials in one. These are special combined formulations. They can be selected for application in rooms of any humidity level.
“And I’m crazy, and I’m crazy!” (C)
alex-bs published a topic in Our work, August 17, 2021, topic
Hello, brothers in repair! I haven’t written anything here for a long time, and in general I rarely come in, it’s all somehow too much time: either drinking, or partying, and now a new “attack” has attacked me. But knowing that, despite everything, you stubbornly do not forget me, I decided not to be a pig and tell you about my new hobby. I’ll start from afar: I have worked almost my entire adult life as an electronics engineer, moreover, as an engineer-developer of electronic and electrical devices of the widest class and purpose, and at the same time purely in the defense industry. It is clear that the scope of my amateur radio interests was limited only by my laziness, there were simply no restrictions on radio components for me, I had EVERYTHING! Well, following the trends of the amateur radio fashion of that time, my main focus was on radio receivers and amplifiers, of course, on transistors and microcircuits. I haven’t been working in this field for a long time, and I threw all the parts into the landfill a long time ago, but all this time I had a dream in my soul - to make a tube power amplifier, and not a simple one, but one that would make everyone gasp. But I must say that at work I spent most of my time dealing with electric vacuum devices, radio tubes, to put it simply, so this topic was very familiar to me. And then there’s this fashion for “warm tube sound”, which people are literally going crazy about. In short, a year ago I decided to make my dream come true. I immediately decided: the mainstream, ordinary tube amplifiers with an output transformer, are not interesting to me, this is not a royal matter! Shouldn't I invent a TRANSFORMER-LESS tube amplifier? Well, I well imagined the difficulties along this path, and I had some of my own thoughts on this matter, but still I decided to consult with the radio amateurs. I found a suitable group on Facebook, started publishing in it myself, and once asked a question on the topic: could anyone tell me the circuit of such an amplifier. And they immediately give me a link: https://hifisound.com.ua. a-6s33s-otl/ (I hope I didn’t violate any Forum rules by providing a direct link here, especially since it’s from a completely different area?). I won’t talk about this scheme, if anyone is interested, I can later explain what’s what, I’ll just say that this scheme immediately interested me, both for its unusualness and for the potential opportunities that I saw in it. I decided to start. And where to start: there are 0 parts, there is a soldering iron, also a Soviet one, and a tester from Ketai. But, bad luck - the beginning: I got comfortable on Avito, on Ali Express, went to the Mitinsky radio market a couple of times, and began to acquire amateur radio junk.
Now I’ll go and take Tinka for a walk, and I’ll continue, if you’re interested, with photos. )))
