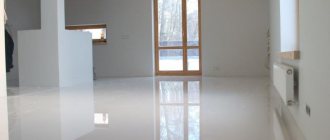
The main advantage of self-leveling floors is a perfectly flat surface after pouring. Self-leveling floors are used to prepare the base for finishing coatings or as a base material. The main reasons for the need to pour a second layer are gross violations of the recommended technology or a complete lack of construction experience among the performers. In order to make a decision about pouring the second layer, you need to know the features of bulk materials and how to use them.
Is it possible to pour a self-leveling floor in two layers?
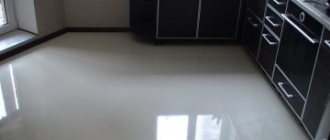
Self-leveling floor - impeccable work
Types of self-leveling floors and their performance characteristics
Currently, industrial companies produce several types of poured floors, differing in chemical composition and physical parameters. The better their differences are understood, the lower the risk of marriage.
- Cement based self-leveling floor. This material is used to level bases for finishing coatings; it is the cheapest of all self-leveling floors. Not so long ago, the use of cement-based self-leveling flooring was limited; today it is very popular among developers. By and large, such material differs little from ordinary liquid cement-sand screed. To increase operational and physical parameters, various acrylic additives are added to it. The minimum pouring thickness is 5 mm; this parameter must be remembered; it is very important when deciding on pouring the second layer.
Cement based self-leveling floor
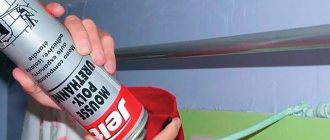
- Polyurethane self-leveling floor. A two-component material, the cost is several times more expensive than cement analogues. It is used for arranging finishing coatings in office and bank buildings, cafes and restaurants. Recently it has been used to create designer floors in prestigious residential buildings. It is poured in two layers using technology, the first layer is opaque as a base for decorative designs or ornaments, the second layer is transparent and protective.
Elastic and impact-resistant, polyurethane self-leveling flooring is suitable for surfaces subject to regular deformation.
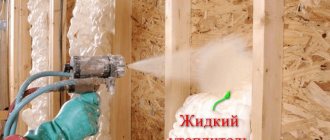
- Epoxy based . The most durable coating, characterized by increased performance characteristics. Excellent resistance to critical static and dynamic loads, and is not afraid of the effects of aggressive chemical compounds.
Main types of self-leveling floors
As can be seen from the characteristics of poured floors, the second layer can be poured only in two cases: when the technology of polyurethane floors requires it and in the case of large unevenness after pouring the first cement-based layer.
Prices for self-leveling floors "Starateli"
self-leveling floors prospectors
Self-leveling cleanroom flooring
How to make a self-leveling floor with your own hands. DIY shoes for self-leveling floors
This material is used in a room where the number of microorganisms in the air and the concentration of aerosol particles are maintained within the appropriate cleanliness class. As a rule, it is used in areas of the pharmaceutical and food industries, electronics, precision mechanics, etc. The coating ensures a tight surface, smoothness, evenness, ease of cleaning in various ways, and completely eliminates the release of contaminants.
The self-leveling floor is applied to concrete. The material for the clean room is made on the basis of polyurethane, epoxy, methyl methacrylic resins, selected in accordance with the work conditions to ensure the required cleanliness class from P0 to P9.
Why is there a need to fill a second layer?
We will not consider options for arranging polyurethane or epoxy poured floors; these are very expensive materials and require complex technologies. Only real professionals with extensive practical experience in performing such work should work on such floors. In addition, for pouring complex coatings it is necessary to have special expensive mechanisms and equipment . It is not economically feasible to buy them for private developers to install floors in a small apartment.
Cement-based self-leveling floors with the addition of acrylic components are widely used in private construction. The purpose of such floors is as a base for finishing coatings in residential premises. Can be used as the main coating in technical rooms of cottages or in some extensions.
A fragile screed can be crumbled even by hand
Table. What mistakes do inexperienced builders make?
| Error name | Consequences and recommended remedies |
| Not enough water | This situation occurs quite often. Lack of water has two negative consequences: the strength of the material decreases and the horizontal surface of the coating is disrupted. It is because of the second factor that there is a need to level the floor by pouring a second layer. As for the decrease in strength, this is not a critical phenomenon if the self-leveling floor serves as the basis for laying ceramic tiles. |
| Large amount of water | At first glance, it seems that a large amount of water increases the evenness of the surface, the liquid mass spreads evenly and quickly over the entire area of the room, the surface is flat and without differences in height. In practice this is not the case at all. Excess water is a big problem for poured floors. The fact is that binding additives are not able to absorb and use up all the moisture, the bulk composition settles and delaminates. After the water evaporates, the surface crust crumbles, and the floor has to be completely redone. The second layer is poured over the entire room with a thickness of at least one centimeter after removing the crust; this is a rather expensive repair. |
| Violation of the mode of mixing dry ingredients with water | When preparing the mixture, you should definitely follow the manufacturers' recommendations. First pour water into the container, and only then add dry ingredients. But that's not all. You need to carefully select the mixer speed. Too large ones cause a huge number of air bubbles to appear in the material. They physically do not have time to rise to the surface due to the fact that the solution quickly hardens and the viscosity increases. A needle roller helps little; a thick mass sticks to its surface and it becomes smooth. |
| Poor-quality surface primer or its complete absence | The primer performs two important functions: it increases the adhesion coefficient of the compositions and reduces the rate of moisture absorption by concrete slabs. If the base is poorly primed, then there are areas where moisture is absorbed much faster than neighboring areas. As a result, in these places the self-leveling floor quickly increases viscosity, and the surface after hardening is uneven. We have to solve the problem of how to eliminate the defect: by encryption, partial putty or re-filling of the self-leveling floor. |
| Slow mixture production | Such problems arise among amateurs. They cannot ensure the mixture is leveled in the time recommended by the manufacturer. As a result, the surface is uneven. Why does this happen, since advertising claims that the floors are self-leveling? In practice, this is not the case; the master must constantly level the mixture over the entire area; in the allotted time, it can independently level out the horizontal difference of only a few millimeters. If the base has large differences in height, then the solution must be dispersed over the area with a special squeegee. The evenness and needle roller slightly improves, but you shouldn’t place high hopes on it. The evenness of the surface depends on the ability of the builders to work. Some tools have special devices for adjusting the thickness of the poured layer. |
| Incomplete deaeration | If work with a needle roller is done carelessly, this will have a negative impact not only on the strength, but also on the evenness of the poured floor. The fact is that the air bubbles will rise to the top, but will not be able to escape completely - the viscosity of the solution increases too quickly. As a result, the surface is weakened and uneven, and tubercles appear in some places. To correct the problem, refilling is required, but the decision is made by the technician on site, taking into account the actual condition of the surface. |
| Wet cement-sand or concrete screed | Wet cement-based screeds continue to dry out and release water vapor. In addition, various chemical reactions occur in them with the formation of carbon dioxide and other chemical compounds. A self-leveling floor poured onto such a “living” surface prevents the free removal of steam and gases. If there is a small thickness of material above them, then it may rise slightly above the rest of the surface. As a result, there are tubercles of varying heights and air pockets between the base and the self-leveling floor. To eliminate the problem, you will have to remove the coating and replace it with a new one or pour a second layer. |
| Drafts or heating systems turned on | Due to the large difference in the rate of hardening of the solution, areas of the floor with depressions and bumps appear. The magnitude of the differences in height can be critical and require repairs. The problem can be corrected using various methods, including refilling. |
The choice of error correction method depends on their nature, cause and area. Local ones are most often eliminated without significant loss of time and financial resources. Large areas with defective flooring require significant costs.
Cracks in the self-leveling floor
Delamination of self-leveling floor
Let's find out the composition
Any mixture, even if the final self-leveling floor is poured, includes the following main components:
- Binders. This can be cement, gypsum, or a combination of them, which are supplemented with polymer components.
- Supplements They impart qualities to the solution such as excellent spreadability, better ductility, and increased adhesion to the previous layer or overlap.
- Fillers. This includes lime chips and sand with the appropriate fraction.
Its use will depend on the content of the mixture itself - for the finishing layer or as a surface leveler from existing unevenness. If desired, mixtures with dyes are selected, which is especially typical for the finished version of the floor.
Each mixture will have a purpose: for the kitchen, bathroom, garage and other objects.
Gypsum mixtures are suitable for dry rooms, but for wet rooms it is better to take cement-based compositions. Their qualities will differ markedly, and the drying time will also vary.
Warm floors require an elastic solution to work. The mixture must change (shrink and expand) under the influence of constant temperatures. When deadlines are running out and you want to do everything as quickly as possible, it is best to arrange a quick-hardening universal self-leveling floor.
A universal self-leveling floor can be used to install not only the second layer – the finishing layer, but also the main layer – the subfloor. Everything will depend on the preferences of the customer or the independent contractor.
Is it possible to use a second layer of fill for repairs?
First, it should be noted that unevenness appears only through the fault of the performers; if you have doubts about your professionalism, then it is better to use cheap cement-sand mixtures to prepare the base or seek help from specialists. By the way, self-leveling floors appeared relatively recently, and until then cement-based materials were always used and the floors were of excellent quality, satisfying even the most demanding developers. The technology of self-leveling floors increases the cost of coatings several times, and as for the final quality, this parameter depends not so much on modern materials, but on the skills of the craftsmen.
Epoxy self-leveling floor technology
As for the second layer, there is no definite answer; the decision is made by the master after a careful review of the complexity and causes of the problems that have arisen. But there are several general rules; knowledge of them will help when choosing the optimal method for final leveling of the coating.
- The minimum thickness of the second layer cannot exceed the standards recommended by the manufacturer . You should carefully read the instructions; the minimum layer thickness is always indicated on the packaging. There is no need to hope that a self-leveling floor several millimeters thick will have the declared strength; this is even theoretically impossible. The fact is that for the complete completion of all chemical reactions, the mass must be wet for at least 24 hours. A thin layer loses moisture after 1–2 hours, the material dries out and never has time to gain strength.
- Economic expediency . Self-leveling materials are four to five times more expensive than ordinary cement-sand screeds. Even one layer increases the estimated cost of the floor by about 250%; if you do a second layer, the costs increase even more. The decision to refill should be made only if it is impossible to correct the defect in other ways, and there are a lot of them: screeds, putty, sanding, pads, etc.
Calculator for calculating dry mortar for self-leveling floors
Go to calculations
Red self-leveling floor
Saving Techniques
Greenhouse drip irrigation systems variety of uses and benefits
Many people know how to make self-leveling floors with their own hands, but not everyone can boast of the ability to save mortar during work. There may be cases when the base, even under the base layer, is not completely crooked; you can work with a grinding machine. In this case, the unevenness will be smoothed out, and there will be fewer pores on the surface, which will require less primer.
Every crack and pothole should be eliminated, as the composition of the finished self-leveling floor solution may get there. Instead of leveling out, everything will go into emptiness.
Instead of buying a primer, you can make it yourself. To do this, take a mixture for self-leveling floor and dilute it to such a state that it resembles paint in consistency. After applying it to the floor surface with a roller, it only takes a few hours for it to dry, after which you can begin making the “cake” of the self-leveling floor.
Tool for self-leveling floor layers
You can save on the base layer. To do this, sifted sand and very fine sand are added to the mixture. After such a layer has completely dried, it is additionally leveled with a clean compound for the base layer (one millimeter is enough). A roller or rule also actively takes part in the work. In each individual case, it is necessary to follow the technology and approach it individually.
Thus, the height of the self-leveling floor will fully depend on the specific room, its parameters, as well as environmental conditions. The maximum thickness of self-leveling floor pouring should not exceed the specified values from the manufacturers. Altitude will not always give excellent results. When faced with self-leveling floors, a larger layer will only take money out of your pocket, but overall characteristics and qualities will remain at the same level.
How to make a second layer of self-leveling floor
If the final decision is made to fill the second layer, then you need to follow several practical recommendations from professional craftsmen.
Surface preparation
Work can begin no earlier than 2–3 weeks after pouring the first layer. Ordinary work on laying finishing floor coverings can begin on the second day of pouring, during which time the material gains sufficient strength. But to refill, you need to wait a long time, during which time the chemical reactions will almost completely end and no gases will be released into the air. If this condition is not met, then there is a risk of swelling of the second thin layer.
An example of a rough screed; as you can see, it was made very sloppily
Analysis of mistakes made
The thickness of the first layer is much greater than the second. This means that he can independently cope with some violations of the work technology. The second layer is much thinner; even minor deviations from the recommended technology will certainly be noticeable on the surface. You need to carefully analyze all your actions, find the reasons for the appearance of unevenness on the self-leveling floor, and only then begin to eliminate them.
Leveling the floor with a thin-layer self-leveling floor
Preparatory work
Before waterproofing work is carried out, the subfloor should be properly prepared. It is important that it is perfectly smooth and clean, well dried. Leveling, if necessary, is carried out using a self-leveling mixture, and only after it has dried, the rest of the work is carried out.
The subfloor is cleaned of debris and dust, it is advisable to even wash it. However, if there are any defects on the floor - cracks, potholes - then they are first sealed with sealant or cement plaster. It also rounds all the corners somewhat.
Preparing the base for self-leveling floor
How to avoid mistakes
As with any construction work, it is much more profitable and easier to strictly follow existing technologies than to eliminate defects later. During work, follow the following step-by-step instructions.
Step 1. Carefully remove construction debris and dust from the surface and seal large cracks. Check the condition of the base along the self-leveling floor. There may be a high bump in the room. It is easier to remove it with a chisel or hammer drill than to significantly increase the thickness of the self-leveling floor.
Construction waste removal
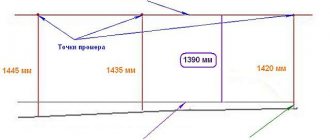
The size of unevenness can be determined using a laser level (long, inaccurate, but prestigious) or an ordinary long bubble level (fast, accurate, but old-fashioned). If you work with a laser device, you will have to take measurements with a tape measure in many places in the room. In this case, you need to at least approximately by eye find out the highest point of the surface and measure it. The most important indicator of a self-leveling floor – the minimum thickness – depends on these parameters.
Using a laser level, floor unevenness is determined
The bubble level is very easy to use. You just need to look at the gaps between the bottom surface of the device and the floor, while placing the level diagonally and along the walls. The entire check takes a few seconds.
Step 2. Calculate the required amount of material and purchase it, check the availability and technical condition of tools and equipment.
Tip 1. There are a lot of self-leveling floors, each of them has its own technical parameters and performance characteristics. Beginners are advised to purchase DIY materials. They also contain special additives that level out minor errors during work.
Beginners are advised to purchase DIY materials
Tip 2. It is recommended to increase the amount of material by about 10% of the calculated value. The fact is that you will never be able to calculate the amount of work accurate to the cubic centimeter. In addition, unexpected losses of material may occur directly during the execution of work. There is nothing worse when you have to stop pouring your floors due to lack of mixture. Subsequent topping up will create many difficulties, and the quality of the coating will be much worse.
Tip 3. Check the base for strength; according to technology, it should be stronger than self-leveling. In practice, this is easy to do - draw lines with the edge of the coin; they should not have fringes on the sides, but look like scratches.
Checking the foundation for strength
Lines should not have fringe
Step 3. Apply primer to the floor, work carefully, do not leave any gaps. We talked above about the great importance of this operation. The more carefully you work, the higher the final quality of the self-leveling floor, the lower the risk of having to apply a second one to level problem areas.
Applying primer
Tip 4. Check the quality of the primer. Pour some clean water onto the surface and wait a few minutes. If air bubbles appear or the amount of water has noticeably decreased, priming must be repeated.
Water should not be absorbed
Step 4. Install a damper tape around the perimeter of the room; it will dampen fluctuations in the linear dimensions of the self-leveling floor during temperature changes.
Damper tape is installed along the edges of the walls
Step 5. Prepare the composition. Before starting work, study the manufacturers’ instructions for preparing the mixture, follow all instructions exactly, and do not try to make your own changes. Many inexperienced builders, after several days of work, begin to feel that they are smarter than everyone else in the world; professional craftsmen and specialized companies are doing it wrong and know nothing. Based on such thoughts, they begin to change the technology at their own discretion in the hope of obtaining the ideal result. In fact, the result is the opposite and very sad.
The packaging must contain detailed instructions for use
Mixing components
When mixing dry ingredients, a large amount of dust appears. You should only work in a respirator. The chemical elements contained in dry material have an extremely negative effect on the lungs and can provoke dangerous diseases.
Rules for mixing the mixture
Tip 5. After mixing, be sure to give the composition about five minutes to initiate chemical reactions, then mix again. There is no need to immediately pour it onto the surface; this does not increase the speed of work, and the strength of the coating noticeably decreases. In addition, the likelihood of unevenness increases, you will have to apply a second layer, this is always undesirable for many reasons.
Re-stirring
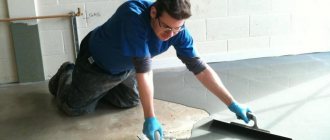
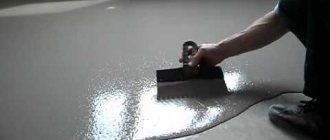
Step 6. Fill the floor from the farthest corner of the room, help the mixture level with a squeegee and then with a needle roller. The needle roller performs two tasks: it removes air bubbles and levels the surface of the self-leveling floor. Do not use a plate roller, but rather a needle roller, and the length of the needles should exceed the maximum thickness of the floor filler by at least 1–3 cm. Move the tool at an average pace. Too high a speed causes new bubbles to appear, and too low a speed does not remove old ones.
Floor pouring begins
The mixture is rolled with a needle roller
This type of roller cannot be used
Step 7. Prepare the next portion of the solution and continue pouring. Work at an average pace, there is no need to rush too much, but breaks are strictly prohibited. You can rest only after the filling of the room is completely finished and all the prepared material has been used up.
Next portion of solution
We immerse the roller to its full depth
Tip 6. Pay attention to the height of the edge of the first layer. This parameter indicates what maximum surface unevenness can appear if the work technology is violated.
Only clean water can occupy an ideal horizontal position in a short period of time. All other solutions with increased viscosity will level out only after an increased period of time. But bulk compositions do not have such a reserve; over time, the viscosity increases exponentially - self-leveling completely stops.
When leveling and removing air, pay special attention to the boundary between old and new materials. It is a mistake to think that the more you move the roller over the same areas of the floor, the smoother they will become. Most often, the effect is the opposite - new bubbles form, and bumps and depressions roll on the more viscous material, which can no longer level out on their own.
No need to be too zealous with the roller
Tip 7. If the mixture sticks over the entire surface of the roller, it is recommended to replace it. It is extremely undesirable to use such a tool; there is a high probability of various tubercles appearing on the surface.
Poured floor
It is recommended to work in special stands for shoes with spikes. Such devices allow, if a defect is detected on an already filled surface, to get to the desired area and correct the problem in a timely manner.
Paintshoes
The next day, check the quality of the fill, use a rule or a long level. If everything is within the existing tolerances for finishing floor coverings, great. If there are large irregularities, then you need to make a decision about refilling the mixture or making repairs in other ways.
This is what the floor looks like the next day
The floor turned out perfectly smooth
Video - Self-leveling floor from A to Z
Installation of roll waterproofing
Self-adhesive bitumen-polymer material is an excellent alternative to cement mixture. Working with him is faster and more pleasant.
Step 1. The base surface is prepared for work. It is thoroughly cleaned of debris.
The foundation is being prepared
Step 2. A bitumen-emulsion primer is applied to the surface. This will be the primer layer. Drying time is about 30 minutes. Apply the substance with a brush or roller to the walls (10 cm from the floor) and the floor along the wall, and then to the entire remaining surface of the floor. All corners are coated well.
Application of bitumen emulsion primer
Advice! You can check whether the primer has dried or not with a cotton swab - blot the surface with it, and if there are no traces of bitumen on it, then you can continue working.
Step 3. The rolled material is rolled out on the floor surface with the adhesive (but now protected) side down. A piece of the required length is cut off. The material is given time to rest for a while, after which the roll is twisted on both sides towards each other.
Rolling out a roll of waterproofing
The material has rested and is curled on both sides
Step 4. The anti-adhesive film on the surface of the roll is cut in its central part.
The anti-adhesive film is cut
Step 5. The film is carefully pulled towards itself - this is how the material is rolled out.
The film must be carefully pulled towards you
Step 6. To remove all bubbles, the material is treated with a special roller or brush.
Removing air
Step 7. The next piece of material is glued overlapping the previous one (at least 10 cm, end overlap - at least 15 cm). The overlap area is additionally treated with bitumen mastic or primer.
The pieces are laid with overlap
The overlap area is treated with a primer
Step 8. The walls are waterproofed. The height of laying the material is at least 20 cm. The material is cut into pieces of the required size - 30 cm. In this case, 10 of them will be laid on the floor, and 20 will be placed on the walls.
Cutting waterproofing material
Step 9. The blanks are bent along the transition line, and the protective film is cut along it.
The protective film is cut
Step 10. The material is laid on a vertical and then on a horizontal surface. The horizontal overlap area is coated with primer.
Laying the material
Step 11. The material is also processed with a roller.
Processing with a small roller