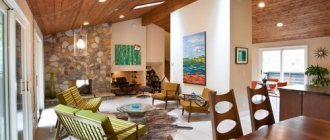
Lining is one of the most common materials used for finishing the interior walls of wooden premises. It consists of thin boards of the same width. The name of the material is due to the fact that in the past it was used for the internal lining of the walls of railway cars. Impregnation for the lining inside the house will help increase the service life and prevent damage by fungus and mold. Such compositions prevent wood destruction caused by exposure to moisture.
Purposes of protecting the lining inside the house during processing
To prevent rotting, the lining is treated with penetrating compounds.
Sometimes residents doubt the need to treat the lining inside the house. If impregnation is not applied to the boards, they will change color as they are used. If there is insufficient ventilation, the coating acquires a bluish tint. This is due to the work of microorganisms, which can only be removed with strong chemical oxidizing agents. Performing such a procedure is quite difficult.
When exposed to sunlight, boards may become covered with a gray coating. It can be removed by sanding, but after a while it will appear again. To prevent such problems, the lining is coated with a protective compound.
If the boards are treated with a water-repellent compound, they will last a long time even in a room with high dampness that is not subject to regular heating.
Popular tags
anti-fungal coating block house timber lining types of log houses types of foundation vinyl siding external finishing external finishing blockhouse internal finishing waterproofing wooden house house made of timber board planks eurolining pouring the foundation protection from rotting roofing strip foundation monolithic foundation do-it-yourself casing piping do-it-yourself lumber slab foundation slab foundation advantage of wooden houses concrete consumption timber calculation material calculation lumber calculation calculation of insulation foundation calculation log house in a paw log house in a bowl log house from a log log house with your own hands construction from winter wood drying foundation insulation insulation foundation ecowool
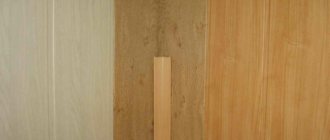
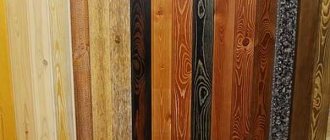
Variety of materials for processing lining
There is a large selection of compounds on sale that can be used to treat the lining inside a country house. Their main purpose is to reduce the flammability of wood and protect against microbes and dampness. Some residents prefer to preserve the original appearance of the material and believe that it is enough to treat the boards with antiseptics.
You can choose a mixture that will have not only protective, but also decorative properties. Sometimes painting of the lining is practiced.
Primer
Before painting, a primer is applied to the wood.
It is usually not used as an independent composition and serves as a base for paints and varnishes. Applying a primer helps to better fix the decorative coating and protects the wood from swelling. To saturate the boards, you can use a spray gun. It is better to treat the joint areas with a brush. Acrylic and alkyd primers are well suited for lining.
Scuba diving
Wood varnishes are one of the most common categories of compounds that can be used to treat eurolining inside the house. For such purposes, it is recommended to choose water-based varnishes. They are significantly less allergenic than mixtures based on organic liquids, although they take longer to dry. They also form a barrier to steam penetration, which prevents contamination of open pores.
A wall covered with aqualak can be completely matte, slightly shiny or glossy. When added to the color composition, a coloring mixture is obtained. It is good for protecting wood from the inside, but it should not be used for exterior decoration: the paint is washed off quite quickly under the influence of environmental factors.
There are different versions of scuba tank containing additives that create certain specific properties. Modifications with antimicrobial components help increase the service life of wood. If the coating is exposed to sunlight for a long time, it is worth buying a composition that minimizes the effect of ultraviolet radiation on the appearance of the lining.
The most durable varnish products are alkyd. This coating retains its fresh appearance for about ten years. In a wooden cottage or residential building they are recommended to cover the floor. It is suitable for walls if the owners prefer consistency in the interior. If you still want to change the color of the walls, you can apply another one over the alkyd varnish.
Oils
Wax for coating wood inside the house
Since ancient times, drying oil obtained from oils has been used to work with lining. However, this composition has disadvantages - it makes the wood sticky and changes its color. Today on sale there are also more technologically advanced oil-based products that are well absorbed by wood. This mixture must be carefully rubbed into the surface. The wood is then polished. Depending on the ingredients included in the mixture, the surface may be matte or shiny.
Waxes have a chemical structure similar to oils. They are very resistant and can stay on the tree for several decades (if there are no significant mechanical loads). The surface is smooth and shiny. Before applying hard wax to wood, it is melted in a water bath. You can also purchase a ready-to-use composition. To ensure even distribution, a primer is first applied to the wood.
Painting wood while maintaining texture
A pronounced wood pattern can be achieved using glaze, pigmented oil or wax. These compounds apply quite tightly, almost painting over the structure of the wood fibers. Any of the compositions described above can be applied with a brush or roller.
When applying paintwork materials, take very little, first applying them in fragments along the entire length of the lining. Then, using a brush or roller, the applied strokes are shaded over the entire surface. After leaving them to soak for 5-10 minutes, to reveal the texture, take a soft, lint-free cloth and remove most of the oil. As a result, the pattern appears much brighter than in its original state: a larger amount of pigmented product is retained in the grooves, and almost none remains on the protruding parts. The result is a pronounced texture. This technique is also called brushing or texturing the lining. In interiors, wood processed in this way looks very decorative: both on the walls and on the ceiling.
The process can be observed in the video. Three samples were painted: two with the same oil with pigment, one with colorless. 5 minutes after painting, one of the pigmented blanks is wiped to reveal the design. To preserve the wood after the pigment has dried (24 hours or more, read on the packaging), the lining is coated with two layers of colorless oil (glaze, wax). In areas of intensive use, you can also coat it with matte varnish.
Required tools and materials
In addition to the impregnating composition itself, you need to prepare tools for application. This could be a spray gun or a set of brushes of different sizes. The product packaging provides detailed application instructions and recommended tools.
Also useful for work:
- construction tape;
- absorbent wipes;
- container for coloring product;
- sandpaper No. 240.
To coat the joint areas, it is better to prepare a separate small brush. To prevent lint from sticking to the surface, instruments should be periodically rinsed in a soapy solution. It is worth doing this before you start applying the product.
Horizontal mount
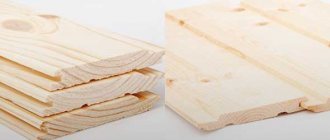
Wooden panels are rarely mounted in this position, but if the need for this configuration does arise, then it is advisable to initially prepare a special false beam. This material is better suited for horizontal fixation than standard eurolining. False timber differs from traditional models in size - thickness 2.2 cm, width on average 14 cm, and length varies from 2.1 to 6 m.
Now you can consider how to fasten the lining horizontally to ensure the same reliability and attractive appearance. First of all, a sheathing is provided on which the sheathing is attached. It can be fixed without the use of hardware - as a rule, your own fastening system is sufficient. But there are also differences in panels designed for horizontal fastening. There are chamfers on the edges of such timber. The installation features are due to the fact that the material should imitate the surface of a classic beam, so during joining there is no intermediate groove.
Preparatory work
Applying paint to the lining with a spray gun
Before impregnation, you need to assess the condition of the boards. If there are dark spots on them, they are removed with a special bleach. The surface is wiped with a soda solution (0.3 kg per 10 liters of water). This procedure is done before impregnating fresh lining, and also if the boards were previously varnished and the coating is still in good condition. When the surface is completely dry, it can be primed and painted according to the instructions.
If the paint coating has lost its presentable appearance, or has begun to crack and peel, the previous layer must be removed. This can be done in different ways. If the new coating is planned to be made transparent, a mechanical method is suitable. To do this, the surface is heated with a hair dryer. When the coating begins to separate, it is removed with a spatula. To remove oil paint, the following modification of the method is used: foil is laid on the boards and ironed on top with a heated iron. The separated composition is collected with a spatula.
If the lining will be painted, special removers can be used to remove the old coating. This is a fairly aggressive method, and the products can whiten the surface unevenly. If the owners plan to apply a colorless coating, it is better not to risk it and remove the old paint by heating. After using a chemical remover, the surface is washed well with water. If there are metal inserts on the surface, wipe them with vinegar.
Basic properties of antiseptics
As you know, the use of protective impregnation for wood lining will allow it to retain its original qualities for a long time. Of course, vinyl lining does not require such measures, but it is mounted on timber, which should also be impregnated.
In addition, a properly selected composition will prevent rotting and insect attacks.
Two types of protective equipment:
- Products that leave behind a protective film.
- Products containing salt solutions, as well as some types of protective substances. They are able to penetrate the structure of wood without harm and destroy bacteria.
It is advisable to use coatings that create a film on the surface of the lining for external treatments, since the toxicity of such products is too high. In addition, during application it is necessary to observe certain safety conditions - wear a protective suit.
After applying the protective layer of impregnation, it is necessary to carry out further processing, which consists of applying varnish substances or conventional painting.
This is necessary to eliminate direct contact of antiseptic-treated wood with humans.
It is also worth paying attention to impregnations, which differ in the presence of a fire protection function, which in turn can also be divided into two types:
- The antiseptic contains special salts ; upon contact, they protect the wood because they prevent combustion;
- Fire blocking compounds. Their role is to perform the functions of a fire extinguisher; upon contact with fire, the coating swells, forming foam on the surface of the lining that prevents combustion.
Application of a special composition that protects wooden panels from fire
Processing lining inside the house with your own hands
You can paint the lining well with a wide brush.
The temperature in the room where the treatment takes place should be above +15 degrees.
Before application, the impregnation must be stirred so that the composition lies evenly on the surface. If a brush is used, the product is applied with the ends of the bristles. Do not press the tool against the surface.
To treat hard-to-reach places (the area near radiators, skirting boards, etc.) use a thin brush (maximum 50 mm wide).
It is better to start coloring from the top. To make the coating durable, it is applied in several thin layers. Moreover, each subsequent one is created only after the previous one has dried.
Mounting methods
We will look at how to properly fasten the lining to a wooden frame in different ways. Each of them has its pros and cons, so please read all the information below carefully.
Option 1 - using finishing nails
This fastener for lining is traditional and has been used for several decades; for this work we will need special nails with a reduced head. The length should be such that 2/3 of the nail fits into the bar; most often, products with a length of 30 to 40 mm are used. The price of 100 grams is 40-50 rubles, so this is also the cheapest method of fastening.
Finishing nails - the most budget-friendly solution
Let's figure out how the lining is attached in this case:
The first installation option is fastening into a groove, that is, into a recess on one of the sides; in this case, the nail is driven in at an angle of 45 degrees and covered with the next element. Below is a diagram of this technology;
This is what the groove mount looks like
You can also fix elements through a tenon; below we show how to properly fasten the lining with nails in this case. Here the nail is also covered by the next element, ensuring the perfect appearance of the finish;
This method is even simpler, but it is suitable for materials with a wide tenon
- Having chosen the option that you will use, you can get to work. Before attaching the lining to the wall, it is necessary to cut the elements to the required length so that there are gaps of several mm to compensate for deformations of the material due to temperature changes;
- The first element in the corner on one side is fixed through the top; anyway, the corner is covered with a plinth or other decorative element. On the other side, a nail is driven into the tenon or groove; this is done very carefully so as not to split the material or damage it. This way you can finish walls and ceilings quickly and reliably.
Remember that when fastening into a groove, the nails are located at an angle
Option 2 – use of clamps
It is impossible to discuss the question of how to fasten a wooden paneling without mentioning the clamps, which are special staples that are placed on the tenon of the elements and secured with nails. For lining, option No. 4 is used, and for block house and imitation timber - No. 5. The products are sold in packs of 100 pieces and cost about 50 rubles per pack; carnations are included.
The photo clearly shows how fastening is done using clamps
Instructions for doing the work yourself include the following steps:
- First, the number of fasteners is calculated, they are located on each edge of the frame, you need to multiply the number of structure edges by the number of lining panels;
- The location of the clamps when the elements are arranged vertically does not matter, but if the finishing is located horizontally, then they should be at the bottom;
It is important to position the fasteners correctly
The working process is very simple: the lining is put in place, fits well with the previous element, after which clamps are placed and secured with small nails. To make it easier to hammer them in, use a spacer.
Clamps can also be screwed on with self-tapping screws
Option 3 - use self-tapping screws
If you are thinking about how to fix the lining to the wall as securely as possible, then self-tapping screws are best suited
Their use is associated with some difficulties, but the fixation strength will be maximum, and if necessary, the finish can be disassembled without damaging it, which is also important
For work, fasteners of small thickness are selected
The workflow in this case looks like this:
- In the groove connection of the lining, holes are drilled at an angle of 45 degrees with a 3 mm thick drill;
- The element is attached to the sheathing, tightly joined, after which a self-tapping screw is screwed into it. The work should be done very carefully: the cap should sink into the material so as not to interfere with the joining, but at the same time you should not press too hard so that the wood does not crack.
In this case, accuracy is important
The question is often asked about what to attach PVC lining to; in this case, all of the above options are suitable. In addition, you can use a simpler option - a construction stapler, it is perfect for plastic.
Before attaching PVC lining, stock up on a stapler and staples
Wood brushing
- gas-burner;
- metal brush;
- work gloves;
- flute
The brushing method allows you to advantageously emphasize the structure and give the wood a touch of antiquity; it involves removing soft fibers (from the top layer) using a hard metal brush. For this purpose, a tree with clearly defined growth rings is selected; the presence of knots, eyes and other defects is only welcome. The best types of wood for brushing are pine, spruce, oak, linden, and walnut. The following are considered unsuitable: cherry, pear, alder, juniper, teak, beech.
Brushing can be superficial and deep, and is performed with or without firing. It is much easier to use the non-firing method at home. The wood is cleaned of dust and dirt, the surface is moistened with water, and after about 15 minutes they begin to comb out the fibers using an iron brush.
This work is quite dangerous, so it is important to follow safety precautions. The remaining debris is cleaned with a flute (wide brush), moving against the fibers, otherwise the dust will adhere to the surface
This is followed by treatment with stain or wax.
For processing using the firing method, you will need a gas burner; it is used to char the surface of the wood. Sometimes there are so-called resin pockets in wood, which can catch fire during firing. Under no circumstances should such places be allowed to burn for a long time; the fire must be extinguished immediately. The degree of charring depends only on your idea; it can be light or completely blacken the surface layer. After this, the fibers are combed out with a wire brush. It is better to work outdoors, as brushing produces a lot of black dust. At the final stage, the surface is sanded using fine sandpaper. In some cases, the firing treatment (followed by combing) is repeated several times, thus achieving the effect of aged wood. If necessary, apply stain or patina, but you can do without it. The result is secured with furniture wax.
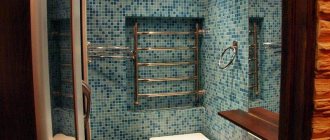
Causes of mold in the bathhouse
There are two types of mold that can grow in a damp room: white and black. Black mold grows on wood very quickly and, without prompt intervention, can lead to the replacement of the entire interior covering, and in the worst case, to damage to the load-bearing supports of the building. White mold produces incredibly toxic spores that can harm your health and cause a number of chronic diseases.
Mold on a carriage in a bathhouse can form due to:
- Use of wood infected with fungus.
- Failure to comply with the layering of steam and waterproofing in the bathhouse.
- Disturbances in the ventilation system.
- Freezing of the structure and not regularly heating the bathhouse during the cold period.
How to consolidate the result
Any efforts to treat mold on the lining in a bathhouse, as described above, may be in vain if the cause of the fungus is not eliminated. Preventive measures include:
- Proper ventilation in the bathhouse.
- Mandatory installation of hydro and vapor barrier materials under the lining.
- Regular heating during the cold season.
- Purchase of high-quality, industrially dried lining.
- Treatment of lamellas with antiseptic solutions before installation.
5 / 5 ( 100 votes)