The height of the apron in the kitchen is the distance between its upper and lower borders. Often this value is also called width.
The standard parameters for the width of the apron in the kitchen are based on the established standards of kitchen furniture, which can also vary somewhat. Therefore, the figures are somewhat approximate, and an accurate calculation is simply necessary.
The appearance of the kitchen and the protection of the wall from dirt, exposure to temperature and moisture depend on the accurate calculation of this parameter. In order not to make a mistake with the dimensions, let’s look at what the height of the kitchen apron depends on.
The main function and features of a kitchen apron
An apron is a kitchen area located between the bottom and top rows of cabinets. The word refers specifically to a section of the wall or its decoration, sometimes to the working surface, and often to the entire space between the rows of drawers. Use an apron to store kitchen utensils and as a space for furniture that can be affected by heat from the hob and water from the sink. The space between the drawers is usually made in the form of a tiled covering, which will not be threatened by greasy stains.
You can’t do without an apron in cramped kitchens, because a solid wall takes up a lot of space, and there will be almost no space left for the cutting surface. Often, items on the upper shelves are at an inconvenient distance, but above the lower drawers, stock must be made based on mandatory standards. The listed nuances mean that there is no alternative to two-tier furniture in a small kitchen.
Primary requirements
The same criteria apply to the backsplash as for any kitchen decoration. The area is laid out from tiles, glass, that is, from materials that do not absorb dirt and are highly hygienic. Panels with repellent properties are also used for cladding.
The look of a kitchen would be incomplete without a beautiful backsplash. They use interesting color combinations, unusual prints, and repeating patterns.
Linear lights are often attached to the apron to illuminate the work surface. This is needed to a lesser extent if there are spotlights. On the lower edge between the working surface and the apron, borders are installed to protect against water and crumbs getting behind the walls of the furniture.
The apron coating is made resistant to the effects of high humidity and high temperatures, resistant to contact with water, steam, smoke, and hot drops. Resistance to mechanical stress is the last key parameter. A good apron will not be destroyed by a careless blow from a frying pan, household appliance or fork.
Criterias of choice
Drawing a conclusion from all of the above, when choosing, you need to pay attention to the following parameters:
- Reliability of the material. The kitchen must have an apron that can withstand sudden temperature changes, exposure to moisture, and is not afraid of high temperatures.
- Easy to clean. The surface must easily withstand the contact of grease and the effects of aggressive chemicals.
- Compliance of the material with the overall interior of the kitchen.
- The quality of the materials used. It is better to purchase only proven products to avoid manufacturing defects.
Standard sizes
The minimum is 40-45 cm, and above the stove it grows to 60-75 cm. In the case of electric hobs, 60-65 cm is enough, but for most gas hobs, the passports say 75 centimeters or more. The bottom edge of the top row is usually 60-65 cm above the working surface, sometimes in one straight line. For housewives below 155 cm, the standard height is 45 cm - there will be no smooth edge with a hood.
Most aprons have a height of 48 to 60 cm. Small and medium-sized household appliances and tableware storage systems can easily be placed there.
The length of the apron depends on the configuration of the kitchen. In Khrushchev-era buildings the room is usually square, while in Brezhnevka-era buildings it is elongated. In rooms with equal sides, the aprons are L-shaped, and the length of most of them is about 1.8-2 m. In elongated kitchens, the length of Brezhnevok reaches 2.5 meters. In spacious kitchens, 3.5-meter options are common.
First, you should draw a marking and measure the distance from its different points to the floor - if the floor is uneven, installation of the panel may become more complicated.
Is there a standard calculation of width
The width of the apron is the distance from the bottom to the top edge of the apron. Since this element has a protective function, it must cover the entire wall space from the edge of the work surface to the beginning of the kitchen wall cabinets and hood. It is important that the kitchen apron extends slightly beyond the countertop and wall cabinet.
The standard apron size is 47 cm, this figure takes into account a 2 cm allowance. Where did this figure come from? This is the distance that separates the bottom edge of the kitchen wall cabinets and the countertop.
Taking into account the height of the hostess and the characteristics of the room itself, the width of the apron can reach 117 cm. This figure is also not taken from the air. As a rule, an apron of this size is used when there is a hood or when there are no wall cabinets.
Important! 117 cm is not the maximum permissible width of an apron in the kitchen, but recommended for comfortable and efficient use. In fact, the width can be absolutely any, depending on the design and taste preferences of the owners, even up to the ceiling.
How to determine the size of a kitchen apron
The owners put their own convenience above all else, and this approach is correct. The height of the countertop, the size of the apron and the level of the top drawers are usually selected intuitively. With the upper tier, everything is simpler - a block of lockers is placed at any level. In the case of the lower one, one chooses between the optimal height and the usefulness of the furniture set.
The panels for the apron are made according to standard parameters, but with the addition of 1-2 cm at the top and bottom for fastening. The tile covering is laid in advance with a noticeable margin, approximately 5-20 centimeters per allowance.
The placement of the hood may be a problem. If the wall decoration behind it is hidden or matches the color of the furniture, the appearance of the kitchen will be attractive. Otherwise, an apron panel is installed there.
If the upper drawers do not occupy the full length of the lower ones, it may be better to trim the free part with an apron.
Floor block dimensions: distance from floor to apron
It is worth measuring the average height of adults or focusing on the hostess. The height of tabletops starts from 80 cm, and low models correspond to a height of 150-155 cm. Women of average height should focus on a tabletop height of 85 or 87 cm. For families with high average height, options of 90 cm or more are suitable. With the right furniture, your shoulders, back and neck will not hurt after a long day of work.
Height is also affected by:
- headset design;
- hob;
- slab size.
It happens that a set fits perfectly, but the height of the furniture is not optimal. You will have to be content with this furniture or attach a tabletop on top. The surface of the bedside tables can be additionally covered with a thick 4-centimeter board for a neat appearance.
If the owner has purchased a low or high slab, it is better to choose furniture that matches its parameters or, as an alternative, to make a platform. Hobs are also tabletop, which adds options in choosing a lower set.
Apron height: location of wall cabinets
Add 45 to 65 cm from the top to the ideal tabletop height. An indicator is obtained that affects the work in the upper part of the kitchen. Ideally, the bottom of wall cabinets is 15 centimeters below eye level. In this case, the housewife can reach the handle on the door at any height. A tall person - up to the third tier of shelves. The normal height of the lower border of the hinged block is in the range of 130-150 cm.
The choice between a small backsplash with a low top tier and a large backsplash with a high top tier is an obvious one. In the absence of bulky storage systems, the need for a large apron disappears. The height of almost all tabletop household appliances does not exceed 40-45 cm. If there is a shortage of stock, it is enough to increase the height of the apron to 50 cm. Products on the shelves of the top row will be at the ideal distance.
Hood model and location
Types of hoods according to different classifications:
- flat;
- island;
- corner;
- inclined;
- telescopic;
- T-shaped;
- dome;
- fully built-in;
- hanging;
- wall-mounted
The height above the stove is maintained at 60-65 cm above electric and 70-75 cm above gas. The lower limits indicate the acceptable value, the upper limits indicate the minimum recommended. It is recommended to place inclined models at a level approximately 50 cm above the burners. Only special furniture sets are suitable for built-in furniture. Islands are hung above kitchen islands, which are typical of large kitchens. Corner models are suitable for curved sets and have large dimensions.
Ideally, the width of the hood is no shorter than that of the stove, with a margin of 7-10 centimeters on both edges. The placement height is increased if the hood power and the size of the kitchen allow it. The material used does not affect safety at a certain height, since fires occur due to the accumulation of soot or grease on the grate.
Width/Length Determination
The width is the height of the apron or the distance between the tabletop and the installation level of the top row along the bottom edge. The indicator can be determined taking into account the height of the bottom row and the required space for equipment. It is necessary to calculate the ideal level of the top drawers, which is also affected by the distance between the shelves. Nothing prevents you from making the width of the finish larger due to hidden parts, for example, adding 10 centimeters at once at the edges.
The length is determined by the components of the kitchen set. Linear units will have space for a sink, stove, dishwasher, and in addition there will be space for 2 full sections. A minimum of 40 cm is left between the stove and the sink. 70 cm is allocated for cutting and preparing cold food. As a result, the length of the apron will be approximately 2.5 meters. For 4-5 full sections there will be an average of 55-60 cm.
Location of hob and sink
Ways to position the washbasin:
- In the corner;
- Near the window;
- On a straight line;
- Island accommodation.
The sink is installed in a corner in order to save the rest of the space and use an ineffective corner one. In a U-shaped layout, installation on a straight line has worked well. The shape of the sink when placed linearly is rectangular, square and round. Window sinks were installed in some Khrushchev-era kitchens. In modern apartments, to add originality, washbasins are also installed on window sills. As a result, communications have to be lengthened.
Install the stove at a sufficient distance from the sink, at least 40 cm. Regardless of whether it is with an oven or separate, only a 5 cm interval is enough to place a dishwasher next to it. You cannot place the cooker near a window, or rather, closer than a meter. Ideally, maintain the same distance between the stove on one edge and the washbasin/refrigerator on the opposite. In a sequential linear installation, it is better to place the stove in the middle, although there are also opinions about the sink in the center.
When allowances are needed
The margin for installing the apron should be maintained mainly for thin panels. It happens that the thickness of the apron is greater than the floor plinth. In this case, the allowances will not allow you to install the furniture, so they are not made. The task will be greatly simplified by the option of masonry, clinker bricks, for example, or tiles. As for the specific size, there are recommendations to make at least 1 cm at the top and bottom, but 2 is better. Due to small allowances, the edges of the wall panel may be subject to excessive pressure. For example, when hitting the headset.
The size and shape of the apron depend not only on the installation stock. Owners always have 2 options in case there is a lot of free space on top. Some people like to fill the broken line of the upper cabinets with a backsplash, while others prefer to keep the usual linear shape.
Dimensions of a kitchen apron without wall cabinets
The top border is adjusted to 2 meters above the floor. There are no height restrictions, but the kitchen looks normal if the top half a meter or meter above the work area is left in the same design as the rest of the walls. An apron of 115–117 cm is installed above the tabletop with a height of 85 cm, including 2 cm for the bottom allowance. This limit should not be confused with the maximum of 65 cm for the apron under the upper tier. Installing cabinets on top of the facing panel will be inconvenient. Above the countertops, 80 and 95 cm high, panels of 120+2 and 105+2 cm, respectively, are attached.
There is no need to reduce the height of the apron under the free space. At least if the top of the panel is at a level of 130-140 cm. Such a design will look stupid, it is better not to highlight the apron at all. It would be correct to leave the finishing above the lower block consistent with the rest of the design.
You should not leave a free wall; it is better to install several open shelves with adequate capacity.
When allowances are needed
If a professional takes the measurements, he will tell you in a matter of seconds whether an allowance needs to be made. But how can you determine whether it is needed or not if you take measurements yourself?
This can be affected by several factors: the evenness of the wall, the presence of a plinth or an oblique cut at the bottom of the cabinet, the presence of a gap between the wall and the countertop. In any case, there are only two options for resolving this issue:
- When kitchen furniture is close to the wall. Then the standard height of the apron in the kitchen without allowances is used (the distance from the countertop to the bottom of the hanging cabinet). If the material from which the apron is made is dense enough, all the elements should fit snugly against each other, and the apron literally lies on the table (however, then it “eats” 1-2 cm of the working part of the table).
- If there is a long distance from the wall to the countertop. This is when allowances are included in the calculations. They help to visually hide the gap and protect this section of the wall from contamination.
Material and its effect on size
Popular materials:
- MDF panels;
- Impact-resistant glass;
- Tile.
In the case of tiles, it doesn’t hurt to make a covering from other fragments with a continuous finish. The height of 2 rows of tiles together with the seams will be approximately 60 cm, and in the end you will get a simple combination with a height of 56-58 cm with hidden allowances and a grout joint exactly in the middle. The tiles in general have a wide range of sizes, so you get a beautiful combination on the backsplash. It won’t hurt if the height of the apron is a multiple of 5 centimeters.
MDF can be mounted on any surface. The panels are large in size: compact ones are made with a narrow side of 40 cm. The fragments are usually adjusted to the height of the apron so as not to make thin stripes, or, conversely, the distance is selected to match the MDF elements. The ends of MDF boards are finished with protective tape.
Decorative glass cladding is ordered to the exact size. In most cases, glass skinals are made as a one-piece structure according to the dimensions of the apron. Colored glass mosaics are also popular. If necessary, puzzles are trimmed or hidden.
Installation under the hood
The area under the hood is calculated individually in each individual case; the width of the apron in this place should be equal to the width of the household appliance with the addition of a few centimeters to go under the furniture. The height is determined by the model of the appliance and the distance between the countertop with the stove and the beginning of the wall hidden under the hood.
When installing an apron made of tiles or stone, the distance to the hood is simply filled with a certain amount of material. If you use MDF or plastic with a standard width of 60 cm, you must additionally cut a piece of the required size. The joint must be closed with a special plastic threshold.
Style and colors
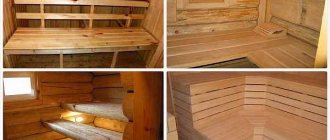
Landscapes and natural motifs are popular. They transform boring rooms beautifully and inexpensively. Aprons are made with drawings and mosaics on sea, forest, and Mediterranean themes. The style is also more complex, for example, in the spirit of loft, English interior, techno, hi-tech, eco. Treated wooden boards with a Provence, Western, or Loft look are sometimes used as an apron.
You need to experiment with color. The apron is finished with a different approach: at odds with the furniture and in color, consistent with the wall decoration and in contrast. White, blue, green tones look ideal - with any shade of the kitchen set. Softness is added with pink, orange, and purple colors.
Surfaces are chosen with any texture. For a kitchen, a glossy one would be best: a reflective coating diffuses light well and improves aesthetics.
Height and methods of placing sockets on a kitchen apron
Nests are not installed above the sink and stove. Initially, points are selected so that the rosettes do not approach less than 30 cm along, and the ideal distance is 50-60 cm diagonally. If there is not enough space, it is better to first move it away from the sink, then away from the hob.
Most points for connecting electrical appliances are located between 1 and 1.5 m above the floor. Approximately in the middle of the apron is the best place for them.
The outlet for the hood is installed behind the cabinet, just above its top edge. A power source for illumination is placed nearby.
For low power devices, lines are made of 3 sockets together. Ideally, 2 such clusters are made at a height of 15-20 cm above the tabletop. The limit is 3.5 kW per cluster.
Built-in appliances are placed at least 1 meter from the outlet on the apron. For other devices, the rule is no more than 1.5 meters.
Illumination of apron and work area
Spot lights or linear LED lights are usually installed above the work area for processing and preparing food. Point ones are mounted in the upper part of the headset or on the outer bottom of wall cabinets. Illumination is improved by rotating wall lamps and hood lamps.
The apron will receive a lot of light from lamps for the work area, but the lighting of this element, the countertop and the kitchen as a whole is also improved by additional sources. For example, long linear and tape. Linear ones are installed in one strip under the top drawers, sometimes they are built in. Tape ones are connections of lighting fragments that are laid along the apron and work area in various patterns. The cost of linear and tape devices sometimes reaches half the price of a headset, so purchasing them is a question with many components.
Common mistakes
Everyone makes mistakes. But it’s better to learn from the mistakes of others - and to warn your own in time. We talk about some of the pitfalls that accompany the design of the apron area.
Dark tones combined with grainy texture
It looks incredibly impressive, bold and always relevant. But here’s the problem: any stains are clearly visible on such a surface, and grease and soot literally eat into the top layer of the tile. Get ready to scrub them endlessly - or immediately look towards other shades.
Snow-white seams
Many owners, when laying ceramic tiles on a backsplash, want to highlight the contrast and purchase an ultra-white fugue for grouting. Of course, it immediately makes a pleasant impression and favorably emphasizes all the advantages of the chosen tile. However, over time, even waterproof grout loses its color and the seams acquire an unattractive gray tint. Therefore, it is optimal to immediately make a choice in favor of options that are not clearly contrasting.
Poor quality installation of the protective screen.
It can lead to very sad consequences when condensation from violent boiling gets onto the back side of the glass apron. As a result, the surface will become foggy instead of transparent, and if insects also crawl there, then you will have to forget about any aesthetics altogether.
Lay out the apron before installing the headset
It would seem convenient to first cover the wall with material, and then calmly hang the cabinets on top. However, this “seemingly” in practice turns out to be the fact that the furniture can rest against the tiles. If the set was made to order, this is fraught with a new fit. Therefore, the ideal algorithm is as follows: install the set - lay out the apron. And everything will be wonderful!