Installing suspended ceilings is a simple process for an experienced specialist. It is very important to take into account every nuance during installation. How long the structure will last depends on the quality of the materials used during the work and the quality of its implementation. It should be remembered that after installation, the ceiling levels in the room will become significantly lower. In order to find out how much the ceiling will drop with suspended ceilings, you should decide on the size of communications and the type of lamps. If the structure has two levels, then the ceiling height will decrease by 10 centimeters.
The distance from the floor slab to the surface of the ceiling being installed will be directly affected by several points, such as:
- Type of material used.
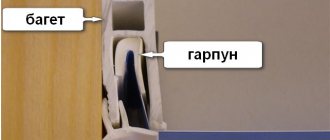
- Method of fastening the canvas to baguettes.
- A variety of connections for lighting elements.
- The number of communications that will be hidden under the structure in the future.
- It also depends on the shape of the room and height.
Reasons for lowering altitude levels
It is known that there are three reasons that determine how much the ceiling will drop with suspended ceilings at the time of installation. Each of them affects its height level:
- In most cases, voids form at the junctions of ceiling slabs and walls. This happens because these places most often do not have a flat surface. Since it is impossible to attach a frame to the voids, thanks to which the material is tensioned. If you do carry it out, the baguettes will be unreliable. For this reason, the canvas is lowered until the void in the walls ends.
- Installing lamps of any kind requires lowering the ceiling level. Lighting systems can have different types, and their size determines how far the entire structure will be lowered. The upper part on which the fastening is located must be hidden under the tension material.
- If the surface of the slab is uneven. This problem may arise from the shrinkage of the building or from the experience of the builder who carried out the renovation work. It is important to eliminate the reason why the defect may have formed. The height of the room will depend on how much the ceiling drops with suspended ceilings.
The best way to solve the problem is to change the ceiling height. If you neglect this, then at the time of installation the canvas will be uneven and unreliable.
Two-level plasterboard ceilings with lighting
Ceilings made of gypsum plasterboard have completely replaced other types of floor finishing.
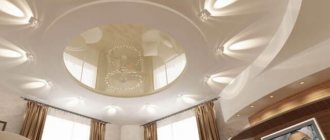
In recent years, you can often see two-level plasterboard ceilings with lighting in apartments. Having figured out the installation and studied examples of installing profiles, it is possible to make such a design with your own hands. The shape of the ceiling system can be either the simplest, consisting of rectangles or squares, or the most bizarre, made in the form of various curves and ovals. Before you do everything yourself, it is important to calculate and purchase the necessary materials, prepare tools and components so that nothing distracts you from the process.
It is worth noting that the work is not as simple as it seems, so it is better to invite a partner who is competent in repairs.
To what height does the structure go down?
A common problem for most homeowners is low ceiling levels. Therefore, everyone is concerned about how much the ceiling will drop with suspended ceilings after installation. If the top slab is flat and there are not a large number of communications, then the fabric sheet goes down only 3 centimeters. If a special PVC film is used as a base, then by 2.5 centimeters. In practice, there are rarely ideal conditions, so the level of indentation can vary from 2.5 to 16 centimeters.
In some cases, due to the unevenness of the ceiling surface, measurements on one side of the wall show an indentation of 4 centimeters, and on the other 10, so the owner’s decision is necessary. Sometimes the walls under the ceiling have gaps up to 6 cm in size; construction waste is most often placed in them and then covered with mortar. In order for the entire structure to hold firmly, it is necessary to determine the presence of voids. If the fastener is installed in this place, the baguettes will simply disappear.
Materials and tools
Before you make a two-level plasterboard ceiling with lighting with your own hands, you need to measure the room and buy gypsum board with a reserve, since the sheet can be broken due to carelessness or miscalculated in size. Stock up on profiles in accordance with measurements and screws and dowels:
- the guide and ceiling profile have a standard length of 3 m;
- required estimated number of hangers for profiles;
- anchors with self-tapping screws;
- screws for metal;
- dowels of various lengths.
Tools you will need:
- metal scissors for cutting profiles;
- hammer drill if the walls are made of reinforced concrete (with a reliable drill or drill);
- level (you can get by with the usual one);
- pencils for marking, construction tape;
- drill or screwdriver with various attachments and drill bits;
- hacksaw and plane for processing the edges of plasterboard, square.
For those who have installed the frame of a single-level ceiling with their own hands, it will not be difficult to make a two-level ceiling, but it is better to start installing a gypsum board ceiling on two levels with simple structures, rectangular or square in shape, without complex bends.
Installation of lighting elements
Installation of lighting elements is an important part in the installation of suspended ceilings. They should be connected first. How much the suspended ceiling is lowered when installing the entire structure depends on which lighting fixtures are chosen. If you plan to select different types of lighting fixtures in one room, you can visually divide the room by height. Types of lamps that can be installed under structures:
- LED lamps.
- Chandeliers.
- Spots (spotlights).
- Halogen light.
- LED Strip Light.
To make a choice, you need to have an idea about each type of lamp. The height level will depend on this. It is important to remember that the suspended ceiling frame must be made of durable material; this is necessary for the reliability of the entire structure. This is required to a greater extent when choosing large luminaires.
How to visually increase the ceiling height in a low room?
In apartments where the height of the walls is initially small, the suspended ceiling causes the rooms to seem even smaller than they actually are. To remedy the situation, there are several techniques successfully used by designers:
- Understated furniture. Despite existing standards, which, by the way, are outdated in most cases, you can use low sofas with armchairs, low chests of drawers and cabinets. This technique makes the room wider.
- Pasting striped wallpaper. In this case, the stripes must be oriented vertically. They shouldn't be too narrow. You can also paint the walls, make them striped, which will visually “raise” the ceiling.
- Stretch not matte, but glossy fabric. Reflection adds extra volume. And in combination with vertical stripes on the walls and low furniture, the effect is enhanced significantly.
- Flat and built-in lamps. Hanging or overhanging chandeliers are not suitable, and caring for them is more problematic. It is much better to install a flat lampshade and LED spotlights.
Combine methods. You can make another level along the perimeter or along one or two walls. Outwardly, it will seem that the middle, larger part is recessed, which will also add volume to the room. You won't have to rebuild anything. All methods are exclusively design. The main thing in cramped conditions is not to use massive furniture, especially if it is also high up to the ceiling.
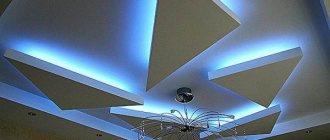
LED strips
LED strip is often used in surface finishing. Its use makes it possible to correct any unevenness that may occur during the installation of the sheathing. The first step is to decide how many cm the suspended ceiling is lowered, and then deal with the installation process. Most often, the height level varies from 2.5 to 10 centimeters when using such lighting.
If the stove in the room is located high, then you can make a maximum indentation of 10 centimeters without fear that the room will be low. It is important, based on the height of the ceilings, to make a choice of material for stretching the threads. They differ depending on the level of the top plate. In the case of a low ceiling, some types of materials are used, and in the case of a high ceiling, others are used.
Two-level plasterboard ceiling with lighting
It is worth paying special attention to this important stage and doing everything carefully. It is necessary to set aside the distance from the lowest corner, moving down, the distance should correspond to the distance to the lowest level of the ceiling. Do the same by securing the plasterboard structure to the side rails. Then secure the corners along the perpendicular edges of the lower ceiling and the vertical inner wall. Putty the joints.
The only drawback can be considered the dust emitted upon contact with plasterboard sheets, which is harmful to human health. In general, the double ceiling will look very impressive and will become the main decoration of the interior, and a backlit solution will add sophistication. You will need a couple of profiles - UD and CD.
UD is a guide profile mounted both on the wall and on the ceiling, as well as at the fastening point of the side, if it is present in the center of the structure. CD is a more rigid, load-bearing profile from which the lintels and racks are created; the plasterboard sheet is attached to them. Fix the plasterboard sheets in the center by hanging corners and crosses. Make a skeleton to attach the drywall to.
Such fittings can be used for profile ties.
Spots
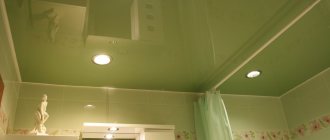
Recessed spotlights of the spotlight type are used in decoration. They require reducing the ceiling level from 6 to 10 centimeters. During the work, it is determined how many centimeters the suspended ceiling is lowered, but within acceptable limits. At the time of installation, holes with a diameter of 4 millimeters should be cut on the canvas. After that, a ring made of plastic is glued to the edges of this hole. It allows you to prevent defects that may form when the fabric is stretched. Lamps of this type can be installed in two ways.
Additional Selection Considerations
When choosing spot lighting products for various types of floors (made of plasterboard, suspended or tensioned), you must, first of all, rely on the type of socket design the device has. The type of socket will determine the size of the light bulb that needs to be screwed into the socket. And the depth at which the device will be placed directly depends on this (if a built-in type is used).
Light bulb socket
Such devices have cartridges:
- E27 – designed for a standard light bulb, so it’s quite large;
- E14 - “minion”. Quite small;
- G4, G5, G9 – these bulbs have pins, which allows them to reduce overall dimensions.
As you can see, the standard sizes of cartridges have a direct impact on the dimensions of point models. We've sorted out the range of product choices. Now let's look at what devices need to be used in each individual case.
Methods for installing spots
This installation option is more effective, as it creates a visual impression that the light is emitted by the canvas itself. In this case, no holes are made. But this option has a lot of disadvantages: due to lack of air, the lamps overheat, in case of burnout it is difficult to replace the light bulb, and the level of emitted light decreases. If you still plan to use this option for lighting the room, you should purchase energy-saving light bulbs. They don't get very hot and will last longer.
At web level, the installation is more practical to maintain and safer to use.
Technical advantages
A large selection of spot lighting characteristics provides a variety of functional features. But its positive qualities, first of all, depend on the quality of the device and its configuration:
- The presence of a uniform wide angle of illumination and the ability to control it;
- Safety in high humidity;
- Protection from dust, vibration, mechanical damage;
- Low power consumption;
- Remote control, which is convenient for high ceilings;
- Increased service life;
- Possibility of using different lamps;
- No noise, flicker or glare;
- Compact and aesthetically appealing.
Each user will find other additional benefits for themselves.
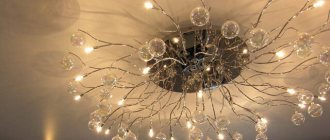
Chandelier installation
Depending on which chandelier is chosen, it is decided how much the suspended ceiling with lamps in the entire room is lowered. Chandeliers come in several types:
- Chandeliers that are installed directly to the ceiling.
- Hooked, they are hung on hooks that are mounted on the stove.
It is best to choose the lighting option and type of fastenings after installing the baguettes. Installation of hooks is carried out with an indentation of more than 3 centimeters from the upper base to the canvas. It should be remembered that after some time a slight sagging of the canvas may occur. Therefore, it is better to lower the chandelier lower, with a reserve.
Where to begin
Before constructing a two-level plasterboard ceiling with lighting, you should think about the shape and arrangement of the tiers. If you don’t like the option of a flat ceiling panel with built-in lamps, you can find a ready-made one, which shows all the calculations for gypsum boards and consumables.
But most often you want to get a unique design, like no one else has. Then it’s worth making your own sketch, taking into account the interior of the room where it will be installed.
It is necessary to take into account all the details, taking into account the design.
A ceiling model with extended sharp corners in a room with soft oval curves of furniture or a high-tech design in a room with a classic interior will look ridiculous.
It is worth noting that such a ceiling is installed only in a room with high ceilings, otherwise the surface will press and the space will be significantly reduced.
When installing two-level plasterboard ceilings with lighting in a room with high ceilings, you can install a system zoning the room using certain lighting techniques and multi-level structures.
It is necessary to pay attention to the microclimate of the room in which do-it-yourself gypsum plasterboard structures will be installed. For example, they are under no circumstances acceptable in damp areas such as the bathroom. Even slight wetting can lead to deformation of the plasterboard, after which repeated repairs become inevitable.
Sagging of the canvas
In some cases, after installation, suspended ceilings may sag after a certain period of time. Therefore, you should think in advance how much the suspended ceiling is lowered during installation, as this is very important. Reasons for sagging may include factors such as:
- Poor quality of fabric.
- Installation by unscrupulous workers.
- Violation of installation technology.
- The moldings on the walls are not installed correctly.
If the tension structure is installed using all technologies using high-quality fabric, the sagging will be insignificant. It will be visually invisible; in percentage terms it is equal to one percent of the length of the room along the diagonals.
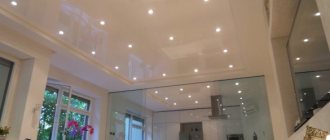
Photos of spotlights on a suspended ceiling
It’s not that difficult to choose the right models yourself. But if in doubt, you can always contact a store consultant or designer. They will tell you which of the presented lamp options are best suited for a stretch ceiling, help you calculate the required quantity and recommend how to arrange them. Our selection of photographs will help you make a preliminary selection of the model and design you like.
What do security numbers mean?
Standard models provide a regulated protection indicator - it is indicated by the abbreviation IP. The two numbers next to it indicate:
- The first is to protect against clogging of the structure with solid particles. 0 – no protection. From 1 to 4 – possible ingress of particles (in descending order of their size). 5 – the structure is completely protected from the penetration of dust grains;
- The second is the degree of protection against moisture. From 0 to 8, where 0 means there is no protection from moisture, and 8 means it can withstand prolonged immersion in water.
Types of lamps by consumption
Designers recommend using energy-saving lamps and LEDs. They have a number of advantages: they last a long time, do not get hot and do not dazzle. However, these light sources cannot be used for all rooms.
If the lamp is made of durable, high-quality metal, then you can use an incandescent lamp. This would make sense in a year-round greenhouse where warmth is needed or in a basement.
220 V
Incandescent lamp. The glass bulb contains a spiral that heats up and produces bright light when current is applied.
Lamps are divided into types:
- painted, mirror, matte bulb;
- power – 25-150 W.
Matte or painted lamps are inserted into lamps in the bedroom or a separate area of the room for decoration.
The advantage is low cost, easy installation.
Disadvantage: it gets hot and breaks down quickly.
Energy saving
Halogen, fluorescent, LED light sources.
Halogen lamps are used as additional lighting for one area of a large room or as illumination of an object.
Indicators: power – 1-20 W, light output 15-22 Lm/W, operating life up to 4,000 hours.
If a halogen lamp is dirty, it will quickly fail.
Luminescent - have different shades of light. Are there any markings? in which the letter G denotes a design with pins, E – thread.
Characteristics: light output 40-80 Lm/W, power up to 80 W. Operating life up to 40,000 hours.
LED light source. It is based on a semiconductor crystal. The downside is that over time the crystal doesn't shine as brightly.
Characteristics: power up to 30 W, light output 120 Lm/W, operating life up to 50,000 hours.
The disadvantage is the high price.

