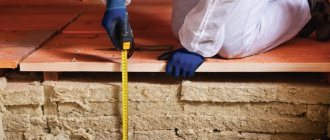
Not so long ago, those who received a warrant for an apartment in a new building could move in and live in peace. Today, before moving into a new house, owners will need to make repairs. Most housing is rented without finishing. This is a way to reduce the cost of an apartment. Residents are given the opportunity to acquire their own corner at an affordable cost. The result is an economical option. The studio type of housing is popular. The owners purchase walls without finishing or partitions. You will need to paint the walls, install plumbing, level the floors and surfaces. New residents perform all rough and finishing work. Owners should not forget about pre-finishing work. The correct procedure for repairing a new building without finishing is described below.
We remember about shrinkage and neighbor's repairs
Before you make a renovation plan, think about settling your home. The desire to do rough and final repairs at once is understandable, but in the case of a new building, do not rush to do it.
Shrinkage of a house takes 1-2 years. Craftsmen advise that before moving, only perform rough finishing and postpone the remaining work for two years.
You are not the only one who is renovating an apartment in a new building, that is, there is regular vibration of the hammer drill, dust from the ventilation duct, and much more related to the activities of the neighbors. In addition, the new walls and screed add weight to the house, so it begins to shrink again.
Bottom line: in panel and brick new buildings, before moving into your apartment, do only rough repairs, put everything else aside for 1-2 years. In a monolithic house, you can immediately begin a complete renovation, but do not neglect preventive measures for a “walking” house (reinforcement, expansion joints, etc.; it is better to hire an experienced company that will do a turnkey overhaul using modern technologies).
Complete turnkey apartment renovation
- Everything is included The cost of repairs includes everything: work, materials, documents.
- Without your participation After agreeing on the project, we only bother the owners when the repairs are completed.
- The price is known in advance. The cost of repairs is fixed in the contract.
- Fixed repair period Turnkey apartment renovation in 3.5 months. The term is fixed in the contract.
Read more about Done
Performing rough operations
The developer can perform rough screeding and plastering of partitions. Next comes the finishing touches. But first remove all construction debris, concrete deposits, and plaster. Check how smooth the walls are. It is possible that you will have to scrape off or cut off excess material.
The work is quite dirty. Prepare in advance a large number of garbage bags and respirators. It is better not to close windows during cleaning, even in winter.
Next, proceed to the longest stage - pouring the concrete screed. Preliminary:
- fill holes between the slabs if there are any;
- place interior partitions in places where they are permanently located. We are not talking about lightweight plasterboard structures, but about walls made of brick or foam blocks. If partitions already exist, check for the presence/absence of cracks and through holes.
First, a reinforcing mesh is laid on the floor. A sand-cement mixture is poured on top in the proportion of 1 part cement x 2 parts fine crushed stone x 3 parts quarry or river sand, carefully sifted. It is better to take drinking water rather than tap water so that the chemical composition of the concrete mixture does not change. The screed should not be too liquid.
Complete hardening and strength gain will occur after 28 days. Then SNiP allows you to start laying tiles, linoleum or laminate. Walking on the new screed is allowed after 4-5 days. It is not recommended to artificially accelerate the drying percentage. Ideal drying conditions:
- humidity up to 70%;
- temperature not higher than 250C in the absence of drafts and direct sunlight.
- Standard cement screed can be replaced with gypsum screed, but not in the bathroom or kitchen. The screed will be ready for further work in a week, and walking on it is allowed after 4-5 hours.
A little more about timing
Now you should think about buying building materials. In winter, market activity subsides, so prices may be more pleasant than in other seasons. But it’s better to start work in the spring - this is true if you don’t want to renovate the apartment yourself. The fact is that in the spring the crews are not so busy, and the cost of their work is sometimes lower during this season.
Helpful advice!
You don't like the heating radiators supplied by the developer, so you want to replace them with more modern, stylish and reliable ones? Then, even more so, plan repairs taking into account the heating season, because such a replacement will require disconnecting the risers, and in winter the management company will not agree to this.
What to consider when planning a renovation
As soon as a certificate confirming ownership is received, property taxes will begin to be charged on the apartment. The owner is already required to pay rent for the use of electricity, gas (if available), and water. No one lives in the apartment yet, doesn’t fully use any of the square meters, and bills are already appearing in the mailbox.
Sergey Yurievich
Construction of houses, extensions, terraces and verandas.
Ask a Question
If you want to resell the property, the apartment begins to generate losses from the moment it is put into operation. Therefore, do not put off repairs for a long time.
Budget
You need to understand how much money you are willing to spend on repairs, because the amount of work directly depends on this. Show flexibility: you will have to invest heavily in some things, but you can spend little on others. What can't you save money on?
- Floor and walls. Remember that they must be smooth and of high quality. Investments in them are long-term, that is, having done everything well once, you can forget about it for a long time. You can only invest well in surface preparation, but you can also save money on the finishing coating, for example, on wallpaper.
- Engineering Communication. Facilities such as heating, electrical, sewer and water supply must be reliable and safe. Saving on this expense item can lead to an accident, and then it will be not only about money, but also about nerves, health and even life.
- Redevelopment. If you obtain all the permits and properly organize the space in accordance with your preferences, living in an apartment in a new building will be comfortable and pleasant. If you have enough money, do the redevelopment at the highest level.
Where does renovation begin in a new building?
First, change the doors, or at least the locks. Hundreds of people looked at the apartment before you; someone “accidentally” might have duplicates. In order not to worry about the safety of your property, start repairs from the front door.
At the next stage, invite an experienced electrician, preferably from a management company, to install a distribution panel. Otherwise, you will not be able to use either a hammer drill or a concrete mixer.
When installing electrical wiring, consider the following:
- in rooms with high humidity, special waterproof sleeves are used for laying wires and cables;
- for the washing machine, boiler, air conditioners, separate cables are laid, designed for a current of up to 25A;
- mandatory grounding, in particular for power cables.
The cable must be continuous from the distribution panel to the final outlet. Twisting and soldering are tantamount to short circuits and failure of the entire system.
After installing electrical wiring, do not forget about water supply and sewerage. No one lives in the apartment yet, but water will also be needed for repair work. Install a toilet and at least one sink. Do not immediately spend money on exclusive options - limit yourself to the simplest ones during the renovation. They won't feel sorry if something heavy falls from above and cracks appear. Use high-quality sewer and water pipes, in particular if you plan to “embed” them in a wall or floor.
Project
For this purpose, it is better to hire an architect or designer to think through the interior equipment together with professionals. A plan is needed for all rooms, every corner: what will be placed where, where and what light sources to place. Don't forget about windows, partitions, radiators, etc. - all this should be noted in the project. Make it as detailed as possible. For example, the dimensions of the sofa affect the height of the sockets.
Interesting fact!
The word repair comes from the French remonte, meaning “replacement, secondary equipment of horses.” The officers who purchased horses for their regiments were called repairers.
Installation of plumbing fixtures
Installing equipment in a new room is not difficult, the main thing is to correctly connect all the existing pipes. A certain sequence of actions can be distinguished:
- Before installing the bathtub, you should connect the siphon; a corrugated hose is best suited for this.
- When the tightness of the hose is checked, the bathroom is grounded.
- Depending on the drain, the sink can be installed on a separate pedestal or mounted in a cabinet; models mounted on walls are no less popular.
- If the bathroom is combined with a toilet, a toilet is installed. It can only be installed in a certain place where there is a sewer drain.
The toilet is also selected depending on where the drain is located. You can fix the plumbing fixtures to the wall, use hanging models, or install the toilet on the floor.
Materials
It's time to decide on the materials. We need a list of works and materials that will be required for them. Choose:
- bathroom tiles;
- coatings for all surfaces - floors, walls, ceilings (plaster, wallpaper, etc.);
- doors;
And all the rest.
Helpful information!
Not only the cost of materials matters, but also consumption. The consumption of high-quality materials is lower, due to which finishing with expensive options can ultimately be cheaper compared to using budget finishes.
Approaches to renovating an apartment in a new building
Experts distinguish two types of repairs: planned and rapid.
Planned option
Good for those who are decorating an apartment for themselves and intend to live here happily ever after. A work plan and estimate are drawn up. All stages are outlined with the necessary materials and deadlines. A team is selected, including the necessary specialists: plumbers, plasterers, painters, etc. The work is carried out systematically, the deadlines for screeding are maintained (at least 28 days), and puttying and plastering technologies are followed.
Flaws:
- the estimate in most cases turns out to be exceeded;
- the process risks becoming endless. If craftsmen are paid not for results, but on a time basis, they will not be in a hurry. At your expense.
Planned renovations should be targeted at those who have a place to live, who do not rent an apartment and do not count every ruble spent on decoration. Among the advantages of this option:
- no rush. There is an opportunity not to miss anything important or significant in later life;
- careful planning. The wishes of all family members, children, parents are taken into account.
Quick repair from scratch
In a minimum amount of time, the screed is poured and the plumbing is installed. In one of the rooms, the walls and ceiling are being decorated to provide a place to live. Then, as money arrives, all other premises are put in order.
This option is considered more economical. The apartment is used for its intended purpose. The repair period depends only on the financial capabilities of the owner and his desire to live in comfort. Disadvantage: ten years will pass in such a “temporary structure” and the state of permanent decoration of the surrounding space.
Necessary destruction and accurate measurements
If necessary, we demolish unnecessary walls and expand openings. That is, we remove everything that is not needed, as well as all garbage.
If according to the plan you want to change doors and windows, you need to take measurements and order finished products based on them.
Interesting fact!
During the construction of the Great Wall of China, sticky rice porridge served as a fastening solution. A mixture of cooked rice and slaked lime has proven to be an excellent formula for longevity.
Don't skimp on pipes
Pipes made of cross-linked polyethylene bend, so they are easy to install, and the system turns out to be reliable / Photo: Mitrofanov.vd / Wikimedia Commons They
usually try to save money on pipes in three ways: buy cheaper, order a simpler circuit and ignore unnecessary parts. But sometimes such frugality can have not very pleasant consequences.
- Polypropylene water supply pipes are cheaper. But they do not bend, so they have to be cut and connected with fittings. As a result, connections become weak in places and leaks occur. I recommend cross-linked polyethylene pipes: they are more expensive, but the material itself is more reliable. It is also easier to work with such elements because they are flexible and do not require additional connections, which eliminates installation errors.
- Pipes are combined in a series or parallel (collector) way. The first option is cheap, but inconvenient: if the faucet in the bathroom breaks, the water will have to be turned off in the kitchen. With manifold wiring, each device functions separately, so if something fails, the rest of the plumbing can be used.
- A coarse filter must be installed on water supply pipes, which traps large impurities such as grains of sand. A fine filter is sometimes added to it - it copes with smaller particles. Thanks to it, sanitaryware, faucets, fittings and pipes last longer, and softer and cleaner water flows from the tap.
- Sometimes there are different pressures in the hot and cold water supply pipes, which is why the heated stream flows back through the cold pipes: this results in an overconsumption of hot water according to the meter. To prevent this, you can install a check valve: it prevents the hot flow from entering the cold water supply pipes.
Saving on pipes leads to leaks, unnecessary expenses or inconvenience in everyday life. It is better to reduce expenses on tiles or expensive accessories than on communications.
Repair plan itself
The plan for renovating an apartment from scratch in a new building includes stages, neglect of which is fraught with unpleasant consequences. At the same time, both the stages themselves and the quality of their implementation are important.
If you don’t have the time, experience and energy, it’s better to entrust the work to a company that deals with complex major renovations of apartments. You will only need to agree on the design project with a professional architect, and then accept the work. Think about how much time, effort and nerves this saves. You move into a completely finished apartment, arrange the furniture and move on with your life with maximum comfort.
Regardless of whether you do the repair yourself or decide to entrust it to a company, it is important to know the steps. It is important to understand that the apartment can be rented with a rough renovation already done. In this case, if you are satisfied with everything, we begin the finishing work. If changes are required at the draft stage, we start everything from scratch.
Where to start: sequence of actions
If you purchased property from a developer without finishing, you will need a step-by-step work plan. To a person not particularly familiar with construction, the repair procedure is not at all obvious. And since renovating an apartment from scratch in a new building will require going through all the stages, a plan is simply necessary.
Technology for renovating an apartment in a new building - it all starts with a plan
What does it mean to “renovate an apartment from scratch in a new building”
To determine the scope of work, you need to know where you will start. What you will receive after delivery of the object is specified in the contract. Therefore, we take it, read it carefully, and then we can start planning the order of work. Usually an apartment in a new building without finishing is rented in this condition:
- Windows (usually double glazing) and entrance doors (cheap and not particularly reliable) are installed.
- Walls without finishing (concrete or brick, building blocks), internal partitions - depending on the contract: they may or may not stand.
Apartment renovation from scratch in a new building: everything that is there - entrance doors, walls, windows, heating, water supply, sewerage and gas - The floor is a concrete slab without screed.
- The ceiling is the lower surface of the slab without finishing.
- Electricity has been supplied to the apartment; there is a small electrical panel in which one machine is installed. Usually there is one light bulb in the corridor (on temporary wiring).
- The heating is turned off, there are radiators, shut-off and control valves. Heating is the only thing that is ready for use at any time, since this is common property.
- Cold and hot water - risers are brought into the apartment, there are outlets on which there are meters (sealed). After the meters there is a tap, to which you can connect if necessary.
Only the kitchen can have one plastered wall - gas workers require a meter to be installed - Sewerage - there is a riser and a drain, closed with a plug. The system is ready to connect.
- If gas stoves are used in the house, there is a gas inlet, a meter, after which a plug is installed. Only Gorgaz representatives can connect gas appliances.
Basically, this is all you have before you start renovating an apartment from scratch in a new building. Everything is in its infancy, but all communications have failed.
Apartment renovation in stages
You should immediately decide on the partitions. Decide where and which ones will stand, which ones will need to be removed/moved. If the partitions already exist and you are planning to redo something, you need to get permission and only then proceed with the transfer. If there are no partitions and you will install them yourself, the contract stipulates what materials you can make them from. It is better to adhere to the recommendations, otherwise you may receive penalties, and they are considerable.
Developing an apartment plan
After approving the apartment plan, you first determine where you will have large-sized furniture, appliances, plumbing, etc. You will need this data to prepare a plan for laying utility systems (water supply, sewerage, lighting, and, if provided, ventilation). When the plan is more or less ready, you can begin the repair itself. The sequence of actions is as follows:
- Installation and transfer of partitions according to the approved project.
Technology for renovating an apartment in a new building: installing partitions - While the partitions are being built, you are simultaneously (or order) developing an electrical wiring plan. After the partitions are in place, electrical wiring is done - wall slitting, cable laying (necessarily three-core - with grounding, the cross-section of conductors for electrical wiring is selected individually). Depending on the type of cable, it is laid either with or without corrugation. Cables are not connected to the panel, sockets and switches are not installed. Only distribution boxes and socket boxes are installed, and the ends of the cables are inserted into them. Electrical wiring is laid: in grooves in the walls;
- in the floor under the screed;
- on the ceiling if a suspended or suspended false ceiling is planned.
Electrical wiring layout
Cold and hot water pipes, sewerage
Plastering walls - quality is important
Putty is almost a final finish
Use a screed to level the floor. Apartment renovation from scratch in a new building is almost complete
This is the procedure for renovating an apartment from scratch in a new building in the general case. There are particulars, but they are individual. Then, depending on the situation, shift or swap the stages.
Construction of walls and partitions
Performed in accordance with permits and design. There are many options for what to make partitions from. A popular solution is to use tongue-and-groove slabs, although they are quite heavy. They are laid according to the principle of the designer.
If the surface of the partitions is even and smooth, there is no need to plaster, just treat it with a primer.
Helpful information!
If you choose aerated concrete walls, you can install electrical wiring in them along with the general wiring. In the case of frame partitions, the wires are laid immediately.
Laying pipes, electrical wiring and other communications
Many craftsmen know how important it is to choose suitable pipes, since the material from which they are made plays a big role. Typically, polypropylene pipes are used; this material is quite durable and can last longer.
We recommend reading: Piping in the bathroom and toilet
When it is necessary to install pipes in the bathroom, they are usually hidden in the walls so that they do not spoil the appearance of the room after finishing. Grooves are made in the walls, and pipes are laid in them, and communications are closed from above using tiles.
The process of laying pipes is very important; it must be done correctly to avoid blockages and poor pressure. If the owner has never done this himself, he should seek professional help. The craftsmen will also be able to install a filter and counters, if necessary.
When carrying out electrical wiring, first a plan is drawn up that indicates its location. Based on the completed project, they begin to lay the wires.
Installation of communication systems
It is necessary to install water supply pipes and connect the sewerage system. If the partitions are load-bearing and of sufficient thickness, pipes can be mounted in grooves. If this is not possible, it is reasonable to install the bulk of the pipes in the bathroom. They can be closed with a box.
First, cold water is supplied, then hot water is supplied to the bathroom and kitchen.
Helpful advice!
To prevent the disgusting smell from the sewer in the room, install special plugs. They are important if the communication connection will be made later.
By the way, already at this stage you can equip the ventilation openings with special grilles.
Latest finishing work
At the last stage you will need to complete:
- laying laminate, carpet and linoleum. If you have experience or qualified assistants, you can save on hiring third-party personnel. If not, you will study another time. Distortions and unevenness on the floor cannot be masked by anything. These are not walls where a stain on the wallpaper is covered with a painting;
- connecting lamps, chandeliers, sconces, installing sockets, toilets, sinks, shower cabins, bathtubs.
A significant part of the repairs in a new building can be done with your own hands. But trust certain stages (installation of electrical wiring, suspended ceilings, windows, doors, heating equipment) only to professionals. This will save time, money, and nerves.
Alignment of walls
If plastic panels are installed, plaster is not needed, because this material is mounted on the sheathing. In the case of other materials, plaster is needed. Today there are ready-made mixtures for this.
You can plaster using a building level, but it is better to use beacons.
Note!
Before plastering, prime the surface, this will improve the adhesion of the walls and plaster.
By the way, you can use “dry plaster”, that is, cover the walls with plasterboard sheets. It's quick and simple, all electrical wires will be hidden under this material, so you won't have to cut partitions for them. However, this method is not acceptable in damp rooms.
Finishing work
While the screed dries and gains strength, start finishing the walls of the kitchen and bathroom. A good option is tiles. If you have work skills, it is better not to start studying and not to try to lay it with your own hands. A specialist will do everything faster, more beautifully, and smoother.
For the living room and bedrooms, the choice of finishing materials is greater: decorative plaster, standard, liquid and paintable wallpaper, decorative painting. If the walls are plastered in rough form, leveling and applying a primer are carried out.
Drywall will help you get perfectly smooth surfaces.
Decorative protrusions, openings in interior partitions, and suspended ceilings are also made from it. For walls, choose a thickness of 12.5 mm, for the ceiling 9 mm. The advantage of drywall is that you can hide wiring, utility networks and communications behind it without cutting into the walls. Don't forget about spot lighting.
The joints of the ceiling and partitions, corner joints are masked with decorative cornices and plastic “stucco”. If you want to order suspended ceilings, first fully prepare the walls for finishing.
Next, proceed directly to the design. To avoid having to re-clean the floor from dust and debris later, as soon as the screed gains its initial strength, cover it with cheap linoleum or plastic film.
Pouring the floor screed
At this stage, you need to decide whether there will be insulation and sound insulation. Maybe you want to install a heated floor.
The screed can be done using a cement-sand mixture or self-leveling floors. The last option has proven to be better.
Interesting fact!
Warm floors were used by the Romans in ancient times. This device was called “hypocaust”, when a free space was made above the floor, providing access to hot air into the rooms above it from the stove or fireplace.
Installation of accessories and entrance doors
This process begins when all renovation work on the premises is completed. The owner can install a suitable door in the room, and then arrange the required furniture and accessories in the bathroom.
Accessories include mirrors, lights and lamps, various hooks. It is not recommended to install the door before the repair is completed, since during roughing and finishing work there is a high probability of damaging it.
Choose grout for tiles
There are two types of grout available at retail outlets: cement and epoxy. The cement version is used for ceramic tiles and porcelain stoneware. This grout is easy to apply, but over time it cracks and begins to leak water. Usually it lasts for 10 years, but it can become unusable earlier: it depends on the shrinkage of the house, the temperature and humidity in the room.
Epoxy grout is used in conjunction with glass mosaic. Application is more difficult, but this material does not allow water to pass through and remains in its original form much longer than the cement version. However, you should not use epoxy grout for ordinary ceramics: the composition will clog into pores and irregularities and will not wash off from the surface. And cement grout will ruin the look of the glass mosaic - the finish will fade.