The peak of popularity of acrylic bathtubs has already passed, now many users are trying to increase the life of this well-advertised plumbing fixture. Users' personal practical experience shows that manufacturers' advertising brochures are very far from reality; acrylic bathtubs have significantly more disadvantages than advantages. As a result, in all operational indicators they are significantly inferior to bathrooms made using traditional, familiar technologies.
Repair kit for acrylic bathtubs
Quite a lot of money spent by buyers does not allow them to immediately change baths that have lost their original characteristics; they try to repair them. The result of the repair depends on the qualifications of the technician and the quality of the repair kits.
If a defect appears on the bathtub, the owners try to eliminate it without completely replacing the bathtub with a new one
Important. There is no need to be under the illusion that after renovation, an acrylic bathtub will be better than a new one. At best, you will be able to restore its performance by 70–80%, keep this in mind. There are no technologies for repairing plumbing products that allow us to completely restore factory performance.
A defect on an acrylic bathtub will still be noticeable after repair, if you look closely
We will try to give objective assessments of the existing repair kits for acrylic bathtubs and give step-by-step instructions for their use. What do manufacturing companies offer for repairing acrylic bathtubs?
How to make your own bath cream?
Folk remedies made from improvised ingredients can completely replace professional products for cleaning acrylic bathtubs.
In one of the simplest recipes. You need to prepare half a liter of hot water, 15-20 g of baby soap, 100 g of soda, aromatic oils for scent. Rub the soap on a fine grater, add water and leave. After a few hours, mix the thick soap solution with soda. For aroma, add a few drops of tea tree oil, bergamot, orange or lemon.
Soak a soft cloth or sponge with the resulting mixture and thoroughly wipe the surface of the bathtub. Leave for half an hour, then wash off - cleanliness and a pleasant smell are guaranteed. The home remedy does not harm acrylic and is absolutely safe for the skin of your hands.
Preventing contamination
Compliance with the basic rules for using an acrylic bathtub will save you from unnecessary costs and make it easier to care for your plumbing, prolonging its service life.
No. 1. Do not soak laundry. The components of washing powders are not always comparable to the polymer coating. In addition, if bright clothes fade, then the bathtub has every chance of “absorbing” the paint. This property of acrylic must be taken into account when washing your hair after “fresh” painting.
No. 2. Taboo on bathing animals.
Pets' claws will damage the polymer coating. As an option, you can put “anti-scratch guards” on the paws and place the animal on a bedding
No. 3. Caring attitude. Do not place heavy objects, metal basins, etc. in a plastic tank. They can deform acrylic and leave dents and scratches.
No. 4. Regular care. The best way to prevent the formation of tubular stains is to clean the bathtub after each bath. Simply rinse the bowl with warm water and remove any drops with a cloth.
If it is no longer possible to tidy up the surface of the polymer plumbing fixtures, it is better to buy and install a new acrylic bathtub or carry out repair work using an acrylic liner. We advise you to read our recommended articles.
Polishing
There are special liquids for polishing acrylic bathtubs. We recommend using them if it is not possible to repair scratches with a repair kit or paint them. It is better to polish scratches on an acrylic bathtub by hand. You can use the softest felt circle for a drill, screwdriver or grinder.
Acrylic polishes can have different bases. Basically they matte the coating. It is better to use a wax-based polish - it gives the surface an even glossy shine. Despite the type and composition, the procedure is the same:
- Rinse with detergent, dry or wipe the bathtub;
- Apply polish to scratches or abrasions;
- Polish the surface by hand or with a tool;
- Rinse off any remaining polish.
Important
When polishing with a drill, grinder or screwdriver, set the tool to minimum speed. Periodically clean the area being treated and check how well scratches and abrasions are removed.
Restoration with liquid acrylic
If an acrylic bathtub has lost its original color, has become cloudy or is covered with small scratches, it is not necessary to write it off. It is possible to update plumbing fixtures using the method of surface treatment with liquid acrylic.
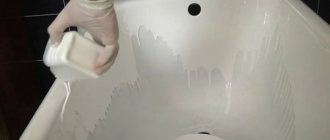
Restoration work requires preliminary preparation. This will take no more than an hour. The essence of the procedure is to thoroughly wash, dry and remove the shut-off valves (meaning the siphon). Cleaning is carried out using soda and fine sandpaper. Moisture is removed with a hair dryer. Remaining water forms bubbles in the coating, which will cause the acrylic to peel off.
Liquid acrylic is prepared according to the instructions. Most often, the polymer coating is mixed with a hardener. Then the mixture is applied to the work surface with a glass. It spreads well throughout the bowl. It takes less than an hour to process the entire area. Over the next hour, the acrylic continues to spread over the walls, forming a monolithic layer. The masking tape and protective film are removed after the liquid has completely hardened.
When performing work, it is recommended to take the following precautions:
- You need to wear gloves on your hands, wear work clothes, cover the floor and adjacent surfaces with film (acrylic cannot be washed off after hardening).
- The bathtub drain is installed after final drying.
- You can remove the protective film only after the working solution has hardened, when it will not stick.
Properly carried out restoration will return the bathtub to its whiteness, shine, and smoothness.
Work technology
Preparation for restoration
In this section, I will tell you how to update a worn-out bathtub with your own hands using pour-in technology. There is nothing complicated here, but we still have to spend quite a lot of time on preparation - after all, the result largely depends on the quality of this stage of work.
Sandpaper is definitely not enough here...
Review of chemicals for acrylic
When purchasing, you can ask the consultants how to clean an acrylic bathtub, because not every solution is suitable for this material.
The most effective mixtures are able to combat serious stains without harming the coating.
Bass
Professional product for baths, showers, acrylic sinks. It can also be used to wash chrome and metal taps, faucets, and heated towel rails.
The product does not contain abrasives and has a gentle effect on coatings. The product is intended to combat old rust stains and limescale.
The solution destroys unpleasant odors, mold and mildew. When used, it decomposes without harm to health and does not damage the surface being treated.
Penetrating into the structure of drips, it destroys corrosive particles. After washing, the bathtub acquires a mirror shine.
The mixture creates a durable protective film that protects the surface from exposure to aggressive environments for a long time.
Cif
Cleaner for acrylic sanitary ware. Thanks to the formula with active microgranules, it copes well with any contaminants.
You can easily clean:
- mold;
- red streaks;
- raid.
Disinfects surfaces, eliminates bacteria and germs. The composition gives a whitening effect, but does not have a destructive effect on acrylic.
Cif spray and gel is suitable for washing bathtubs, showers, washbasins, toilets, tiles, and cabinets. The main advantage is that when working with the substance there is no need to exert force or thoroughly rub the surface.
It is enough to apply it on a sponge and easily walk over the coatings. After 15 minutes, the solution should be rinsed with clean water and allowed to dry.
Akrilan
A mixture that is suitable for almost any material. Available in spray form. The bottle has a convenient cap that allows you to select the desired spray mode.
You can apply the composition as a foam or make a single jet, which depends on the area being treated.
When the cap is moved to a vertical position, the liquid supply is blocked, this ensures safety, especially for families with children.
Since people often use herbal decoctions for medicinal purposes and add them to water, a yellow-brown coating forms on the walls, which is difficult to remove.
Acrylan works well on stains and can be used to clean injectors.
The product actively eliminates mold that collects around drain holes. After half an hour of the solution, you can see how all the dirt disappears with water.
Mr. Chister
The mixture contains a specially developed formula designed for washing acrylic bases. It can be used to clean the bathtub from grease, corrosive stains, fungus, and lime.
The product has antibacterial properties, so it is used as a disinfectant. Application is quite simple, you just need to turn the sprayer cap and apply the solution over the entire surface area.
Thanks to the durable polymers contained in the composition, after processing a thin film is formed on the coatings, protecting against the effects of salts and minerals.
Foam does not destroy the structure of acrylic, and scratches do not appear after it. It is recommended to wash plumbing fixtures with gloves and a mask, as the pores are poisonous. After cleaning, it is necessary to ventilate the room.
Star-Acrylat
The solution contains a minimal amount of antibacterial substances, therefore it is effective against most microbes and fungi, but is harmless to acrylic.
Active components allow you to clean the bathtub with the most stubborn stains. You can also wash chrome elements and stainless steel parts.
To wash the injectors, it is recommended to unscrew all the upper caps, treat the inside with the composition, rinse with clean water after 30 minutes, and dry.
The flavors contained in the liquid eliminate unpleasant odors and have a long-lasting refreshing effect.
To get rid of rust, it is better to clean problem areas several times. There is no need to apply force; the chemical reaction begins when the solution comes into contact with the surface.
Legs
6. Assembling the legs. To do this, screw a set consisting of several nuts, washers, and a plastic support (the leg itself) onto the steel studs in a certain order. If the acrylic bathtub comes with a screen, then do not forget to put spring latches on the rods to secure it and support the casing. This entire structure is fixed and “controlled” on the steel beams that we installed in point No. 5. Often the studs should expand to the indicated points under the side of the bathtub and under the seat, where there is also reinforcement in the form of a plate; then you need to not overdo it with stretching, so as not to deform the edge of the product. When all the support points are not in place, they need to be set “to rough” - usually this is about 600-650 mm of the total height of the bath (if there is a casing, adjust it to it).
7. We bring the bathtub into the bathroom and put it in the designed position. We use plastic legs to level the bathtub, taking the total height based on the size of the casing. We fix the legs with locknuts. Along the top and, where possible, along the bottom of the side on the cladding, we draw lines for the top and bottom edges of the product.
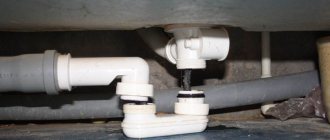
Often at this stage, miscalculations in the preparatory work appear; as a rule, they consist in the fact that the legs/frame rest against some kind of communications (many allow open installation under the bathroom). There are problems with connecting the siphon (something is in the way, or the drain hole was made clearly under the neck of the bathtub). The solution may be to re-drill the hole in the beam, or reinstall it with some offset.
8. We clean the bathtub, mark on the walls where the grips will be installed. To do this, measure the width of the side and take this size into account when marking. Please note that the edges of the bath should not rest firmly against the “bottom” of the hooks, leave minus 3-5 mm. Using dowels we mount wall grips.
9. We assemble the siphon (in point No. 7 we had to make sure that it is working properly) and connect it to a sewer pipe with a diameter of 40 or 50 mm. We don’t connect it to the bathtub yet.
How to clean an acrylic bathtub - tips and tricks
How to wash an acrylic bathtub so that it does not change its appearance, serves for a long time and pleases the eye with its unsurpassed appearance. In view of the fact that acrylic bathtubs appeared on our market quite recently, many people ask themselves the question - what products should be used to wash such bathtubs and how to handle them correctly. There are no big difficulties in the procedure of washing an acrylic bathtub. The main thing here is to follow the cleaning rules.
We are all accustomed to bulky and heavy cast-iron bathtubs, and acrylic bathtubs, which are elegant in shape and quite lightweight, at first glance seem fragile and impractical. That is why many people are wary of plumbing fixtures made of acrylic.
Features of washing and caring for an acrylic bathtub
Unfortunately, many people still do not know the basic rules for caring for acrylic. It is worth noting that the surface of an acrylic bathtub requires more careful care and therefore you should familiarize yourself with a number of rules for caring for this material. By following basic care rules, you will be able to prolong the impeccable appearance of your bathtub.
Acrylic is a wear-resistant material. Its surface has a dirt-repellent effect, so microorganisms do not develop on it. In addition, an acrylic bathtub is not afraid of impacts, but it is easily scratched.
Features of washing an acrylic bathtub
The main thing is to be careful and careful when washing an acrylic bathtub. It is not recommended to use powdered and abrasive products, as well as pastes containing chlorine, acid, alkali, and ammonia as a cleaning product.
Such substances contribute to the appearance of scratches on the surface and also lead to loss of natural color. Before you start cleaning your acrylic bathtub, always carefully read the composition of the cleaning product you are using. Do not use metal or hard brushes - such brushes will damage the integrity of the acrylic coating.
It is also not recommended to bathe your pets in an acrylic bathtub, or to place metal basins and buckets in them. Never place various objects in the bathroom - stools, metal basins and objects, as well as any other household utensils.
What means can you use to wash an acrylic bathtub?
To properly care for an acrylic bathtub, you must use a liquid with a cleansing effect as a cleaning product. Dishwashing composition, liquid soap, shower gel, etc. are perfect for this purpose.
If you find streaks of lime on the surface of the bathroom, it is not necessary to wash the entire container completely. It is enough to take a soft cloth, moisten it in lemon juice or table vinegar and wipe the surface.
If you notice that some areas of the surface of the bathroom are starting to darken, then just rinse the container with running water and wipe with a dry and soft cloth.
If minor scratches occur in the acrylic bathtub, its surface can be treated with a polishing material, in particular it can be ordinary mastic. Furniture polish or car polish is often used for this purpose.
Special products for cleaning acrylic bathtubs
The current level of development of the chemical industry has made it possible to develop special means thanks to which an acrylic bathtub can retain its original appearance for a long time. Moreover, with such products, any acrylic container is washed quickly and safely. I would especially like to highlight such products as Akrilan, Cillit, Sarma, Acryl-Net, Star-Acrylat.
These cream-gels are specially designed for washing acrylic surfaces. The product is applied to a napkin and only then on the surface of the bath. Wipe the entire surface of the container with a napkin and leave for 5 minutes. After 5 minutes, the product should be rinsed well with warm water and wiped dry with a cloth.
You can also use universal products to clean acrylic bathtubs. The most popular universal cleaner for acrylic surfaces is the product from Ravak. It is developed using special technology and is intended for washing acrylic surfaces.
To effectively get rid of rust, it is recommended to use products that are designed to combat rust specifically from acrylic surfaces.
In any case, when choosing a cleaning product for an acrylic bathtub, always give preference to special products. Such products will not only carefully clean the surface, but will also give it shine and protection in the form of a thin waterproof film. Now you already know how to wash an acrylic surface and you can provide it with proper care and increase its service life.
Silicone treatment
10. Apply a layer of silicone inside the hook-grippers, and apply a small amount of polyurethane foam to the part of the wall to which the side of the acrylic bathtub is pressed. We put the product on the grips. We install a siphon on the bathtub, close the drain with a stopper and draw water, so our structure will be loaded and as motionless as possible.
11. Most craftsmen are not satisfied with the rigidity of the standard fastening of acrylic bathtubs (even branded ones) - and these complaints are fair. As an option, people create brick pillars with mortar, additional supports, etc.
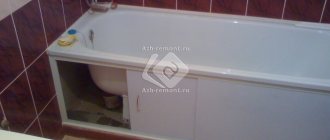
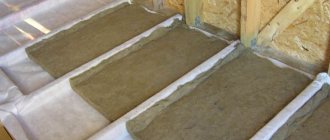
Everything is much simpler if under the bottom of an already installed bathtub you make a substrate from sheet foam or EPS. The entire “pie” is glued together using polyurethane foam, and polyurethane is used to secure it to the floor and to the bathtub slab. The same trick works great for brick (foam instead of mortar), just don’t forget to load the bath with water. As a last resort, you can fill this space with foam in several stages.
8. The final touch is to seal the gap between the side of the product and the wall cladding. Here you will need “sanitary” silicone. Particularly careful plumbers can use white silicone and just a wet finger (some have special shaped spatulas for sealants) to create a completely presentable joint, but more often this place requires the installation of an outer corner.
A few final tips:
Install an acrylic bathtub after facing work, lay the walls and floors completely. As a last resort, place the wall tiles at least 150 mm below the side. Do not clamp the product on top with tiles - then problems with dismantling may arise.
Purchase a bathtub before starting plumbing work and equip it with a siphon in advance (pay attention to the location of the legs and drain points). Strictly ensure the perpendicularity of the walls to which the acrylic bathtub is adjacent (installation of partitions, leveling of walls, tiling work), otherwise difficulties will arise with the grips, and they are the most important elements of fixation.
Install all accessories (handrails, headrests, overflow fittings...) in advance, before the final installation of the product.
Do not place the brick screen and its cladding close to the acrylic, leave a gap for the elastic sealant (2-3 mm), the same applies to wall hooks. Remember, the sides of an acrylic bathtub do not have load-bearing characteristics; all vertical loads must be oriented towards the bottom plate.

