Choosing a sealant to seal a sink
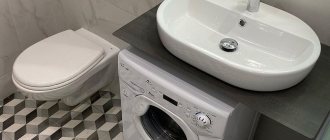
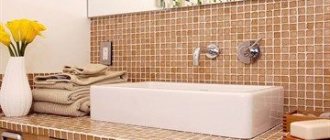
When purchasing a composition, you need to take into account the type of design and material from which the washbasin is made. These criteria are the main ones. To decide which type of sealant to give preference from the many available on the market, it is necessary to consider each in more detail.
Acidic and sanitary
They contain silicone rubber, vulcanizing elements, fillers, adhesion enhancers, fungicides, plasticizers and dyes. Mixtures of this variety are distinguished by their ease of application to the surface, having an increased level of adhesion. Due to their high viscosity, these sealants do not drain from products located in a vertical position, since thanks to it the mixture has continuous contact with them. The fungicides present in the mixtures prevent the occurrence and spread of fungus and mold in places where sealing seams are located.
The dampness in the air ensures that the product hardens quickly after it is squeezed out of the container. Thanks to this, there is no need to wait a long time for hardening and very soon after the application of the sealant is completed, you can begin to use the plumbing equipment that is treated with it. When hardened, the composition is capable of releasing acetic acid, which is why a corresponding odor is formed in the room. For this reason, there are some restrictions on the use of acid mixtures.
Sealants of this type cannot be used in conjunction with a number of the following materials that can come into contact with acetic acid:
- metals that cannot withstand the effects of corrosion;
- marble, limestone;
- mirrors that contain amalgams.
Sanitary sealants have the same features, but their cost is much higher.
Acrylic
The main feature of acrylic-based compositions is the absence of components harmful to health. In addition, they have increased adhesion, making the mixtures perfectly compatible with chipboard, MDF, metal and other materials. Acrylic sealants also withstand significant vibration loads and harden quickly after application, which makes them extremely comfortable to use when performing various tasks.
In addition to the positive qualities, acrylic-based mixtures have certain inherent disadvantages, which include significant shrinkage and hardness. As a result, some time after application, cracks may appear at the seams. It is through such even minor damage that moisture can pass through, which is why it is undesirable to use acrylic sealants when installing a sink in the kitchen.
Polyurethane
Sealants of this type withstand increased dampness without being subject to deformation. Their advantages include a significant range of operating temperatures, as well as a high level of adhesion to many different materials.
The seam they make is elastic and undergoes only slight shrinkage, making the sealing process much easier. You can squeeze polyurethane sealant out of the container using a regular gun.
Polyurethane compounds are not recommended for use on surfaces with polymer cladding, chipboard and MDF. They are a suitable option for installing granite and artificial stone sinks, which have proven themselves in operation.
Silicone
Mixtures are in greatest demand on the market today. Silicone sealants do not shrink, are elastic and resistant to vibration. They are a suitable solution for sealing the joints between the countertop and the sink, providing the opportunity to create a high-quality and long-lasting seam that can withstand moisture and light mechanical loads.
In addition, silicone-based sealants are easy to use. They are sold in tubes, so they can be used with any type of gun. Before applying the sealant, you need to study its instructions in detail and pay attention to protective equipment.
Note! It is recommended to wear gloves when using silicone compounds, as the increased level of grip makes it difficult to remove from the skin of the hands.
The most practical are compositions containing antibacterial additives, which protect seams from the formation of fungi and other negative microorganisms, which is very important in a kitchen with high dampness.
Slice processing procedure
Experienced experts advise: since in the process of creating a hole along the inner edge of the cut, roughness and small chips often form, you need to become familiar with the rules for processing the cut, failure to comply with which leads to a number of problems:
- Since it is impossible to ensure absolute sealing of the unprotected surface of the chipboard, its insufficient degree causes moisture to penetrate into this part of the tabletop. As a result, decay processes may be activated and a fungal coating may appear.
- Subsequently, the cutting edge becomes fragile and the stability of the shell decreases, which ends with its distortion.
- As a result of rotting of the countertop, its aesthetic, strength and performance qualities are reduced and then replacement will be required.
To prevent the above-described troubles, you should:
- Treat the end surface of the cut with fine-grained sandpaper and treat it with high-quality plumbing sealant. Professionals recommend using a spatula to perform this work; in the absence of which, the composition can be applied with your finger. Carrying out protective measures helps prevent wetting and subsequent swelling of the surface of the cabinet.
- If, when performing work such as cutting out a sink in a countertop, chips are found on the front side of the plastic, they are carefully treated with sealant, and there is no need to apply it in a thick layer, since in this case the thickness is not important.
- There is another way to protect the end side of the cut - it involves treating it with PVA glue. Despite the laboriousness of this process, it is reliable, like the previous option. To enhance the protection effect, the applied layer of glue should dry for about 30 - 50 minutes.
- Next, you should glue the seal made of foamed polyethylene; it is usually included with the sink. This material is fixed on the side of the sink along its perimeter. When, after attaching the seal, it can be seen, the material is carefully trimmed with a knife. If this is not done, the edges of the sink will not fit tightly to the countertop and water, getting into the gaps created, will cause swelling and further rotting of the end.
Since the process of attaching the seal directly affects the performance and wear resistance of the kitchen set, attention should be paid to it:
- You need to take the material and degrease it with a rag soaked in gasoline and solvent.
- Then sealant is applied to the seal in a continuous thin strip so that the glue does not come out when compressed and pressed against the outer edge of the sink.
Tools needed for work
Before installation, you should select and purchase a pistol that is practical and comfortable to use. For this task, it is optimal to use a tool with a semi-closed cylinder and a skeletal appearance. These models are used for containers with a built-in nozzle.
To fix the sink in the kitchen, it is advisable to prepare a number of the following tools and items:
- electric drill with drills of different diameters;
- several screwdrivers or a screwdriver with interchangeable attachments;
- building level;
- marker;
- electric jigsaw;
- measuring angle made of metal;
- stationery or construction knife.
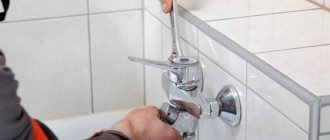
The tap should be connected to the water supply system using flexible hoses. Screwing the nuts and couplings must be done with an adjustable wrench, and the threads must be sealed using plumber's tape.
If the standard brackets for the sink are very flimsy or do not match the dimensions, then it is necessary to purchase additional fasteners that will increase the stability and service life of the product, and since there are no backlashes, the possibility of premature damage to the sealing seam is eliminated.
Necessary materials
Before work, you need to prepare a number of materials and tools that are used when installing sinks:
- jigsaw;
- drill with attachments;
- square, ruler, pencil;
- furniture corner, special fasteners for sinks, if they are not included in the delivery package;
- sealant (it is better to take transparent silicone);
- seal for sinks.
When purchasing, unpack the product, check the integrity of the bowl and sides, determine the completeness of the product and the need to purchase the necessary parts. In addition to the fasteners, during installation you will need a siphon and a pipe connecting to the sewer (ready-made kits), fittings in the form of a mixer and connections to it.
Preparatory work
Before applying the sealant, you must make sure that there is no water on the surface of the countertop and the sink being installed. In addition, they should not contain traces of oil and grease, which, if detected, can be removed using household solvents and detergents.
Note! Wiping the surface to remove dust and small debris should be done using a soft rag. In this case, it is possible to increase its level of adhesion to the sealant and achieve the creation of a high-quality, dense and elastic seam with no cracks or other damage.
Video description
Watch the video on how to embed a stone sink into a countertop:
We install ceramic products
Ceramic sinks have the following feature: one part of the sink is overhead, the other is cut into the countertop. Such models are fastened using a combined method. To ensure the reliability of the structure, both sealant and mechanical fixing devices are used.
In addition, to secure the sink, load-bearing structures are made from wooden blocks. You can do this yourself. Wood should be treated with antiseptic agents.
Products made of ceramics and natural stone are very heavy, so when installing them, durable countertops and cabinets are required Source www.build2last.ru
Carrying out the installation of a sink
During the installation of the sink, actions must be performed as follows:
- First you need to cut a hole for the sink.
- After this, you should place the product in the cut-out opening and make sure that it is stable.
- Next you need to install a plastic pipe using a carved gasket.
- It is necessary to connect all the components, and then check their density and tightness.
Note! To avoid the appearance of cracks and deformations, it is necessary to prevent twisting of these elements.
- Next, you need to install the pipe into the siphon and tighten the nut with an O-ring.
- Screw the flexible hoses for cold and hot water into the corresponding holes.
- Then you need to thread the screw and washers for the mixer body.
- At the next stage, perform actions with flexible hoses in a similar way.
- Next, using dowels and self-tapping screws, it is necessary to install the brackets.
- Once completed, install the sink into the hole in the countertop.
After carrying out these steps, you need to make sure that the sink is securely placed on the brackets, after which you need to strengthen them until they stop. After this, you can begin connecting the plumbing equipment.
The last thing you need to do is seal the joints. If excess material occurs during the application process, it should be removed using a soft cloth before hardening occurs. Otherwise, removing silicone or another type of sealant after hardening will require more time and some effort.
The sequence of actions when installing traditional sinks was described above, but it must be remembered that installation should be carried out taking into account the structural features of the sink. For this reason, you should also become familiar with the nuances of fixing other types of products.
Installation of a built-in sink
When installing it, you should ensure that the placement of the liner and drain corrugation is comfortable and there are no kinks, due to which the elements will crack over time. This shortcoming may occur due to the small installation space.
The shape of the shell must be outlined along the contour. Next, you need to mark the internal contour to fix the sink.
For the convenience of cutting an opening under the sink, the first step is to make a hole into which you then need to install the cutting element of an electric jigsaw.
Important! To obtain a reliable and long-lasting seal, you must use a gasket, which is supplied as standard with the sink. An additional seam should be made using sealant.
Fixing the integrated sink
Installation of products of this type requires joint-to-joint installation, maintaining gaps that do not exceed 1-2 mm. They should be rubbed with a special compound, sealed and polished, thereby achieving a uniform appearance.
When installing an integrated sink, extreme care must be taken, as otherwise it can easily be damaged. The greatest attention should be paid to the accuracy of the markings, on which the maximum compatibility of the sink with the countertop depends.
Installation of a corner sink
The technology for installing a sink of this type is no different from the above method. The only peculiarity is the need to ensure that the cabinet is rotated at a right angle. For ease of use of the sink, it must be rotated 45°. In this case, the location of the sink will be directly in the center.
When marking, you should hold the upper corner of the product towards you, and the wide one near the wall. Thanks to its correct application, it will be possible to eliminate the presence of distortions and very large gaps between the sink and the countertop.
Fixing stone sinks
These sinks have significant weight, which should be taken into account, because for this reason a number of certain restrictions arise during installation. Installation of stone products must be done using durable steel brackets. To increase reliability, it is advisable to secure additional supports.
Due to the large mass, it is recommended to install the sink together with someone. During the installation process, the product itself should be slowly and systematically immersed in the hole on both sides. As a result, the sink must be placed on the brackets and firmly fixed, and then the plumbing equipment must be connected.
How and how to process chipboard ends
The low cost of chipboard, high performance characteristics, and versatility of use have made them a very popular material. The most common areas of application are furniture production and construction.
The main enemy of these slabs is water - the chips increase in volume, the slab swells, warps and crumbles.
Even at the very beginning of production, sawdust and shavings, after drying, are impregnated with formaldehyde resins. After pressing, the surface of the boards is laminated, sometimes even varnished.
But protecting the surface does not prevent the penetration of moisture from the ends through which it enters. Accumulating inside, water gradually begins to penetrate the wood fibers, which leads to the destruction of the slab.
Consequently, the ends must first be saved from liquid penetration during operation. If they are tightly sealed, the service life of the slabs will be much longer.
The photo shows the effects of water on a chipboard countertop.
Why are the ends the starting point for destruction? Yes, because the production of slabs of the required standard sizes, as well as the preparation of pieces of material of different sizes, requires cutting. In this case, the integrity of the wood fibers is compromised.
Thus, chipboard protection from moisture is carried out in three directions:
- impregnation of wood fibers with resins;
- special surface treatment;
- end sealing.
Useful tips for installing a sink
There are no special differences in this process compared to traditional technology. Here you also need to install a mixer, a drain and overflow system, as well as a siphon. In this case, you should only take note of the type and method of connecting the plumbing fixtures themselves.
To obtain a high-quality result during work, you need to adhere to a number of the following tips:
- Saving plumbing tape should be avoided, since its correct use makes it possible to eliminate even minor leaks.
- Do not overtighten the bolts, as this may cause the threads to break.
- Before using the sink, you must make sure that there are no leaks and that all connections are fully secured.
- Fixing metal washers should be done using a wrench and not the plastic attachment that comes with the flexible hoses.
- There should be no backlash between plumbing fixtures.
By following them, you can avoid many problems during operation.
Tabletop connector - euro saw: hidden docking (photo)
A method of processing ends that uses patterns. To create it you need a milling machine. Only with high-quality equipment it turns out flawless.
Sometimes euro-sawing is produced on a cutting machine - this significantly reduces the cost of production, however, with such economical production, the ends are obtained with fluctuations of a millimeter or more. Therefore, when purchasing, you should check this point very carefully, especially if the price of a prefabricated kitchen surface is significantly reduced. A poorly made joint will not connect as it should, leaving gaps.
Correctly executed ends after assembly form a surface on which the gap is not visible at all - it is there, but its width is a fraction of a millimeter. If the coating is dark in color, it will not be easy to find where the euro-cut table top was cut (photo).
Such ideal quality can only be obtained using a router, and the patterns must be new or at least not worn out.
Removing the sink from the sealant
You can remove the old layer of composition using 2 methods:
- Dissolve it using household and industrial chemicals in compliance with safety precautions, using special protective equipment.
- Trimming with a stationery knife with a sharp blade. Care must be taken when using this tool to avoid cuts and damage to the countertop and sink.
Removing the sealant is not very difficult, even if you have to remove the composition, which is a professional job.
After figuring out how to seal a sink, you can start doing the work yourself, but it is only important to follow the specified nuances, which will allow you to do everything efficiently and without mistakes the first time.
Video:
Final stage
At the final stage, it is necessary to use another tool. To do this you will need a rasp or file, sandpaper, GOI posts, adhesive tape and a decorative corner made of duralumin.
Here the process is simpler and does not require special skills in working with tools. Yes, and millimeter precision and accuracy are not required here.
The first step is to sand the wood. For this purpose, you can use a rasp or file, with which you want to remove excess. After this, use a sanding machine or regular sandpaper (zero grade will do) to bring the wood into a nice looking state. It is recommended to carry out this work even if you are not going to do anything after it. Due to the torn elements of the wood, the material will attract moisture much faster, which will cause faster wear of the material.
Having brought the tree back to normal, it is necessary to bring the plastic to the same condition. Usually, the use of special polishes is sufficient for this. But if one is not available, then you should not buy a new one, since to process one tabletop you will need very little of this product, and then it would be a pity to throw away the polish, and it is not economical.
The ideal option for processing plastic is GOI paste. It is available in almost every home, and is an absolutely universal remedy and quite effective.
Even if the cutting was successful and the grinding was of high quality, it is still better to play it safe so that even small millimeters do not make themselves felt in the future. Therefore, it is recommended to use a special furniture corner made of duralumin for decoration. It should be attached to its place, while the appearance will become neat.
Disadvantages of Eurosaw connection
The positive side of the euro saw is its smooth surface, on which the joint is not visible.
There are also disadvantages, they are few, but they are quite noticeable. Eurozapil is a lock that requires a clearly defined arrangement of parts of the tabletop; they cannot be moved. Placing a headset with a top panel requires an absolutely flat wall and correct angles. If the walls are uneven, then the countertop will not adhere to it, and there will be a gap between it and the wall. It cannot be closed by changing its position. You will have to cover it with a table plinth. If the curvature is significant, then the gap will still remain. You'll have to level the wall.
If you plan to install a set with the letter “P”, then the curvature of the walls will disrupt the arrangement - there will be gaps along all the walls.
In this case, small irregularities will have to be covered in this way: the installation is carried out as close to the wall as possible, and the surface should be worked on separately. The gaps in it will have to be sealed with special planks, and the sides adjacent to the wall will have to be filed down. Therefore, in addition to the question of how to connect a tabletop without a joint, you can immediately figure out how to quickly make the walls straight and even.
Assembly: eurojoint kitchen countertop
The assembly of the tabletop parts is carried out using ties-clamps, as is the assembly under the plank.
However, in the case of connection with a euro saw, you will have to carefully control the relative position of the parts being connected until the nuts are completely tightened - they must be strictly at the same level. It is better to connect the table top with ties after first fixing both parts. If there is a displacement of the planes, this can be corrected using self-tapping screws - simply by pulling the protruding part to the desired level.
Plates with this type of connection are difficult and time-consuming to install, but there is an advantage - you can order a design of almost any configuration, in which the joining of the tabletop at an angle is not limited to anything: a complex shape, with smooth turns.

