Tongue-and-groove slabs are often used to create a partition in a room. They are distinguished by their ease of operation, weigh little, and last for many years. But for the durability of the structure, it is necessary to use high-quality adhesive seams so that they can withstand the load. For this purpose, a special glue for PGP is produced, but you need to choose it carefully, then the installation process will be easier and faster. The choice of glue will be discussed in detail below.
Best Selling Adhesives for GGP: Select the One You Need!
Perlgypsum Gypsum polymer.
This adhesive composition can be safely called an ideal material for laying internal partitions of various types from tongue-and-groove gypsum-polymer slabs in warm, dry rooms. The main advantage of this glue is super strong fixation. The only limitation is that the material cannot be used in the cold.
Founds Gipsform T-115.
Adhesive for PGP, GVL and drywall, recommended for internal use, has good ductility and high adhesion. Application in a thin layer allows you to save considerable money on installation.
Volma Installation.
A popular adhesive for PGP, enriched with mineral additives and designed for installation at air temperatures from +5 ºC. Using this glue guarantees easy application and excellent adhesion!
Volma Montage Frost –
GLP adhesive is frost-resistant, which can easily withstand sub-zero temperatures down to -15 ºC thanks to special anti-frost additives.
Conclusion
If the soundproofing characteristics of the wall are very important to you , then they can be increased by creating double partitions, between which insulation is laid, or by covering the wall with sound-absorbing materials.
Follow the instructions, and you will be able to create an interior partition in your house with your own hands, which will have high strength and soundproofing characteristics. Or make a decorative partition to zone a room
Adhesive for tongue-and-groove slabs and gypsum board and gypsum board sheets SR 26
MRZ Adhesive for tongue-and-groove slabs and sheets GKL and GVL SR 26 is intended for installation of partitions from tongue-and-groove slabs, repair of tongue-and-groove slabs, fastening of gypsum elements, for frameless installation of plasterboard and gypsum fiber sheets (GKL, GVL).
It is used for sealing seams and joints of gypsum plasterboard, gypsum fiber board, PGP in winter at air and base temperatures down to -10˚C. Applied to concrete, brick, foam and aerated concrete, gypsum and cement plasters.
Preparing the base:
The base must be dry and durable, free from dust, dirt, oil stains, and various delaminations. Significant surface unevenness is recommended to be leveled with the appropriate SR 26.
To enhance the adhesion strength of the material to the base, treat the surface with appropriate PRO primer. The base is ready for application of the material only after the soil has completely dried. Avoid dusting the primed surfaces.
Preparation of the mortar mixture:
To prepare the solution, the contents of the bag with constant stirring
pour into a container with clean water at the rate of 1
kg of dry mixture per 0.5-0.55 l of clean water (for 1 20 kg bag - 10.0-11.0 l of water) and mix until a homogeneous mass is formed.
It is necessary to mix the mixture in an amount that can be produced within 20-25 minutes.
Mixing is carried out using small-scale mechanization (professional mixer or electric drill with an attachment) or manually. The solution must be kept for 1-2 minutes, then mixed again.
After this, the solution is ready for use. The solution can be used within 25 minutes from the moment of mixing with water.
When the viscosity of the solution in the container increases (within the pot life time), it is necessary to mix it thoroughly without adding water. To prepare the solution, use only clean containers, tools and water.
Work order:
When installing partitions made of gypsum tongue-and-groove slabs (GGP), the solution is applied into the horizontal and vertical grooves of the slabs being laid.
Each mounted slab is pressed forcefully from above with the ridge of the next slab so that
so that excess glue flows out of the side seams.
The excess glue protruding in this case is removed with a spatula from the surface of the joint of the plates and returned to the container with glue. After drying, any irregularities found are removed by sanding.
Installation of plasterboard (GKL) and gypsum fiber (GVL) sheets on pre-leveled bases requires a solution
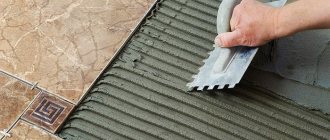
Apply with a notched trowel in continuous stripes around the perimeter of the sheet and in the center.
When installing gypsum plasterboard (GVL) on a base with unevenness less than 20 mm, the solution is applied with a trowel pointwise
along the perimeter of the leaf at a distance of 25-30 cm and along the middle of the leaf in one or two rows at a distance of 35-40 cm.
On a base with unevenness of more than 20 mm, it is necessary to install beacons using
strips of plasterboard sheets about 10 cm wide.
Glue the strips using gypsum adhesive SR-26 PRO. Adjust the installation of beacons to eliminate differences using a level or plumb line. After the glue has completely dried, a sheet of gypsum plasterboard (GVL) is glued to the beacons. The solution is applied to the sheet with a notched trowel in strips around the perimeter and in the center.
Recommendations when performing work:
Lay rows of sheets with offset vertical seams. Between the sheets it is necessary to leave a seam 2 mm wide, between
sheet and floor - 10 mm, between sheet and ceiling - 5 mm. Seal the seams between the sheets.
Using gypsum leveling putty SR 26. It is recommended to prepare the surface for painting using finishing putty SR-18 PRO. Follow the recommendations when performing work in winter.
| Name | Indicators |
| Compound | high-quality gypsum, mineral fillers, modifying additives |
| Color | white |
| Application temperature | -10…+30˚С |
| Water consumption per 25 kg of dry mixture | 10.0 – 11.0 liters |
| Consumption of dry mixture for installation of PGP per 1 m² | 1.5-2 kg |
| Consumption of dry mixture per 1 m² of surface when gluing gypsum plasterboard and gypsum board on a flat base | 3-5 kg |
| Consumption of dry mixture per 1 m² of surface when gluing gypsum plasterboard and gypsum board on an uneven base (up to 20 mm) | 4-6 kg |
| Recommended thickness of adhesive layer | 2-30 mm |
| Drying time | 24 hours |
| Strength of adhesion to the base | ≥ 0.5 MPa |
| Viability of solution | at least 20 minutes |
| Shelf life | within 6 months from the date of manufacture |
What to replace
Often, a special acrylic adhesive composition based on gypsum is not cheap and not everyone can buy it, especially if a large quantity is needed.
What to replace it with. Mix ordinary tile adhesive with PVA (take half a kilogram of PVA for one bucket of solution). After thorough mixing, you should get a fine, elastic composition that can be easily applied with a spatula.
Advice! Instead of tile adhesive, regular cement mortar will do.
When installing the PGP or block, the excess homemade mixture is squeezed out. The industrial composition must be used within an hour, as it sets quickly.
Nowadays, gypsum tongue-and-groove boards are a popular material for the construction of walls and partitions in rooms with dry and normal humidity conditions. When installing structures made of PGP, gypsum glue is widely used.
As gypsum adhesive manufacturers, we can offer you the most attractive prices. Glue for gypsum boards produced by the Peshelan Gypsum Plant is supplied in convenient packaging of 30 kg. The finished mixture is excellent for installing tongue-and-groove slabs and wall blocks, frameless fastening of gypsum particle boards, insulation, gypsum stucco and other work.
Additional Information:
When starting a renovation, we always want to choose the best and highest quality materials for our home, so that we can then enjoy coziness and comfort.
Therefore, by choosing knauf perlfix adhesive, we ensure reliable fastening of drywall sheets or insulation, and we will be sure that they will last for many years.
Knauf perlfix is a dry mixture (mounting mixture) made using certain polymer additives.
Knauf perlfix glue is chosen by professionals because it
- easy to use
- Has excellent soundproofing and thermal insulation qualities
- Made from environmentally friendly materials
Knauf perlfix is used only for work inside the building. This glue is not suitable for outdoor use.
Knauf perlfix 30kg is intended for gluing plasterboard sheets, as well as gypsum panels and other materials on various types of surfaces. It is worth noting that Perlfix Knauf glue is also suitable for working with uneven or already plastered surfaces. The only requirement is to observe the thermal regime and not work at temperatures below five degrees Celsius with a plus sign.
Knauf perlfix (the price of the product is indicated in the price list) is not picky, but before work it is still worth cleaning the work surface of various fats, dust, sand, paint and other elements. This will provide better grip for the knauf perlfix 30 kg.
Knauf Perlfix (the price is presented on the store’s website) is quite easy to prepare for use. knauf perlfix 30 kg is mixed in fifteen liters of water. After the mixture has completely dissolved, let it sit for two minutes, and then stir for five minutes. Next, Perlfix Knauf glue is infused for no more than five minutes and mixed again. That's it - the glue is ready to use!
How to work with it
When starting to work with Perlfix, it is necessary to determine the volume of work, the area of the working surface and how much material will be consumed for a given area. The unevenness of the walls of the room and the thickness of the material applied will determine the consumption of Perlfix plasterboard adhesive.
Installation of drywall on Perlfix takes place in several steps:
- The first step in the upcoming work will be to clean the walls from dirt, old coating, loose plaster and other contaminants that can impair the adhesion of surfaces. If the surface is very dirty, then it is worth washing it;
- The next step is to prime the walls. The primer is carried out with special means that prevent the appearance of water, condensation, mold, mildew and the destruction of the coating by harmful microorganisms. Surfaces that strongly absorb moisture must be primed with a specially designed product. After the primer has been applied, it must be allowed to dry. It is worth making sure that dust does not accumulate on the dried surface;
- Next, you should prepare a solution of Knauf Perlfix mounting adhesive in accordance with the instructions on the package. The glue should be mixed in small portions to avoid unnecessary consumption and premature hardening of the finished mixture. Dry glue is gradually added to the water and thoroughly mixed with a construction mixer or drill with a special attachment, at low speed, until the mixture turns into a paste. It is necessary to ensure that no clots form in the mixture, as this will greatly interfere with further work. It is prohibited to add or add other substances to the finished mixture. The period of use of the finished material will be significantly reduced if working tools and containers are dirty;
- You need to glue drywall to the wall as follows. The finished solution is applied pointwise to the prepared sheets in such a way that it is distributed along the middle line of the sheet with an interval of 3-5 cm. And for sheets whose thickness is more than 10 mm, Perlfix should be applied in two rows and along the entire perimeter at a short distance. One of the basic rules of this stage is not to overdo it, since drywall itself is fragile and can crack. If there are unevenness or small holes on the wall, they can be corrected using this mixture, namely by applying another layer of glue to the problem area. It is worth remembering that while using the mixture, adding dry mixture or water to it is prohibited. And after work with glue is completed, working tools should be washed with clean water;
- It is necessary to leave the walls without external influence for 7 days for the glue to dry. At the same time, you can finish other surfaces in the room.
Popular types of glue for working with gypsum material
In the building materials market in modern times, there is a huge assortment of different types of adhesives for slabs. If you don’t know which glue is suitable for your design, you can easily get confused in this variety. At the moment, there are several brands that have already proven themselves well.
tongue-and-groove slabs
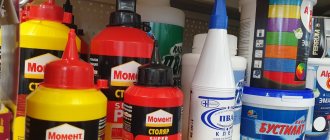
"Volma-montage"
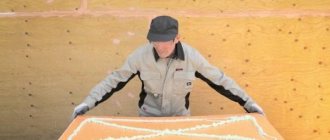
The photo shows that the first type of installation adhesive can be classified as “Volma-montazh”. The composition of this type of glue is made of gypsum binder, which combines well with a variety of mineral-based additives. The use of this glue allows you to achieve high-quality adhesion, retain moisture, and also make installation of the slabs easy due to the simplicity of the preparation process.
We invite you to watch a video that highlights the intricacies of installing gypsum boards.
The use of such glue allows for frameless installation of tongue-and-groove slabs in a vertical position. In addition, it is possible to strengthen gypsum components, as well as thermal insulation sheets.
"KNAUF Fugenfüller"
Knauf Fugenfüller glue deserves a special place. Glue is a dry putty mixture that is applied to plaster. It is used for sealing joints, as well as for puttying surfaces. Such a product is considered not only economical in cost, but also allows you to simultaneously use the material as glue and putty. If you need to complete construction in a short time, you should use KNAUF Fugenfüller glue.
"Weber.cel gips"
Next we should mention the adhesive “Weber.cel gips”. This is a white powder. In the process of its manufacture, gypsum, friction sand and various polymer additives were used. This mixture should be mixed with water during preparation. This is a durable type of adhesive designed to work with drywall, tongue-and-groove boards, and other types of soundproofing materials. Apply with a spatula. After a short period of time after application, the surface is able to withstand heavy loads.
"IVSIL PLAST"
The presented glue is considered an equally popular type. This type is made on a binder with polymer additives. This composition is very effective when working with gypsum fiber sheets.
"BOLARS Gipsokontakt"
Don't forget about this glue. Made on the basis of gypsum sand with the addition of the required amount of polymer additives. The use of this material allows us to achieve high-quality installation of tongue-and-groove slabs. Its scope of application includes indoor work.
When buying glue for installation work, you should rely not only on the qualities of the above manufacturers, but also on the cost. Experts recommend purchasing glue only from large construction stores to eliminate the possibility of purchasing counterfeit products. Before you start using glue, you should carefully read the instructions.
Features of application
IMPORTANT!
Work with the mixture must be carried out only in rooms with dry and normal humidity conditions and a temperature not lower than +5 degrees. The viability of the solution after preparation remains for 35-40 minutes. Gypsum adhesive produced by the Peshelansky Gypsum Plant compares favorably with its analogues due to its increased strength and excellent water-retaining properties. A big advantage is the ease of preparation and use of the solution, as well as the speed of its setting.
Gypsum glue allows you to carry out finishing work of any complexity with the highest possible quality.
Tongue-and-groove slabs are a gypsum material that is used to construct partitions in buildings, public complexes, etc. Used for the construction of structures in rooms with normal humidity.
Due to their resistance to moisture, some boards can be used in areas with high humidity. During the manufacturing process of products, special additives are placed into the molding mass to reduce “water absorption.” Such slabs, as a rule, have a special color.
Using the right type of adhesive, it is very easy to install tongue-and-groove slabs, while ensuring high efficiency of the construction process. The use of tongue-and-groove slabs avoids the need for plastering the surface. By supplementing the installation of slabs with special binders, you can ensure increased adhesion and greater resistance of the coating to cracks.
To work with tongue-and-groove slabs, you will need a special glue, which is made on the basis of an ordinary gypsum mixture. Thanks to the use of special glue, it becomes possible to significantly strengthen the structure of tongue-and-groove slabs.
Glue VOLMA-Ceramic
Another mixture from the same manufacturer is made on the basis of Portland cement, fractionated sand and various modifying additives. Dry tile adhesive VOLMA-Keramik is most often used for finishing work. It is characterized by ease of use, high tear strength, and ductility.
Technical characteristics and scope
The product is suitable not only for internal, but also for external cladding work using different materials:
- Ceramic tiles of medium and small size. Will last in dry and damp areas. Cover walls and floors.
- Medium and small sized porcelain tiles. In this case, Volma Keramik is only suitable for laying on the floor.
- Clinker tiles.
The bases can be brick, PGP, gas and foam concrete, plasterboard, gypsum plasterboard. The main thing is that they are strong and dry. The glue can be applied to screed, cement-based plaster, and lime. For better adhesion, the surface is primed.
Characteristics of tile adhesive:
- grey colour;
- hardens within a day;
- suitable 3 hours after dilution;
- begins to lose its ability to bond after 10 minutes (open time);
- retains properties in a layer of 2–5 mm;
- the position of the tiles can be adjusted within 10 minutes after laying;
- air temperature, base - from +5 to +30°C;
- For every kilogram of mixture, 0.18–0.22 liters of water are spent;
- adhesion to concrete - minimum 0.5 MPa;
- frost resistance - F 35, withstands at least 35 freezing and thawing cycles.
Consumption depends on the surface, tool, layer thickness, approximately 1.3–4.5 kg per m2 of base.
There is a similar tile adhesive from the same company on sale - VOLMA-Keramik+. It is a little more convenient and reliable:
- open time is twice as long;
- You can adjust the position up to 15 minutes;
- adhesion to concrete is more reliable - from 0.6 MPa.
Volma-Ceramic+ is better stored. It loses little quality after freezing, thawing, and thermal aging. Adhesion to concrete decreases to 0.5 MPa. When stored in damp conditions, adhesion to this base is not lost.
Storage conditions and solution preparation
Volma Ceramic glue is best stored in its original packaging. Warranty period - 12 months at normal humidity.
Prepare the solution as follows:
- Pour the dry mixture into clean water at a temperature of +10 to +20°C.
- Mix well. A construction mixer or drill with the required attachment will do.
- Wait 5-7 minutes and stir again.
When preparing the solution, follow the proportions indicated on the packaging. If there is too much water, the tile adhesive loses quality.
Useful video on the topic:
Operating procedure
When laying tiles there are several steps:
- Apply the solution to the base surface. Use a toothed trowel.
- Distribute the glue evenly.
- Profile the surface with the teeth of a trowel.
- Lay the tiles.
- Press firmly with displacement.
- Grout the seams after 24 hours using a special grout.
Consumption rates for different solutions
Depending on what concrete is needed for, 1 m3 of solution may contain different volumes of cement. In modern construction, concrete mortar is used to carry out four tasks: pouring the foundation, laying building blocks, pouring screed and performing plaster. For each of these types of work, it is assumed that a certain type of mortar with a specified volume of cement will be prepared.
The highest consumption of cement per cube of mortar is obtained when preparing a mixture for masonry or plaster. When pouring a foundation or screed, it is important to use large fillers (gravel, crushed stone, slag), which reduces cement consumption. The purpose of the solution is indicated by the brand (the properties of concrete and the main characteristics depend on it).
concrete according to GOST:
- M100 – 170 kilograms of cement
- M150 – 200 kilograms
- M200 – 240 kilograms
- M250 – 300 kilograms
- M300 – 350 kilograms
- M400 – 400 kilograms
- M500 – 450 kilograms
For plaster
A standard plaster solution is prepared from 3 parts sand and 1 part cement. If the layer is made with a thickness of no more than 12 millimeters, then 1.6 kilograms of M400 cement and 1.4 kilograms of M500 cement are weighed per 1 square meter of plaster. The volume of mortar per cubic meter of masonry can be calculated as follows: 1 m2 x 0.012 m = 0.012 m2 = 12 liters.
On masonry
For a square meter of brickwork one brick thick, you will need at least 75 liters of M100 mortar. is 1:4. Thus, it amounts to 250 kilograms per cubic meter of sand. How many cubic meters of solution will be needed in total is calculated based on the size of the building.
Water is taken in half the volume. So, if you mix the solution using buckets, it turns out like this: 1 bucket of M500 cement, 4 buckets of sand, 7 liters of water.
For the foundation
To prepare a solution for pouring the foundation, you need to calculate everything correctly. Typically, a solution of grade M100-M300 is used. The strength of M100 is sufficient for low-rise buildings, M150 and M200 are suitable for buildings of several floors. The higher the grade, the stronger the structure will be. For mixing, take cement M300/M400 (1 part binder and 3 parts sand) or M500 (1 part binder and 5 sand).
Cement consumption per cubic meter of solution:
- M50 (based on M400 cement) – 380 kilograms
- M100 (based on M300 cement) – 214 kilograms
- M200 (based on M400 cement) – 286 kilograms
- M300 (based on M500 cement) – 382 kilograms
Such calculations are relevant if the mixture is prepared according to the following proportions: 1 part cement, 2-4 parts sand, 3 parts crushed stone/gravel.
For screed
The proportion for mixing is as follows: 1 part cement and 3 parts sand. Here you can give an example of correct calculations. So, you need to fill a surface of 3 by 4 square meters (12 is obtained) with a layer thickness of 30 millimeters.
Calculation steps:
- Determining the required volume of concrete solution: 12 m2 x 0.03 m = 0.36 m3.
- Choosing a brand of concrete - take M200, prepare it from M500 cement, which requires 410 kilograms.
- Calculation of the number of bags of cement: 410 kg x 0.36 m3 = 148 kg / 50 = 3 bags (almost).
- How much sand is needed: 1600 kg/m3 (weight of a cubic meter of mixture) x 0.36 m3 (required amount of mixture) = 576 x 0.75 (proportion of sand in concrete) = 432 kilograms. A cube of sand solution will take about 1200 kilograms.
Execution of work
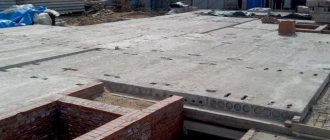
Installation of tongue-and-groove slabs
First, you need to mark the room for laying the first row of slabs. The first row of tongue-and-groove slabs is mounted on a pre-leveled base. Apply assembly adhesive into the existing grooves of the masonry elements. After that, the plates should be pressed against each other according to the “groove-ridge” pattern, and the protruding excess mortar should be removed using a spatula. The rows of slabs are installed with vertical joints offset by at least 10 cm. The masonry elements must be laid within 15 minutes after applying the mortar. The position of the masonry elements can be adjusted using a rubber mallet within 10 minutes after laying. Control of the horizontal position of the masonry is carried out using a level. To increase the strength and rigidity of the structure, every second row of slabs is attached to the walls using special metal corners.
Installation of plasterboard and gypsum fiber sheets
— If the base is uneven up to 5 mm, apply the mounting adhesive using a notched trowel in an even layer over the entire area of the sheet. After which the sheet should be pressed to the base and adjusted to the level.
— If the base is uneven up to 20 mm, apply mounting adhesive in portions around the perimeter of the sheet with a minimum interval, as well as in the center in one row along the sheet with an interval of 30 - 40 cm. After which the sheet should be pressed to the base and adjusted according to the level.
— If the base is uneven by more than 20 mm, the surface must first be leveled using strips of plasterboard 10 cm wide, glued horizontally and vertically to the base. The plasterboard strips must be placed at the level of the upper and lower edges of the sheet to be glued, as well as every 60 cm of the sheet width. Then apply the adhesive solution using a notched trowel onto the mounting plane of the sheet. Then the sheet must be pressed to the base and adjusted to the level.
Laying rows of gypsum boards and gypsum boards is carried out with offset vertical joints. During installation work, it is necessary to leave a gap of 5-7 mm wide between the sheets. Subsequently, these seams are filled with special putty compounds. Between the floor and the glued sheets, technological gaps of 10 mm wide should be left, which are necessary to remove moisture from the solution.
General recommendations
It is recommended to carry out further work no earlier than 2 days after gluing the plasterboard or gypsum fiber sheets.
All of the above recommendations for use are correct at a temperature of +21ºС and a relative air humidity of 60%. In other conditions, the setting and drying time of the material may vary.
ATTENTION!!!
To protect your hands while working, you must use gloves. Keep away from children. In case of contact with eyes or skin, rinse thoroughly with water.
Along with the above instructions on the use of the material, when carrying out work, you should be guided by the relevant SP (SNiP) and instructions. The technical description does not replace the professional knowledge and skills of the work performer. If you doubt the possibility of using a material, you should test it yourself or seek advice from the manufacturer.
General information on the calculation results
- The perimeter of the building is the total length of all walls taken into account in the calculations.
- Total masonry area - The area of the outer side of the walls. Corresponds to the area of the required insulation, if provided for by the project.
- Wall thickness - The thickness of the finished wall, taking into account the thickness of the mortar joint. May differ slightly from the final result depending on the type of masonry.
- Number of blocks - The total number of blocks required to build walls according to the given parameters
- Total weight of blocks - Weight excluding mortar and masonry mesh. Just like the total volume, it is necessary to select a delivery option.
- Quantity of mortar for the entire masonry - The volume of mortar required for laying all the blocks. The volumetric weight of the solution may vary depending on the ratio of components and additives introduced.
- Number of rows including seams - Depends on the height of the walls, the size of the material used and the thickness of the masonry mortar. Excluding gables.
- Quantity of masonry mesh - The required amount of masonry mesh in meters. It is used to reinforce masonry, increasing the solidity and overall strength of the structure. Pay attention to the number of reinforced rows; by default, the reinforcement of each row is indicated.
- Approximate weight of finished walls - Weight of finished walls, taking into account all building blocks, mortar and masonry mesh, but excluding the weight of insulation and cladding.
- Load on the foundation from the walls - Load without taking into account the weight of the roof and ceilings. This parameter is necessary to select the strength characteristics of the foundation.
To calculate blocks for partitions, you need to start a new calculation and indicate the length of only all partitions, the thickness of the walls to the floor of the block, as well as other necessary parameters.
Laying tiles on the PGP
Let me remind you that ceramic tiles are laid on flat walls with a deviation from the vertical level of no more than 2-3 mm per meter of length. The unevenness of the surface of the wall in the light should also not exceed 2-3 mm.
A correctly laid partition made of PGP allows you to obtain the required evenness without any problems. At the same time, if significant flaws were made during the installation of the PGP, the partition can be leveled with a gypsum plaster mixture. (For more details, see the article Is it necessary to plaster tongue-and-groove slabs).
Waterproofing
The basis of the PGP slab is gypsum and the surface of the PGP partition belongs to gypsum bases with high hygroscopicity. This means that the gypsum surface absorbs water well and gradually deteriorates in a humid environment.
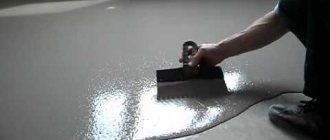
In the classic version, the gypsum surface is protected from moisture with a two-layer deep penetration primer, followed by treatment with a coating polymer primer. For example, weber.tec 822.
However, the use of moisture-resistant GGP boards makes it possible not to waterproof the walls. Although it is recommended in any case to treat places where walls are in direct contact with water (shower, bath) with a layer of waterproofing.
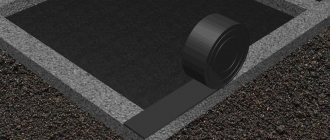
In addition, waterproofing using a special waterproofing tape is mandatory at the junction of the walls made of PGP and the bathroom floor. This is especially true in apartments where PGP walls were made instead of a destroyed plumbing cabin. The destruction of the cabin, a priori, removed the layer of waterproofing on the bathroom floor, it needs to be restored.
Choosing adhesive for laying tiles on PGP
In theory, any universal tile adhesive of class C1T is suitable for laying tiles on gypsum, pre-primed surfaces. For example, Unis adhesives.
In practice, read the information on the glue packaging. It is necessary that the glue is suitable for gypsum bases. To be on the safe side, you can choose an adhesive that is designed for complex substrates. For the paranoid, I recommend C2E class glue. For example, LITOFLEX K80 glue.
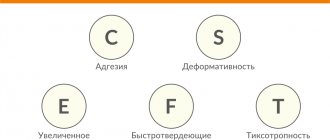
By the way, the tile adhesive class is deciphered as follows (EN 12004 standards):
- The letter C means cement adhesive;
- Number 2 – improved technical characteristics;
- Letter E – the time for open application on the wall has been increased.
Choice of grout
The main purpose of grouting the joints between the tiles is not decoration, but to protect the layer under the tiles from water and humidity.
When following all the above rules, namely the use of moisture-resistant slabs, abundant primer, waterproofing and the use of moisture-resistant glue, the choice of grout type does not matter. Any high-quality grout will do, including cement grouts with mineral fillers, such as Ceresit or Atlas.
When in doubt, use expensive two-component epoxy grout (Litokol Litochrome or Sopro Topas).
Installation of the following rows
Installation of walls made of tongue-and-groove slabs involves displacement of the seams in the second and subsequent rows. To ensure this condition, the slab must be cut in half. At the end and beginning of the row, staples should be fixed on the cuts. This must be done in the place where the sections adjoin the wall. The glue should be more liquid; it should be applied to the bottom and side grooves of each product. It is important at this stage to check the vertical and horizontal of the masonry. The next row is installed only after the glue has set in the second row.
Usage
Average consumption of foam adhesive for silicate and gypsum boards: for products up to 130 mm wide - 1 strip, for larger ones - 2 strips for each joint. When working, you should follow some recommendations.
- The surface is carefully prepared and cleaned of dust.
- The container is shaken for 30 seconds and placed in a glue gun.
- 1 row of blocks is laid on a classic mortar.
- From the 2nd row, foam is applied. The cylinder is held with the bottom up; when applied, the nozzle of the gun should be 1 cm from the surface of the PGP. The optimal jet thickness is 20-25 mm.
- When used horizontally, the strips are not longer than 2 m.
- The leveling of the slabs is carried out within 2 minutes, position adjustment is possible by no more than 5 mm. If the curvature is greater, it is recommended to carry out the installation again, as well as when tearing off elements at the joints.
- After a break of more than 15 minutes, the gun nozzle is cleaned.
Installation is recommended to be performed in heated rooms or in warm, dry weather.
How many pieces of foam block are in a cube?
| Block size, mm | volume, m3 | Quantity per 1 m3, pcs. |
| 600x200x200 | 0.024 | 41.7 |
| 600x250x200 | 0.03 | 33.3 |
| 600x300x200 | 0.036 | 27.8 |
| 600x350x200 | 0.042 | 23.8 |
| 600x375x200 | 0.045 | 22.2 |
| 600x400x200 | 0.048 | 20.8 |
| 600x450x200 | 0.054 | 18.5 |
| 600x500x200 | 0.06 | 16.7 |
| 600x250x250 | 0.0375 | 26.7 |
| 600x250x250 | 0.0375 | 26.7 |
| 600x300x250 | 0.045 | 22.2 |
| 600x350x250 | 0.0525 | 19.0 |
| 600x375x250 | 0.05625 | 17.8 |
| 600x400x250 | 0.06 | 16.7 |
| 600x450x250 | 0.0675 | 14.8 |
| 600x500x250 | 0.075 | 13.3 |
| Block size, mm | volume, m3 | Quantity per 1 m3, pcs. |
| 625x500x75 | 0.023 | 42.7 |
| 625x500x100 | 0.031 | 32.0 |
| 625x500x125 | 0.039 | 25.6 |
| 625x500x150 | 0.047 | 21.3 |
| 625x500x175 | 0.055 | 18.3 |
| 625x250x100 | 0.016 | 64.0 |
| 625x250x125 | 0.020 | 51.2 |
| 625x250x150 | 0.023 | 42.7 |
| 625x250x175 | 0.027 | 36.6 |
| 625x250x200 | 0.031 | 32.0 |
| 625x250x250 | 0.039 | 25.6 |
| 625x250x300 | 0.047 | 21.3 |
| 625x250x375 | 0.059 | 17.1 |
| 625x250x400 | 0.063 | 16.0 |
| 625x250x500 | 0.078 | 12.8 |
Brand overview
Among the manufacturers producing adhesives for tongue-and-groove boards, there are both well-known Russian brands and large foreign companies. In the classic version, the compositions are supplied in bags; they are best stored in a dry place, avoiding direct contact with a damp environment. Packaging sizes may vary. For beginning craftsmen, we can recommend 5 kg bags for preparing a single portion of the solution.
"Volma"
Gypsum dry adhesive for installation of PGP made in Russia. It is distinguished by its affordable price and availability - it is quite easy to find on sale. The mixture is available in a regular and frost-resistant version; it can withstand atmospheric temperatures down to −15 degrees even when laid. Suitable for horizontal and vertical laying of slabs.
Knauf
A German company known for the high quality of its building mixtures. The Knauf Fugenfuller composition is considered a putty, but can be used for laying thin partitions and non-load-bearing structures. Has good adhesion.
Knauf Perlfix is another adhesive composition from a German brand. It is focused specifically on working with construction gypsum boards. It is characterized by high bond strength and good adhesion to the material.
"Bolars"
The company produces a special glue “Gipsokontakt” for PGP. The mixture has a cement-sand base and polymer additives. Available in 20 kg bags, it is economical to use. The adhesive is intended for indoor use outside of humid environments.
IVSIL
The company produces compositions in the Cel gips series, designed specifically for the installation of PGP and drywall. The product is quite popular, has a gypsum-sand base, good adhesion, and hardens quickly. Cracking is prevented by the addition of polymer additives to the composition.
Adhesive foam
Among the brands that produce foam adhesives there are leaders. First of all, this is ILLBRUCK, which produces PU 700 composition on a polyurethane basis. Foam holds not only gypsum and silicate boards together, but is also used for joining and fastening bricks and natural stone. Hardening occurs in 10 minutes, after which the adhesive seam remains reliable protection against any external threats, including acids, solvents, and contact with a humid environment. 1 canister replaces a bag of dry glue weighing 25 kg; with a seam thickness of 25 mm, it provides coverage of up to 40 linear meters.
Titan also deserves attention with its Professional EURO foam adhesive, which is optimal for working with silicate GGPs. The Russian brand Kudo produces a composition with similar characteristics to Kudo Proff. Among universal foam adhesives, the Estonian PENOSIL with its product StoneFix 827 is also of interest. The connection becomes strong in 30 minutes, and you can work with both gypsum and silicate boards.
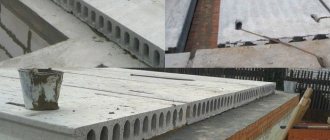
What are gypsum boards?
The specified building material has the form of monolithic slabs, which have precise geometric parameters; they are connected to each other using a tongue-and-groove lock. For the manufacture of such boards, building gypsum is used; they can be ordinary or moisture resistant .
Since building gypsum is used to create such boards, they can “breathe”, do not burn, do not emit harmful substances, and are odorless, therefore they are ideal for the construction of interior partitions and decorative ones for zoning space in the office.
The standard size of the slab is 667x500x80 mm , it has an area of 0.333 cm2 , and weighs about 29 kg.
To create one square meter of gypsum partition you will need only 3 slabs, which makes installation of partitions simple and quick. Unlike creating a partition from plasterboard, you do not need to install a frame and filler
The advantage of this material is that it produces a flat and smooth surface; you just need to seal the seams and you can glue wallpaper, paint or lay tiles.