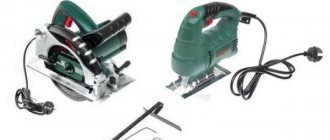
Small hand saw with jigsaw files
Authorization on the site
Very easy to make, a small hand saw, consisting of a wooden handle into which jigsaw files are attached.
While cleaning out my workshop, I found a bunch of jigsaw files. Moreover, most of these files are completely new and have never been used before.
In general, I must say that they were purchased quite a long time ago, 14-15 years ago. At that time I already had a jigsaw, but I didn’t have many other power tools, for example, an angle grinder or a circular saw for wood. Therefore, I had to do many types of work, say, sawing metal blanks or longitudinal sawing of boards with a jigsaw using appropriate files.
However, over time, I acquired the mentioned tools and therefore the need for such a wide variety of files disappeared.
However, I decided to use these files anyway by making a small hand saw. The fact is that when making small homemade products or just small parts, you often have to cut small grooves or cuts, both in wooden and in metal or plastic blanks. And this is where a small hand saw will come in very handy, into which you can insert different files from a jigsaw.
For special work
To cut glass or ceramics, you need to purchase equipment made of durable alloys. Such a blade should have a special diamond-type coating on the cuts or using tungsten carbide.
Processing glass in a straight line with a jigsaw is impractical - it is better to use another tool. But he can handle figure cutting.
General cutting principles
Principle 1. All jigsaws produce uneven cuts. This is important to understand. The design of the tool itself implies several degrees of freedom of the saw, so it will not be possible to get a one hundred percent perfect cut, but following a few simple rules will reduce the number of “jambs” to a minimum:
- make no effort. Absolutely none. A slight pressure to the surface and setting the direction of movement is all that is needed for a clean cut. Yes, slowly, but efficiently;
- correct choice of stroke frequency. Each material has its own engine speed. Of course, you will have to select it experimentally, because the appropriate speed depends on many factors: the structure of the material, its thickness, the type of file installed, etc.;
- either speed or quality. Enabling the saw's pendulum feed mechanism speeds up the cut, but reduces the quality of the cut;
- only acute consumption. As soon as the cutting edge becomes slightly dull, the file begins to behave unpredictably. Therefore, if the teeth “sag”, change them urgently;
- temperature is everything to us. It is necessary to carefully monitor the temperature of the cutting surface and prevent it from overheating. Saw teeth are subject to severe wear precisely at moments of overheating, since the metal becomes softer and cannot adequately withstand the forces of friction.
The Achilles heel of most jigsaws is the pendulum system. It is its design that, in most cases, does not allow obtaining a cut strictly perpendicular to the surface. There are quite large gaps in the pendulum mechanism, which “lead” the file away from the vertical and the intended cutting line, when even slight forces are applied to the jigsaw. Only a few professional tools have a different pendulum system design (assembled directly in the gearbox) and cutting blade stabilization, which keep the saw blade in a strictly perpendicular position. To ensure a guaranteed perpendicular cut, the file should be as thick as possible (from 1.5 mm).
Principle 2. A jigsaw is just a saw drive. Its “bells and whistles” (number of pendulum feed stages, backlight, laser pointer, etc.) are not particularly important. A really important parameter is the power of the jigsaw. The type and thickness of the material that will be “too tough” for a jigsaw depends on it.
Principle 3. The file is the main violin in a duet with a jigsaw.
There are a huge number of types and varieties of this instrument. And each one is “tailored” to a specific task or material. The quality of the final result depends on the correct choice of the type of cutting tool.
How to cut plywood without chipping?
And finally, let’s try to briefly answer the question: “How to cut plywood without chipping with a jigsaw?”
Here you should pay attention to a few fairly simple tips that will help you get an even and smooth cut:
- It is not recommended to saw plywood on uneven surfaces or on weight, without stable fastening of the plywood sheet - to prevent movement and displacement both up and down and in the lateral directions. Ideally, use a specialized workbench. If you do not have this opportunity, then consider options for placing and fastening sheets of plywood using several clamps or other available means. Otherwise, you are almost guaranteed to have distorted cuts and an increased likelihood of breaking the saw blade.
- If your jigsaw has a beat mode, we recommend turning it off. The cutting blade should move smoothly, without jerking.
- Try to keep the cutting blade at a right angle to the plane of the plywood sheet throughout the entire cut.
- Do not press on the jigsaw to speed up the process of cutting plywood - a high-speed tool at a low feed speed of the cutting edge will do the job just fine. And excessive pressure can lead to breakage of the saw blade and the appearance of unwanted chips or other disturbances in the appearance of the cut.
- If you are cutting laminated plywood, then from the front side of the plywood you can first go along the intended line of the future cut with the blade of a construction knife. This will additionally help avoid unwanted damage to the laminating layer when cutting.
- To avoid chipping when cutting non-laminated plywood, some craftsmen suggest pre-treating the future cut site (along its entire length) with PVA glue. Or protect the cut line with electrical tape or masking tape. (In the case of PVA glue, cutting should begin only after it has completely dried).
What to look for when choosing a jigsaw file?
Tooth shape
Such a nuance as the “shape of the teeth” cannot be ignored, since their configuration can determine the capabilities of the purchased jigsaw. Before making a purchase, it is worth understanding for what needs this or that canvas is being purchased. A huge number of small teeth will significantly improve the quality of the cut, but at the same time the speed will be reduced. A blade with large teeth will significantly speed up the process, but the cutting will be rather sloppy. Based on the shape of the teeth, the blade can be divided into the following groups:
- Separated - this blade is used for cutting soft metals. Wiring accompanies heat accumulation. As for sawdust, thanks to this structure of the teeth, they are retracted from the blade.
- Wave-shaped - also used for cutting soft materials, aluminum, non-ferrous metals. In this case, the wiring is group.
- With conical grinding – used for cutting plastic and wood.
- Sanded – used for rough cutting of wood and other materials.
File width and thickness
Such a nuance as the width and thickness of the jigsaw blade cannot be ignored when choosing a jigsaw, since criteria such as the quality and speed of performing various types of work depend on these two nuances.
Both wide and narrow products have their positive aspects. The wide file is quite strong and stable. When using it, you don’t have to worry that it will deviate from the intended course. Narrow blades make it easier to perform various maneuvers compared to wide ones. Thickness is also important because the thicker the canvas, the greater its stability.
Types of files according to purpose
The word jigsaw still evokes associations with wood. And although modern jigsaws are widely used for sawing plastics and metals, the main material for work is still wood and plywood. You also have to think most often about which blades to choose for a jigsaw on wood.
On wood
For general work on wood and its derivatives (plywood, chipboard, MDF), standard saw blades with a gray shank for simple or hard wood are chosen. The dimensions of the blade, the spread and the size of the teeth are selected individually. But sometimes it is necessary to perform work that differs from ordinary sawing.
If speed is important, even at the expense of the quality of the cut, then you need to choose long saws with large teeth and a large pitch. Divorce is also desirable more.
If you need to get an even and smooth cut without chips, then take blades with a small mark or without it at all. Teeth – medium or fine. Materials that have a finishing side (laminate, chipboard) have to be cut upside down. If you want to see the cut from the front side, then you need to choose files with the teeth in the opposite direction (the last letter of the marking is R).
For artistic cutting there should be a narrow blade no wider than 4 mm, small teeth and short length. Compliance with these conditions will allow figure cutting to be carried out at small turning radii.
For metal
An electric jigsaw is still not the most suitable tool for cutting metal. But if necessary, he can handle it if you choose the right file. The teeth of such files are very small and wavy; the blades are made of especially strong alloys, but they also quickly become dull. It is advisable to select files marked specifically for the type of metal you will be working with.
For polymer materials
The file markings contain designations specifically for working with such materials. Ordinary plastic and PVC products can also be sawed with wood blades. In this case, the teeth must be chosen larger and with a larger spread. A small tooth will not only cut, but also melt the material. For plexiglass, it is better to choose a metal fabric with a wavy pattern.
For special materials
These options have their own designation. First of all, it is ceramics. The files for it are made of special alloys, and the teeth are made with a special durable coating.
Also, especially strong coated teeth are required for cutting drywall.
But for soft materials, files without teeth are produced at all. Their cutting edge is a smooth blade, sharpened in a wave-like manner.
Quick release mount
Most current models of jigsaws intended for household use are equipped with this. If the clamp is frontal, the key is located in front, if it is lateral, then it is on the side. To equip the tool with a file, you simply need to release the key, insert the file into the slot of the clamp and release the key.
In new models of jigsaws, changing the file is even easier. For example, for those who are interested in the question of how to insert a file into a Makita jigsaw, let us say that often in the latest household-class models, the quick-release key is released by pressing the protrusion (key) located on the front small casing of the upper protection that fits the front part . In this case, the rim of the casing moves forward from the edge from which the pressure is applied, the shank of the file is inserted into the slot of the holder, the key is released, the casing is put in place, and at the same time the shank of the file is fixed in the mount.
You can verify the strength and operation of the fastening by tugging on the file. If it doesn't pop out, then everything is fine. It would be useful to remind you that it is strictly prohibited to handle the saw blade when the tool is connected to the mains (with a battery - not on the fuse).
Shank type
The shape of the part of the file inserted into the jigsaw - the shank - determines the way it is clamped in the tool.
Saws with a T-shaped tail are ubiquitous. They are suitable for most modern models of jigsaws for wood, such as those developed by BOSCH, a trendsetter in this area. In jargon they are called "European type".
American models (DeWalt, Black&Decker) use saws whose tail end ends in a semicircular cutout resembling the letter U. Such shanks fit all clamps with a block or screw. In the jargon - “American type”.
There are still special Makita shanks and T-shaped “Bosh” shanks, but with two stops. They are suitable only for old models of jigsaws from these companies and, rather, are rarities.
What it is?
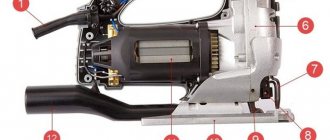
A jigsaw file is a blade equipped with teeth of one type or another, fixed at one end to the movable rod of the tool. Since all materials have their own properties and characteristics, a large number of varieties are produced. They are designed to solve various problems, cutting certain materials. As a rule, craftsmen purchase sets of several types of cutting tools.
Selection criteria may be:
- The most popular and common types of cutting.
- Purpose for a particular material.
- Creation of a universal set that allows you to perform most types of processing.
Separate, specialized samples are also available for sale. They are purchased to perform specific work according to previously known parameters of the material and cutting conditions. The choice of file type is determined by the user’s level of training, experience and knowledge. In order to avoid mistakes and choose the best option, you should study the features and characteristics of the cutting tool.
Is it possible to make a stationary jigsaw from a jigsaw?
Professional-grade jigsaws have holes on the support platform that allow you to securely and safely secure the device to the frame. In this case, the tool can be used to create an electric jigsaw.
The key difference between a stationary jigsaw and traditional manual models is the method of processing workpieces . In stationary technology, the workpiece moves relative to the saw blade. A classic manual electric jigsaw needs to be moved relative to a stationary workpiece.
The good thing about an electric jigsaw is that it allows for high-precision processing of workpieces . For this purpose, the workpiece is fed using special guides and a movable carriage.
If we speak for ordinary manual jigsaws for metal, errors involuntarily arise when pushing and directing the device, which does not allow processing workpieces with increased accuracy.
How to choose a jigsaw.
Materials and tools
To make such a hacksaw, I will need the following accessories:
Materials and fasteners:
- A piece of peeled and well-dried elm branch 20-25 cm long and 15-16 mm in diameter;
- Metal clamp with a clamping screw for a screwdriver.
Tools:
- Jigsaw with wood saw;
- A file with a large notch and a sharp edge;
- Sandpaper.
Tooth blades
Like traditional hacksaws, jigsaws use a serrated saw blade for cutting. There is a wide variety of types of paintings. The gear can differ both in the type of attachment to the jigsaw spindle and in the profile of the teeth themselves.
One of the main parameters of saw teeth is the material used to make the blade . The gear blades can be based on several grades of steel:
- HCS – classic carbon steel
- HSS – high speed tool steel
For cutting metal, it is recommended to use blades based on high-speed steel HSS. Such fabrics are characterized by increased strength and excellent wear resistance . The tooth becomes dull and licks off quite slowly.
The main disadvantage of HSS-based sheets is their high price . This grade of steel is very expensive.
Many manufacturers of equipment for jigsaws for metal are trying to reduce the cost of blades. , Bi-Metal technology is being increasingly introduced . Bimetallic blades are created from 2 grades of steel at once. The blade itself is cheap carbon steel, which has low hardness but exhibits excellent flexibility. The cutting edge (gear) is high-quality HSS steel, which confidently cuts absolutely any metal.
Bi-Metal sheets are very inexpensive. Their price exceeds the cost of analogues from cheap HCS. But such blades are still much cheaper than HSS teeth.
Fastening
The saw blade is fixed, as mentioned above, by three types of locking mechanisms:
Quick-clamping. The main advantage is clear from the name - quick change of cutting tools. But there are some disadvantages:
- The mechanism works only with “native” types of shanks specially developed for it. Other types will not work.
- There are restrictions on the geometric parameters of the files - width and thickness.
- mechanism, a plastic handle-block (lever), is pulled inside the jigsaw, the rod is released;
- the file is inserted all the way, with the shank into the slot;
- The block is released - the saw blade is fixed.
ADVICE. From practical experience: saw blade jams occur due to abnormal cutting conditions (excessive force, curved cut with a wide blade). Pounding, using pliers and other “brutal” techniques is extra work and risks damaging the instrument. It’s easier to carefully disassemble the jigsaw itself and unlock the exposed locking mechanism.
2. Block screw fastening. By the way, it should be noted that all types of shanks are suitable for this system. The procedure for installing the file:
- the fixing screws must be loosened, - the protective casing is moved and the threaded elements are unscrewed with a wrench (two or three turns);
- a file is installed in the groove (slot), with the cutting part from the jigsaw, in the direction of the cut;
- the screws (located frontally, at the bottom of the tool) are tightened with a hex wrench (must be included in the kit);
- the casing returns to its place.
The main disadvantage, which appears immediately or over time, is inaccurate fixation in the cutting direction. The canvas leads to the side. Another disadvantage is the thread breaking due to excessive tightening efforts. The third negative factor is the failure of the support block. It is almost always impossible to find a replacement; you have to grind it yourself.
3. Side screw fastening (with locks). Occupies an intermediate position in terms of ease of changing the file between the shoe-type fixation and the quick-clamping mechanism. Stages of work:
- the side screw unscrews;
- the shank is installed in the opened groove;
- the canvas is exposed visually and to the touch;
- the screw is screwed back in.
Accuracy of installation depends on initial factory assembly. Over time, individual elements wear out, play appears, and the file begins to wander.
Recommendations for selection
In addition to the main tactical and technical characteristics, the attachment point in a jigsaw is a mechanism that affects the accuracy of cutting the workpiece. Hence, when visually inspecting the selected tool, you need to take a closer look at the operation of the fastening elements:
- Check for play - insert the file and move it; there should be no free yaw motion.
- Turn on the tool and try to determine whether there is any beating in the blade. Minimal displacements are difficult to notice, but visible to the eye, indicate poor quality assembly.
- Perform a test cut (if the seller allows it). The cut must coincide with the markings - the file follows exactly the cutting path.
- Evidence of reliable fastening - during the test test, the cutting tool remained in place and did not fall out of the fixation mechanism.
Mastering the method of installing a saw blade into a power tool will not be difficult; just carefully study the instructions included with the product. During further operation of the jigsaw, carefully monitor the condition of the file attachment unit.
The process of setting up a jigsaw for the correct cut
It is important not only to choose the right equipment, but also to know how to set up a jigsaw for work. The first thing to check is the loft in the actuator stem. It must be in accordance with the limits specified in the instructions. And also check the reliability of the sole. And if there are gaps, the fastening points should be tightened.
Checking the installation of the sole relative to the file
The installation angle may not be correct initially. And to fix this, you should configure the tool yourself. To do this, you need to loosen the fasteners, move the sole to disengage the teeth, install the sole correctly, and securely fix it.
Flatness of the sole over the entire surface
If this condition is not met, it is necessary to remove the sole from the jigsaw and straighten it with precise blows with a bronze hammer on an anvil. And then sand the surface with sandpaper.
Offset of the groove for securing the saw to the end of the drive rod
In this case, it is necessary to turn the shank of the nail file with the same offset as the groove, but only in the opposite direction. This will make it possible to install the saw blade exactly along the axis of the sole.
To prevent the file from breaking during the procedure, it is necessary to heat the transition of the shank into the blade red-hot on a gas stove and, using pliers, turn it to the required offset angle. When finished, you need to straighten the file with a hammer on an anvil.
Fraser
The milling cutter allows you to get the cleanest possible edge of the workpiece, while the quality will not be so easy to distinguish from the formatter, and sometimes it will be even better.
First, you need to cut the workpiece with a jigsaw, making an indentation from the marking line by 2-3 mm, and then align the line according to the template. Usually, for this purpose, a second piece of laminated chipboard is used, sawn on a format saw, so that it is of a suitable size.
It is necessary to use a copy cutter, that is, one with a bearing. This way you can get a very clean cut. Among the disadvantages of working with a router, there is a lot of hassle, since there is a need for precise markings, preliminary filing of workpieces and setting templates for the router.
Final stage
At the final stage, it is necessary to use another tool. To do this you will need a rasp or file, sandpaper, GOI posts, adhesive tape and a decorative corner made of duralumin.
Here the process is simpler and does not require special skills in working with tools. Yes, and millimeter precision and accuracy are not required here.
The first step is to sand the wood. For this purpose, you can use a rasp or file, with which you want to remove excess. After this, use a sanding machine or regular sandpaper (zero grade will do) to bring the wood into a nice looking state. It is recommended to carry out this work even if you are not going to do anything after it. Due to the torn elements of the wood, the material will attract moisture much faster, which will cause faster wear of the material.
Having brought the tree back to normal, it is necessary to bring the plastic to the same condition. Usually, the use of special polishes is sufficient for this. But if one is not available, then you should not buy a new one, since to process one tabletop you will need very little of this product, and then it would be a pity to throw away the polish, and it is not economical.
The ideal option for processing plastic is GOI paste. It is available in almost every home, and is an absolutely universal remedy and quite effective.
Even if the cutting was successful and the grinding was of high quality, it is still better to play it safe so that even small millimeters do not make themselves felt in the future. Therefore, it is recommended to use a special furniture corner made of duralumin for decoration. It should be attached to its place, while the appearance will become neat.
Another little tip: when cutting a tabletop at home, you can use a guide tape with an adhesive layer, which will help the blade not deviate from the route.
Ensuring a clean cut
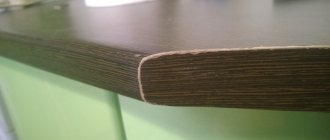
In many cases of material processing, the size of chips can be reduced to half a millimeter. Such minor imperfections are not noticeable; they can be removed by chamfering with sandpaper or covering up the chips with a correction pencil. You can also sand the end with sandpaper or cut through the top layer of the surface with a utility knife.
To begin, make 2 cuts half a millimeter deep on both sides of the part, indicating the thickness. Two grooves should be marked along the edges of the cut, which can be done using an oblique shoemaker or segment knife (for uncoated wood material or chipboard), or using a sharp drill and a pobedite cutter (for laminate).
Application of adhesive tapes
Adhesive tape (for example, ordinary tape) is used to protect the back side of the material. It is necessary to glue a tape to the cut line to protect the processed fabric from tearing off large elements. Masking tape cannot be called a very effective option for preserving material when cutting with a jigsaw, since its strength indicator is extremely low.
A fairly wide (each side of the cut material should be covered by at least fifteen centimeters) aluminum or fiberglass reinforced tape is best suited. In addition, the adhesive tape must be pressed with a dry cloth to eliminate the risk of wrinkles.
